Would you like to use a stylish desktop? Most people don’t mind using the default look provided by the Linux distribution, but some people take customization very seriously. The GNOME desktop with its essential-features-only design doesn’t seem to offer options to customize theming. But actually they are sort of hidden in the Tweaks app and depend on the installation of a GNOME extension, namely User Themes.
Let’s see how we can turn our GNOME desktop into some serious eyecandy!
](/files/2016/10/sw-updates.jpg)
Source: OMG! Ubuntu!
Installing the GNOME extensions support
To customize GNOME using extensions, you need to install some things first, in case you haven’t yet. I explained that in the previous post:
So here I’m going to just summarize what you need to do. In case you need more information, read that post.
Run the following command to install the needed packages:
1
# zypper in gnome-tweak-tool gnome-shell-extensions-common chrome-gnome-shell
And install the GNOME Extensions browser extension clicking one of the following links:
- for Google Chrome, Chromium, Opera and Vivaldi: visit the Chrome Web Store;
- for Mozilla Firefox: visit the Mozilla Addons website.
Everything installed, reboot your computer (maybe it is enough to just logout and login).
Installing the User Themes extension
In the previous post I also explained how to install GNOME extensions. There, I used System Monitor as example. Today, let’s install the User Themes extension.
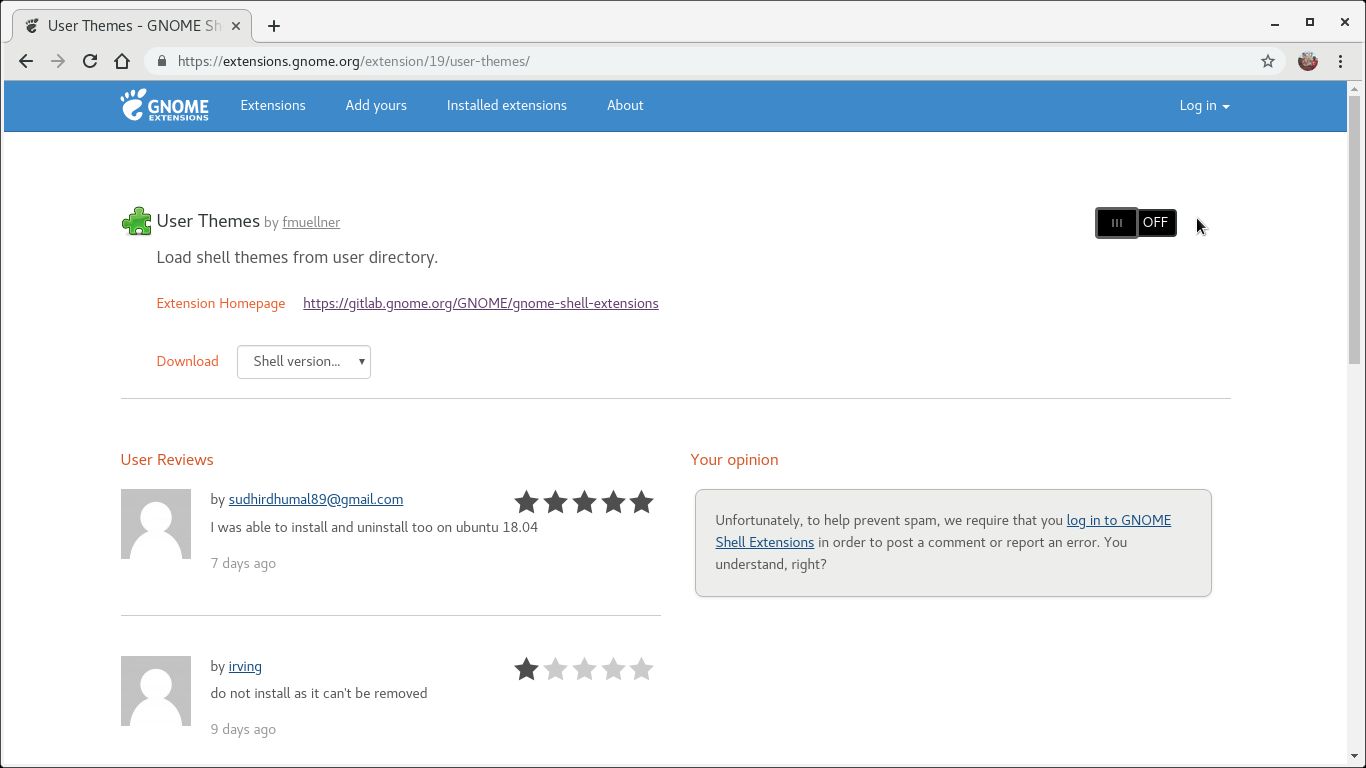
Launch your browser and go to the extension page:
Click the on/off toggle:
Confirm you want to download and install the extension by clicking Install in the dialog box that appears.
Downloading and installing themes
You can find many interesting themes for GNOME Shell, GTK3 and other kinds of arts to prettify your desktop at Gnome-look.org.
As an example, I’m going to use Yaru-Colors, which is a fork of Ubuntu’s default theme Yaru ported to many different colors.
Let’s make our openSUSE desktop look like a green Ubuntu!
Go to the theme page:
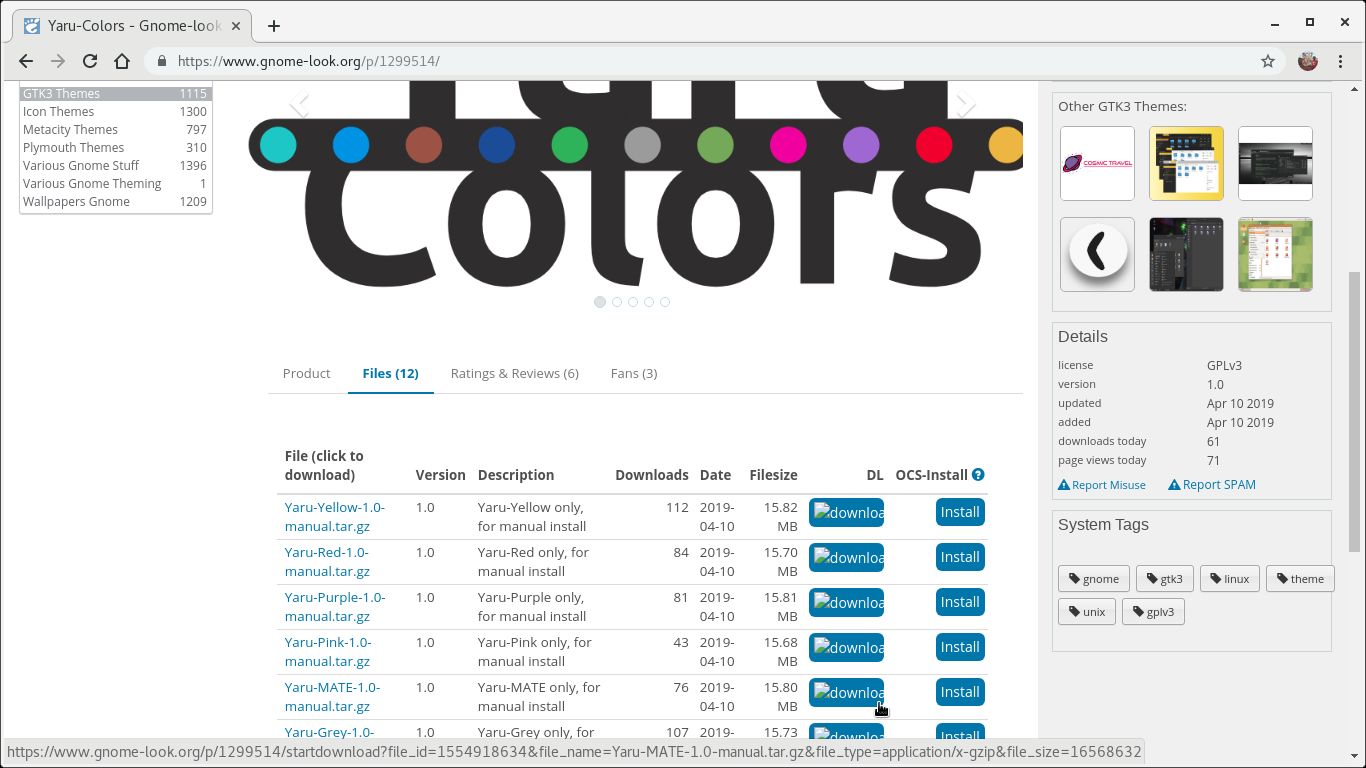
Select the Files tab and click the Download button for the Yaru-MATE-1.0-manual.tar.gz file:
Now you have an archive named Yaru-MATE-1.0-manual.tar.gz in your Downloads folder.
Using the Terminal app, extract the archive contents and copy things to their places:
1
2
3
4
5
$ cd ~/Downloads
$ tar -xzvf Yaru-MATE-1.0-manual.tar.gz
$ mkdir -p ~/.local/share/{icons,themes}
$ cp -r Yaru-MATE/Icons/Yaru-Mate ~/.local/share/icons/
$ cp -r Yaru-MATE/Theme/* ~/.local/share/themes/
Installation instructions may differ from theme to theme. If you read Yaru-Colors description at Gnome-look.org, you are going to see it provides an installation script. I preferred the manual installation just to illustrate how the installation of a theme works.
Applying themes
Once the theme was downloaded and installed, we can now apply it.
Open the Tweaks app.
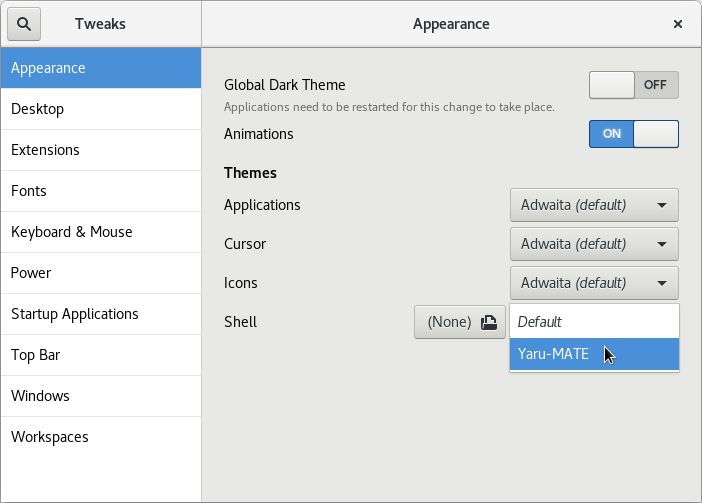
Right in the first section, Appearance, choose Yaru-MATE as the Shell theme:
Also change the Applications and Icons themes accordingly.
Notice that changes are applied immediately.
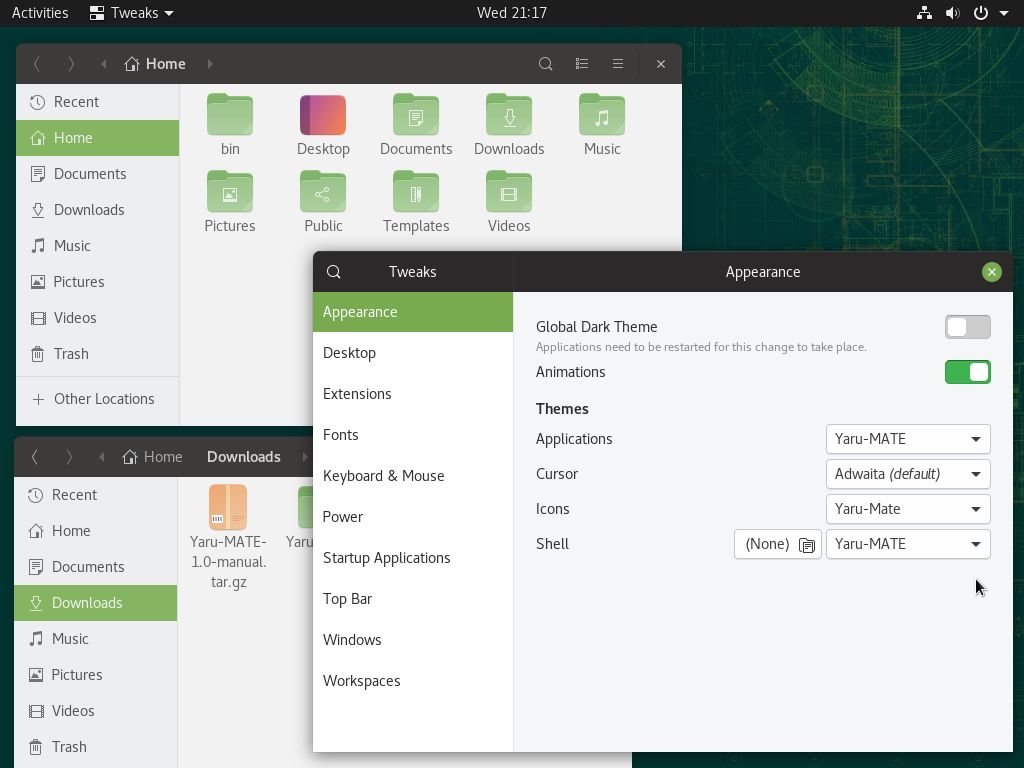
Now your desktop should look like this:
Installing themes from openSUSE repos
Some themes are available as packages on openSUSE repositories. For instance, the Adapta GTK theme and the Papirus icon theme. Both are based on Google’s Material Design, resemble Android and are the default themes used by the Manjaro Linux distribution.
Let’s make our openSUSE desktop look like Manjaro! (or Android)
Install Adapta and Papirus packages running:
1
# zypper in gnome-shell-theme-adapta gtk2-metatheme-adapta gtk3-metatheme-adapta gedit-theme-adapta papirus-icon-theme
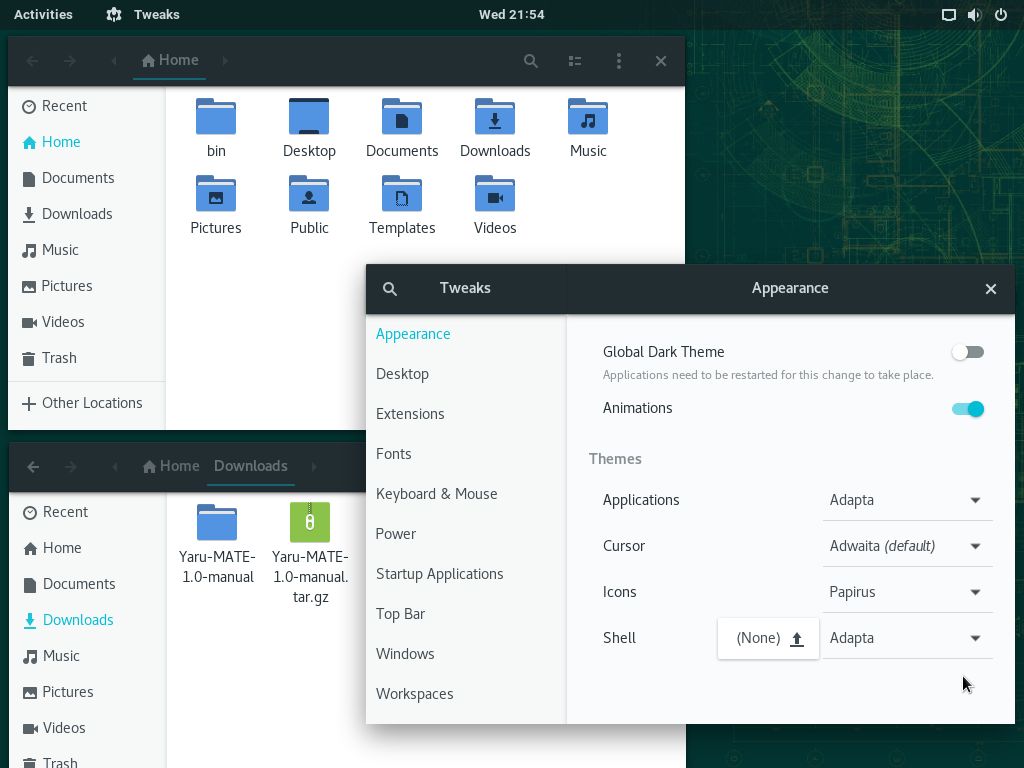
Open the Tweaks app. In the Appearance section, select:
- Adapta as Applications and Shell themes; and
- Papirus as the Icons theme.
Now your desktop should look like this:
Looking at Gnome-look.org, do you like any theme? Please tell me in the comments!
