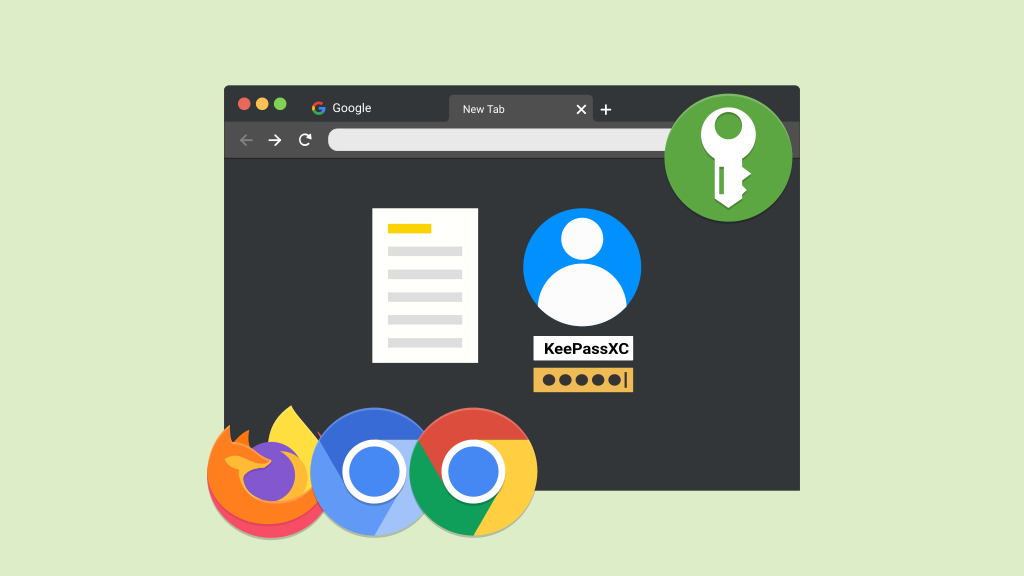
We’ve seen that KeePassXC is the most secure way to save usernames and passwords. But many people store passwords in their browser for convenience: when you register on a website, the browser itself offers to save your username and password. Likewise, when you come back to that website, the browser itself fills in the login form with the saved username and password. Let’s face it, copying and pasting usernames then passwords from KeePassXC to the browser, as we saw in the first article, is cumbersome. Fortunately, there’s an extension you can install that simulates the browser’s natural behavior but retrieves passwords from KeePassXC.
The KeePassXC browser extension is available for the following browsers:
Today, you’ll learn how to install, set up and use the KeePassXC browser extension. For reference, I’ll be using Firefox, the default browser for Linux Kamarada, but the extension can be installed and used in a similar way on other browsers, as well as on other systems, such as Windows or macOS.
Note: according to the KeePassXC documentation, Flatpak and Snap based browsers are generally not supported. Firefox Snap is currently the only known exception.
Installing the browser extension
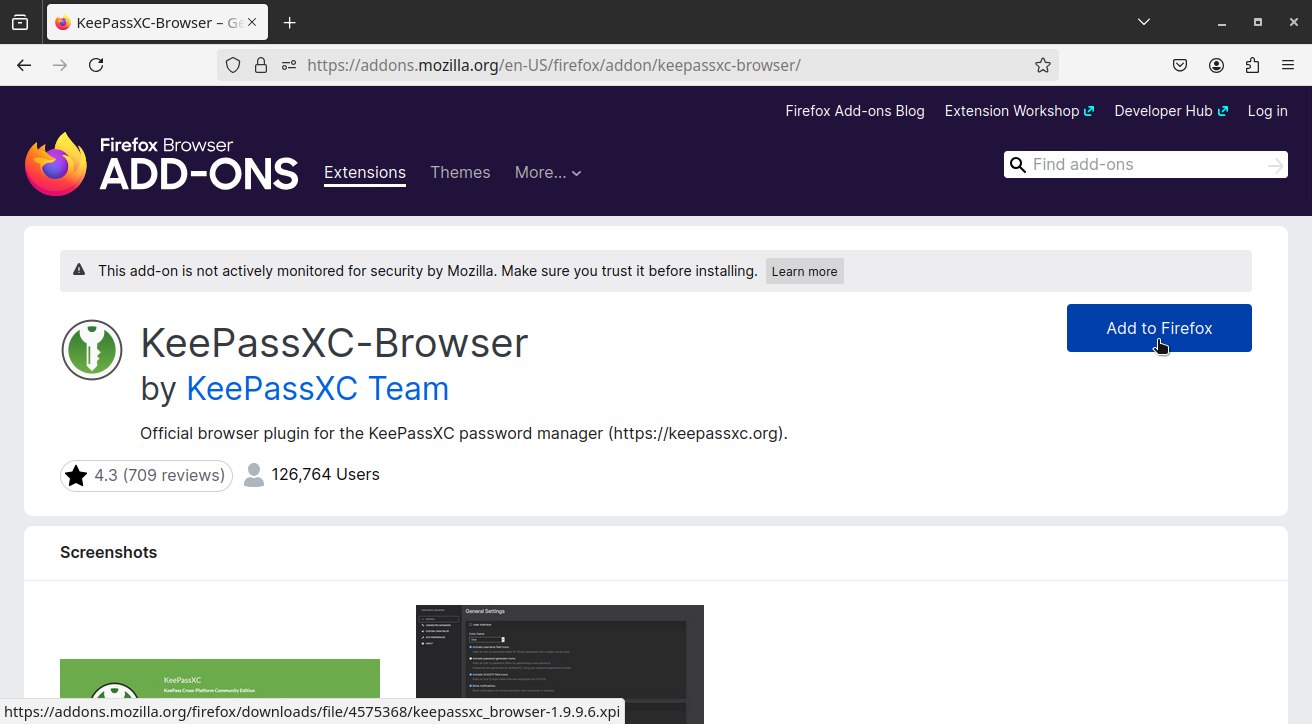
To install the KeePassXC extension in your browser, click the corresponding link:
On the page that opens, click the button to install/add the extension to the browser. For example, if you are using Firefox, click the Add to Firefox button:
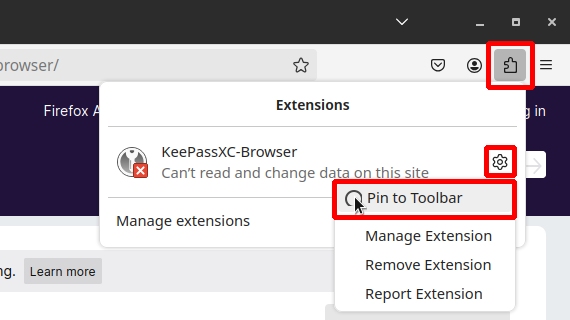
Optionally, make the extension always visible to make it easier to use:
Setting up KeePassXC
Browser integration is disabled by default in KeePassXC.
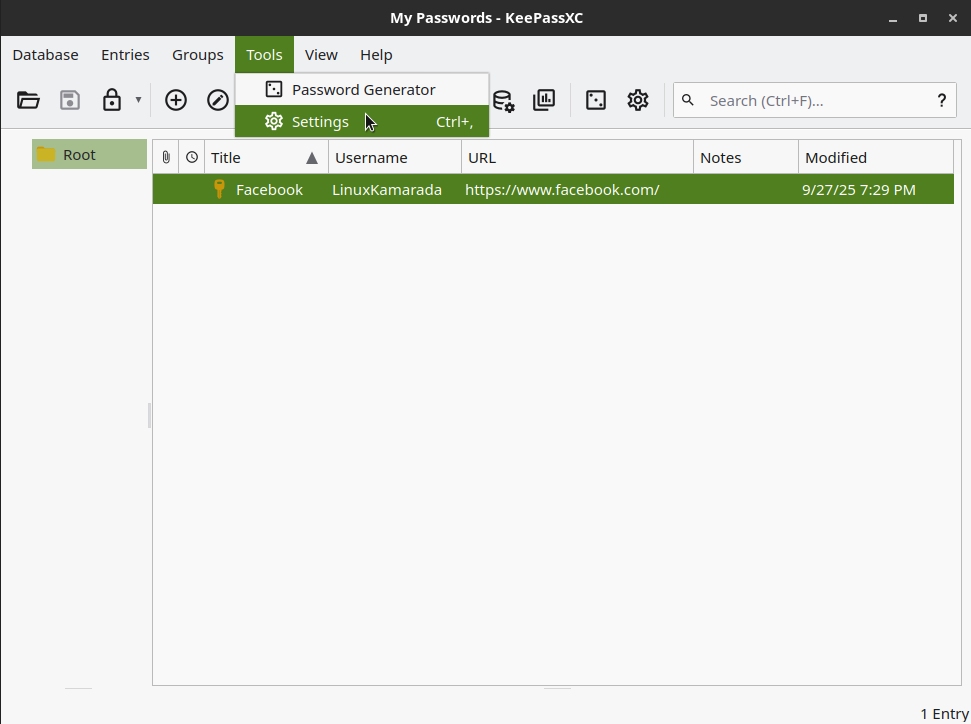
To enable it, after opening the KeePassXC app, go to Tools > Settings:
By the left, select Browser Integration:
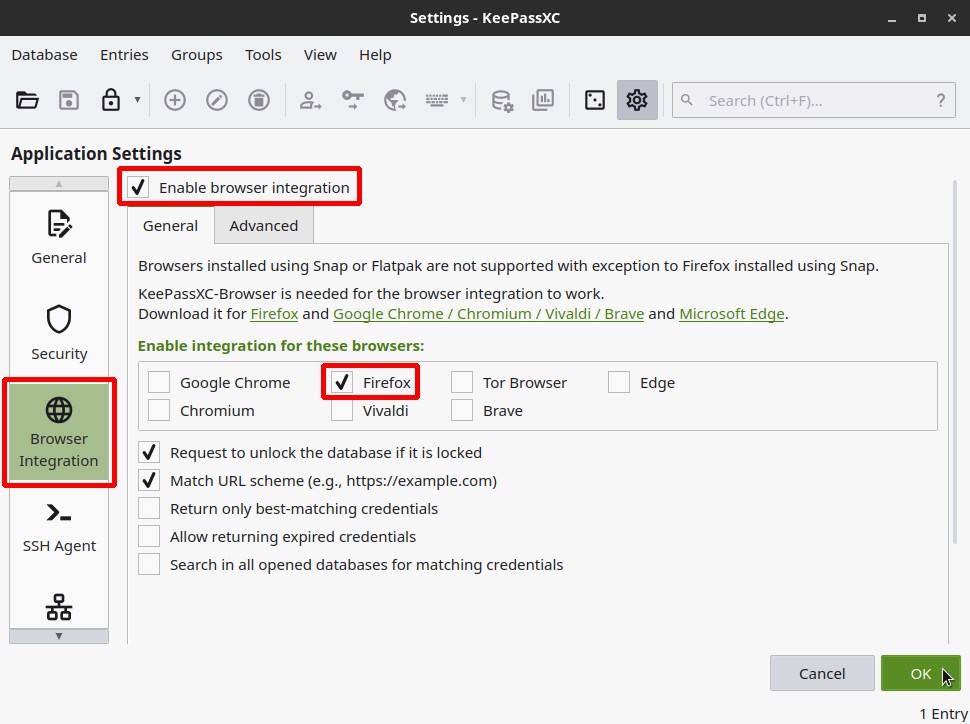
By the right, check the Enable browser integration option. Then check the browsers for which you downloaded the KeePassXC extension.
Finally, click OK.
Setting up the browser extension
Now let’s set up the communication between the browser and KeePassXC through the extension.
Ensure your password database is unlocked, then open (or restart) your browser.
On your browser, click the KeePassXC extension icon:
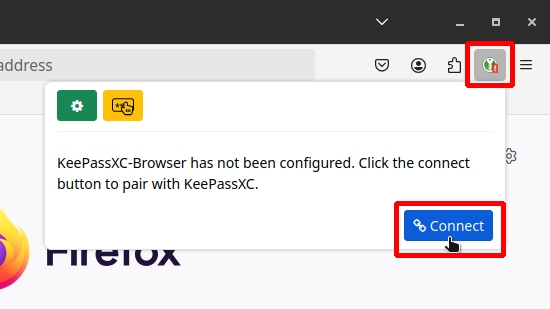
On the pop-up window that appears, click the Connect button.
KeePassXC opens and asks you to enter a unique name to identify the connection between this browser and this database:
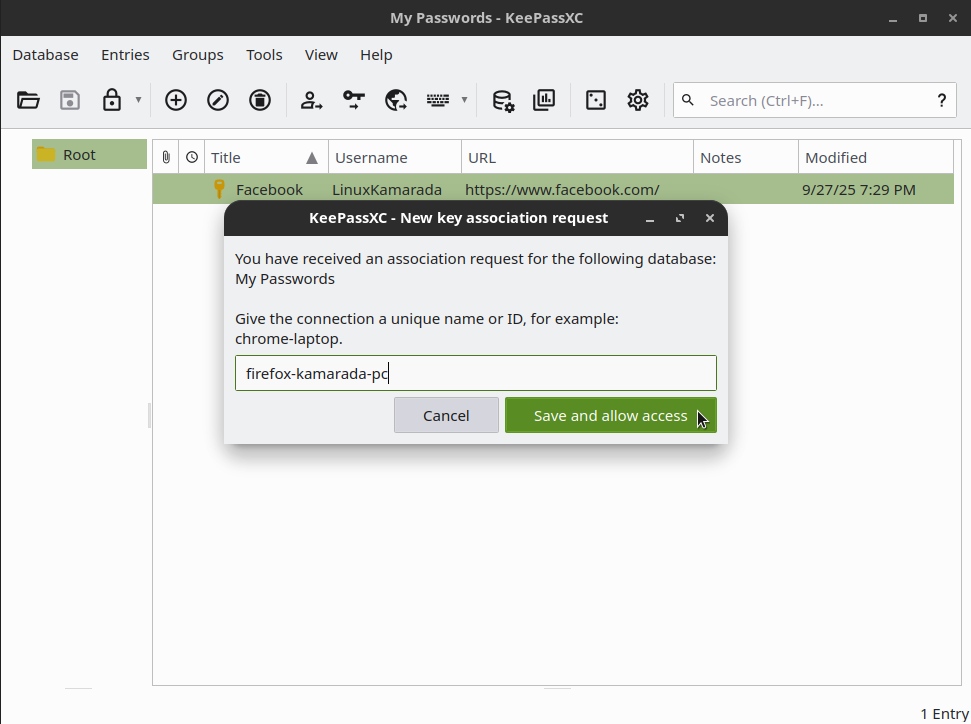
Enter a unique name in the text field (e.g. firefox-kamarada-pc) and click the Save and allow access button.
Note: if you set up another extension connection to this same database in the future and reuse this name, the previous connection will be overwritten and this first browser will lose access to KeePassXC.
Using the KeePassXC browser extension
Now that we’ve installed and configured the KeePassXC browser extension, let’s see how to use it in everyday life.
Start by opening KeePassXC and unlocking your password database. Then, open your web browser.
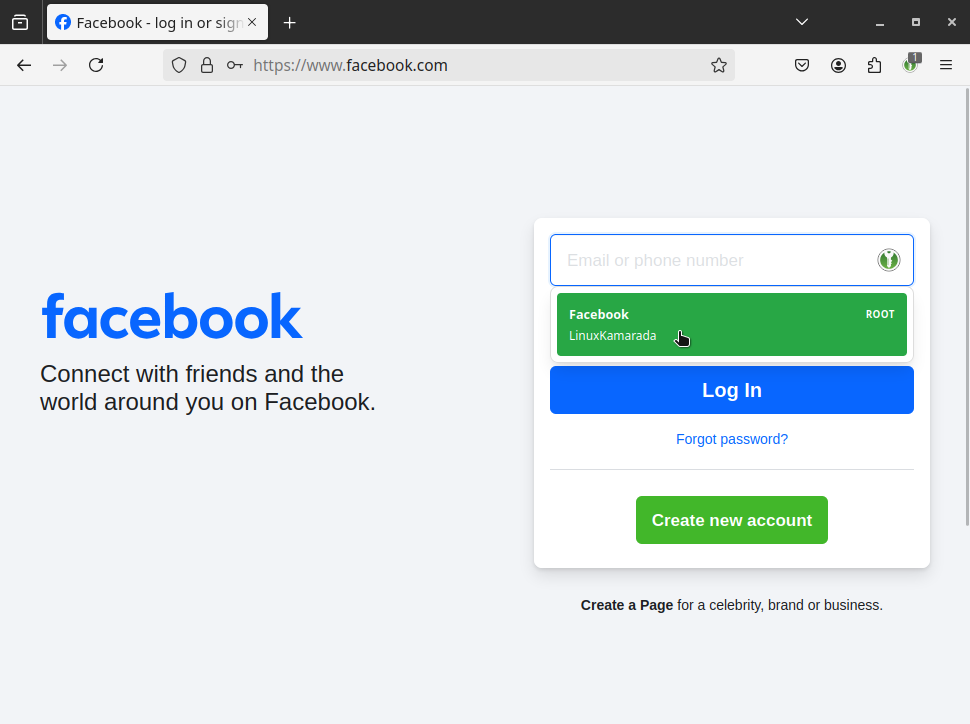
On your browser, go to a website. For example, facebook.com.
If you have a password for this site stored in your database, KeePassXC will display the Browser Access Request dialog box:
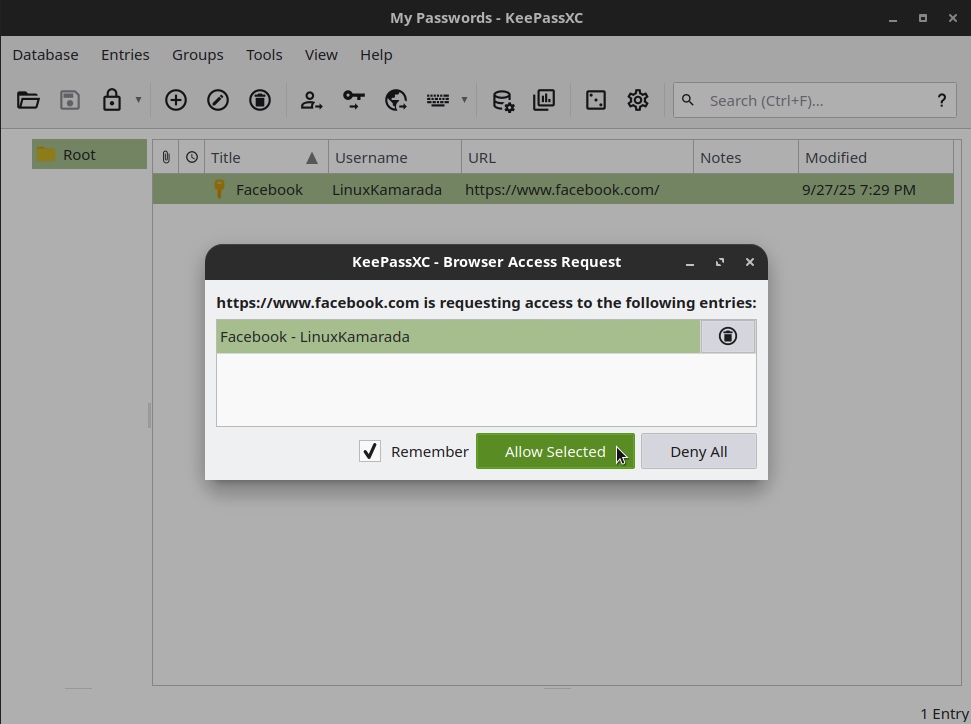
Make sure the credentials you want to use are selected. Optionally, check the Remember option to prevent this dialog from appearing again. Finally, click Allow Selected.
Back to the website, the KeePassXC icon will appear in the username field of the login form. Click the icon to fill in the username and password fields with your stored credentials. A menu will appear for you to choose the credentials you want to use:
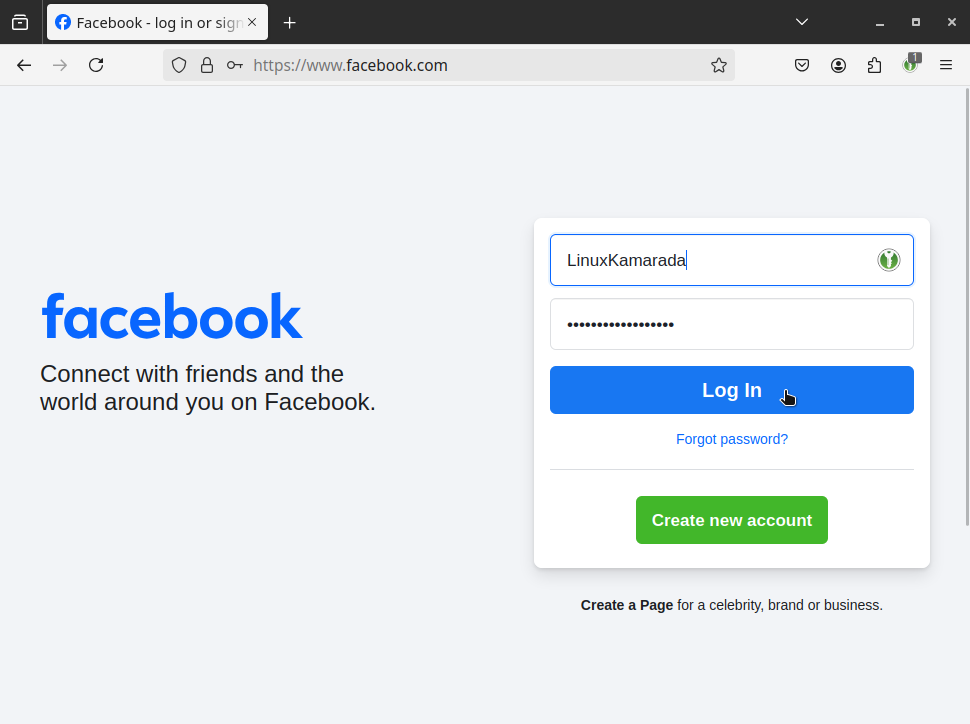
Username and password fields filled in by the KeePassXC extension, just Log In:
In the future, if you log into that same website with a different username and password combination (perhaps because you changed your login and password, perhaps because you created a new account), the KeePassXC browser extension will offer to save that combination as a New entry or Update the existing one, just as the browser would do if those credentials were managed by it:

Troubleshooting
If you followed the steps outlined here, the integration between KeePassXC and your browser should work just fine. Below, I have outlined some possibilities for what might happen differently.
If you launched the browser first and then KeePassXC, they probably didn’t connect. In this case, click the KeePassXC extension icon and then click Reload:

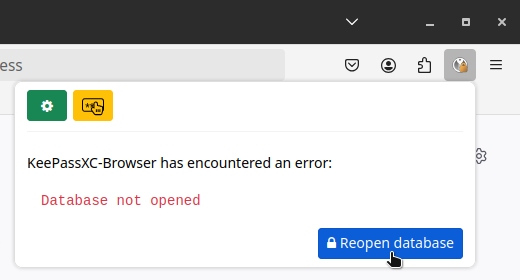
It could also be the case that the database is locked. In this case, click the KeePassXC extension icon and then click Reopen database:
It’s worth paying attention to the KeePassXC extension icon, which will change based on its connection state:
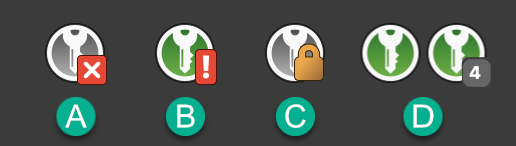
A) KeePassXC has not been started or is disconnected;
B) KeePassXC is running, but the browser extension is not connected to the current database;
C) connected to KeePassXC, but the database is locked;
D) connected to KeePassXC and ready to use. If the icon is shown with a number, it indicates the number of credentials found for the current site.
If none of the tips presented here helped you solve your issue, you might want to check out the KeePassXC browser extension’s Troubleshooting Guide.
If you have any questions, you can also share them here in the comments.


