Recently I decided to boost my home Wi-Fi network. I’ve already got a MikroTik hAP ac lite tower. This time I bought an USB adapter to connect my laptop using the 802.11ac network’s 5Ghz band: a TP-Link Archer T4U.

The 802.11ac Wi-Fi standard targets high performance. The higher frequency allows for higher speeds and less interference, be by the fewer devices using it (today the 2.4GHz spectrum is too crowded by cordless telephones, microwaves, Bluetooth and 802.11n Wi-Fi devices), be by the smaller range of the 5GHz networks (the wavelength decreases as the frequency increases, in practice that means that if both you and your neighbor have 5GHz Wi-Fi networks at home, it is more difficult for them to overlap).
I’ve chosen that 802.11ac adapter taking into account that its manufacturer provides a Linux driver (a Linux kernel module). However, I couldn’t get it to work on openSUSE Leap following the manufacturer’s instructions. The official driver was targeted at Ubuntu 14.04 with Linux kernel version 3.16.0, both released in 2014. Since then, a lot of things have changed. So the official TP-Link Archer T4U driver for Linux does not work with the kernel 4.4 that empowers the openSUSE Leap 42.x series.
Fortunately, as it often happens with free (libre) software users, googling I found a community version of that driver on GitHub. After some reading, I was able to install it and experience the 5GHz Wi-Fi at home.
To contribute, I decided to tell what I did, step by step, just in case anyone needs it.
Get the ingredients
Let’s get the community driver source code.
If you are used to Git, you can clone the driver’s repository:
1
2
$ git clone https://github.com/abperiasamy/rtl8812AU_8821AU_linux.git
$ cd rtl8812AU_8821AU_linux/
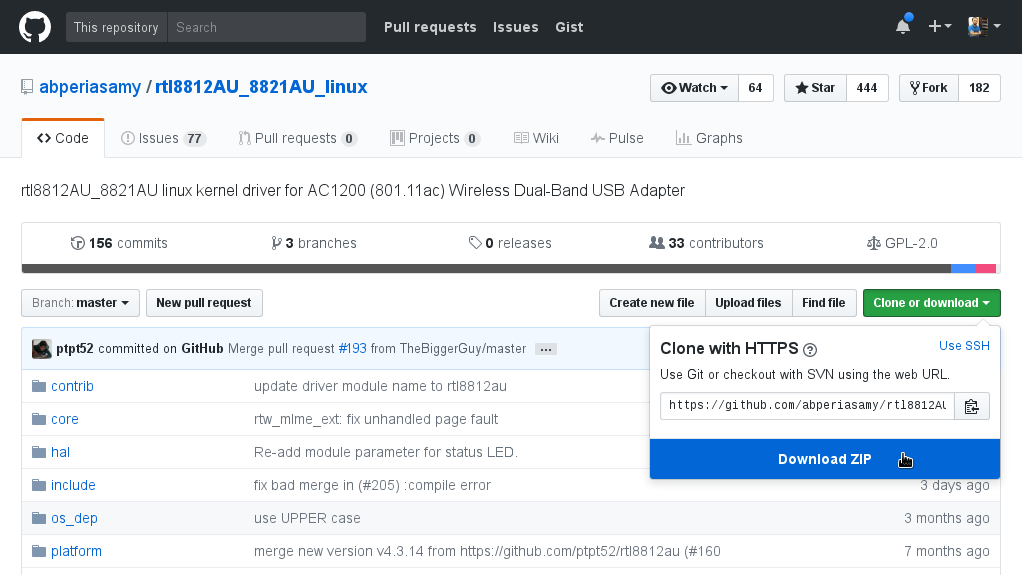
You don’t need to use Git, it’s just a convenience for those who already use it. If that’s not your case, visit the community driver page at GitHub, click on Clone or download and then on Download ZIP to download the driver’s source code:
The zipped (compressed) file contains all the files that make up the source code. Unzip those files:
1
2
$ unzip rtl8812AU_8821AU_linux-master.zip
$ cd rtl8812AU_8821AU_linux-master
You need to install the packages gcc, make, dkms and kernel-default-devel to be able to build the driver from source:
1
2
# zypper ref
# zypper in gcc make dkms kernel-default-devel
(I suppose you use the default kernel, provided by the kernel-default package)
Hands-on!
Inside the folder where the driver source is, run the following to build it and install it:
1
# make -f Makefile.dkms install
Please note that the driver is not yet immediately loaded. The following command should return nothing:
1
# lsmod | grep rtl8812au
Run the following commands to load the driver and check it is indeed loaded:
1
2
3
4
5
# modprobe rtl8812au
# lsmod | grep rtl8812au
rtl8812au            1368064  0
cfg80211              593920  5 mac80211,rtl8812au,ath9k,ath,ath9k_common
usbcore               245760  10 uvcvideo,usbhid,rtl8812au,ehci_hcd,xhci_pci,rtsx_usb,ath3k,btusb,xhci_hcd,ehci_pci
You need to repeat the hands-on section commands every time you update the kernel.
Voilà!
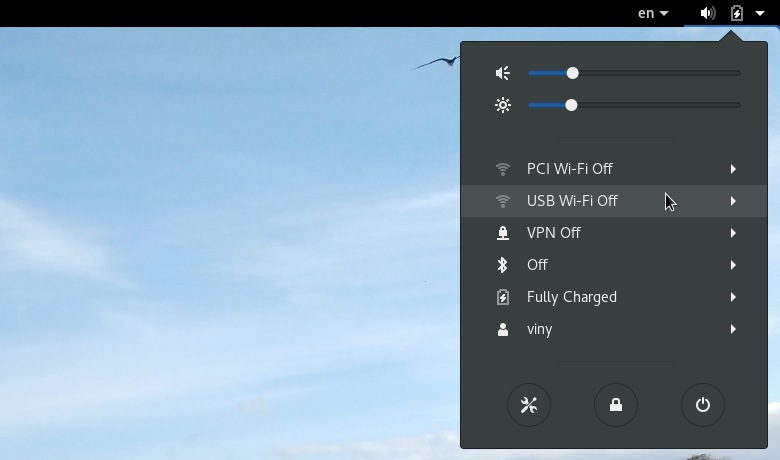
That done, the system already shows the new Wi-Fi adapter:
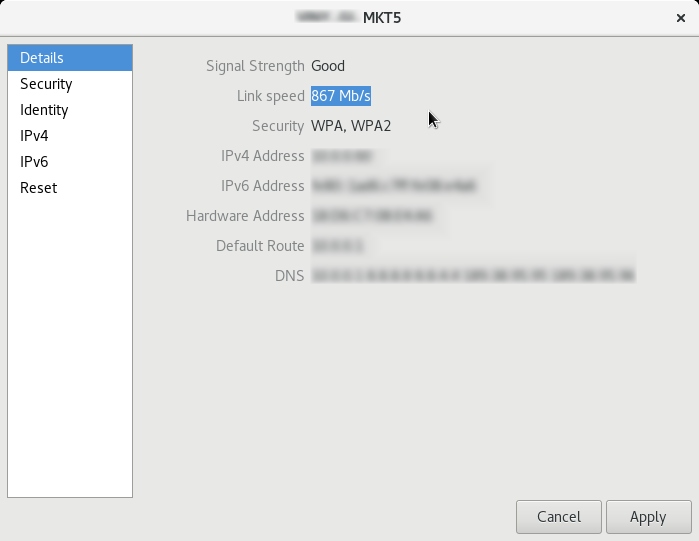
Now you can connect to your Wi-Fi network at 5GHz:
Have a lot of fun!
References
- IEEE 802.11ac - Wikipedia
-
[AC1300 Wireless Dual Band USB Adapter TP-Link]tp-link-archer-t4u - abperiasamy/rtl8812AU_8821AU_linux: rtl8812AU_8821AU linux kernel driver for AC1200 (801.11ac) Wireless Dual-Band USB Adapter
- TP-LINK Archer T4U - WikiDevi
- How To Unzip Files Using The Linux Command Line
- Howto: Linux Add or Remove a Linux Kernel Modules / Drivers - nixCraft


