
PlayStation 2, better known simply as PS2, was a 128-bit video game console released by Sony in 2000. It was the best-selling console of all time, having sold over 155 million units worldwide. More than 10,000 games have been released for the PS2, some of the best known include: Pro Evolution Soccer (PES), Grand Theft Auto (GTA), Guitar Hero, Resident Evil, God of War, Devil May Cry, Final Fantasy X, Mortal Kombat Shaolin Monks and others. Would you like to remember any of those classics? See how to do this with PCSX2.
PCSX2 is a PS2 emulator for PC. An emulator is a software that allows your computer to run software made for another device. A video game emulator allows your computer to run games made for that video game. With PCSX2, you can play most PS2 games on your PC.
PCSX2 is free software and its source code is available on GitHub.
Here you are going to see how to install and use PCSX2 on Linux. As usual, here I use the Linux Kamarada distribution, which is based on openSUSE Leap.
PCSX2 system requirements
When it was released, the PS2 was a video game with specs far superior to those of its competitors. Even now, many years later and with the advancement of technology, not all PCs are able to emulate it. PCSX2 is a very hardware intensive program. To play PS2 games — and, above all, play well, because there’s no point in being able to start the game if it’s slow — you’ll need a computer considered “intermediate” to “advanced” by today’s standards.
The PCSX2 website presents the following minimum required specs:
- Operating system:
- Windows 7 or newer (32 or 64 bit), or
- Ubuntu 18.04 or newer, it can also be Debian, Arch Linux or other distro (32 or 64 bit)
- Processor (CPU):
- that supports the SSE2 instruction set
- that has 2 processing cores (dual core) and hyperthreading
- PassMark Single Thread Performance benchmark rating near or greater than 1600
- Graphics processing unit (GPU):
- that supports Direct3D10 (on Windows) or OpenGL 3.x (on Linux)
- that has 2 GB of dedicated video RAM
- PassMark G3D Mark benchmark rating around 3000 (e.g. GeForce GTX 750)
- RAM memory: 4 GB
The PCSX2 developers listed its requirements somewhat differently than usual. But I’m going to show you in practice how you can see if your computer fits them.
To find out your computer’s specs, if you use the GNOME desktop (default for Linux Kamarada), open the Settings app and go to the Details section:
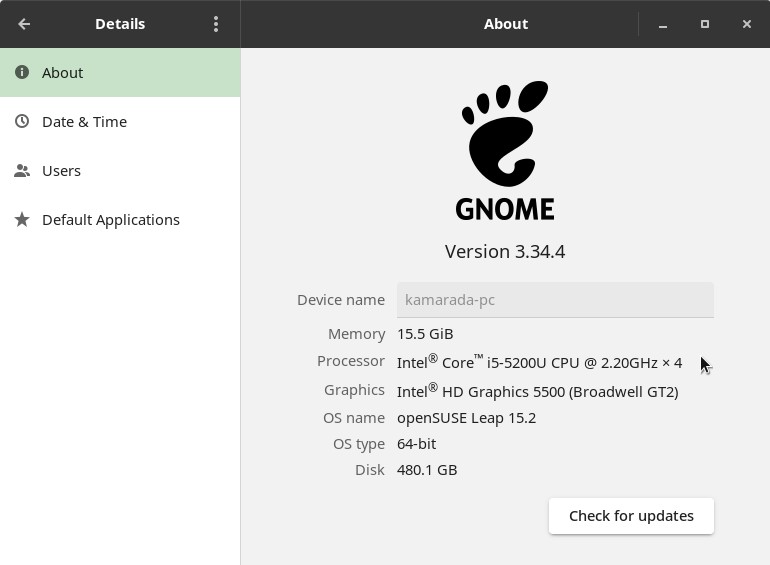
In my case, I have:
- Operating system: openSUSE Leap (Linux Kamarada) 15.2 64 bit
- Processor (CPU): Intel Core i5-5200U with 4 cores at 2.2GHz
- Graphics processing unit (GPU): Intel HD Graphics 5500
- RAM memory: 16 GB
With this information in hand, let’s check our benchmark rates.
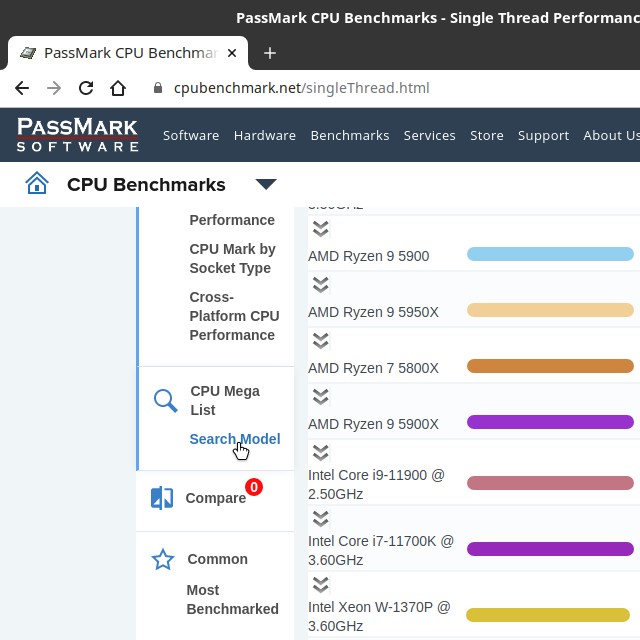
Go to the CPU benchmark website and click the Search Model link in the left navigation bar:
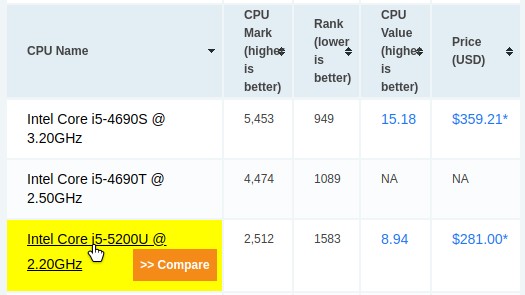
Search for your CPU model and click it on the list:
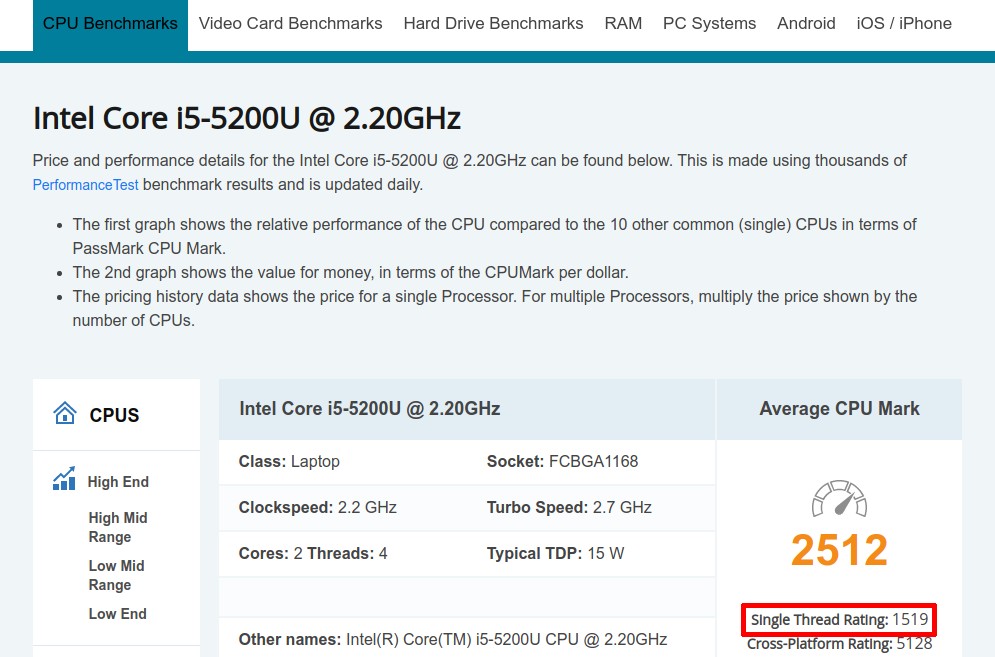
On the model page, check the number that appears under Single Thread Rating:
Then open the GPU benchmark website and do the same to your graphics unit.

In my case, my CPU’s rating is 1519 and my GPU’s rating is 580.
As you can see, my computer doesn’t meet the PCSX2 minimum requirements. At least in theory, I couldn’t play PS2 games on my PC.
But the PCSX2 website also explains that these requirements are recommended for moderately complex games, which pushed the PS2 hardware to its limits. Some 2D games and others that underutilized the PS2 hardware may run on more modest CPUs, rated as low as 1200 (luckily, my CPU was rated above 1200).
You can check lists of light games (on the forum) and intensive games (forum and wiki).
Also fortunately the list of light games includes Disgaea: Hour of Darkness, whose DVD I already had. This game is very good, very fun and easy to play, I recommend it!
The recommended specs for PCSX2 is as follows:
- Operating system:
- Windows 10 (64 bit), or
- Ubuntu 19.04 or newer, it can also be Debian, Arch Linux or other distro (32 or 64 bit)
- Processor (CPU):
- that supports the AVX2 instruction set
- that has 4 processing cores (quad core), with or without hyperthreading
- PassMark Single Thread Performance benchmark rating near or greater than 2100
- Graphics processing unit (GPU):
- that supports Direct3D11 (on Windows) or OpenGL 4.5 (on Linux)
- that has 4 GB of dedicated video RAM
- PassMark G3D Mark benchmark rating around 6000 (e.g. GeForce GTX 1050 Ti)
- RAM memory: 8 GB
If your PC has these specs or higher, it’s likely able to play any PS2 game well, with great performance.
But, as I said, all these recommendations are actually highly game dependent. Even if your computer has specs below the recommended (or even below the minimum, as mine), be sure to check the game lists to see which games you are able to emulate with your PC.
Recommended: PS2 controller
PlayStation consoles are also differentiated from the others with regard to the controllers, which have many buttons. To play PS2 games on PC, I recommend you to use a controller similar to the PS2 controller. There are models with USB cable, others with two cables, USB and PS2, which can be used on both PC and PS2.
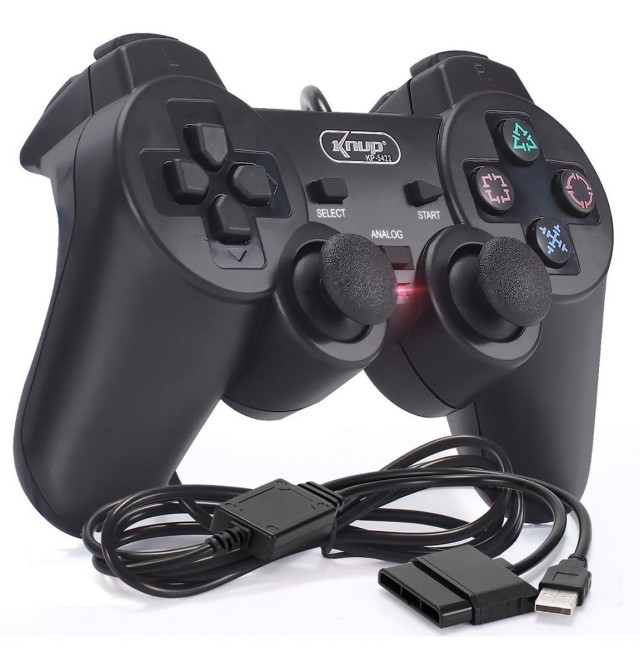
Example of controller that can be used on both PS2 and PC (via USB)
If you already have a PS2 controller, an alternative is to use a USB adapter.
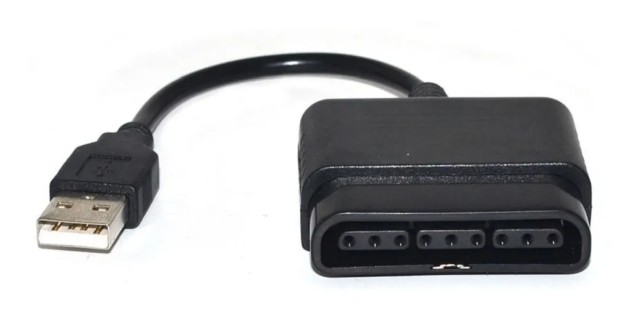
Example of PS2 to USB adapter
PS2 controls are plug and play on PCSX2, that is, you don’t need to set them up. In addition to being easier to configure, they make it easier to play, improving the experience, which gets similar to playing with the console. I strongly recommend using a PS2 controller.
Where to get the PS2 BIOS?
PCSX2 is not the simplest emulator out there, despite the developers’ efforts to make it as user-friendly as possible. That’s because the PS2 isn’t the simplest video game out there either. And there is a difference in the PS2 emulation compared to other consoles emulation, e.g. Super Nintendo (check it out here): to emulate the PS2, you need one more program besides the emulator, which is the BIOS.
The BIOS (acronym for Basic Input/Output System) is a program that comes pre-installed on a chip on the computer and is responsible for recognizing the hardware components when the computer is turned on. Just as your PC has a BIOS, the PS2 has a BIOS too. And PCSX2 needs this BIOS to emulate the PS2.
The PS2 BIOS is not included with PCSX2 since it is a program whose copyright is claimed by Sony. Ideally you should extract the BIOS from a PS2 console. The PCSX2 website has a program that allows you to do this, visit the tools section to find out how.
An alternative is to download the already extracted PS2 BIOS from a website. You can find a website from where you can get the PS2 BIOS using search engines like DuckDuckGo or Google.
Where to get PS2 games?
Unlike Super Nintendo games that came in cartridges, PS2 games came in DVDs, which are media that many computers have drives for. If your computer has a DVD drive, just insert the game disc into the disc drive. You can also create an ISO image from the game DVD and save it to your computer for faster access.
Another alternative, especially if your computer doesn’t have a DVD drive, is to download PS2 ISO images from some website. You can find websites from where you can get PS2 games using search engines like DuckDuckGo or Google.
Installing PCSX2
You can find PCSX2 packages by searching software.opensuse.org or PackMan. But for me what worked best was installing PCSX2 via Flatpak.
Flatpak is a distribution-agnostic package manager. Until recently, different Linux distros used different package formats, often incompatible with each other. For example, Debian and Ubuntu use DEB packages, while RedHat, Fedora and openSUSE use RPM packages. Flatpak brought a simpler alternative to install programs on different distros: as long as Flatpak is installed, the same Flatpak package can be installed on any distro.
First, to install Flatpak on Linux Kamarada or openSUSE, in case you haven’t done it already, run:
1
# zypper in flatpak
After installing Flatpak, add the Flathub repository, which is the main Flatpak repository:
1
# flatpak remote-add --if-not-exists flathub https://flathub.org/repo/flathub.flatpakrepo
Finally, to install PCSX2 using Flatpak, run:
1
# flatpak install net.pcsx2.PCSX2
Right after installing, you should be able to launch the emulador.
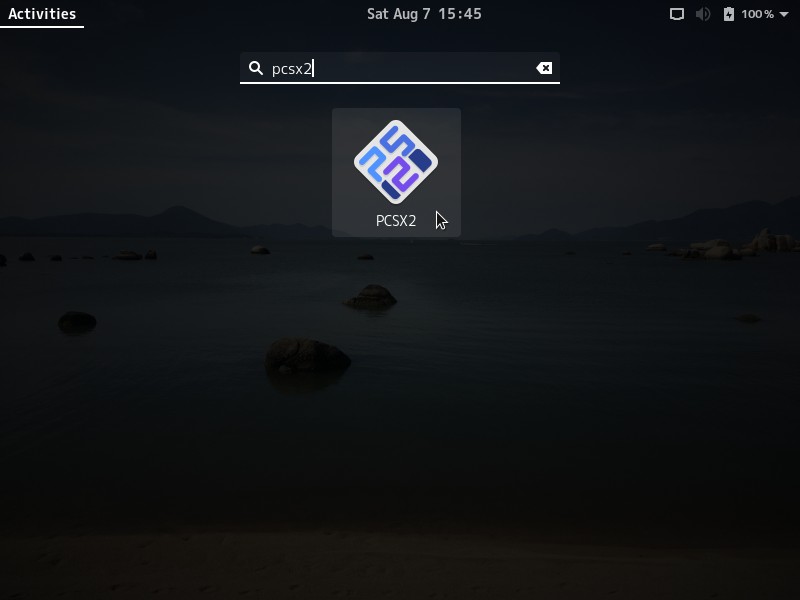
Starting PCSX2
To start PCSX2, if you use the GNOME desktop, click Activities, by the upper-left corner of the screen, start typing pcsx2 and then click the emulator icon:
Setting up PCSX2
The first time you start PCSX2, it presents a first time configuration wizard. There are some simple settings you need to set up before you can start playing. Usually, you only need to set up them just once, when using the emulator for the first time.
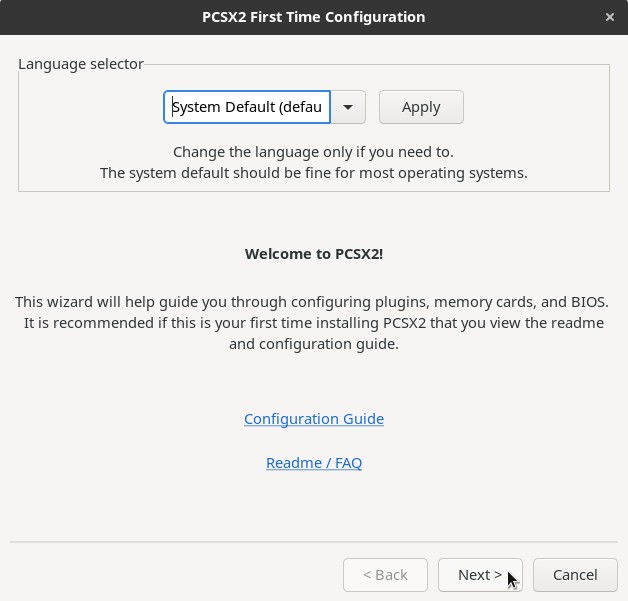
On this first screen, the wizard allows you to change the language of the emulator, which, by default, is the same as the system language. You can leave it as is and click Next.
On the second screen, we can select and configure the PCSX2 plugins:
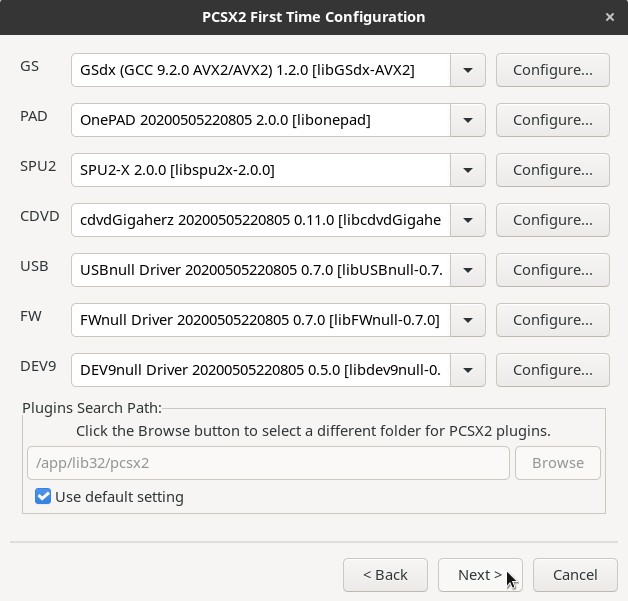
If you are going to play with the keyboard instead of the PS2 controller, click the Configure button corresponding to the PAD plugin. On the window that opens, configure the key mappings as you wish, and click OK when finished:

Most people running PCSX2 on a modern PC will be able to continue normally here without changing other plug-ins or settings. Click Next.
If you try to continue and get a warning that the GS plugin (Graphics Synthesizer, the PS2 graphics unit) failed to load or is incompatible:
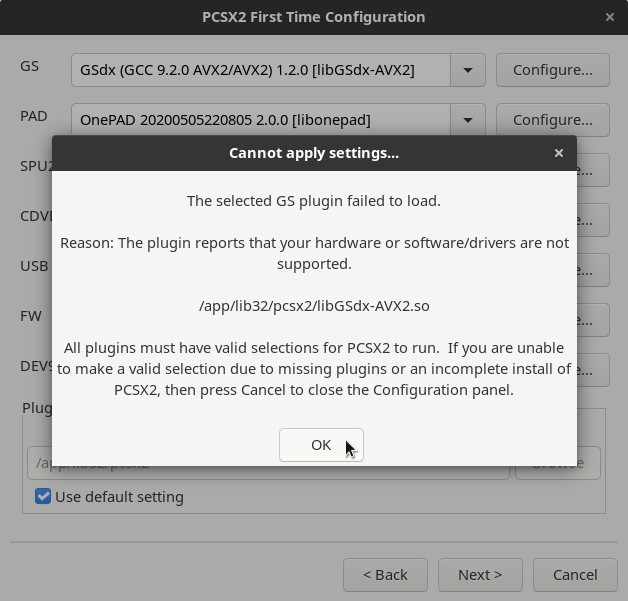
Click OK and, back to the plugins selection, change the GS plugin:
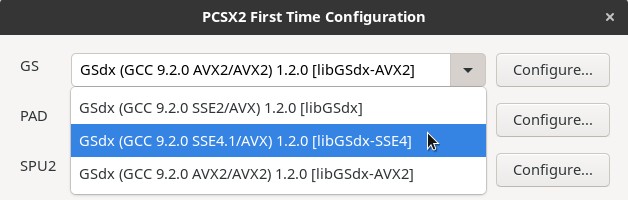
Select the plugin with SSE4 and try again. If that doesn’t work either, select the plugin with SSE2 and try again. If even that doesn’t work, your PC may be severely outdated and may not be able to emulate PS2 games with PCSX2. If that’s your case, you might want to ask for help on the PCSX2 forum.
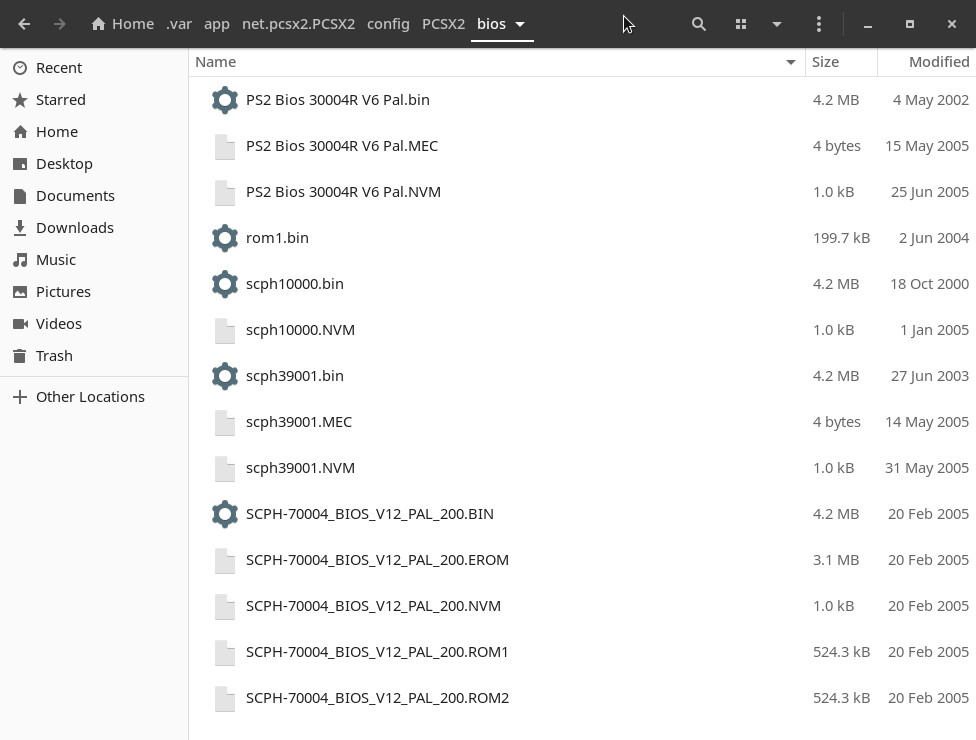
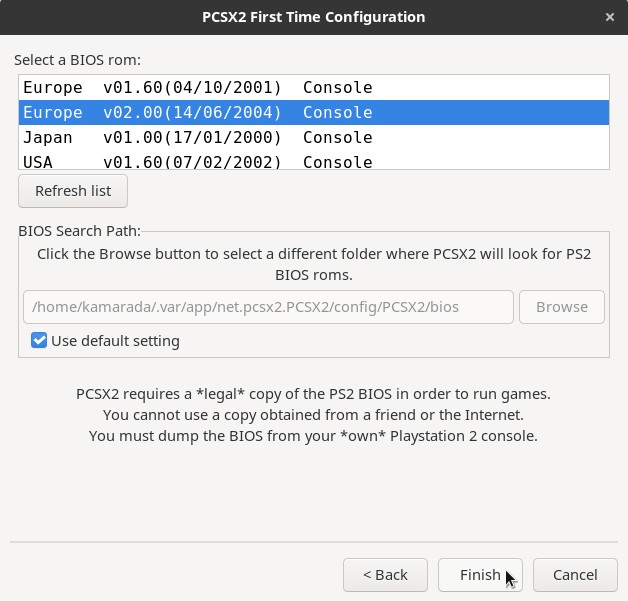
On the third and final wizard screen, you need to select the BIOS:
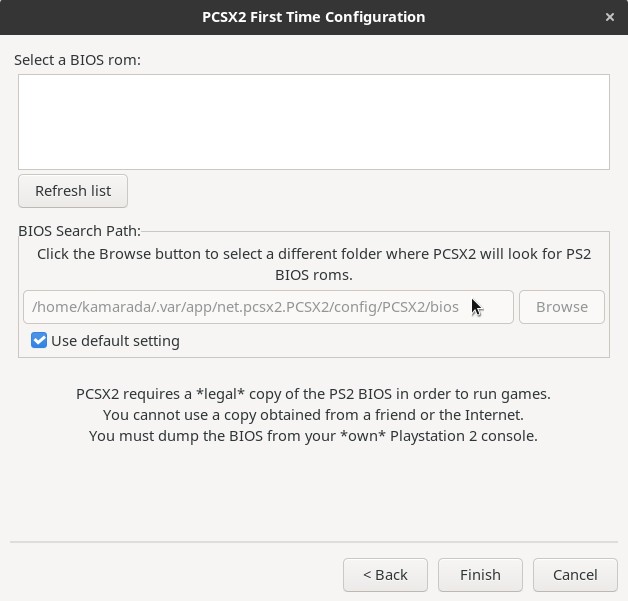
Look at the folder where PCSX2 expects the BIOS to be (in my example, /home/username/.var/app/net.pcsx2.PCSX2/config/PCSX2/bios) and copy the BIOS files to that folder:
Or, if you prefer, uncheck the Use default setting option and click the Browse button to inform the folder where the BIOS is.
In either case, click Refresh list. Then, select the BIOS from the list (I don’t know what’s the difference among the versions, in doubt I selected the latest one) and click Finish:
PCSX2 main screen
After the configuration wizard is finished, PCSX2 will present its main screen:

The next time you start the emulator, it will open right on this screen.
Starting a game
If you’re going to play with a PS2 controller, now it’s a good time to plug it in, if you haven’t already.
Open the CDVD menu and select one of the following options:
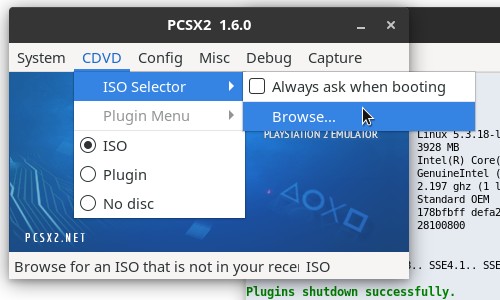
- ISO: if you want to load the game from an ISO image;
- Plugin: if you want to load the game from a DVD inserted in the DVD drive; or
- No disc: goes to BIOS (similar to turning a PS2 on without a DVD inserted).
If you selected the ISO option, go to CDVD > ISO Selector > Browse and inform where the ISO image is.
That done, open the System menu and click one of the following options:
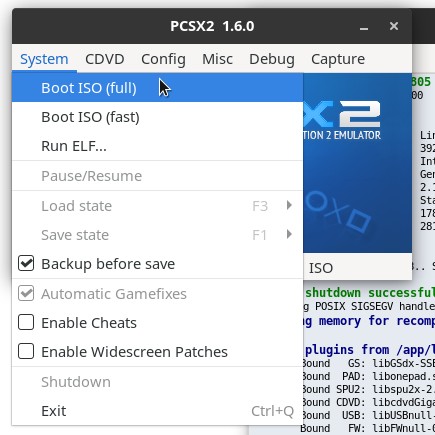
- Boot ISO (full): starts the BIOS and then the game (same as PS2); or
- Boot ISO (fast): skips the BIOS and starts the game directly.
Then the game should start:
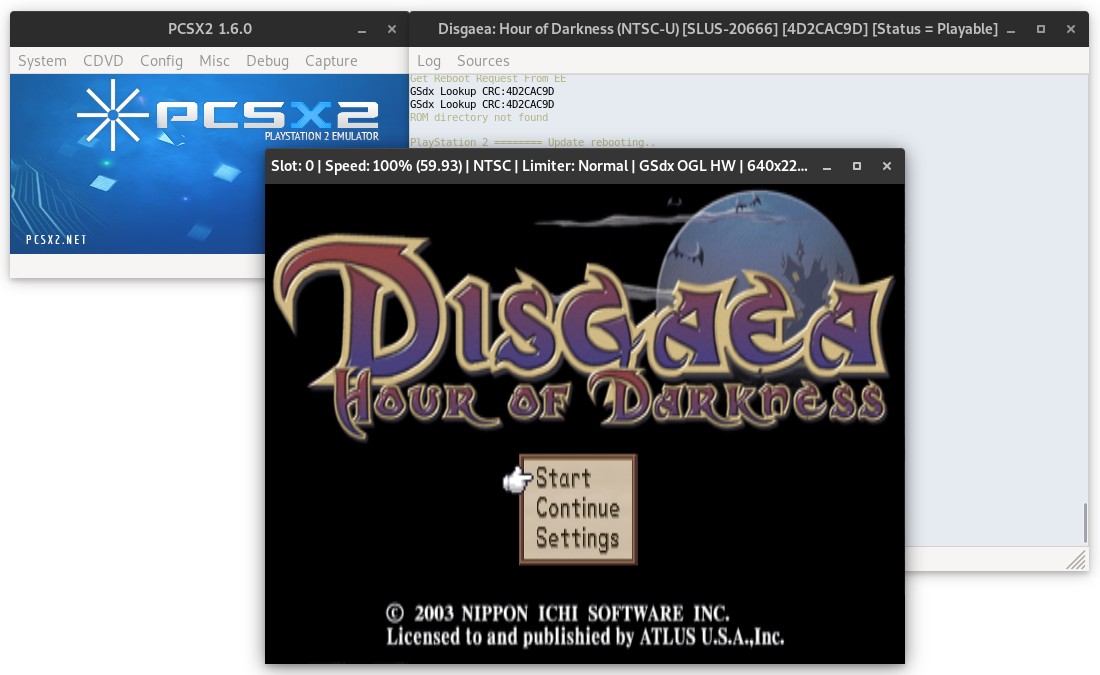
Saving and loading game states
An advantage the emulator offers over the video game is that you can save the game state, as well as resume from where you saved it, at any time you want. Even at moments when the game wouldn’t normally allow saving or resuming.
Playing on PCSX2, you can save the game state just like you would on PS2 (using the game’s own menu, PCSX2 emulates memory cards, as we’ll see below), or you can use one of the 10 slots available on the emulator.
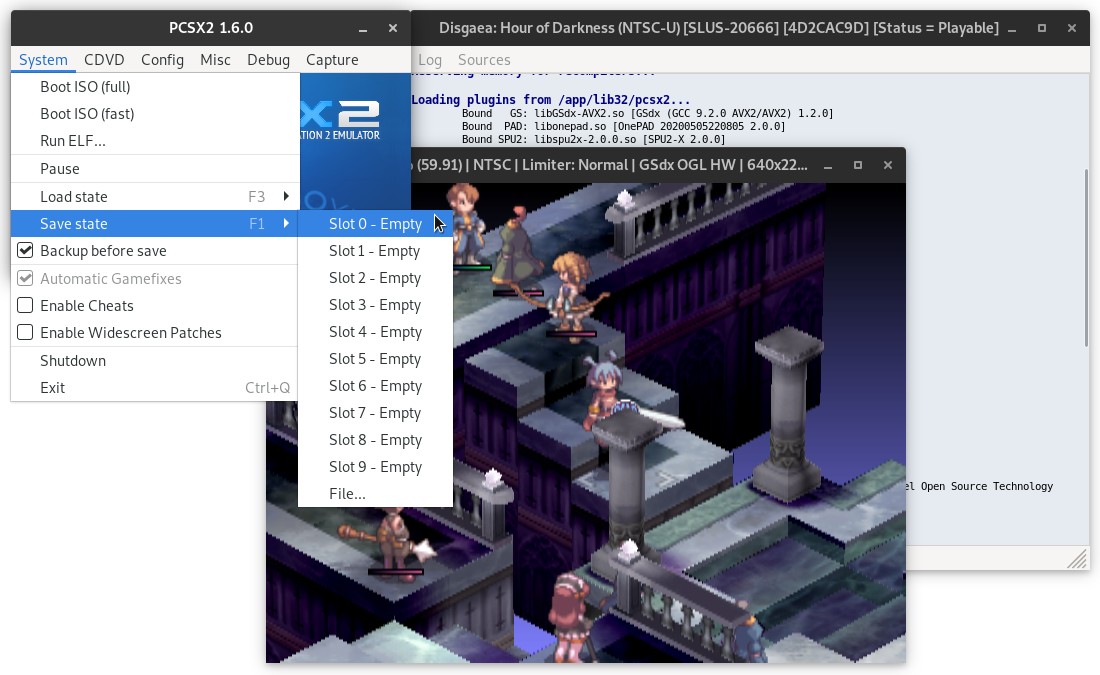
To save the game state, open the System menu, point to Save state and choose one of the available slots:
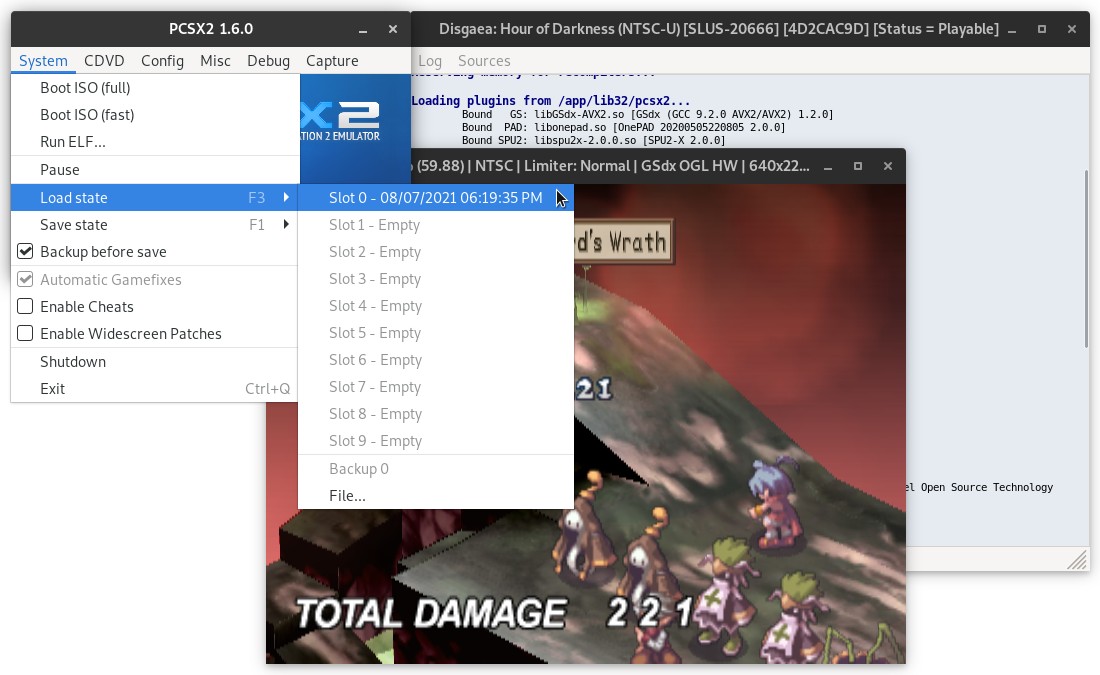
To resume a previously saved state, open the System menu, point to Load state, and choose the slot where your save resides:
To make it easier to save and load states, PCSX2 provides the following shortcut keys:
- F1: saves the game state in the current slot. Default is slot 0.
- F2: points to the next slot (if max 9 is reached, it will loop back to point at slot 0).
- Shift + F2: points to the previous slot (if min 0 is reached, it will loop around to point at slot 9).
- F3: loads the game state from the current slot. Default is slot 0.
Emulation of memory cards
The memory card is a storage device with a flash memory (the same technology flash drives are made) used by the PS2 to save the game progress. Commonly its capacity was 8 MB and it was possible to insert up to 2 memory cards in the PS2.
PCSX2 creates 2 files with .ps2 extension that simulate 2 memory cards in the memcards subfolder inside the PCSX2 configuration folder (in my case, /home/username/.var/app/net.pcsx2.PCSX2/config/PCSX2/memcards). It is a good idea to back up these files from time to time. To mimic PS2 memory cards, each of these files is 8MB large.
Therefore, you can use memory cards within the game as usual:
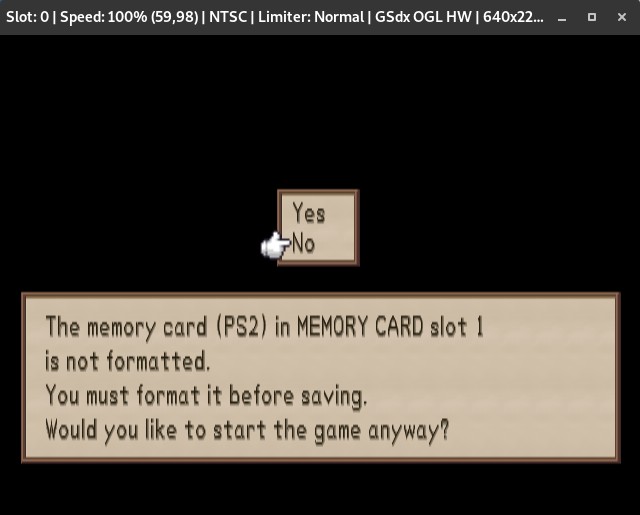
If you need to change any settings regarding memory cards, go to Config > Memory Cards.
Memory cards are separate and different from the emulator states we saw earlier. Memory cards are an emulated PS2 feature, not a native emulator feature. To save your game progress, you can use one feature or the other, or both at the same time.
Full screen
If you want to play full screen, simply double-click inside the game window. Repeat this double-click to exit full screen mode.
Alternatively, you can use the Alt + Enter keyboard shortcut to either enter or exit full screen mode.
Conclusion
I finish my post here. Now it’s up to you: have a lot of fun!


