The “do it yourself” (DIY) culture has grown as it is easy to find tutorials on the Internet on how to do almost anything. More and more people have ventured into making their own clothes, furniture, software and even gadgets.
In the areas of computing and electronics, DIY is made possible by technologies such as the Raspberry Pi and Arduino.
We’ve talked about the Raspberry Pi before, but it’s a full-fledged computer. It can even be used as a desktop for everyday tasks like browsing the web or doing homework. Depending on what you want to do, it can be overwhelming. It’s like killing a mosquito with a bazooka.
Today, we are going to talk about Arduino.
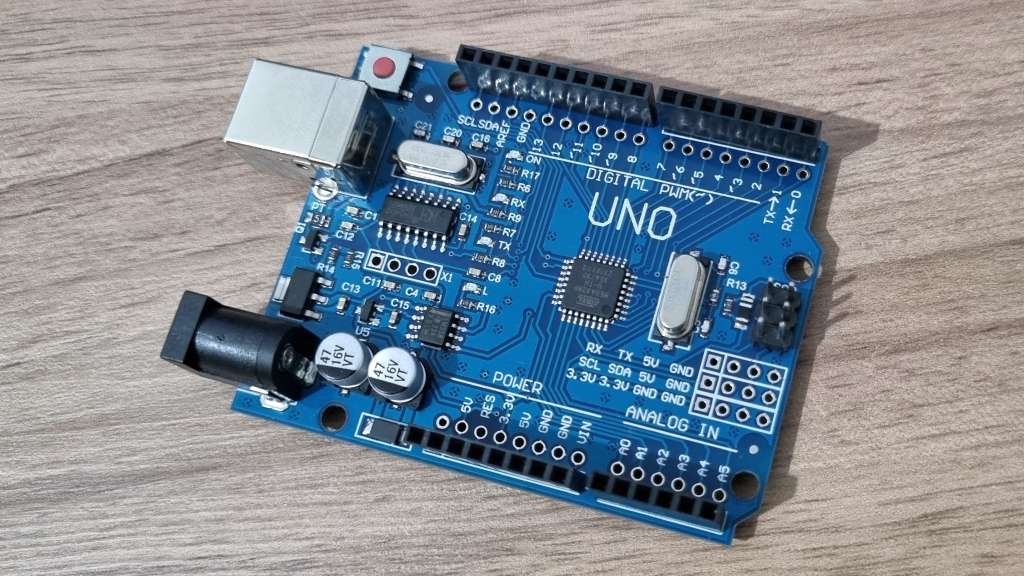
Arduino is a programmable electronics prototyping platform based on easy-to-use, free and open source hardware and software. There are several boards with microcontrollers and pins that can be used to read inputs – a finger on a button, something approaching, or an X/Twitter message – and turn them into outputs – turning on an LED, activating a motor, posting something on a social network.
Arduino was created in Italy in 2005, at the Interaction Design Institute Ivrea, by a group of researchers who wanted to offer students a device that was both cheap and easy to program.
You can buy an Arduino board for just about 20 dollars. There are also learning kits, which include a board and several electronic components.
Arduino programming is done using the Arduino programming language (which looks like the C/C++ languages) and an integrated development environment (IDE), more specifically the official Arduino one, called Arduino IDE.
You will see below how to install the Arduino IDE on Linux and use it to get started with Arduino. As a reference, I will use the Linux Kamarada 15.5 distro and the Arduino UNO R3 SMD board, which is the most used and documented board of the whole Arduino family, recommended for those who are getting started with electronics and tinkering with this platform for the first time.
Please note that this tutorial is not intended to teach you how to program Arduino. Here, we will simply make sure that the tools you need to program Arduino are working on your computer.
Fun fact: the name Arduino comes from a pub where some of the project’s founders used to meet. The pub, in its turn, was named after Arduin of Ivrea, who was King of Italy from 1002 to 1014.
Downloading and installing the Arduino IDE
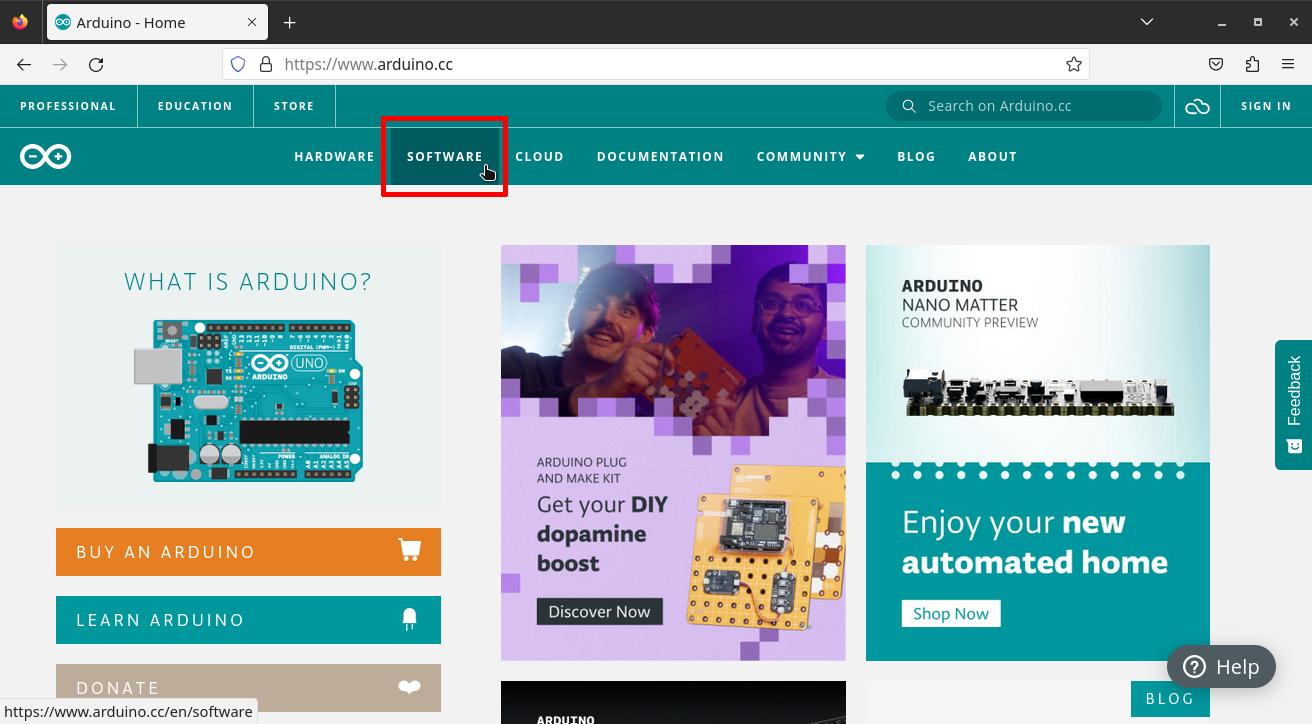
To download the Arduino IDE, visit the official Arduino website and click Software:
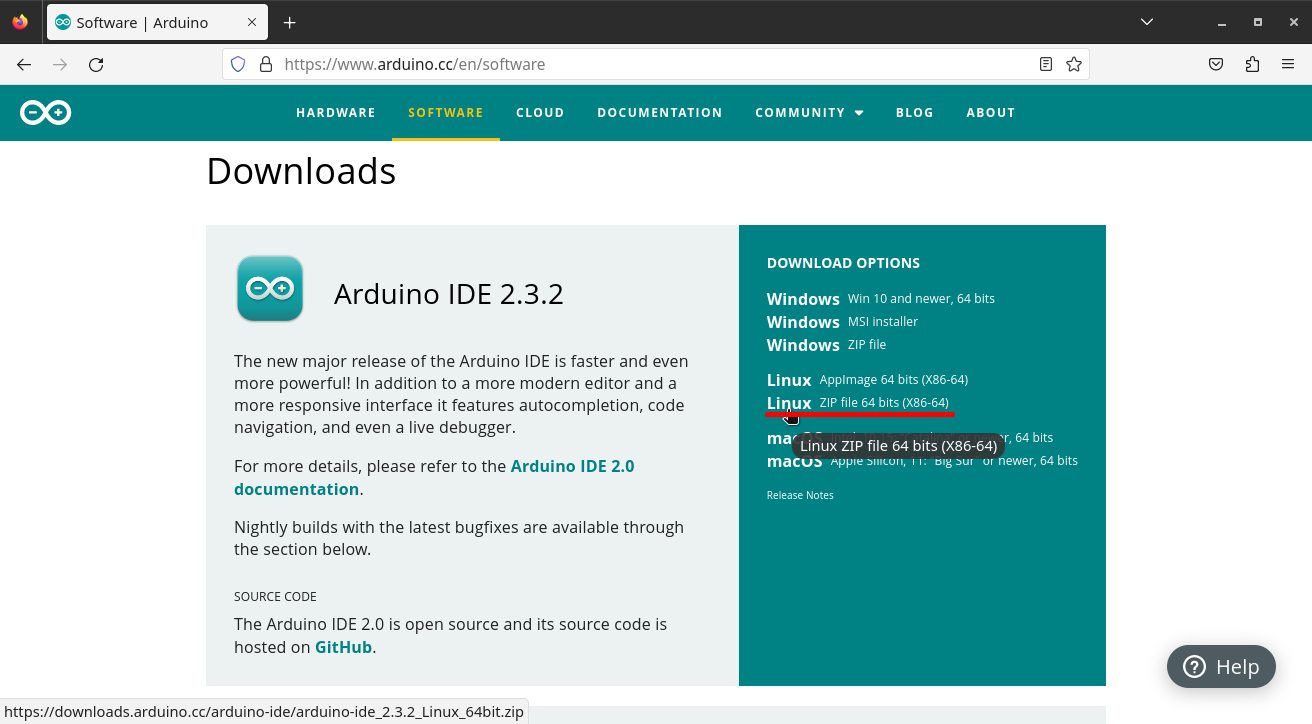
On the next page, click the ZIP file link for Linux:
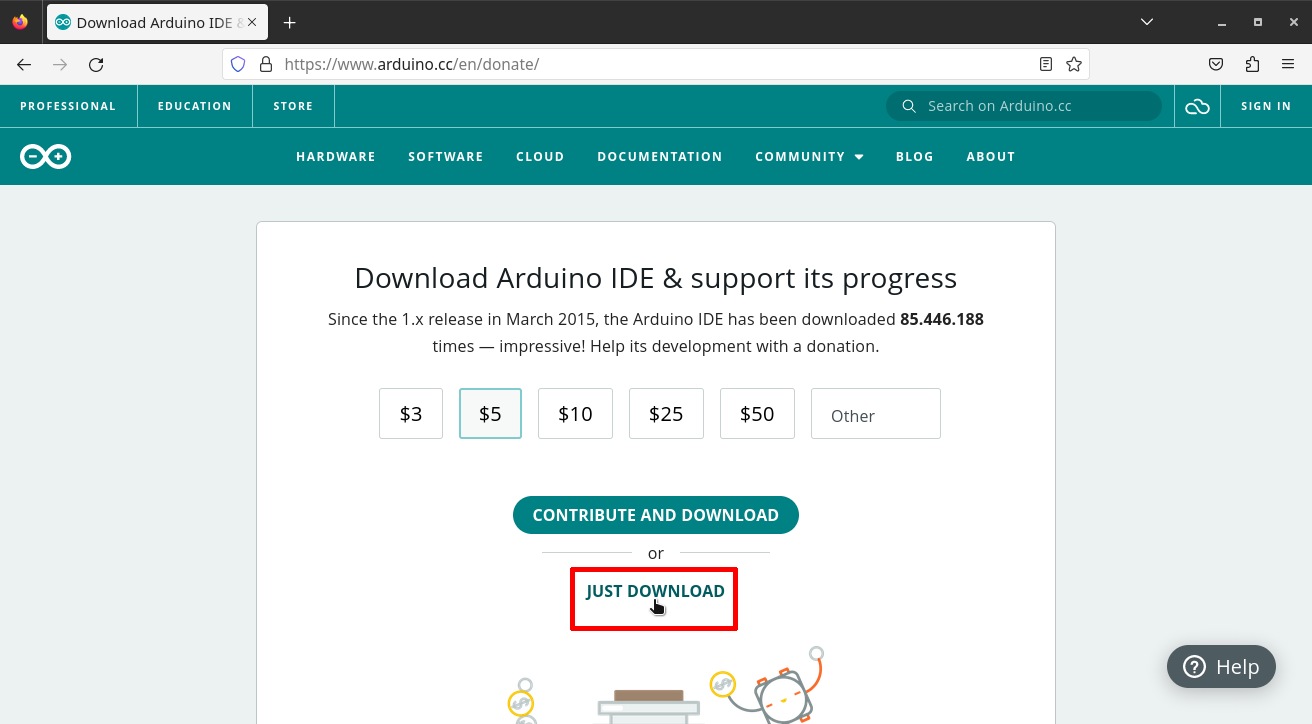
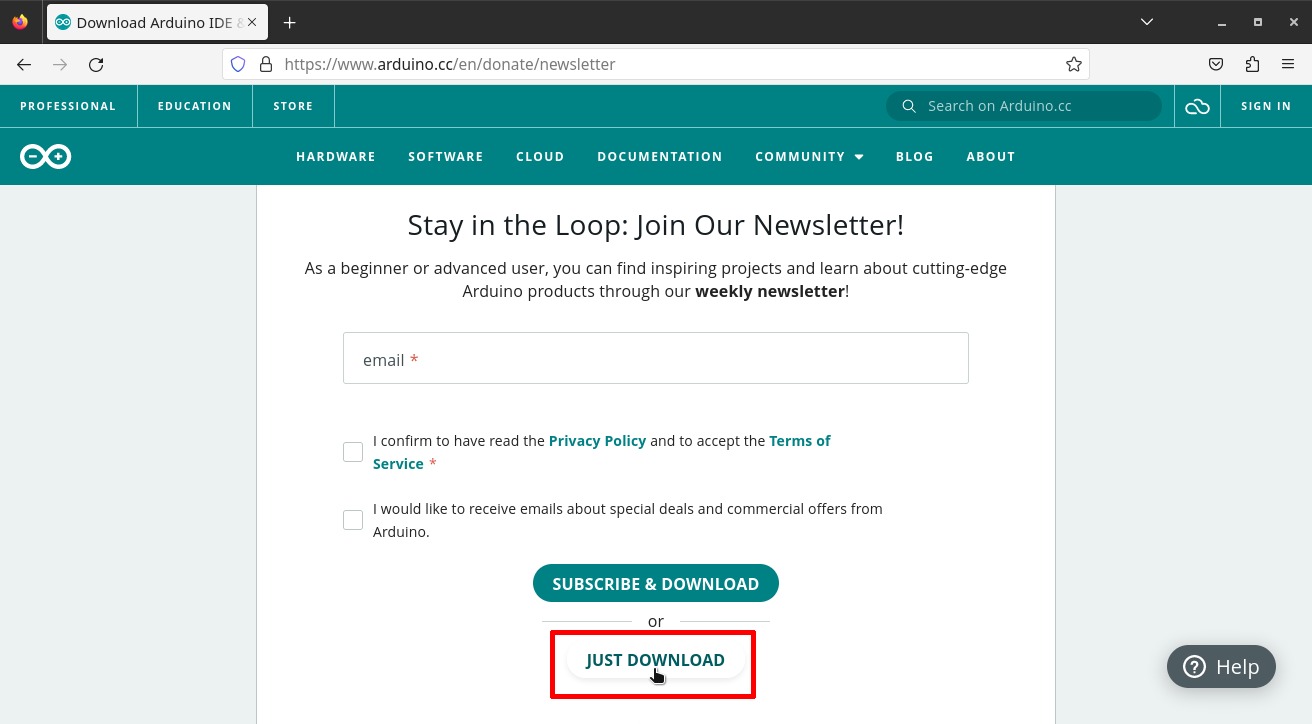
Optionally, you can make a donation to the Arduino Project. Or just download the Arduino IDE by clicking Just Download:
You can also optionally sign up to receive the Arduino newsletter. If you don’t want to, click Just Download:
The ZIP file will start downloading automatically.
At the time of writing, the Arduino IDE is at version 2.3.2 and the ZIP file is called arduino-ide_2.3.2_Linux_64bit.zip.
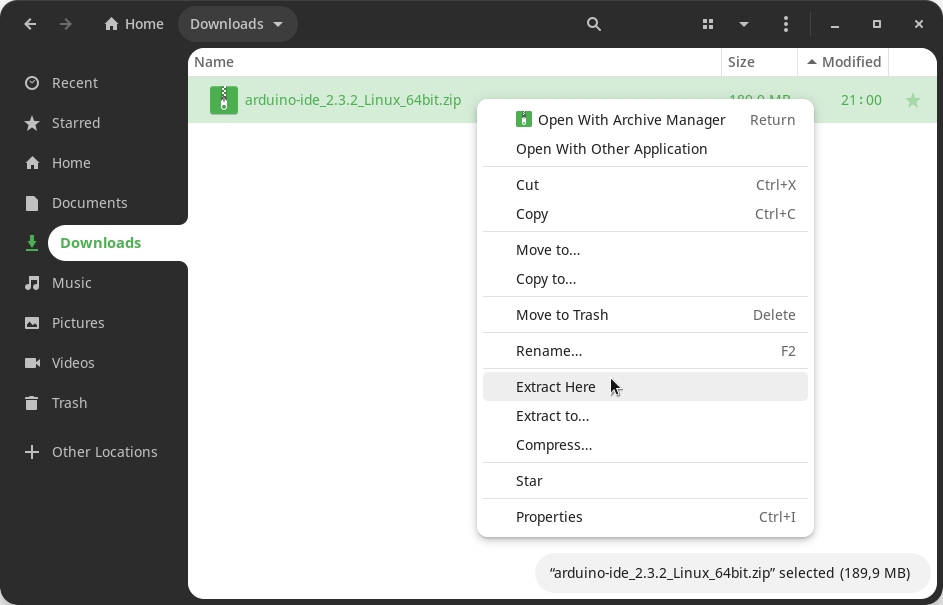
The browser should download it to your Downloads folder. Once the download is complete, open that folder, right-click the ZIP file, and click Extract Here:
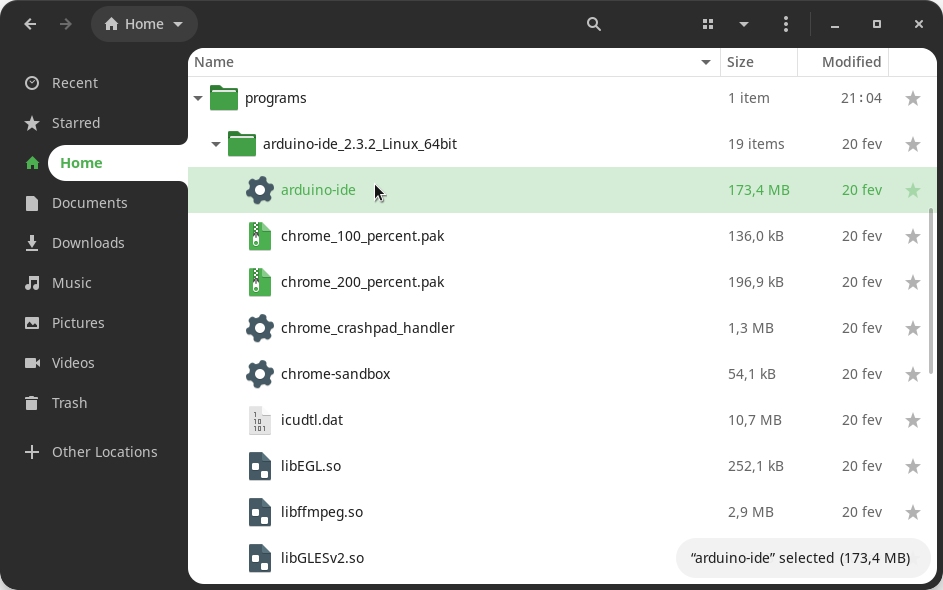
The ZIP file contents are extracted to a folder with the same name as the file. Move this folder to a place that is easy for you to remember.
For instance, I created a programs folder inside my home folder (/home/vinicius/) and moved the Arduino IDE folder (arduino-ide_2.3.2_Linux_64bit) there. Therefore, the path to the Arduino IDE on my system became:
/home/vinicius/programs/arduino-ide_2.3.2_Linux_64bit
Let’s make it easier to start the Arduino IDE from the Activities menu. To do this, we’ll create a .desktop file for it.
Open the Text Editor app (gedit), copy and paste the following content:
1
2
3
4
5
[Desktop Entry]
Name=Arduino IDE
Exec=/home/vinicius/programs/arduino-ide_2.3.2_Linux_64bit/arduino-ide
Icon=/home/vinicius/programs/arduino-ide_2.3.2_Linux_64bit/resources/app/resources/icons/512x512.png
Type=Application
(adjust the file paths as appropriate)
Save this file at ~/.local/share/applications, name it arduino-ide.desktop.
We still need to do one more configuration. Open a terminal window and switch to the administrator (root) user:
1
$ su
To enable the Arduino IDE to access the serial port and upload code to your board, run:
1
# echo 'SUBSYSTEMS=="usb", ATTRS{idVendor}=="2341", GROUP="plugdev", MODE="0666"' > /etc/udev/rules.d/99-arduino.rules
Finally, restart your computer for the changes to take effect.
Starting the Arduino IDE
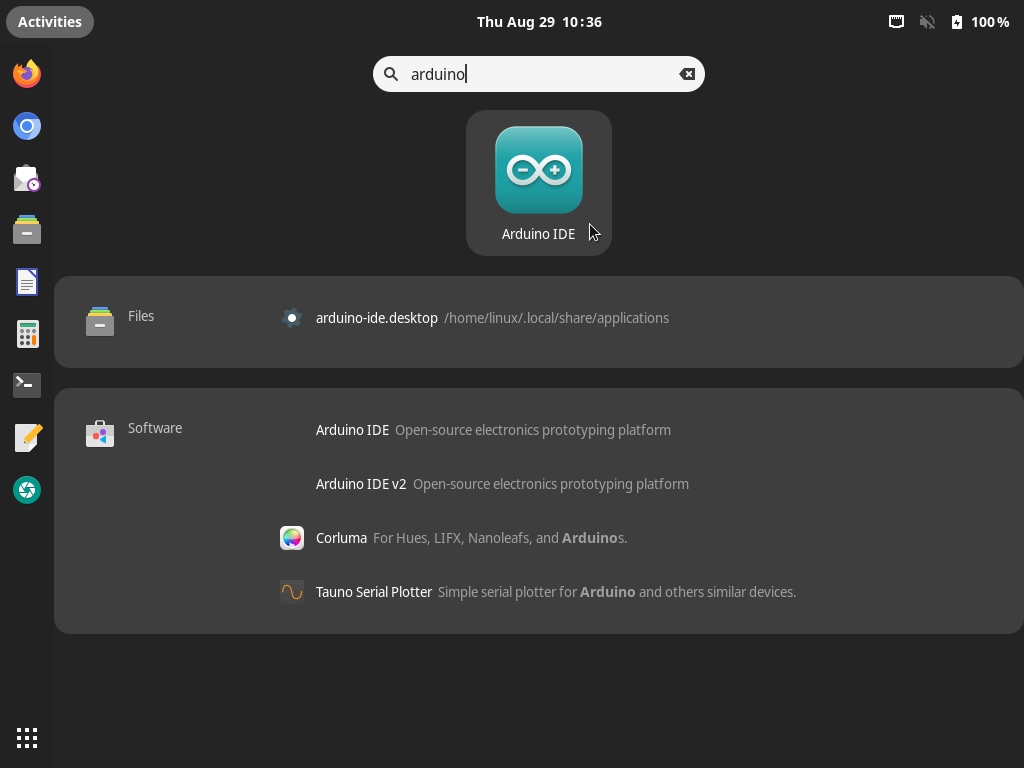
To start the Arduino IDE, open the Activities menu, by the upper-left corner of the screen, start typing arduino and click the IDE icon:
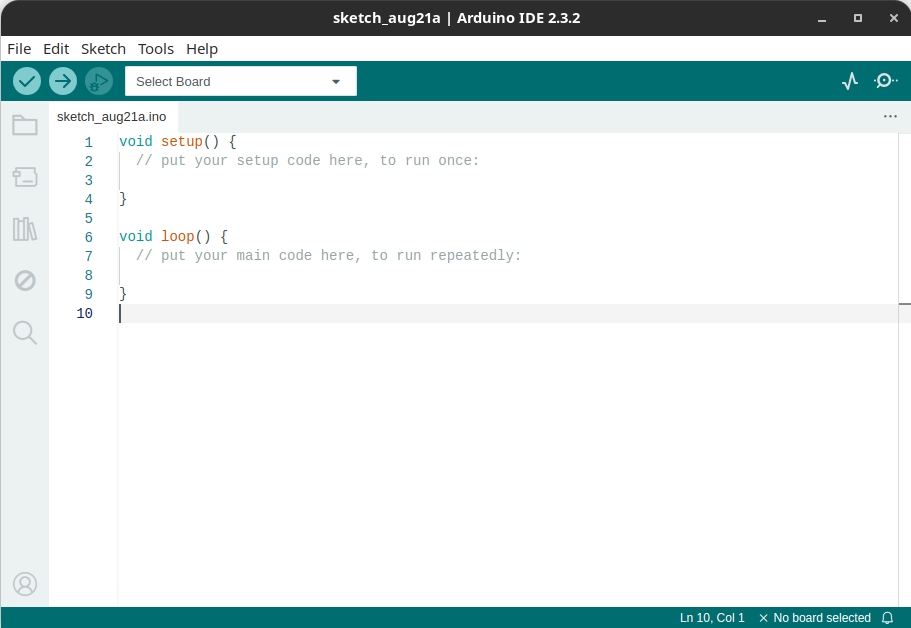
This is the Arduino IDE main window:
Translating the interface (optional)
The Arduino IDE comes in English by default, but it features translations to many languages. You may want to translate it to your language, if it is available.
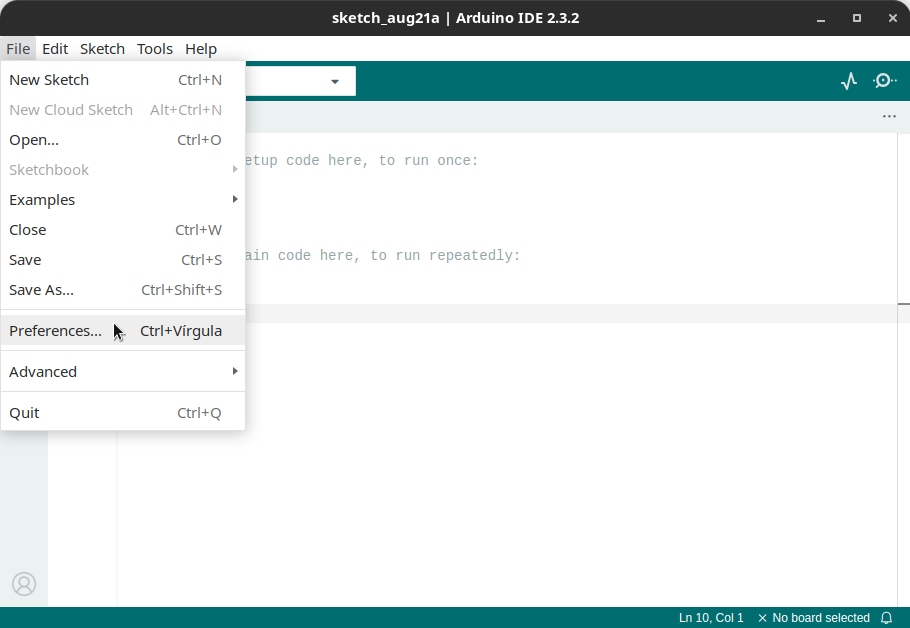
Open the File menu and click Preferences:
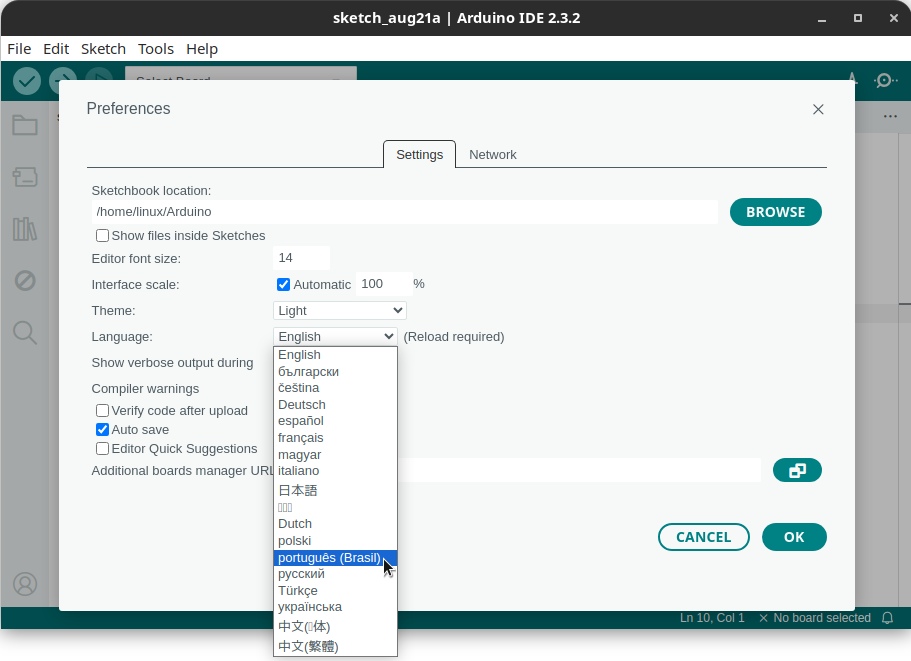
Select your Language from the list and click OK:
The interface is reloaded and translated.
Note that the presented source code, with English comments, is not translated.
For the purpose of this how-to, I’m going to keep the default language (English).
Programming Arduino
To get an idea of how to program an Arduino, we are going to use an Arduino IDE built-in example program, which is Blink.
If you already have some experience with programming, you know that every programming language has a didactic example called “hello, world”, which is the simplest program that can be written with that programming language.
The Blink example program shows the simplest thing you can do with an Arduino, which is to make its on-board LED blink.
After starting the Arduino IDE, connect the Arduino board to your computer using the USB cable that came with it.
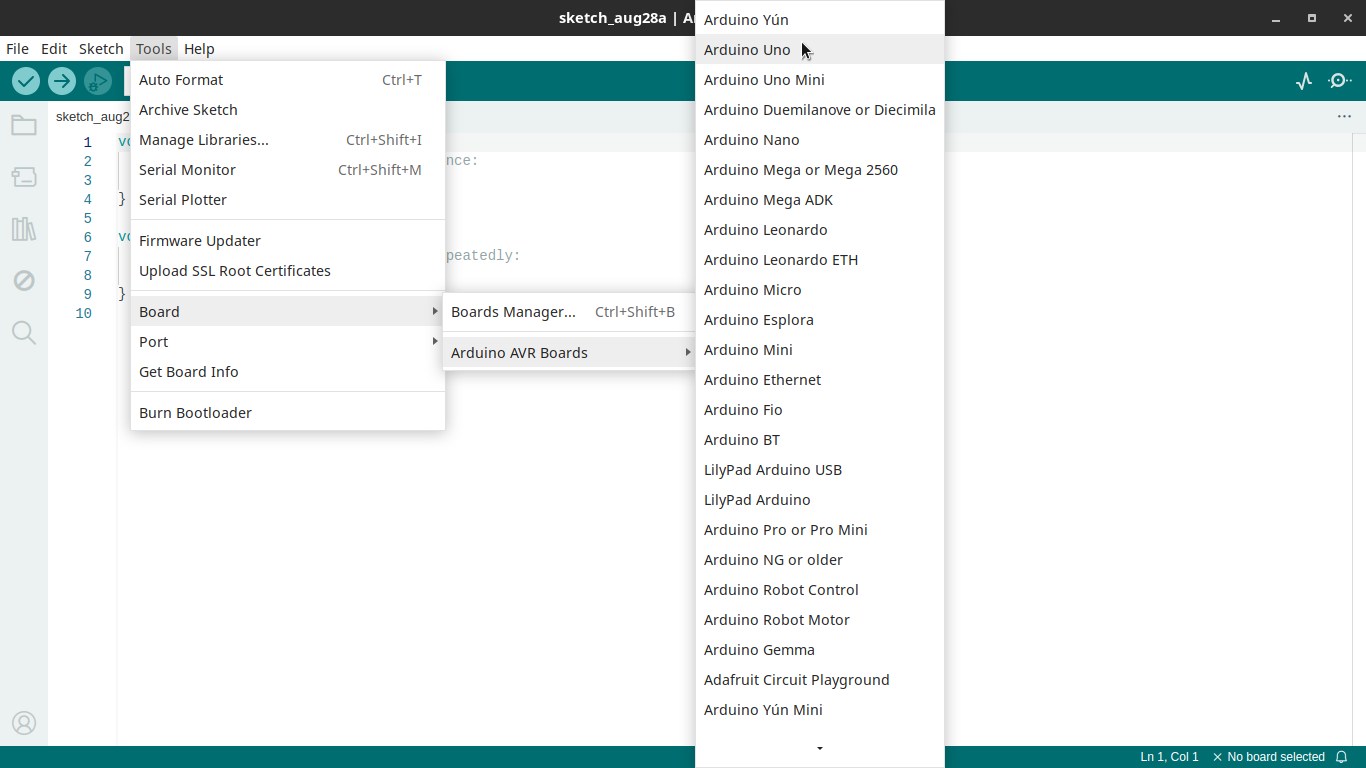
Tell the Arduino IDE which model your board is by going to Tools > Board > Arduino AVR Boards > Arduino Uno:
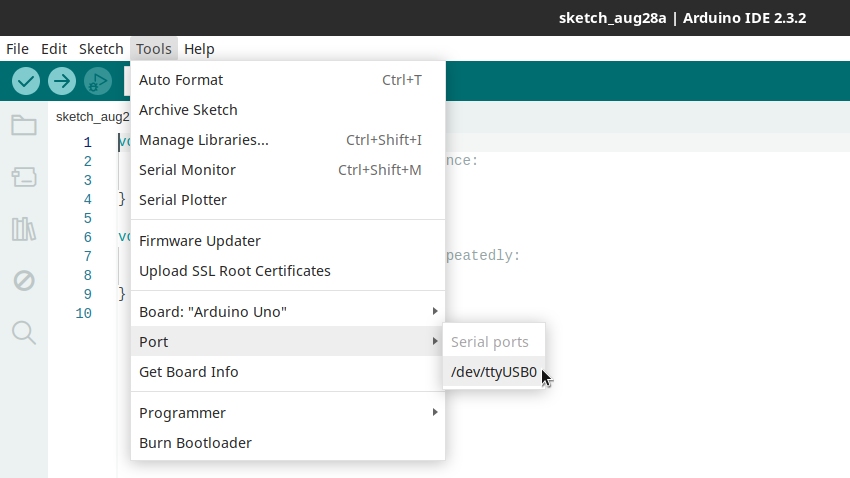
Then go to Tools > Port and tell the Arduino IDE which port your board is connected to (in my case, /dev/ttyUSB0):
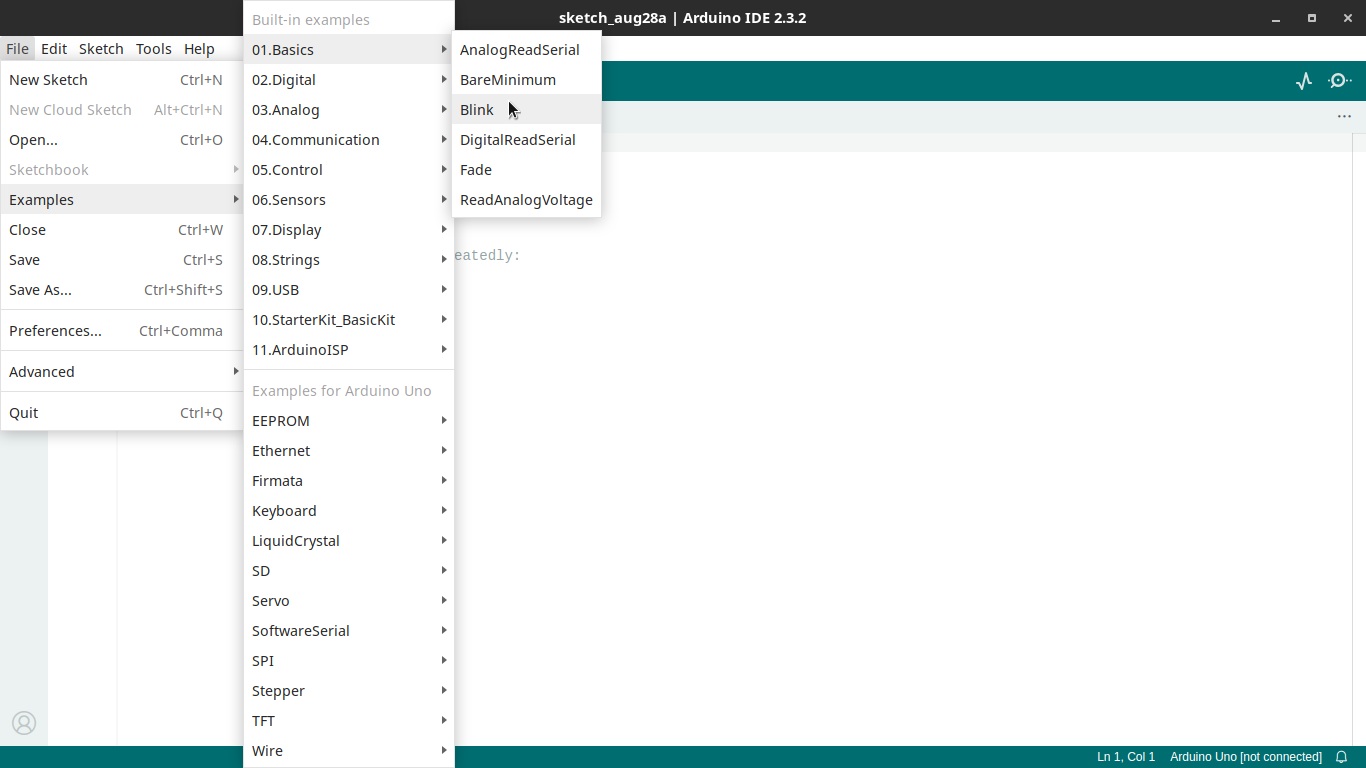
To open the Blink example program, go to File > Examples > 01. Basics > Blink:
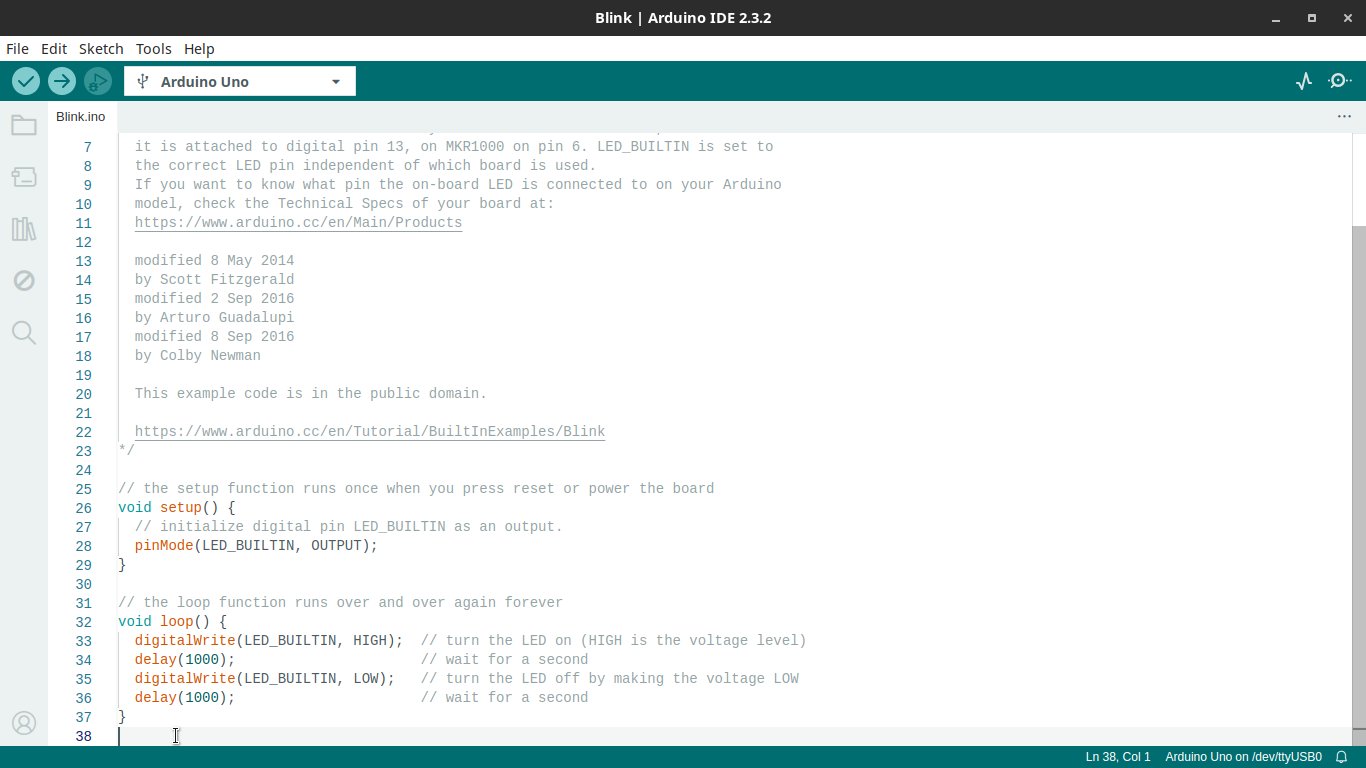
The IDE opens a new window with the example program code:
Usually we would start to program Arduino by writing a program. We skipped that step by loading this example program.
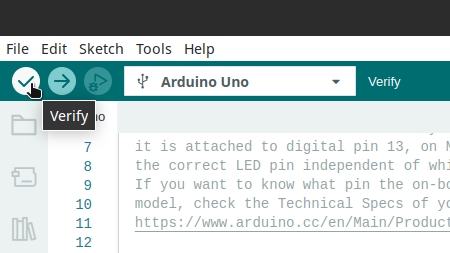
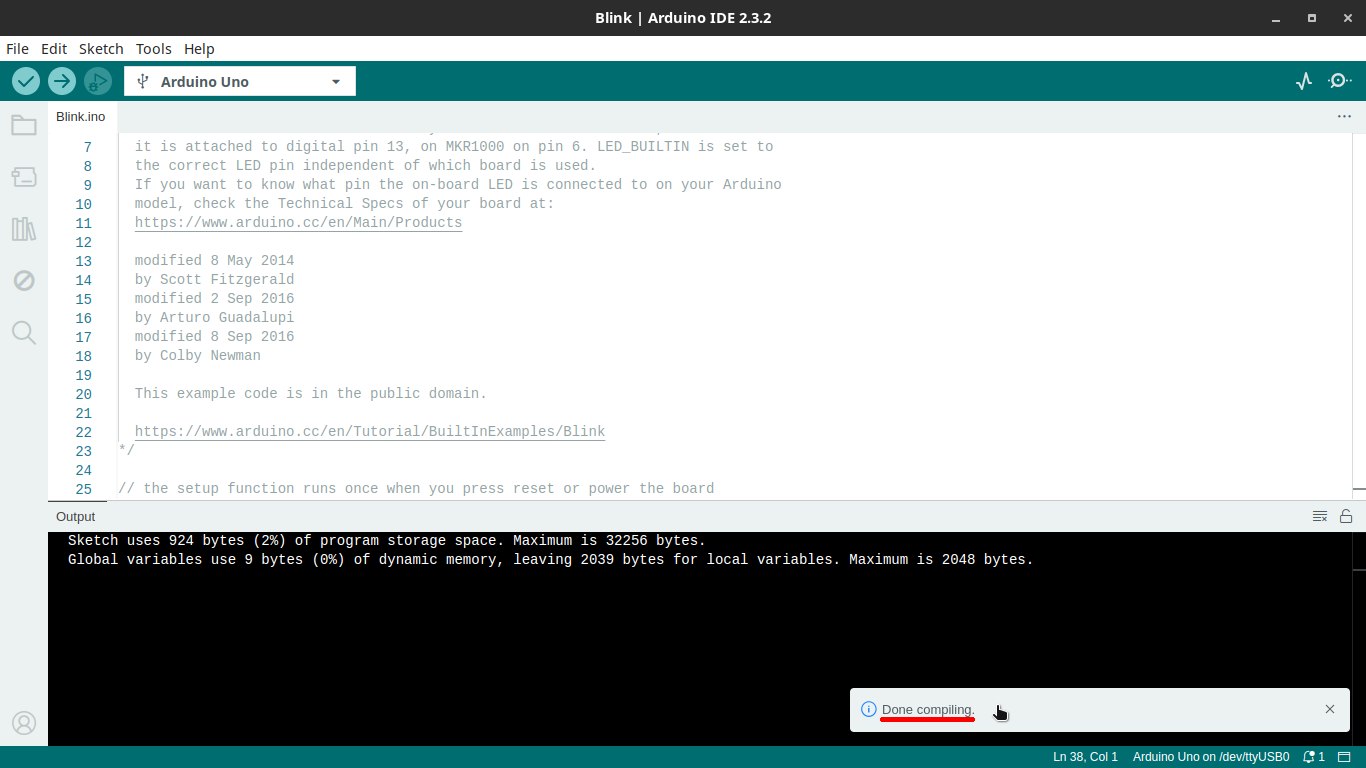
After typing (or, in this case, opening) the program, and before uploading it to the board, it is a good practice to verify it. Click the Verify button:
The Arduino IDE goes through your code and checks for errors. If it finds any, it points them out. If not, it compiles the program. You can use the verifying tool to spot any errors in your code and fix them before you actually upload it to the board.
Since we are verifying an example program from the Arduino IDE itself, we can be sure it has no errors and is going to compile.
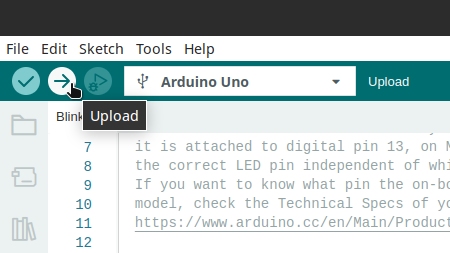
The next step is to click the Upload button:
The program is uploaded to the board:
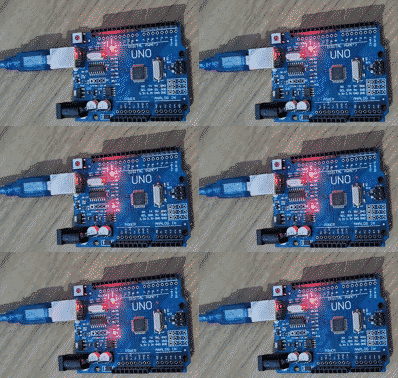
Note that the board now acts according to the program:
And that program is permanently stored in the Arduino’s internal memory: if you disconnect the board from your computer and connect it to the power (using the same USB cable and a cell phone charger, for example), you will see that the board will do what it was programmed to do. The board works independently of the computer.
Troubleshooting
It might happen that when you try to upload a program to the board you get an error message such as:
1
avrdude: ser_open(): can't open device "/dev/ttyUSB0": Permission denied
If you get this error, you need to check the serial port permission and add your user to its group. To do this, open the terminal and run:
1
$ ls -l /dev/ttyUSB0
You will get something like:
1
crw-rw---- 1 root dialout 188, 0 ago 22  2024 /dev/ttyUSB0
Note that the /dev/ttyUSB0 port is owned by the dialout group.
Add your user to that group:
1
# usermod -a -G dialout your_username
Restart your computer and try again.
Another example
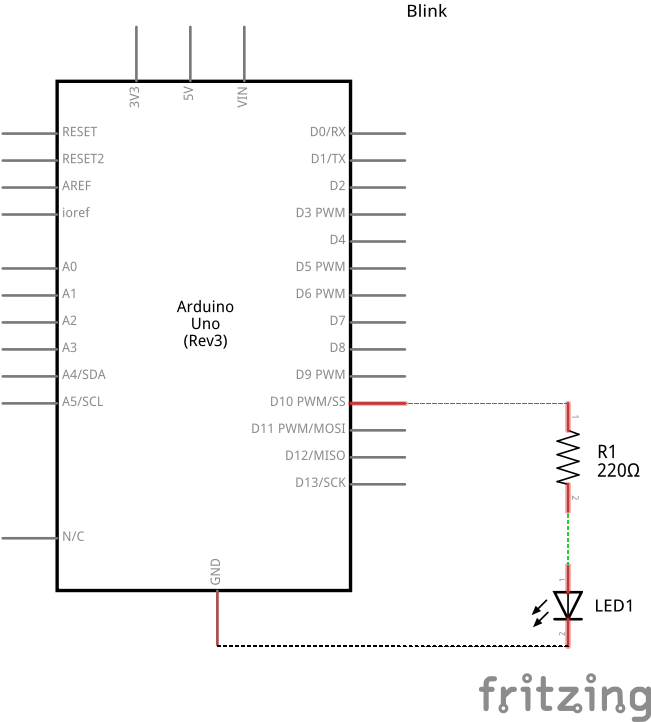
Now that you have made the on-board LED blink, you can improve the experiment and make your Arduino board control an external LED.
To do that, you will need, in addition to the board and the USB cable:
- 1 x 5mm LED;
- 1 x 220 ohm resistor;
- 1 x breadboard; and
- 2 x male to male jumper wires.
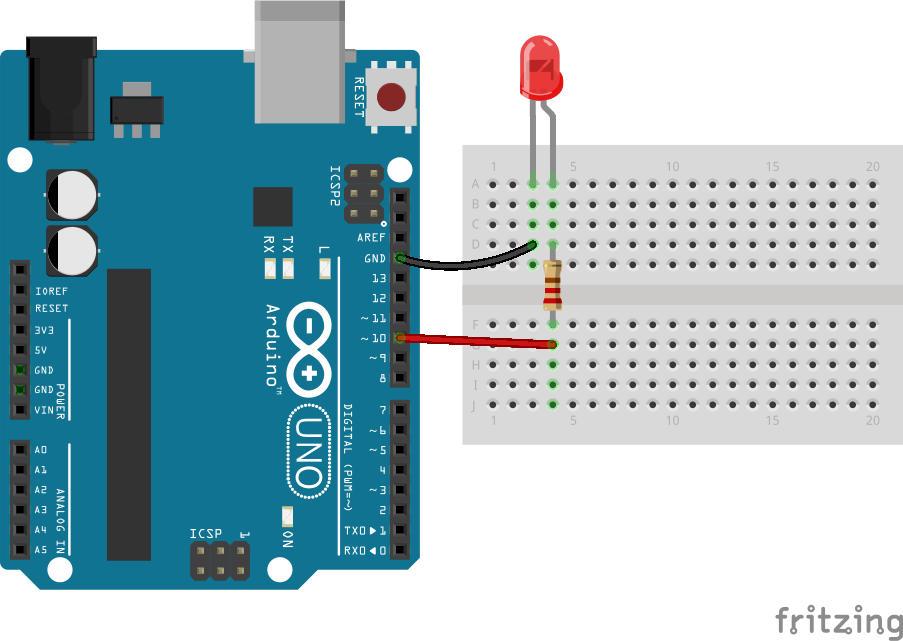
Assemble the circuit as follows:
- connect Arduino’s 10th digital pin to one end of the resistor;
- connect the long (positive) leg of the LED to the other end of the resistor; and
- connect the short (negative) leg of the LED to the Arduino’s GND pin.
(diagrams made with the Fritzing app, and based on a diagram provided by the Johnny-Five community)
You can reuse the Blink example program, just replace LED_BUILTIN with 10. It will look like this:
1
2
3
4
5
6
7
8
9
10
11
12
13
// the setup function runs once when you press reset or power the board
void setup() {
  // initialize digital pin LED_BUILTIN as an output.
  pinMode(10, OUTPUT);
}

// the loop function runs over and over again forever
void loop() {
  digitalWrite(10, HIGH);  // turn the LED on (HIGH is the voltage level)
  delay(1000);                      // wait for a second
  digitalWrite(10, LOW);   // turn the LED off by making the voltage LOW
  delay(1000);                      // wait for a second
}
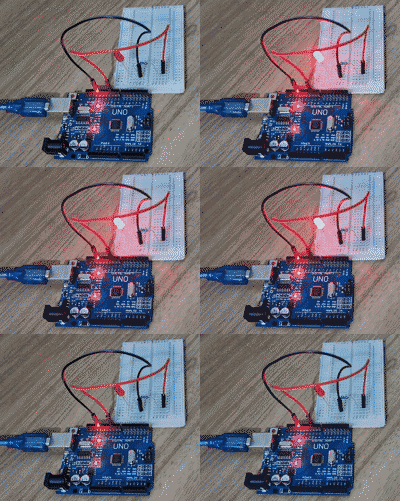
Verify and upload the program to the board and this will be the result:
Recommended further reading
Now that the Arduino IDE is installed and running on your computer, and you know how to use it to program your Arduino board, you can continue your adventures by looking at the official Arduino documentation.
If you know other good sources of information to learn about Arduino, please let me know in the comments.
