Raspberry Pi is a low-cost, credit-card sized, single-board computer developed by the Raspberry Pi Foundation, a UK-based charity that aims to facilitate and promote teaching of basic computer science and digital inclusion.
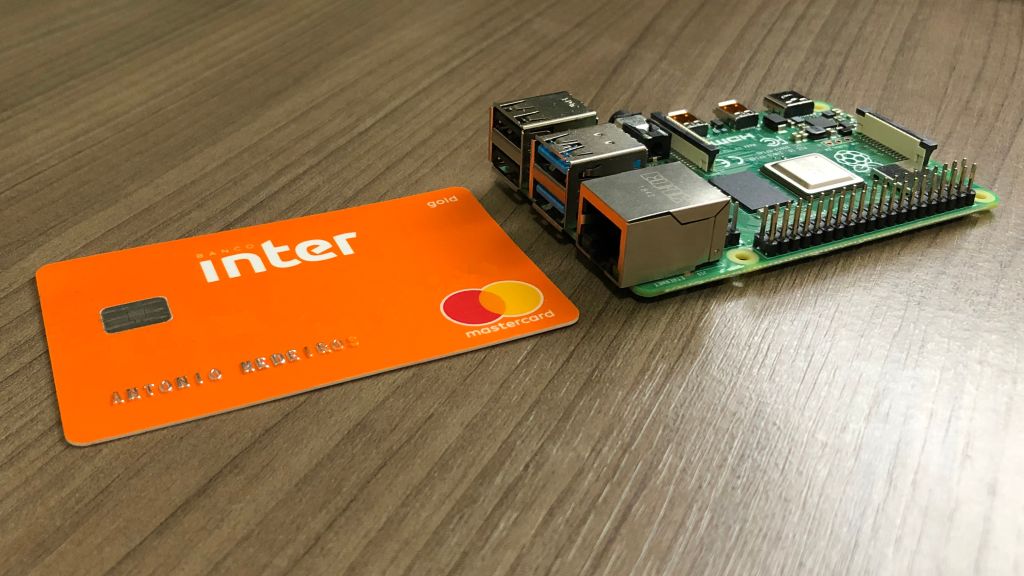
Raspberry Pi: the low cost, credit-card sized, single-board computer
There are people using Raspberry Pi to learn and teach programming skills, build hardware projects, do home automation, it has uses even on industry and research.
Raspberry Pi provides a set of GPIO (general purpose input/output) pins that allow you to control electronic components for physical computing and explore the Internet of Things (IoT).
Here is an interesting example of home automation: a bark activated automatic door opener made with Raspberry Pi and a few electronic components.
Fun fact: the name Raspberry is a reference to a fruit naming tradition in the old days of microcomputers. A lot of computer companies were named after fruits – e.g. Apple. Pi is a reference to the Python programming language. The initial idea was to create a computer that could be programmed only using that language. Some people believe that Pi may be also related to the number π (3.14…) or that Raspberry Pi is a pun with raspberry pie.
A raspberry pie and a Raspberry Pi
ARM architecture
Raspberry Pi is different from a traditional computer not only in size, but also in architecture. That means that their hardware and software work totally differently. While most today’s desktops and laptops are, in essence, equal to the first IBM PC, released in 1981, and are based on x86 (32-bit PCs) or x86-64 (64-bit PCs) architectures, Raspberry Pi is based on ARM architecture, on which most Android smartphones are based too.
In practice, that means that if you copy a program from a PC to a Raspberry Pi (or vice-versa), it won’t work. A program may provide versions for both architectures, but they are different executables – for instance, LibreOffice for PC and LibreOffice for Raspberry Pi.
It is possible to install Linux on Raspberry Pi and use it as a desktop for everyday tasks – surfing the Internet, editing texts, etc. How to do that is what you are going to see here.
Raspberry Pi 4 Model B
The Raspberry Pi launched in 2012 and there have been several generations and variations released since then. It is currently in its fourth generation with the Raspberry Pi 4, released in July. There has generally been a Model A and a Model B of most generations. Model A is a cheaper variant and tends to have reduced RAM and ports like USB and Ethernet. Until now, only a Model B has been released of the fourth generation.
The Raspberry Pi 4 Model B has the following specifications:
- Broadcom BCM2711 system-on-a-chip (SoC) processor
- quad core Cortex-A72
- 1.5GHz clock
- 64-bit ARMv8 architecture
- 1GB, 2GB or 4GB DDR4 RAM (depending on the variation)
- IEEE 802.11ac Wi-Fi network (it is able to connect to 2.4GHz or 5GHz networks)
- Bluetooth 5.0
- Gigabit Ethernet network
- 2 USB 3.0 ports and 2 USB 2.0 ports
- 2 micro-HDMI ports to connect up to two 4K screens at once
- stereo analog audio output to connect a 3.5mm jack speaker or headset
- micro-SD card slot for loading operating system and data storage
- 40 GPIO pins
- and more!
](/files/2019/09/raspberry-pi-4-components.jpg)
Source: Electronics-Lab
If you want to see Raspberry Pi 4 Model B tech specs in more detail, please visit the Raspberry Pi website.
An advice on the amount of RAM
Raspberry Pi 4 Model B comes with either 1GB, 2GB, or 4GB of RAM.
For most educational purposes and many hobbyist projects, 1GB is enough.
For use as a desktop computer, at least 2GB is recommended.
It is important that you choose the right amount of RAM before buying a Raspberry Pi, because it is not possible to expand it later, as RAM is soldered in the board and can’t be replaced.
How much is it?
The entry price for Raspberry Pi has always been 35 dollars. That gets you the base variant of Raspberry Pi 4 B with 1GB of RAM.
But note that $35 is the price of the standalone board. In addition, it is necessary to buy the power supply, a micro-SD card with a capacity of at least 8GB and a micro-HDMI cable. Also, it is optional, but recommended, to buy a case to protect the board.
You can buy board and accessories separately, or together as a kit which comes with everything needed. That’s what I did (more on that below).
If you already own a computer, then probably you have keyboard, mouse and monitor. You can use them with Raspberry Pi, which has USB and HDMI ports. If Raspberry Pi is your first computer, you need to buy them too. If you have a TV with HDMI input, you can use it in place of a monitor.
Just out of curiosity, there has been Raspberry Pi models even cheaper than $35. The cheapest model launched so far is Raspberry Pi Zero, which costs only $5. It is a spinoff of the original Raspberry Pi, but even smaller and cheaper.
Where to buy?
Several stores sell Raspberry Pi, accessories and kits. But there are some stores recognized by the Raspberry Pi Foundation as approved resellers. You can check the Raspberry Pi website for approved resellers that sell Raspberry Pi 4 B in your country.
The Brazilian approved reseller, FilipeFlop, does not sell Raspberry Pi 4 B yet.
I myself bought my Raspberry Pi 4 B from a Chinese approved reseller, the JunRoc Store, through AliExpress, a Chinese shopping website similar to Amazon or eBay.
I bought a kit that includes the Raspberry Pi 4 B variation with more RAM (4GB) and:
- a 16GB micro-SD card,
- an acrylic shell case with fan,
- a USB card reader,
- heat sinks,
- a power supply, and
- a micro-HDMI to HDMI video cable.
 is the best option for those getting started.](/files/2019/09/raspberry-pi-4-kit.jpg)
A Raspberry Pi 4 kit is the best option for those getting started.
It cost me a total of $86.19. I ordered it on August 26 and it arrived on September 17.
If you are going to buy from the same reseller I bought, please note that the same ad offers you 6 different bundles: the Raspberry Pi 4 B standalone board with 1GB, 2GB or 4GB RAM or the corresponding kits. Pay attention to select the bundle you want.
Raspbian: Debian for Raspberry Pi
openSUSE currently supports the Raspberry Pi family up to the third generation:
The fourth generation (Raspberry Pi 4) is not yet supported, as you can see on these links:
- LEAP 15.1 Can Raspberry Pi 4 run openSUSE LEAP 15.1? - openSUSE Forums
- Raspberry Pi 4? - openSUSE reddit
- Raspberry Pi 4 and openSUSE LEAP 15.1? - Raspberry Pi Forums
Even though support is on the way:
So, although usually this blog is green because of openSUSE, today’s post is going to be red, because we are going to talk about another Linux distribution: Raspbian!
The name Raspbian is the combination of Raspberry Pi and Debian: in short, Raspbian is a port of the Debian distribution optimized for Raspberry Pi.
Debian is one of the oldest and biggest Linux distributions available. It was begun in 1993 and introduced the DEB packaging format (analogous to the RPM packaging that openSUSE uses). Debian is focused on stability: it provides only well-tested (usually old) versions of programs, and distribution upgrades usually occurs without errors. If you make a family tree of Linux distros, Debian will be one of the top ones: many other distributions have been created from the Debian codebase, including Ubuntu, Knoppix and Raspbian.
NOOBS: the Raspbian installer
As we are getting started with Raspberry Pi, we are going to install its operating system using the recommended method according to the Raspberry Pi website, which is NOOBS.
NOOBS – stands for New Out Of The Box Software, but it also seems like a pun with noob (a slang which means “newbie”) – is the installer that installs Raspbian on the SD card and is designed to be very easy to use. In addition to Raspbian, NOOBS can also be used to install LibreELEC, a multimedia-focused Linux distribution.
Many sellers supply SD cards with pre-installed NOOBS. Since the kit I bought included a sealed SD card, I had to manually download NOOBS to it. I’m going to show you how to do that.
If Raspberry Pi is your first computer and you don’t have another computer to set up the SD card, you should purchase an SD card with pre-installed NOOBS.
That’s enough: no more talking, let’s roll up our sleeves and start!
Downloading NOOBS
Visit the Raspberry Pi Downloads page. Click the box linking to NOOBS:
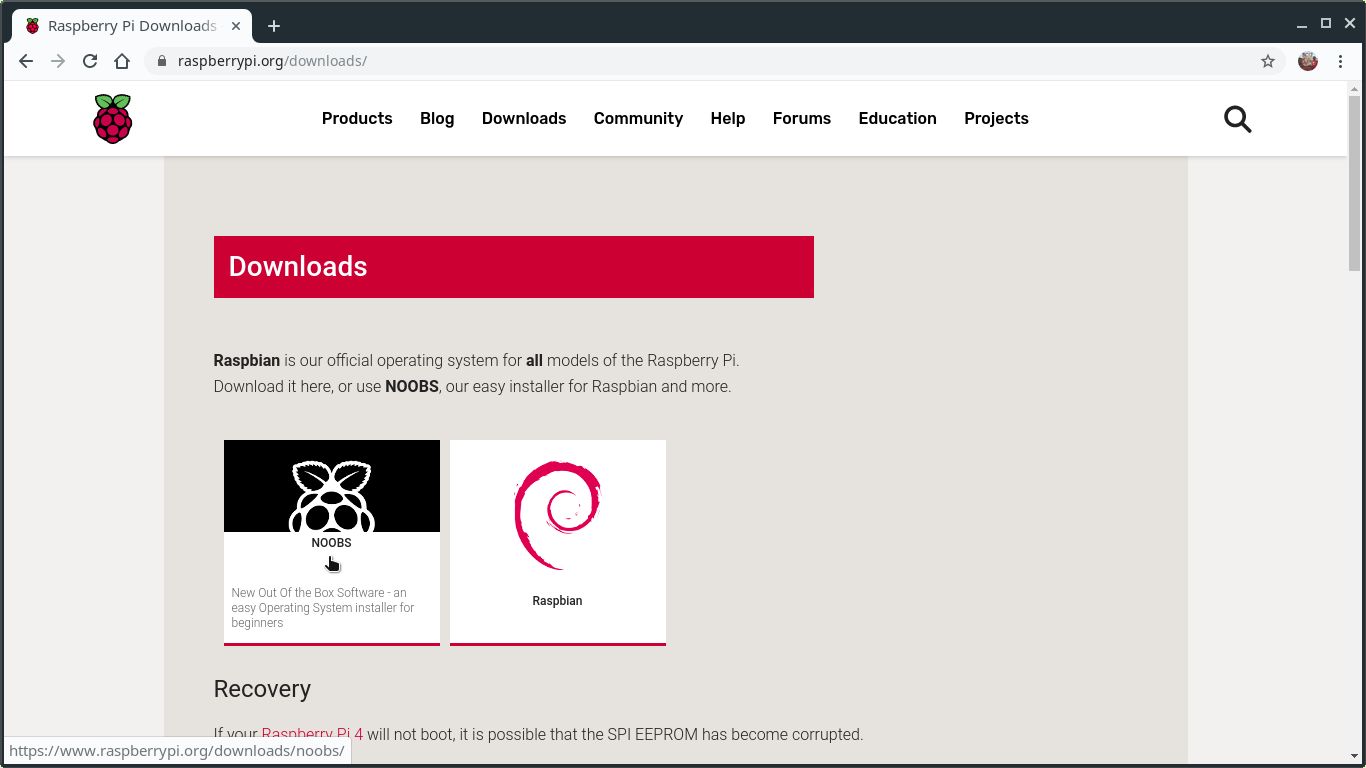
Click Download ZIP, below NOOBS:
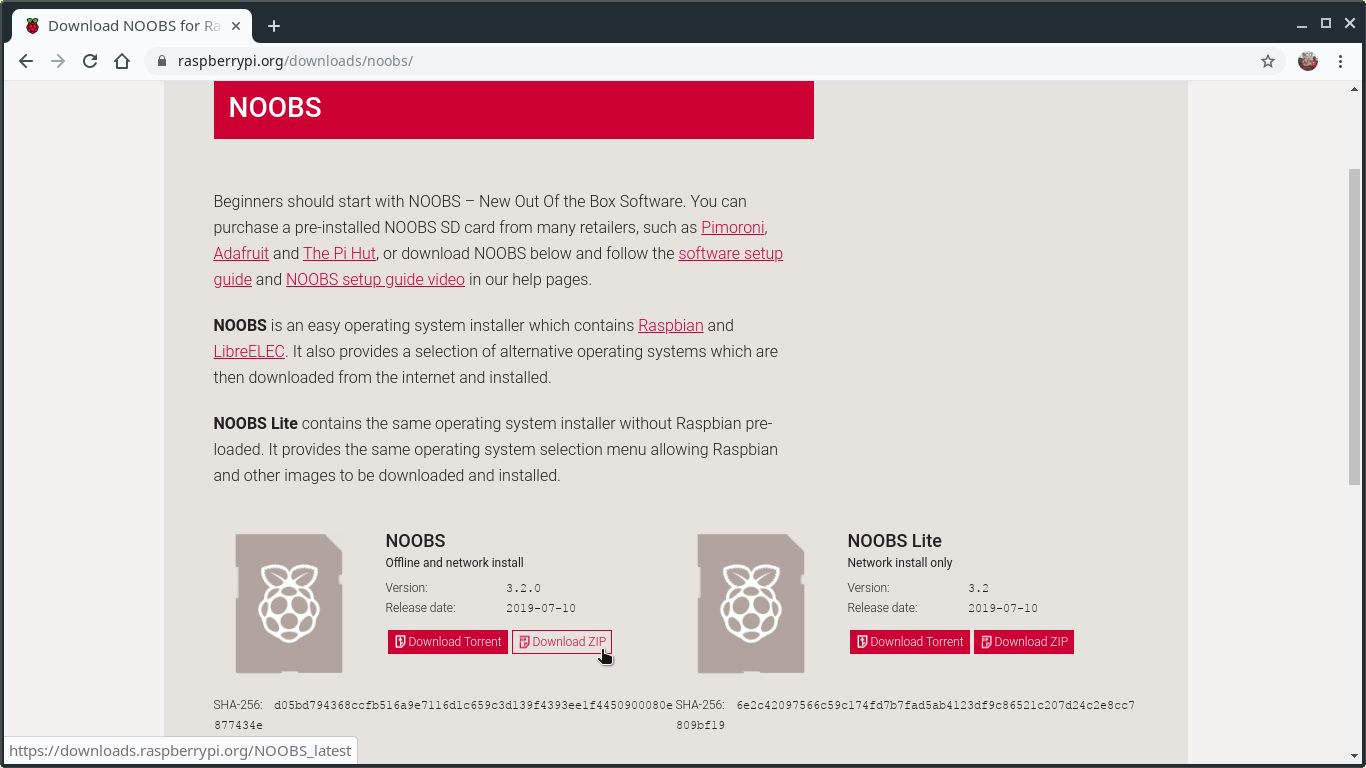
Doing that, you are going to download an archive which contains the operating system installer (NOOBS) together with the operating system itself (Raspbian) ready for an offline install. It is a large file (2.3GB), so you may want to make a cup of coffee for waiting.
There is also NOOBS Lite. It contains only the installer without Raspbian pre-loaded, which is downloaded during installation. I chose to simplify and download everything needed at once.
Make sure to pay attention to the file name – NOOBS_v3_2_0.zip – and where you save it – usually, downloaded files are saved on the Downloads folder inside the user’s home.
Verifying the integrity of the downloaded archive
Usually when we download a file we just open it right after it finishes downloading. But, in some cases, it is important to verify that the file has been downloaded correctly – especially in this case, as we are downloading an operating system! We can avoid serious trouble by simply doing a quick integrity check.
Open a terminal window and run the sha256sum utility informing the downloaded file path:
1
$ sha256sum Downloads/NOOBS_v3_2_0.zip
It takes some time computing the archive checksum and shows it as a large hexadecimal number:
1
d05bd794368ccfb516a9e7116d1c659c3d139f4393ee1f4450900080e877434e  Downloads/NOOBS_v3_2_0.zip
Compare the calculated SHA-256 checksum against the expected checksum presented on the page from where you downloaded NOOBS:
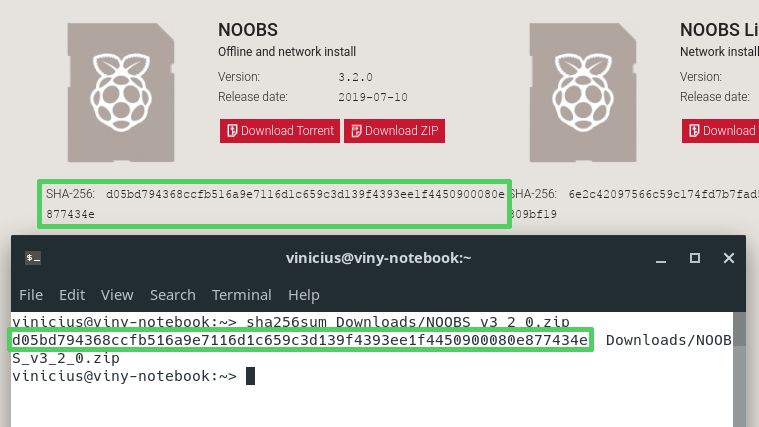
If they match, the archive has been downloaded successfully, so it is safe to go on and use it.
If there is difference between the computed and the expected checksums, something went wrong (e.g. your Internet connection may have dropped out during downloading). In that case, delete the archive and try downloading it again.
Here, I briefly wrote what we needed to know today about integrity checking to install Raspbian. If you want to know more about it, read this post:
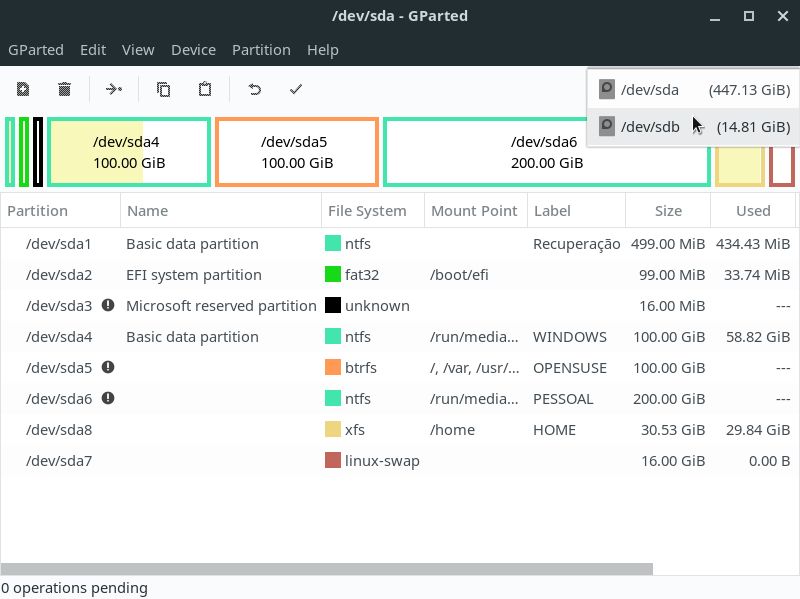
Formatting the SD card
The SD card needs to be formatted with the FAT32 file system. Most cards come with this formatting from factory – including the one which came on the kit I have bought. But it doesn’t hurt to format, especially if you are going to reuse an SD card you already have.
Note that anything currently stored on the SD card will be overwritten during formatting. So, if the card currently has any files on it, you may wish to back those files up first to not lose them permanently.
Remove from your computer or laptop any external storage device other than the SD card which will be formated (USB sticks, external HDDs, etc.) to avoid the risk of formatting the wrong device (and permanently losing files).
Insert the SD card into the computer or laptop’s SD card slot. You may need to use a micro-SD card reader like the one included in the suggested kit.
Open the GParted app. It asks you the administrator (root user) password, which you must inform to proceed. GParted takes some time scanning devices. When it is ready, select your SD card by the upper-right corner of the window:
Right-click the only partition of the SD card (either on the graph or on the list) and click Unmount:
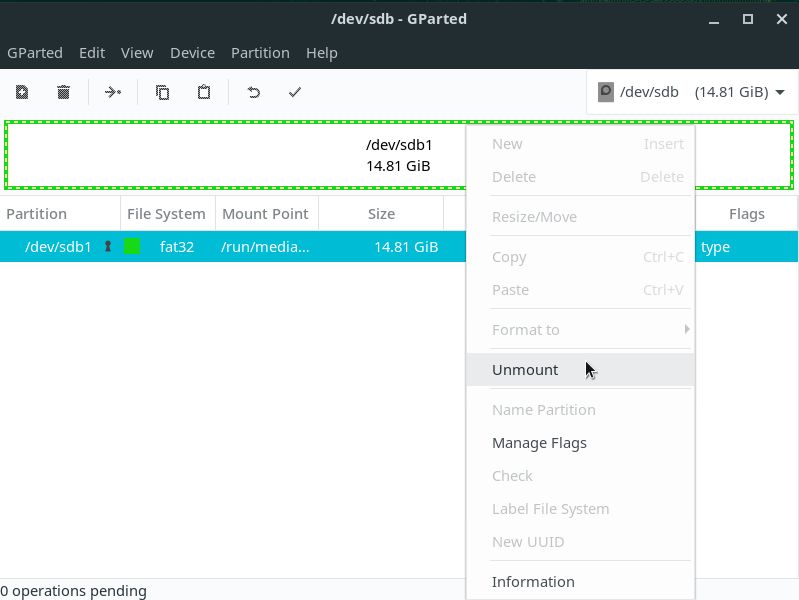
Right-click the SD card partition once more, point to Format to and click fat32:

Click the Apply All Operations button:
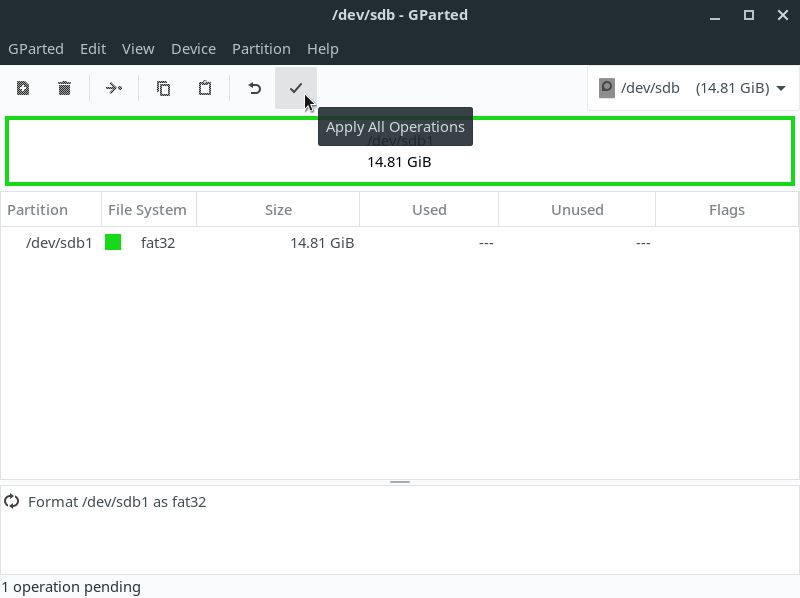
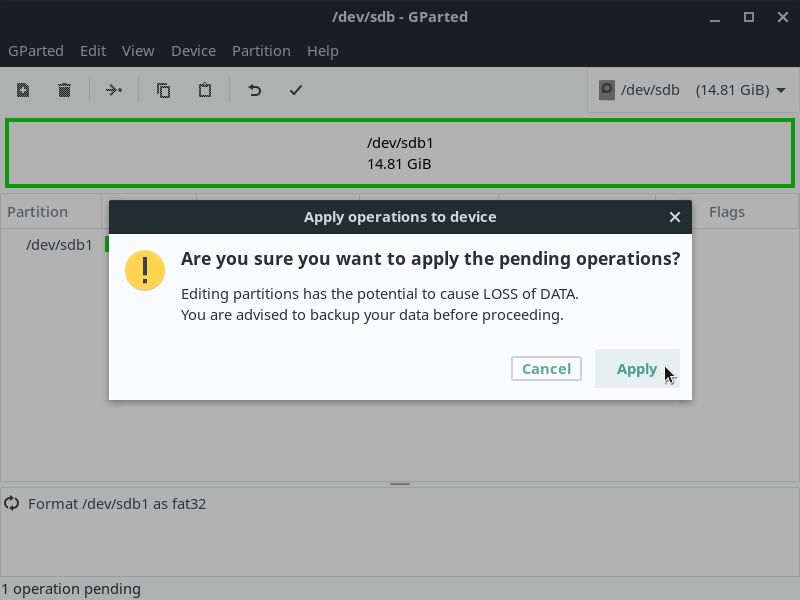
Read the alert message carefully. Then, click Apply:
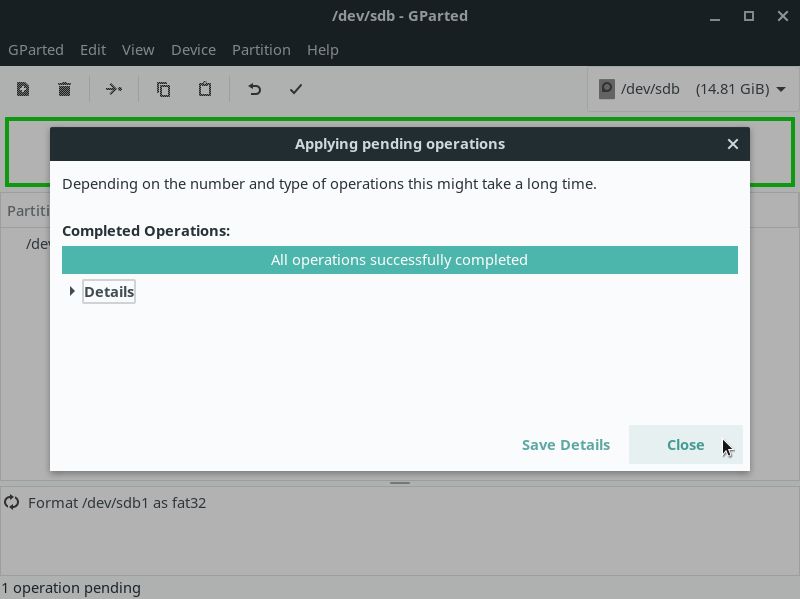
When formatting completes, click Close:
Close GParted as well.
Extracting NOOBS to the SD card
Open the NOOBS archive you have downloaded. It should be opened with the Archive Manager app. Click the Extract button by the upper-left corner of the window:
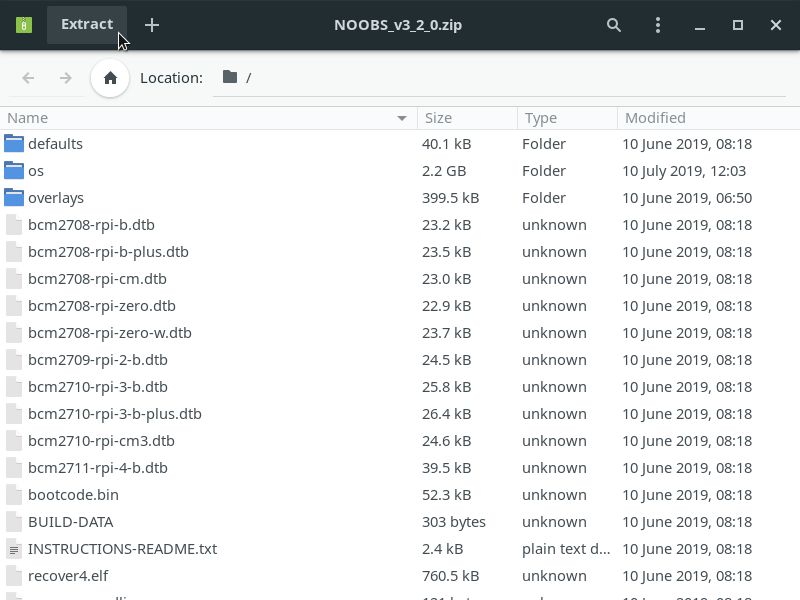
Make sure the All files option is selected (by default, it is). Select the memory card (for me, it appeared as 16 GB Volume) and click the Extract button:
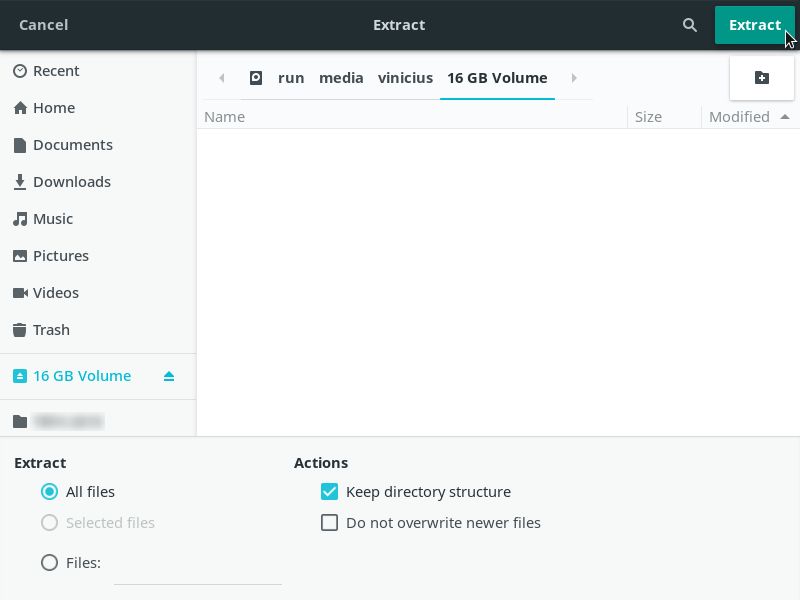
Wait while NOOBS is extracted to the SD card:
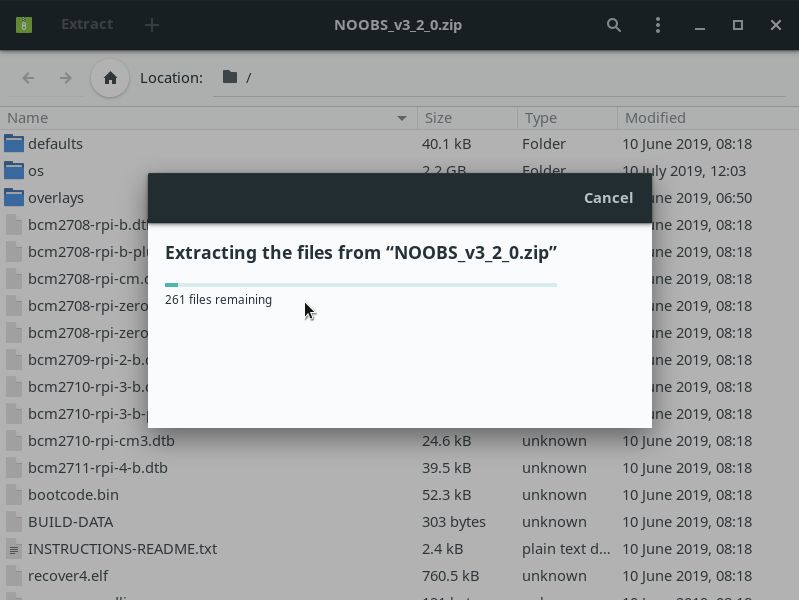
This process may take some minutes. It’s another opportunity to get yourself a cup of coffee!
When it finishes, click Close:
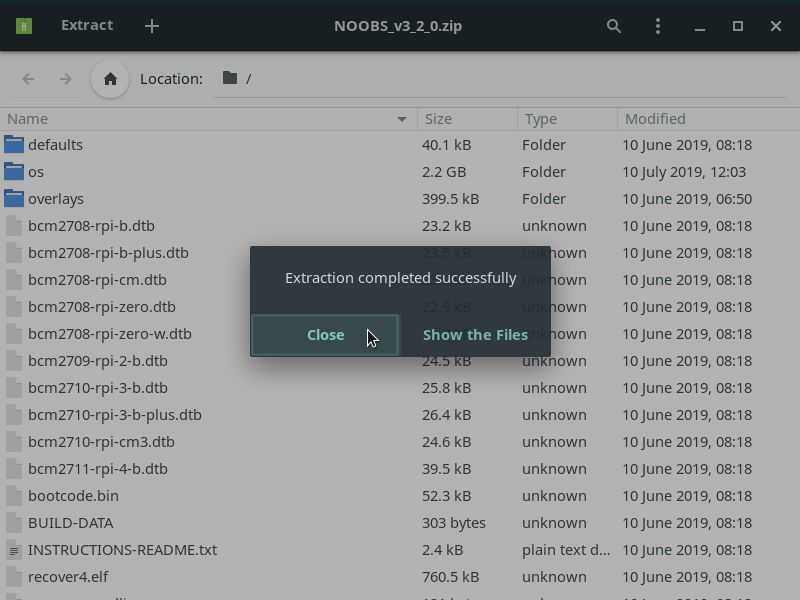
Close Archive Manager as well.
Removing the SD card
The SD card is now ready for use on your Raspberry Pi. It’s time to remove it from your PC.
To safely remove the SD card, open the Files app. Locate the SD card in the sidebar. It should have a small eject icon next to it. Click that icon:
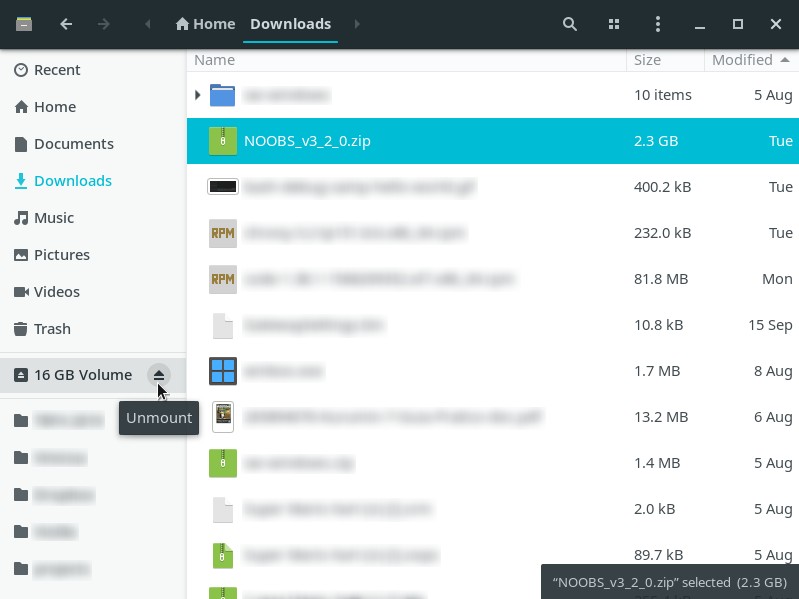
Wait until the notification informing that the device can be removed appears:

Now you can actually remove the SD card from your PC and insert it into your Raspberry Pi.
Note that the micro-SD card slot is underneath your Raspberry Pi.
Connecting everything to the Raspberry Pi
Now get everything connected to your Raspberry Pi: insert the SD card, connect the monitor (or TV) using an HDMI cable, connect the keyboard and the mouse to the USB ports and the Ethernet cable, in case you are going to use a wired network. Leave the power supply last.
](/files/2019/09/raspberry-pi-4-connections-en.jpg)
Source: Setting up your Raspberry Pi
Turning the Raspberry Pi on
Your Raspberry Pi doesn’t have a power button or switch: plug the USB power supply to your Raspberry Pi’s power port, then plug the power supply into a socket and it will turn on.
Two status LEDs light up on the Raspberry Pi: one indicates that it is connected to power (PWR) and the other flashes indicating SD card activity (ACT).
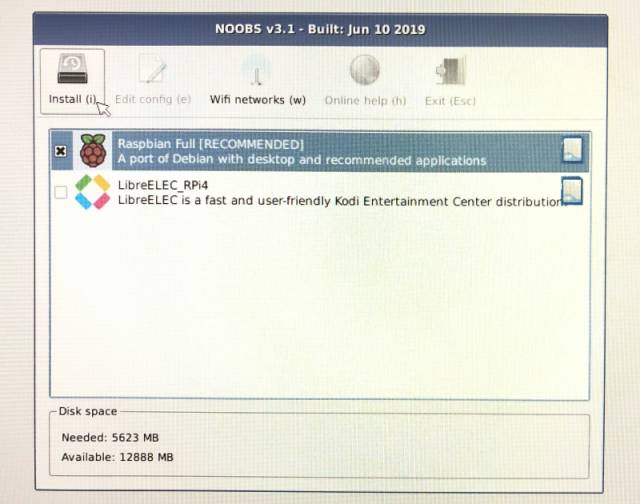
Installing Raspbian
After a while loading, Raspberry Pi presents the NOOBS start screen.
It is possible to change the Language using the combobox at the bottom of the screen:
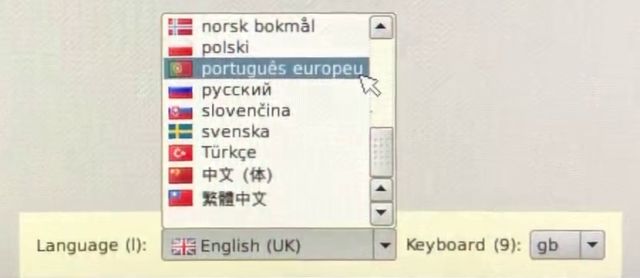
Just to show you the installation procedure, I’m going to proceed with the default language, which is English (UK). You may switch to a different language if you want.
Then, check the box for Raspbian and click Install.
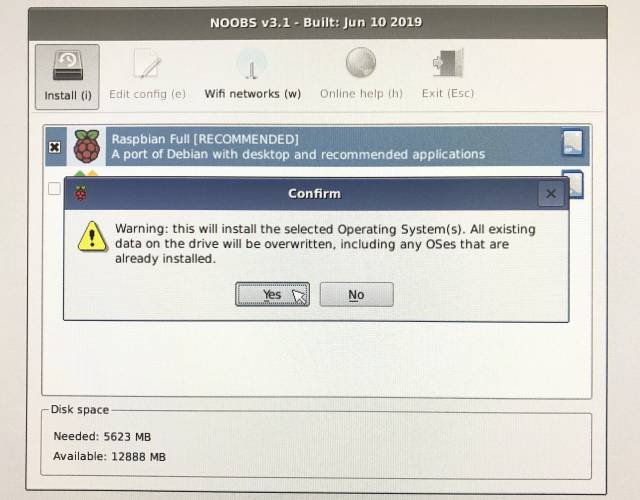
On the Confirm dialog box, click Yes:
Wait for Raspbian to install:
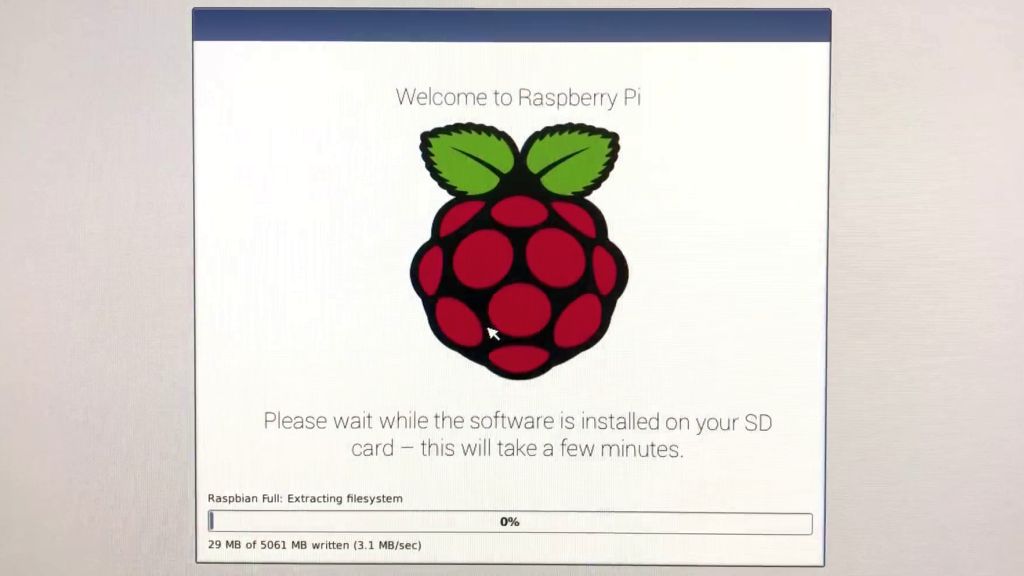
While the filesystem is being created on the SD card, the installer shows some slides introducing Raspbian. You can watch that slideshow… having a cup of coffee!
When the installation finishes, click OK:
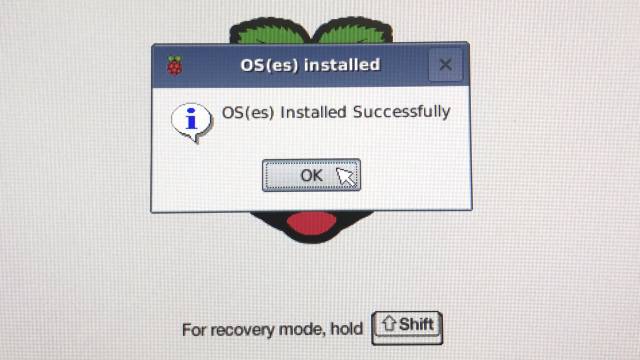
Your Raspberry Pi will restart and Raspbian will then boot up.
Setting up Raspbian
When Raspbian is started for the first time, a configuration wizard pops up:
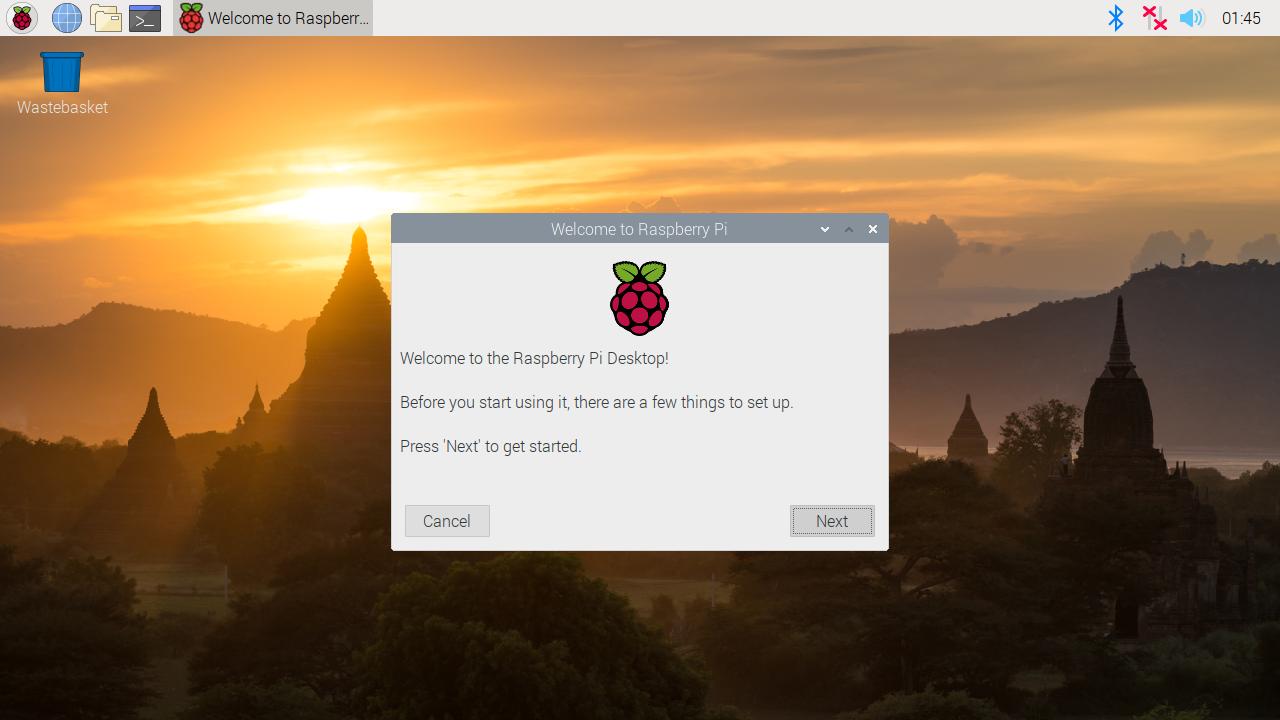
Its screens are self explanatory and will guide you through the initial setup.
Click Next to start the setup.
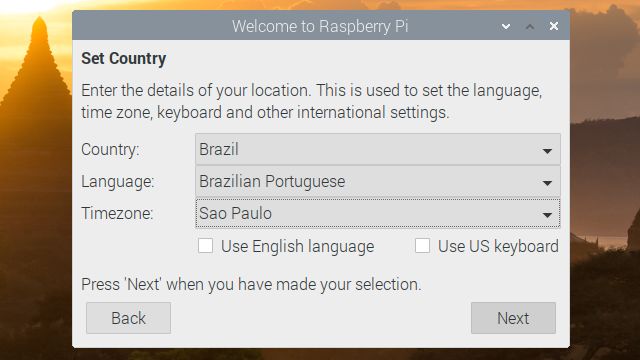
Set your Country, Language and Timezone, then click Next again:
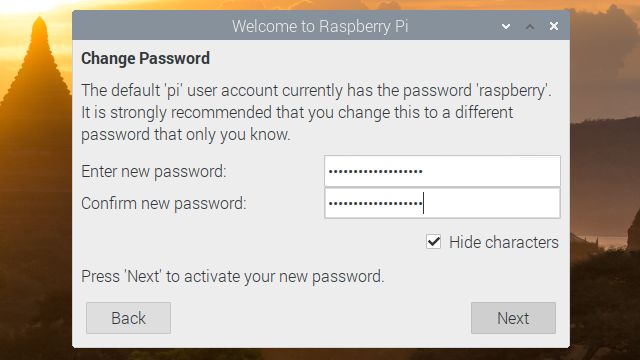
Think of a new password for your Raspberry Pi. Enter it on both text fields and click Next:
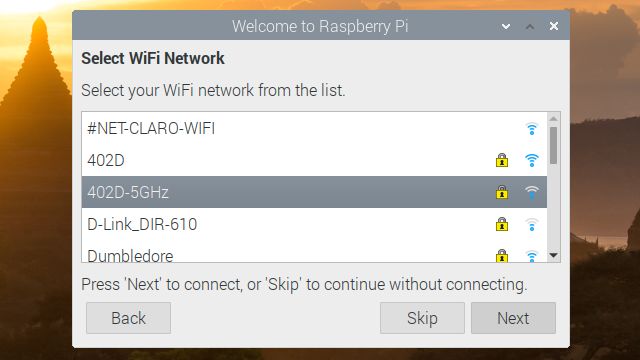
If you want to connect to a Wi-Fi network, select it from the list and click Next. Otherwise, click Skip to continue setup without connecting to a Wi-Fi network:
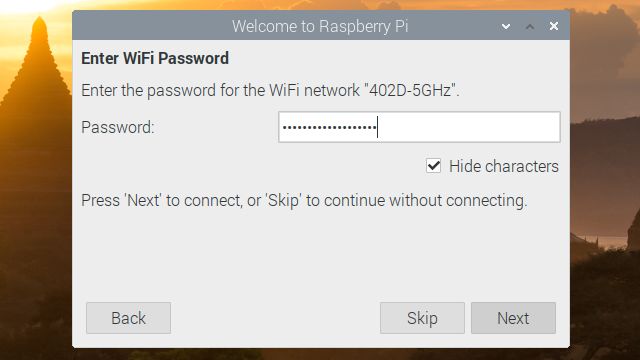
In case you have selected a Wi-Fi network, now enter its password and click Next:
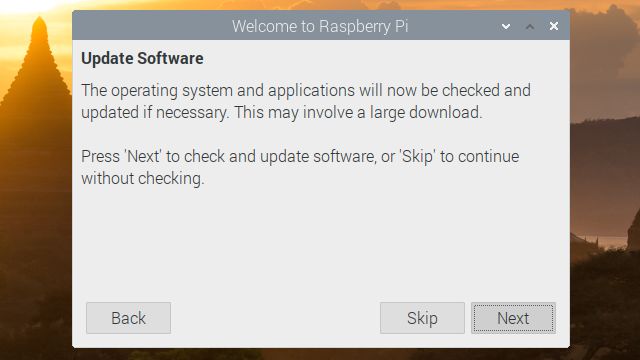
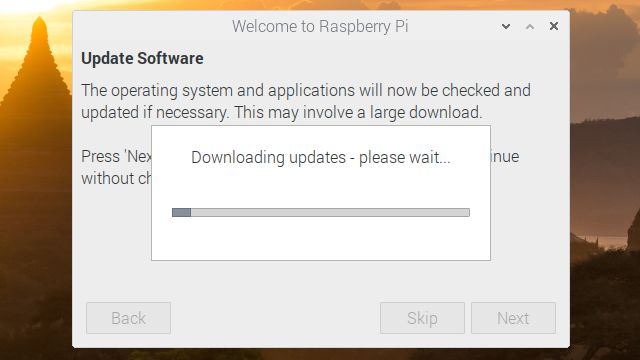
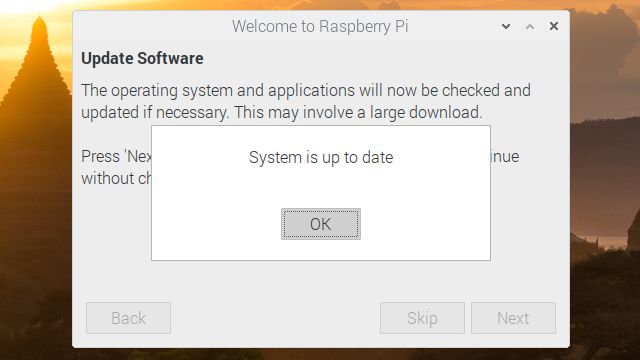
The wizard offers to check for updates to the system, download and install them, if there are any. The wizard will also retrieve any needed translations, although the screen does not tell you that. Click Skip if you prefer to do all of that yourself manually later or click Next (what I recommend) to let the wizard do all of that for you now:
If you let the wizard download updates, that might take a while:
(do you still have coffee? hehehe)
When the update finishes, click OK:
Finally, click Restart to finish the setup:
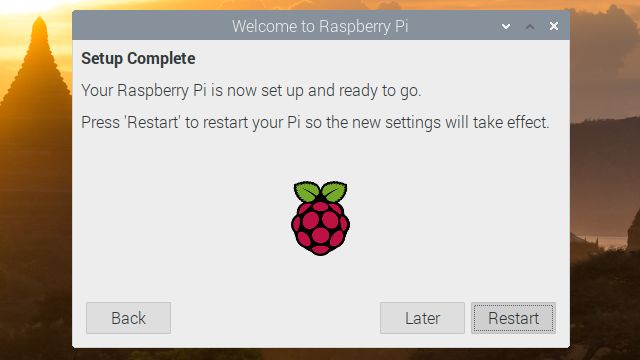
When your Raspberry Pi finishes restarting, it will have a brand new operating system ready for use, with all the updates and translations installed.
Shutting down the Raspberry Pi
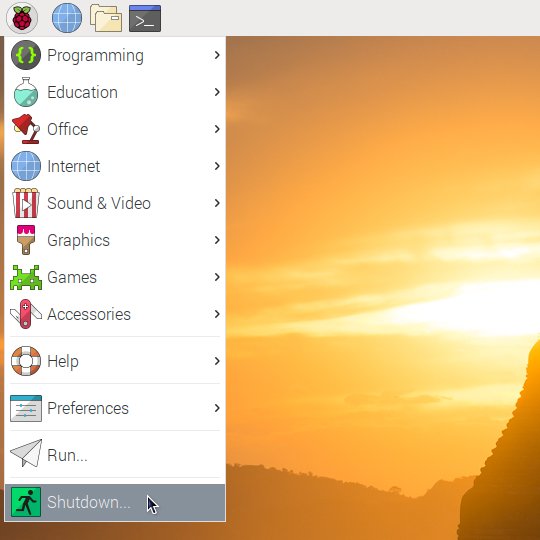
Even though Raspberry Pi does not have a power button, Raspbian has a shutdown command. It is important that you use it, so the operating system can properly unmount filesystems and prevent data loss. Therefore, turning the Raspberry Pi off is not the opposite of turning it on (if it were, you would just pull the power supply).
To safely shutdown the Raspberry Pi, open the applications menu, by clicking the icon with the Raspberry Pi logo, by the upper-left corner of the screen, and click Shutdown:
On the Shutdown options dialog box, click Shutdown:
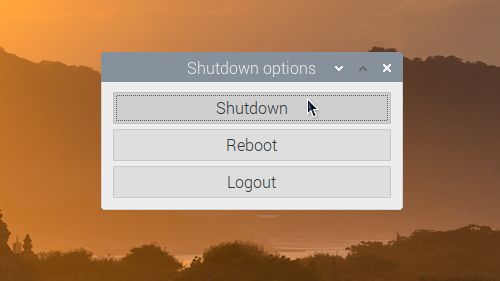
Once the shutdown process has started, wait until it completely finishes. Observe the LED lights: for a moment, the PWR LED goes out and the ACT LED flashes, then the ACT LED turns off definitely and only the PWR LED stays on, indicating that the Raspberry Pi has power, but is doing nothing. Then, you can safely cut the power.
Note: micro-USB ports tend to be fragile, hence prefer to remove the power supply from the socket instead of unplugging it from the micro-USB port.
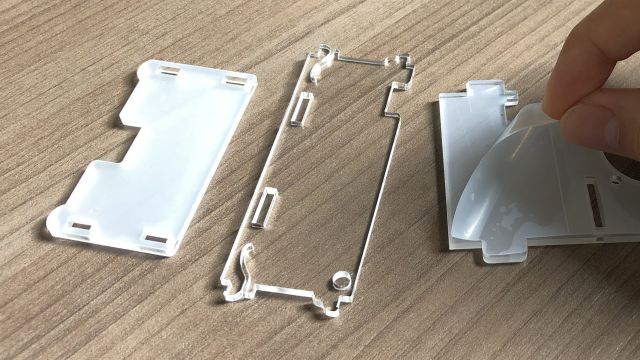
Assembling the case
As I said, I bought on AliExpress a kit that includes heat sinks, a fan and an acrylic shell case. When buying on AliExpress, in case anything goes wrong, the buyer has up to 15 days upon receipt of the product to open a dispute. That’s why I opted to install the system and test the board before assembling everything up. Fortunately, everything worked fine.
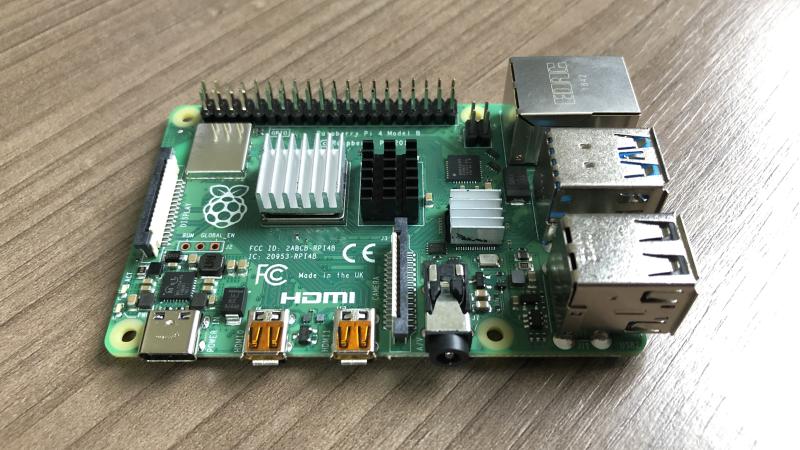
As for the heat sinks, I installed each of them on the chip that looked the same size. So, I put the heat sinks on the processor, the RAM, and the USB controller. In case you need help locating those chips, try comparing this photo with the component diagram at the beginning:
Only later, by chance, I realized that the acrylic case came with protective films. In fact, the case is transparent, I should have peeled the protective films off before.
Each piece of the acrylic case comes with two protective films, one on each side, peel them off:
Plug the fan into the GPIO pins: connect the phase wire (red) to the pin 4 and the ground wire (black) to the pin 6. The phase wire is also indicated by an arrow on the plastic socket:

In case that photo didn’t help you identify which pins to use, try this diagram:
](/files/2019/09/raspberry-pi-4-pinout.jpg)
Source: Raspberry Pi GPIO Pinout
It was very easy to install the acrylic shell case: except for the fan that was screwed on (I did it simply by hand), the six acrylic panels were all attached to each other. There was no need to screw the card, which fit tightly into the case.
You don’t need to use force to fit the pieces together. If something is not fitting naturally, stop, look and think: you are probably doing something wrong.
That’s all, folks!
Now that both Raspberry Pi and Raspbian are ready, it’s time to use them!

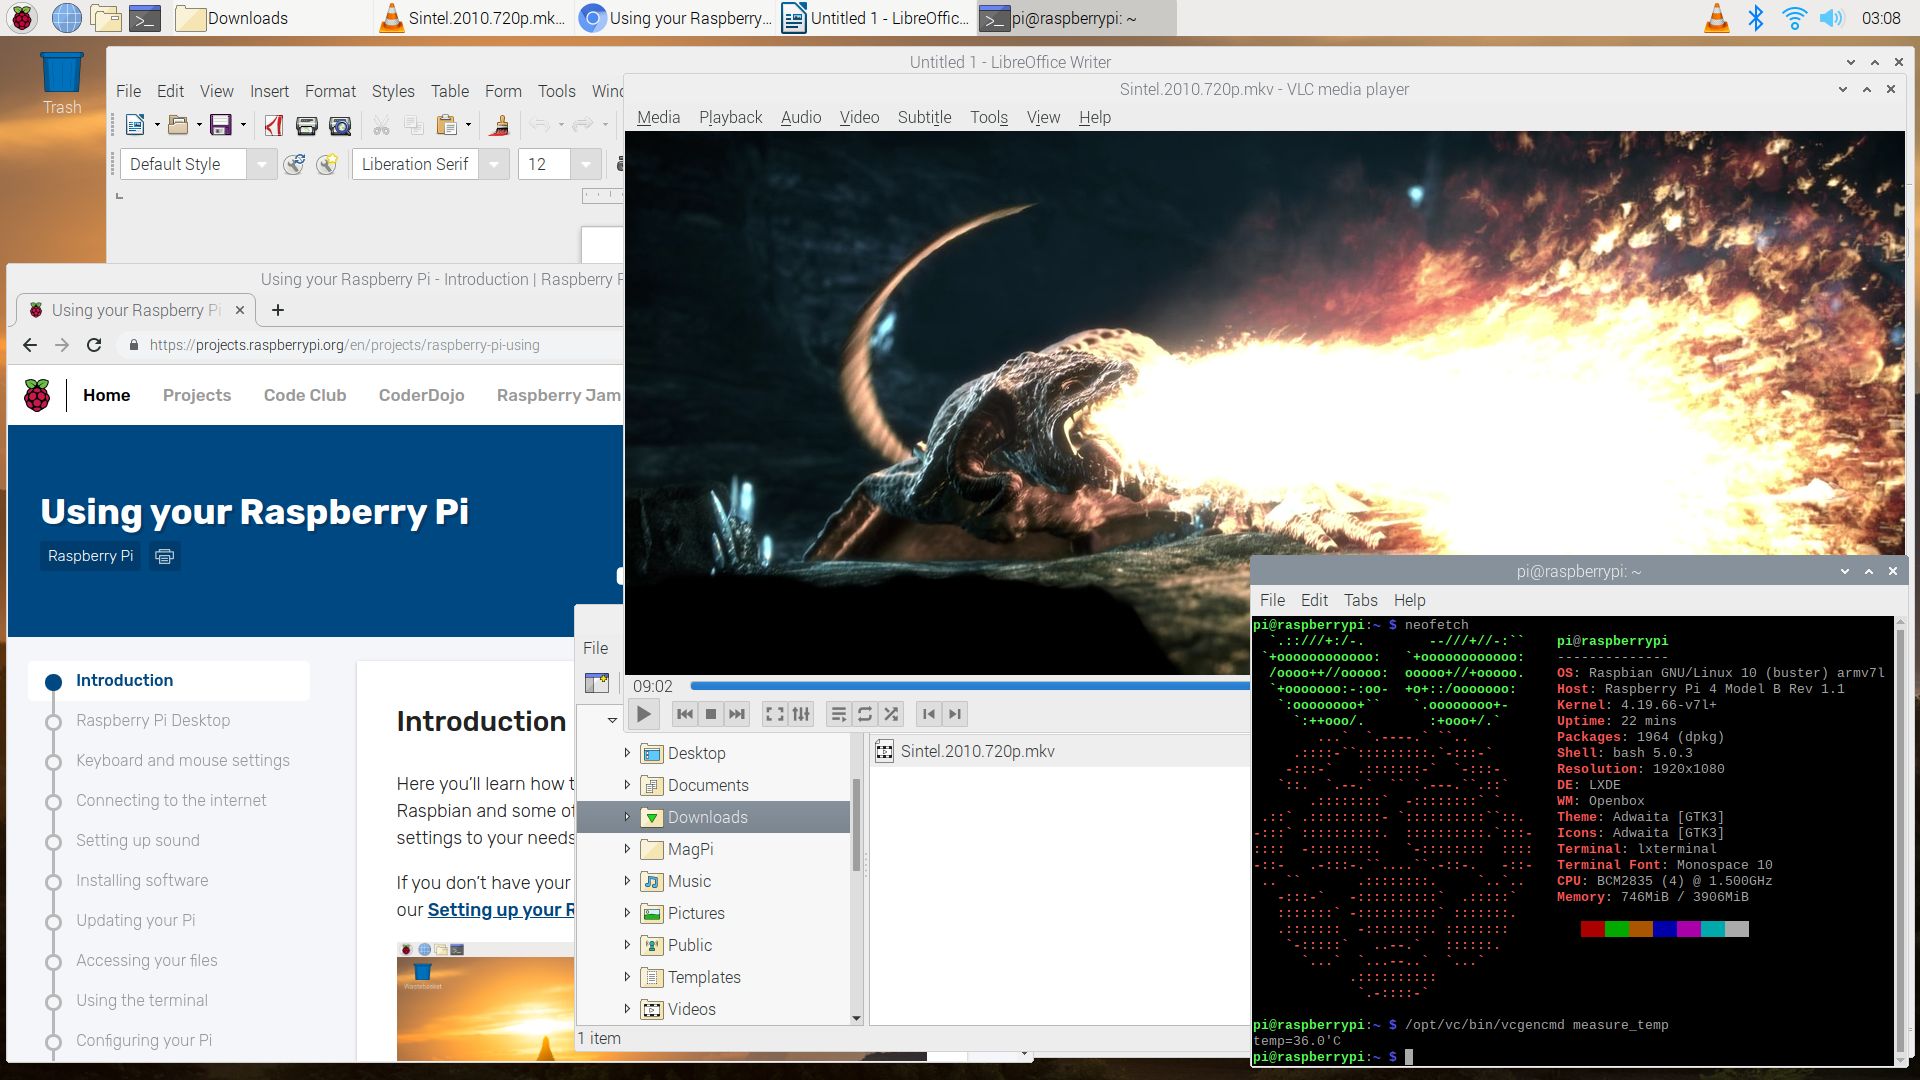
By default, Raspbian uses the PIXEL desktop environment (a fork of LXDE) and the Openbox window manager.
I suggest you continue your reading at the Using your Raspberry Pi guide.
References
- What is a Raspberry Pi? - Opensource.com
- Interview with Raspberry’s Founder Eben Upton - TechSpot
- Setting up your Raspberry Pi
- NOOBS For Raspberry Pi – Rants & Raves – The Blog!
- How To Turn On And Shutdown The Raspberry Pi - It’s FOSS
- Raspberry Pi 4 - A Look Under the Hood and How to Make most of it - Electronics-Lab
- How to Install Heatsinks on the Raspberry Pi 4 (CanaKit) + Temperature Performance Comparison - Edje Electronics
- Raspberry Pi 4 Cooling - ExplainingComputers
- Raspberry Pi GPIO Pinout
- Raspberry Pi Status LEDs Explained - Raspberry Pi Spy


