If you need to work with Linux tools but Windows is the operating system you use the most, we’ve already seen here that one way to do this is through VirtualBox. But depending on your goal, whether it is, for example, using development tools or working with Docker, a VirtualBox virtual machine can consume a lot of your computer’s resources and slow it down. Today we are going to talk about a faster alternative that consumes fewer resources and allows better integration between Windows and Linux, which is WSL.

The Windows Subsystem for Linux (commonly abbreviated WSL) is a feature of Windows that allows you to run a Linux environment inside Windows, without the need for a virtual machine or a dual-boot setup. With WSL, you can run Linux distributions such as Ubuntu, Debian, Fedora and openSUSE directly on Windows, allowing you to run native Linux commands, scripts and tools on Windows.
WSL allows Windows users to:
- Develop for the web in an optimal way, since many servers, frameworks and tools are optimized for Linux;
- Run scripts written in Bash, Ruby, Python, Node.js and other programming languages that are better suited to Linux;
- Use common Linux command-line tools, such as grep, sed, awk, curl, git and others;
- Manage remote Linux servers via SSH;
- Use Docker containers and orchestrate them with Kubernetes;
- Among other uses.
In short, WSL lets you have the best of both worlds, Windows and Linux, without the hassle of virtual machines or dual-booting.
It’s worth noting that we’ve had two WSL versions so far. WSL 2, announced in May 2019 and available in any Windows 11 installation (Home or Professional), uses a full Linux kernel in a lightweight virtual machine that runs behind the scenes and is managed by Hyper-V. WSL 1 was a compatibility layer between the Linux kernel and the Windows kernel, so many Linux programs didn’t work properly on Windows.
In this tutorial, you are going to see how to enable WSL on Windows, install a Linux distribution on it, and get started using it. For reference, I’ll use WSL 2 on Windows 11 and openSUSE Leap 15.6 as my Linux distribution, but, as you’ll see, you can easily install any other Linux distribution, if you prefer.
Prerequisites
To enable and use WSL 2, your system must meet the following requirements:
- Processor: x64 or ARM64 architecture;
- RAM: at least 4 GB of RAM is recommended, but the more, the better the performance;
- Operating system: Windows 11 (any version), Windows 10 (version 1903 or later, build 18362.1049 or later), or Windows Server 2022; and
- Storage: you need disk space to install WSL, the Linux distribution, and the programs you will use.
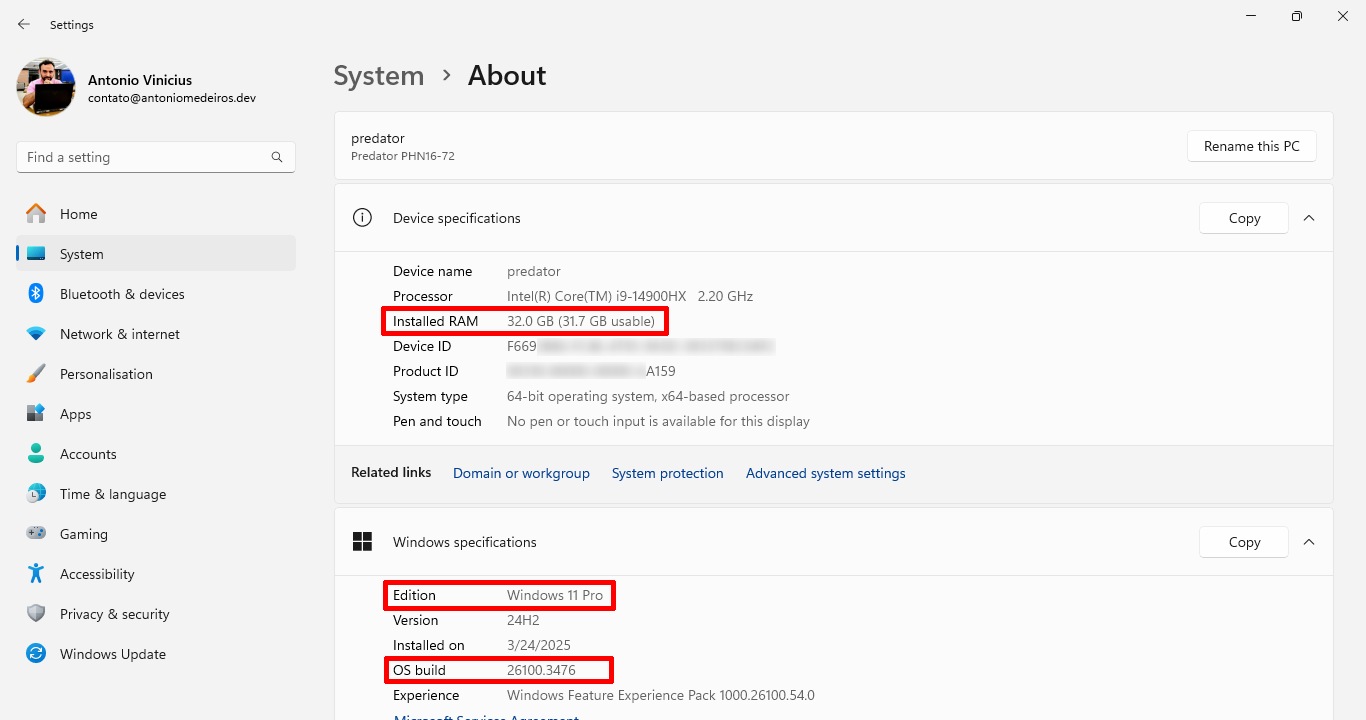
You can check if your system meets those requirements by going to Start menu > Settings > System > About:
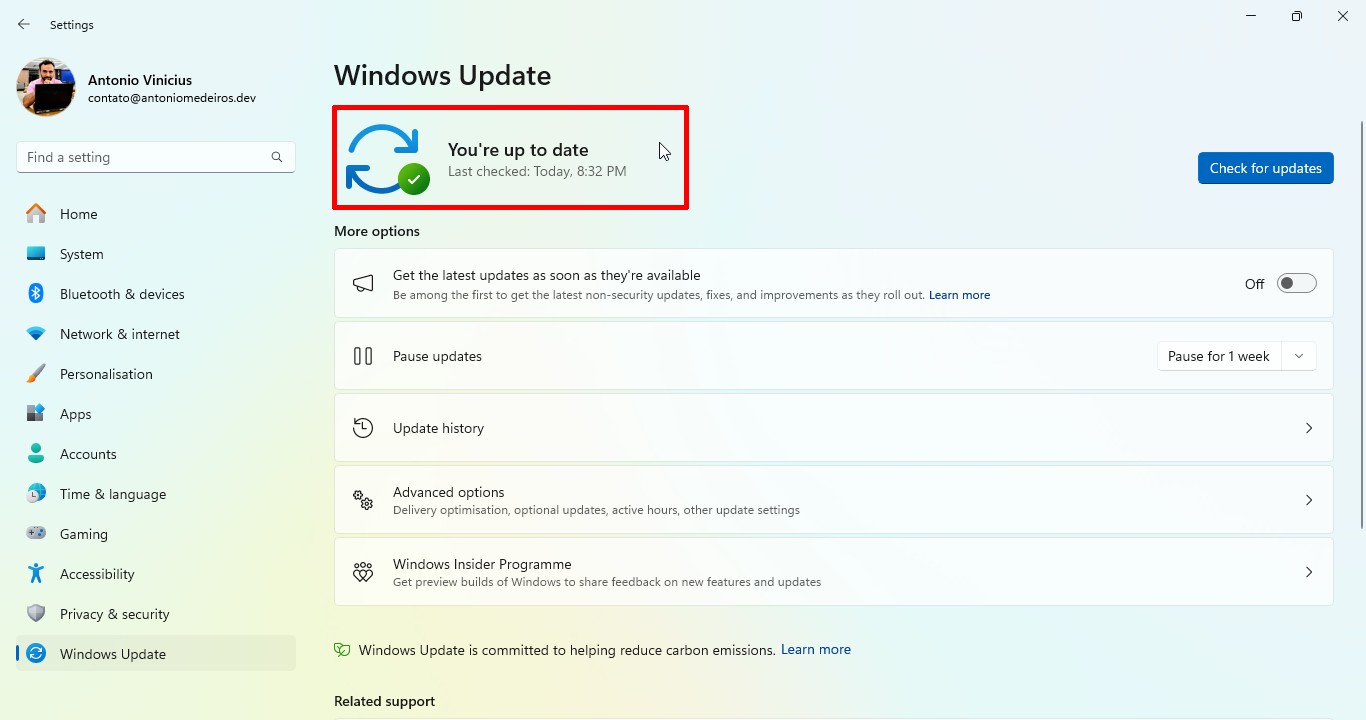
It is also important that all Windows updates are installed. Check Windows Update:
Enabling virtualization and WSL
Before you can enable WSL, you need to enable virtualization. Fortunately, you can do both in the same place.
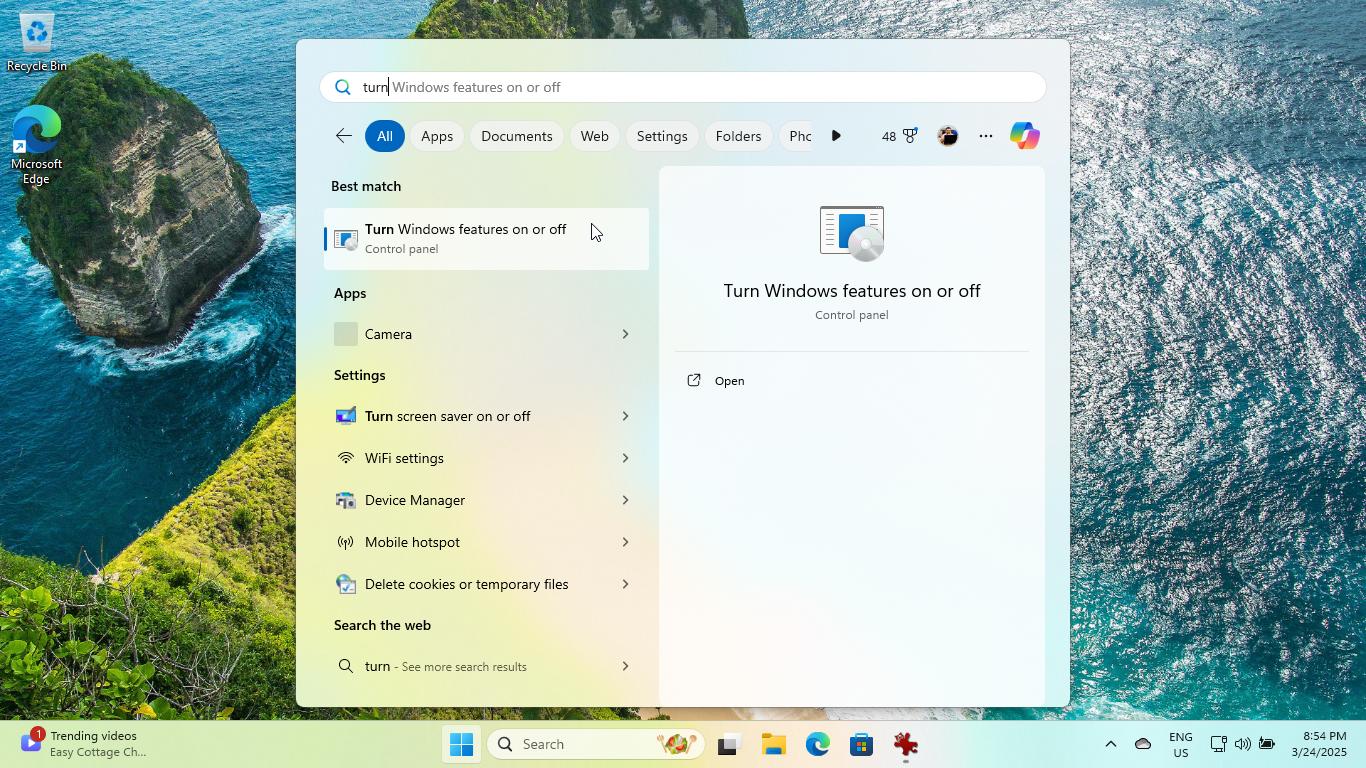
Open the Start menu, start typing turn and click Turn Windows features on or off:
Enable the Virtual Machine Platform feature, if it is not enabled already:
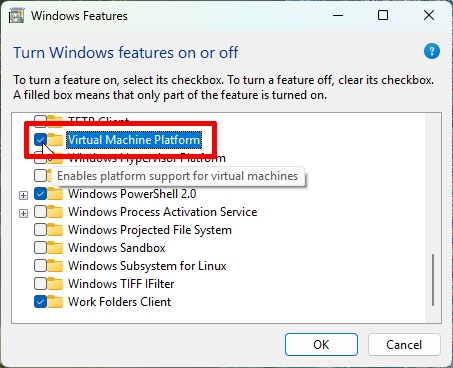
Also enable the Windows Subsystem for Linux feature:
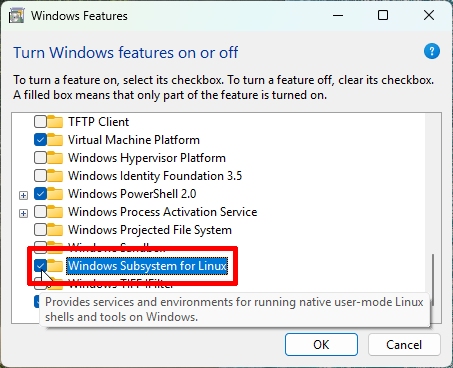
Click OK and restart your computer.
Updating WSL
Before we start using WSL, we need to make sure we have its latest version.
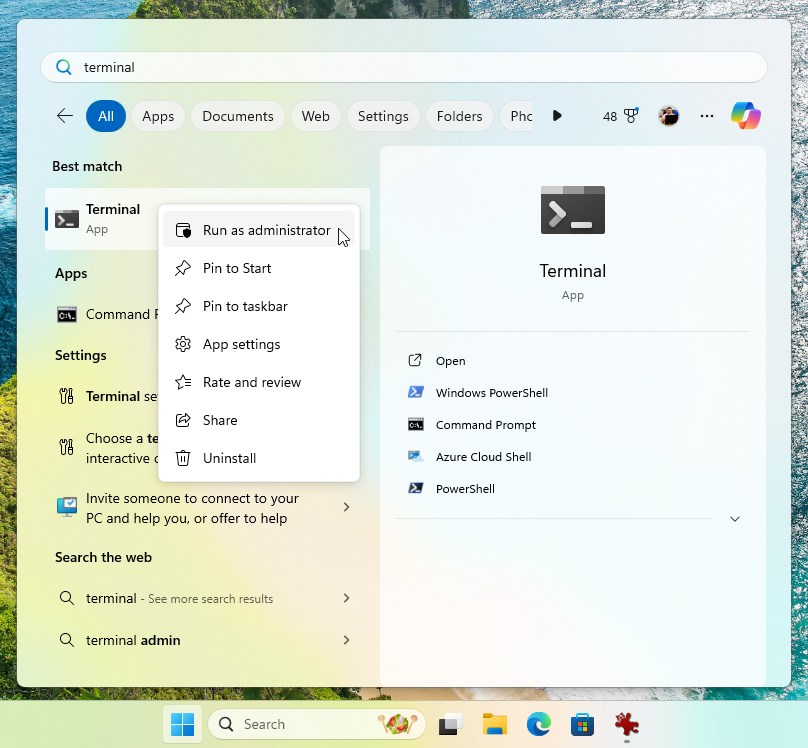
To do this, we’ll run a command on the Windows Terminal. This is the default terminal app on Windows 11, but it can also be installed on Windows 10. Interestingly, it’s open source. If you don’t have it installed on your system, I recommend installing it from the Microsoft Store.
I also recommend that you install the latest version of PowerShell, which you can also do via the Microsoft Store (that app is also open source, how Microsoft has changed!) Configure Windows Terminal so that its default session is PowerShell.
All that done, start the Terminal app as administrator:
And then run the command:
1
wsl --update
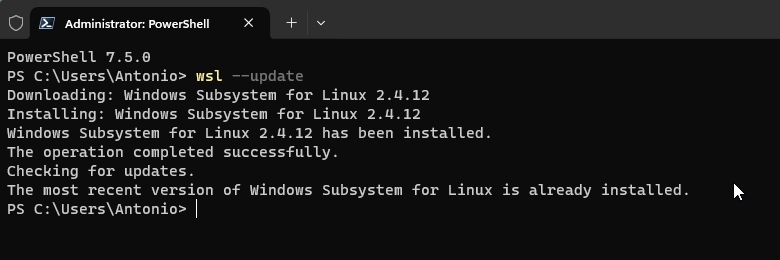
Its output should report that the latest version of WSL is installed.
Installing and using a Linux distribution
At this point, we can install whatever Linux distribution we want on WSL and start using it.
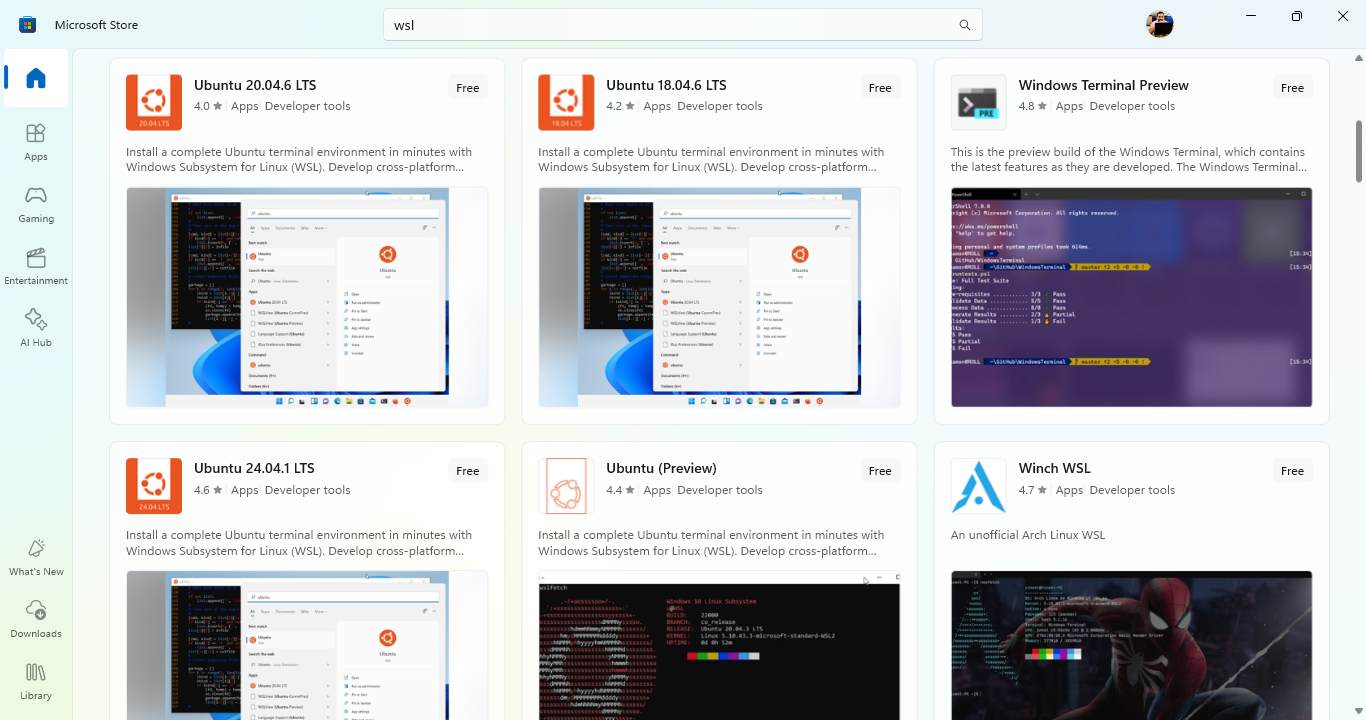
Open the Microsoft Store, search for the Linux distribution you want and install it, just like you would install any other app:
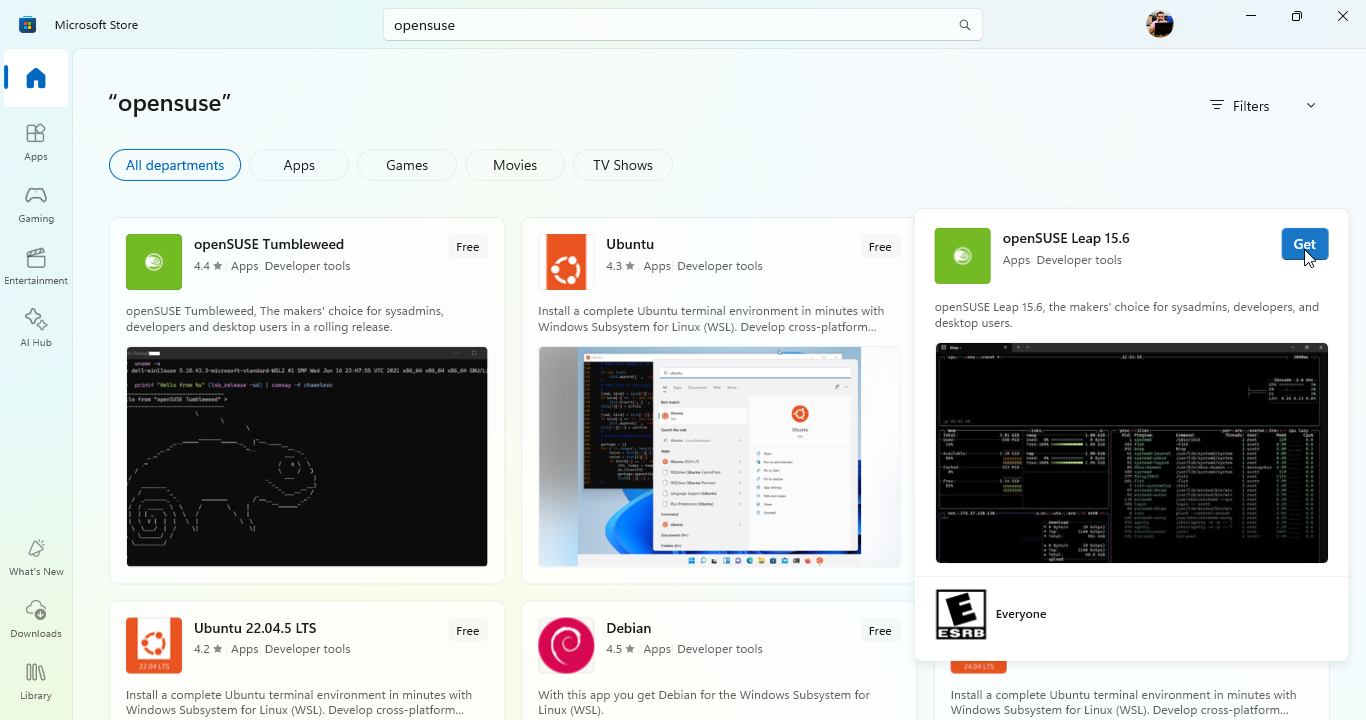
If you search for wsl, you will see several options of Linux distributions that can be installed:
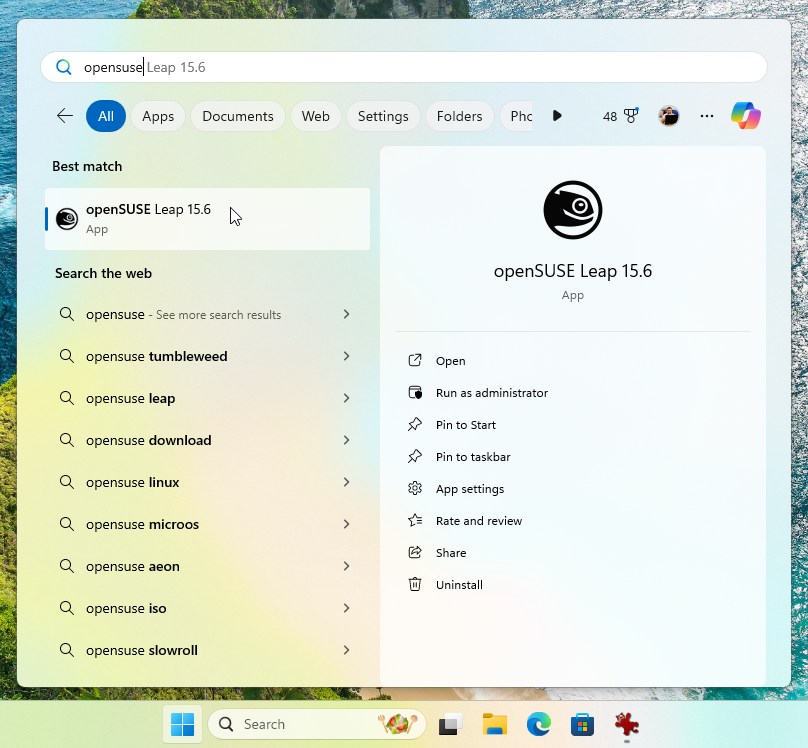
When the installation is complete, open the Start menu, search for your Linux distribution and launch it, just like you would launch any other app:
On first use, it may take a while to start, because some distribution files are still being installed.
Finally, a Windows Terminal window appears with the Linux distro’s command-line interface:
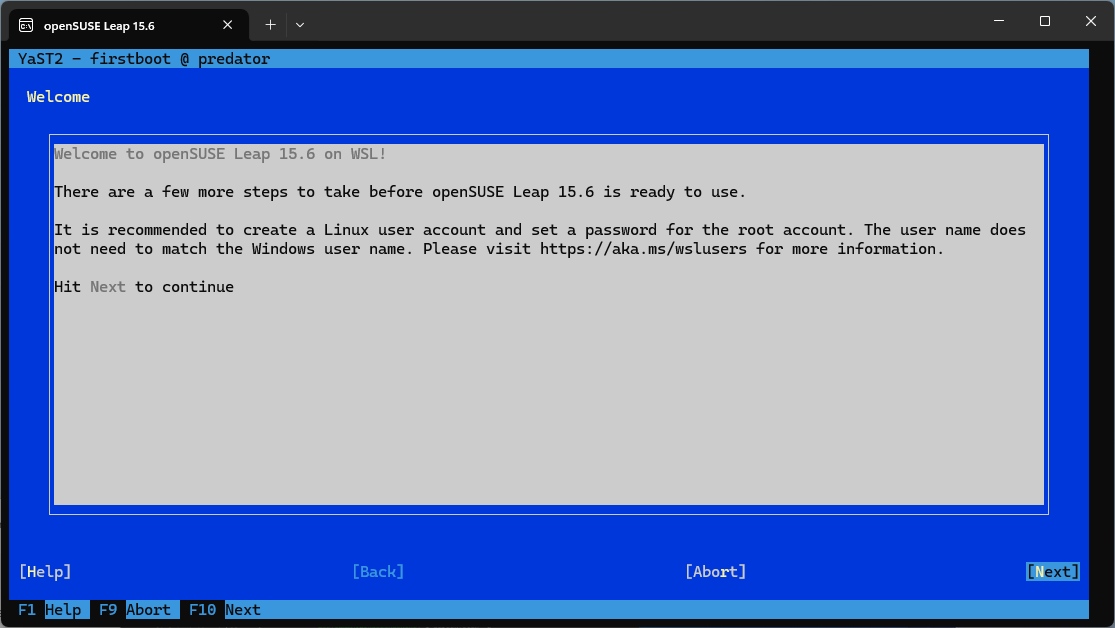
In the case of openSUSE Leap, the first time you use it, you will see the YaST Firstboot, which is a configuration utility. You can use the Tab key to jump from one control to another and the Enter key to confirm.
On this first screen, select Next and confirm.
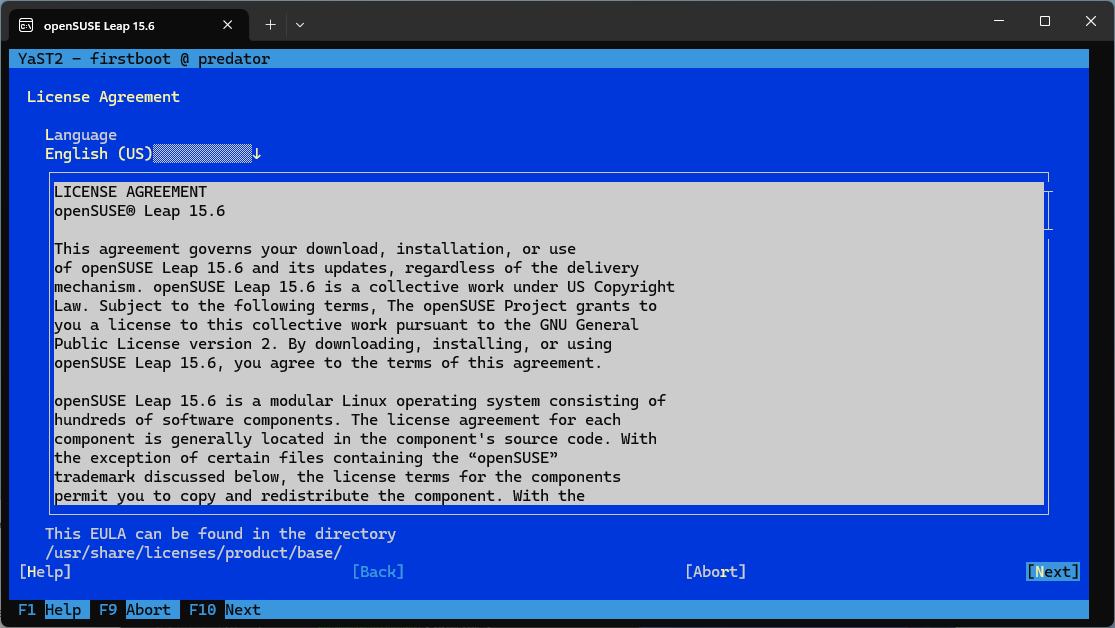
On the second screen, which shows the usage license, also proceed to the next one:
On the third screen, you will be asked to create a Username and Password for your openSUSE Leap installation:
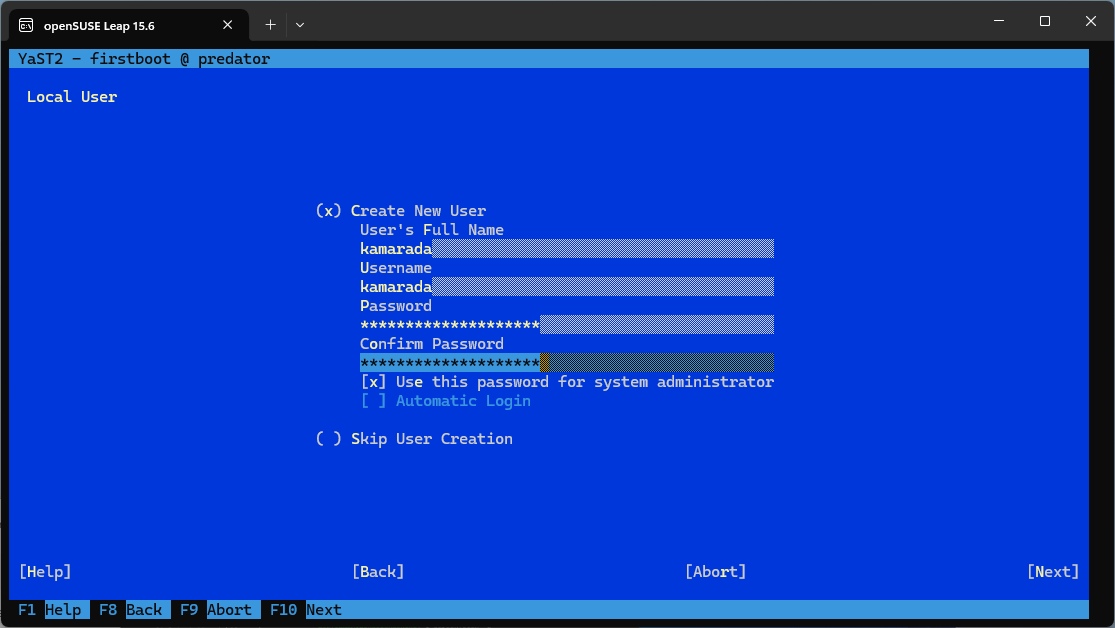
Remember that, under the hood, this Linux installation runs on a Hyper-V virtual machine. Therefore, this username and password are not the same as those for Windows, just as each Linux distribution that you install to use with WSL has its own usernames and passwords. You can use the same usernames and passwords for your convenience, but keep this in mind. For more information, see:
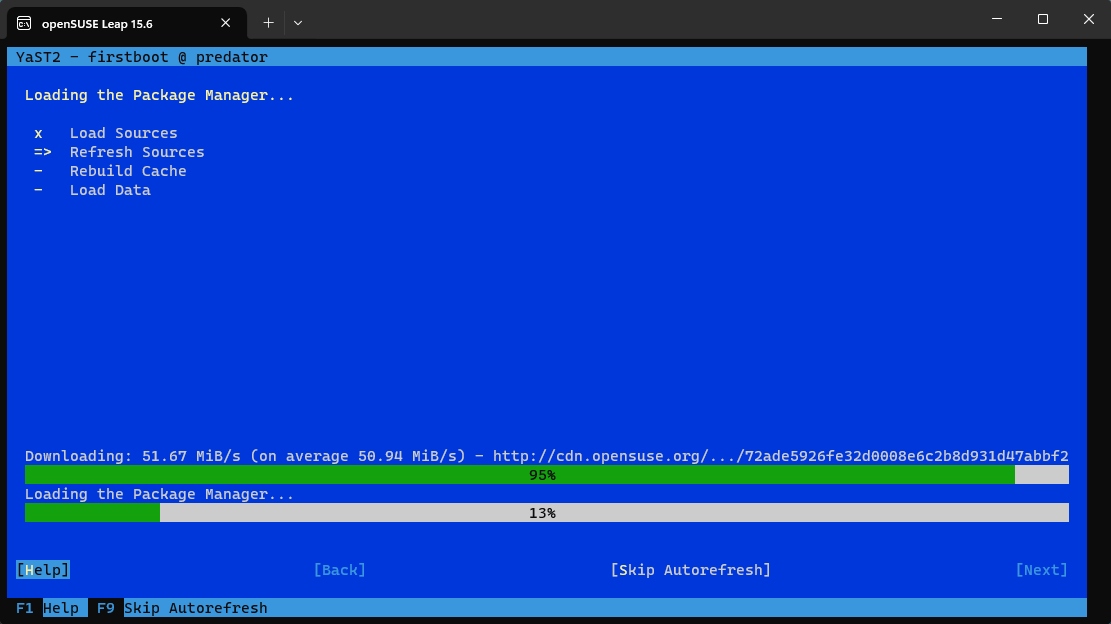
When finished, proceed to the next screen, and wait for the repositories to refresh, which may take a while:
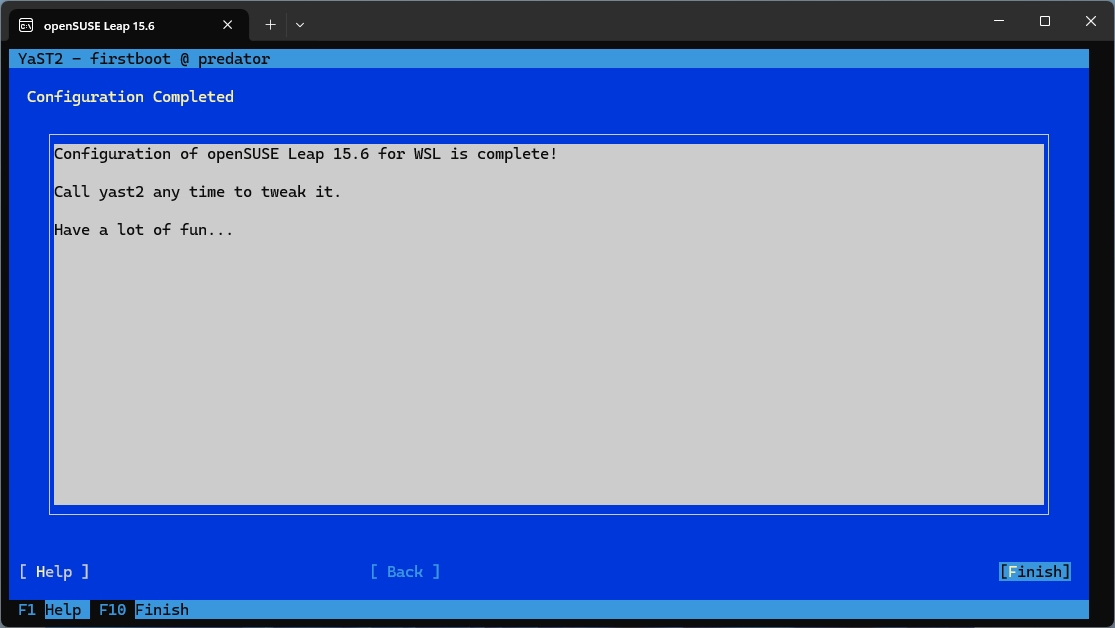
On the last screen, choose Finish to complete the initial setup:
Done! Now you can run commands and use the Linux distribution:
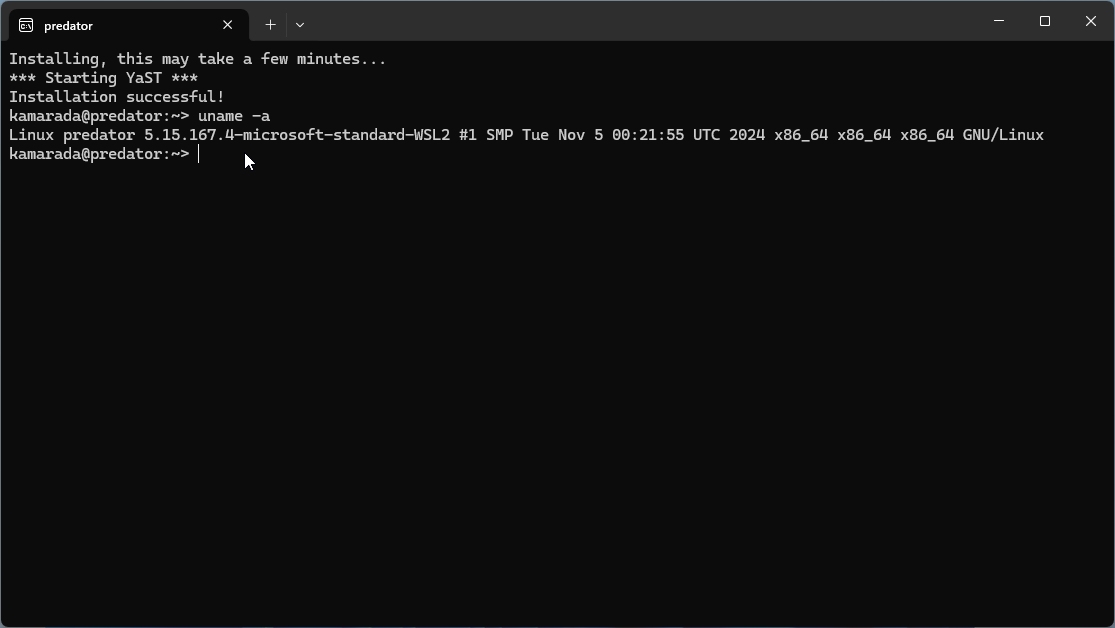
For instance, I used the uname command to get information about the system.
Updating openSUSE Leap
When using a Linux distribution with WSL, Linux updates are not downloaded via Windows Update, that must be done using the distribution’s proper package manager.
Run these commands now, and remember to repeat them from time to time:
1
2
# zypper ref
# zypper up
If you use openSUSE Leap, you probably already know these commands. If not, and you need more information, take a look at:
Shutting down or restarting Linux on WSL
Let’s remember once again that, internally, WSL Linux distros run on Hyper-V virtual machines. If you want to shut them down all at once, you can open PowerShell and run:
1
wsl --shutdown
If you want to turn off only a specific distribution, you can list the installed distributions with:
1
wsl -l -v
This command is the short version of this other, equivalent one:
1
wsl --list --verbose
And it should produce an output like:
1
2
  NAME                  STATE           VERSION
* openSUSE-Leap-15.6    Running         2
To turn off only a specific distribution (for example, openSUSE-Leap-15.6), use one of the following equivalent commands:
1
2
wsl -t openSUSE-Leap-15.6
wsl --terminate openSUSE-Leap-15.6
To start a distribution, you can use the Start menu, as we have already seen, or one of the following equivalent commands:
1
2
wsl -d openSUSE-Leap-15.6
wsl --distribution openSUSE-Leap-15.6
To restart a distribution, just turn it off and then on again.
Installing systemd
systemd is a system and service manager used by many Linux distributions, including openSUSE Leap. It controls system startup, manages processes and services, handles logging, and provides a variety of system administration features. systemd replaces older init systems such as SysVinit. The main command used to manage and interact with systemd is systemctl, which you’ve probably already used.
systemd is not enabled by default on Linux distributions for WSL because WSL has not always supported systemd, this support came from a certain point onwards, and also because to simply run Linux apps systemd is not necessary. But you do need systemd if you intend to use Linux services, such as Kubernetes. Installing systemd on your WSL Linux distribution will make it even closer to a normal Linux distribution.
To install systemd on openSUSE Leap for WSL, run:
1
# zypper in -t pattern wsl_systemd
And restart WSL.
To verify that systemd is running, use:
1
$ systemctl status
Sharing files between Windows and Linux with WSL
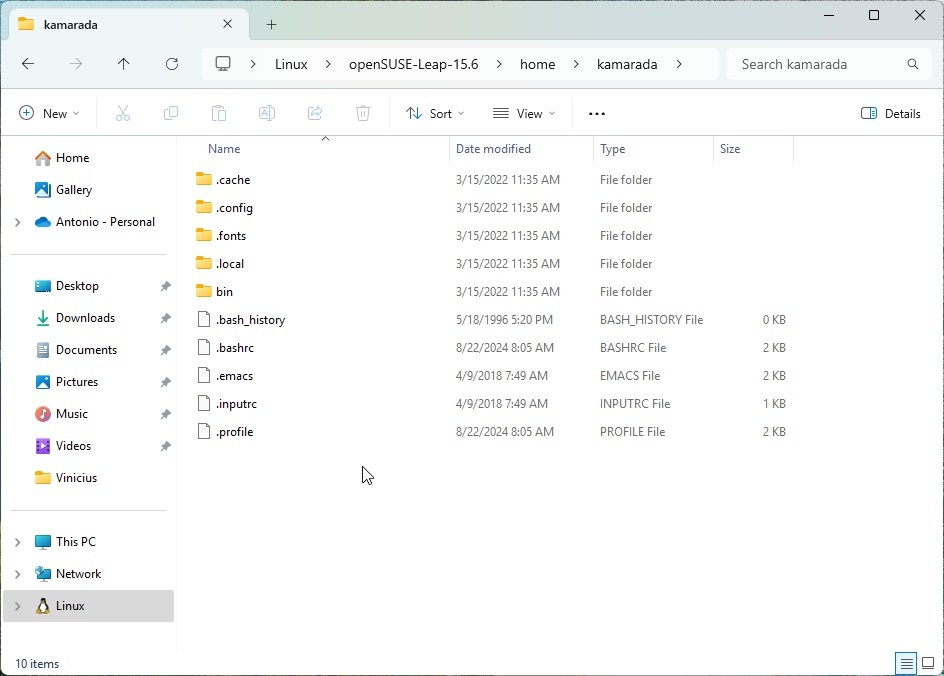
When you use a Linux distribution with WSL, Windows and Linux do not share the same file system (Windows C: does not become Linux /, for example). But you can access Windows files on Linux and vice versa.
On Linux, Windows drives are mounted at /mnt. Therefore, C: can be accessed at /mnt/c. The path C:\Users\SeuNomeDeUsuario\Documents becomes /mnt/c/Users/SeuNomeDeUsuario/Documents.
On Windows, to access Linux files, open the File Explorer and click Linux on the tree by the left:
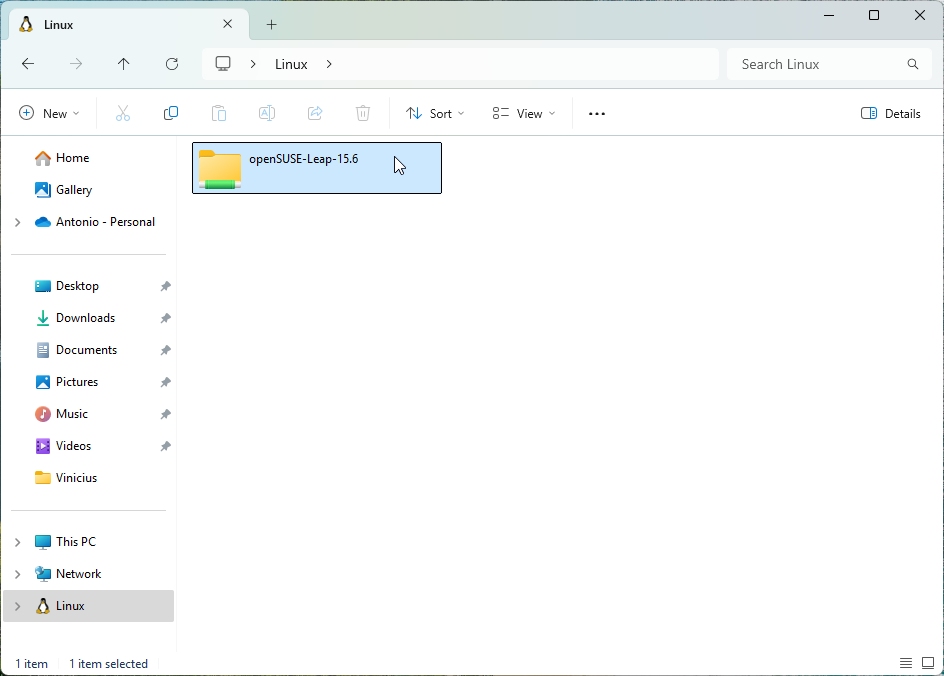
You can also enter \\wsl$ or \\wsl.localhost in the address bar.
For best performance, store your files on the same operating system as the tools that will open them. For example, if you’re going to use a Linux program to open a file, it’s better to have it on your /home than on /mnt/c. Consider copying that file from Windows to Linux, even if after working on it on Linux you’ll have to copy it back to Windows. Or, depending on the case, consider keeping it on Linux only.
Using Linux GUI applications with WSL
Since WSL 2, you don’t have to limit yourself to the Linux command-line interface, and you can run graphical user interface (GUI) applications through WSLg, which is an extension of WSL. For example, let’s see how to run Gedit, the default GNOME text editor, with WSL.
Install WSLg on openSUSE Leap by running:
1
# zypper in -t pattern wsl_gui
Then you can install graphical applications, for example:
1
# zypper in gedit
You can launch the GUI app by invoking it from the command line, or from the Start menu, just like you would launch any Windows app:
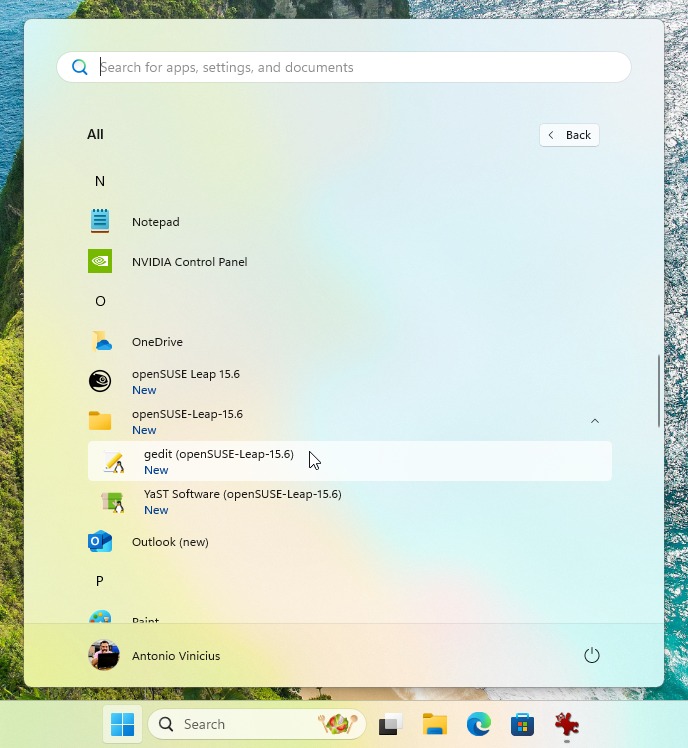
Here is Gedit running on Windows 11 via WSL:

Conclusion
The Windows Subsystem for Linux was designed primarily for developers, but it can be used by anyone who needs to use Linux programs on Windows. If you need to use Linux programs occasionally, WSL is probably already fine for you. But if you use Linux programs often, consider installing Linux on your computer and using it directly. You can dual-boot Linux with Windows, so you don’t have to ditch Windows, and can use either operating system as needed.
If your goal following this tutorial is to set up a development environment on Windows, you may want to continue reading the following references, especially these from Microsoft and Full Cycle.
References
To write this tutorial, the following texts were used as references. You can consult them if you want more information.


