
Although webmails are today more popular than email clients, some interesting features are exclusive of those desktop apps. For instance, if you have a digital certificate, you can digitally sign the emails you send, giving their recipients more confidence about their authenticity and integrity.
In this post, you are going to see you can do that using the Mozilla Thunderbird email client.
Before starting, to get everyone on the same page, I recommend reading previous posts about digital certificates and Thunderbird:
- How to install website certificates on Linux
- Using smart cards on openSUSE Linux
- Read Gmail messages on Thunderbird
Installing your CA certificate on Thunderbird
Similarly as we did with the Firefox web browser, first we need to add our CA certificate to our Thunderbird email client, otherwise it won’t be able to validate our certificate hierarchy.
Let’s see how to add a CA certificate to Thunderbird.
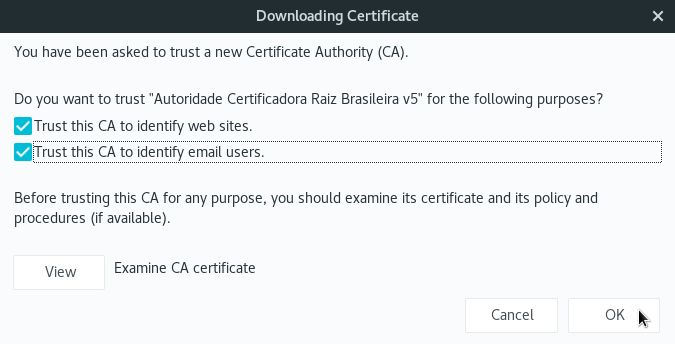
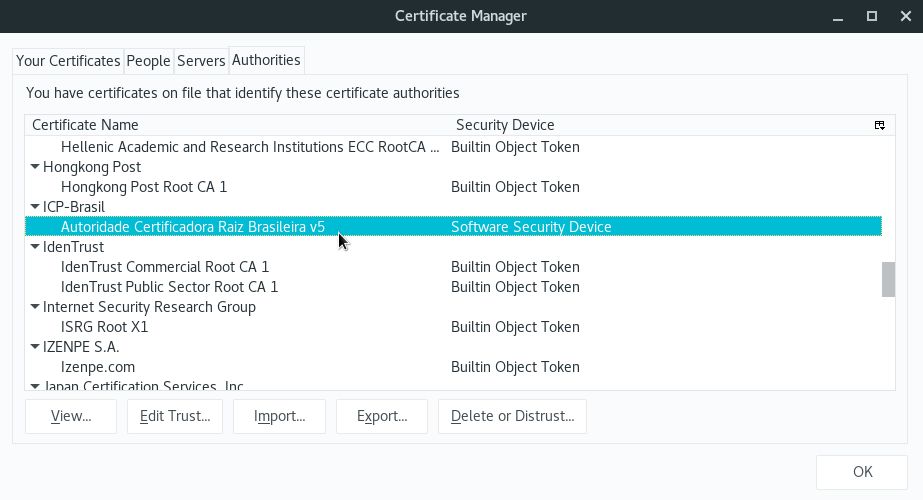
To demonstrate, I’m going to import the certificate of the Brazilian root CA ICP-Brasil, as my certificate was issued by a CA that belongs to its hierarchy.
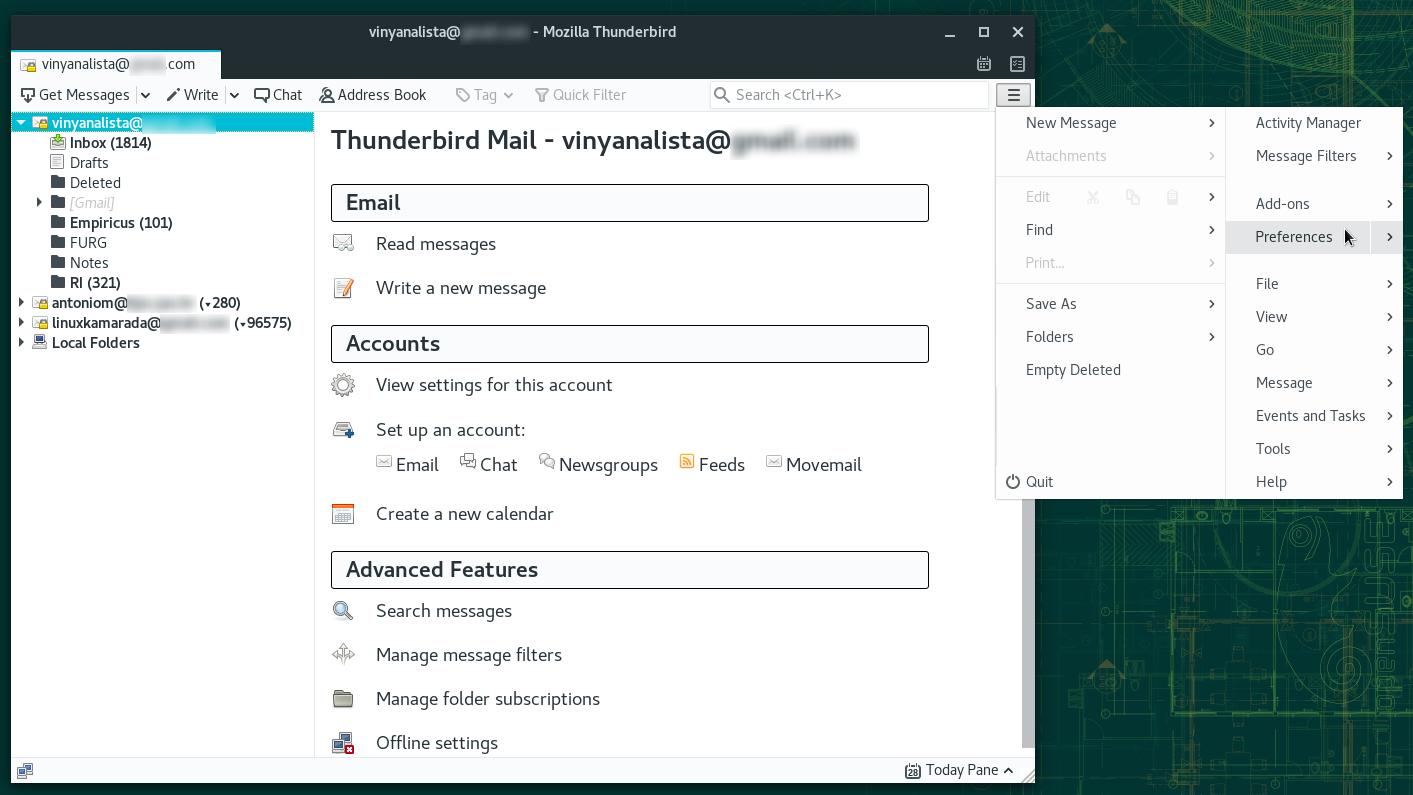
Pull down the Thunderbird menu (top right corner of the window) and click Preferences:
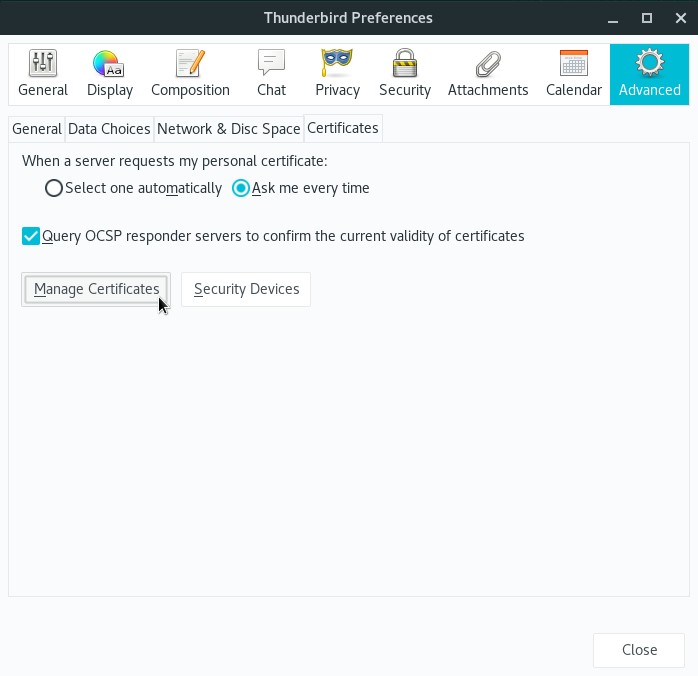
On the Thunderbird Preferences dialog, select the Advanced tab, then the Certificates tab below and click Manage Certificates:
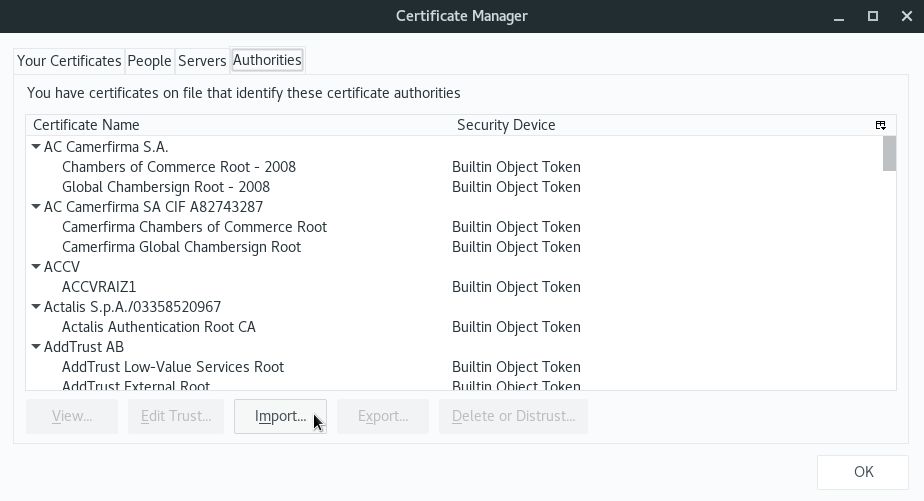
On the Certificate Manager dialog, select the Authorities tab and click Import:
Select the CA certificate file you want to import.
Check all the options to fully trust the Certificate Authority and click OK:
Make sure your CA certificate appears listed and click OK:
Click Close to close the Thunderbird Preferences dialog.
Setting up Thunderbird to use your token
Similarly as we did with Firefox, now we set up Thunderbird to use our token.
Open the Thunderbird menu and click Preferences.
On the Thunderbird Preferences dialog, select the Advanced tab, then the Certificates tab below and click Security Devices.
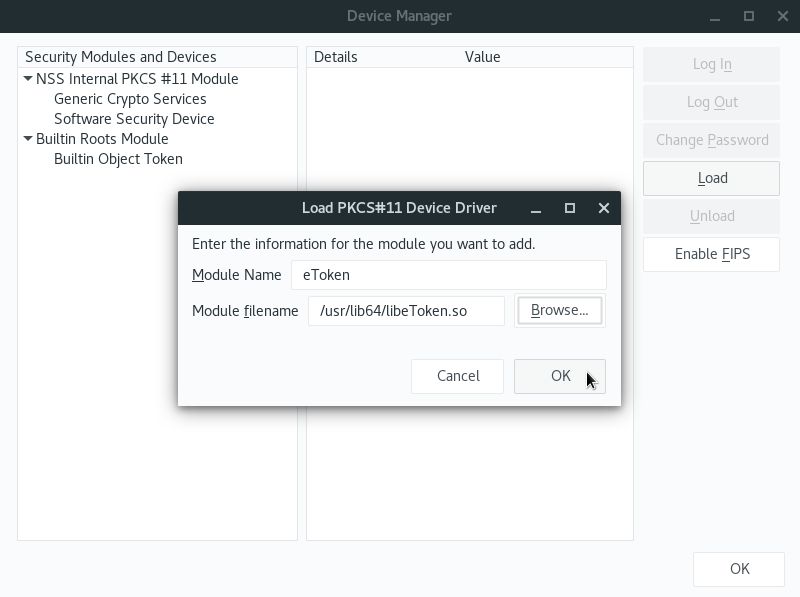
On the Device Manager dialog, click Load:

On the next dialog box, fill in the Module Name field with a name that identifies your token (for instance, eToken).
Fill in the Module filename field with the path to your token’s library:
- if your token is supported by OpenSC, type
/usr/lib64/opensc-pkcs11.so; - if you have a SafeNet token and needed to install SAC (like me), type
/usr/lib64/libeToken.so; - for other token models, ask your token vendor or your certificate authority which path should be informed.
When you finish, click OK:
Your token is added to the list of Security Modules and Devices. Click OK:

Click Close to close the Thunderbird Preferences dialog.
Setting up digital signing on Thunderbird
The next step is to set up Thunderbird to sign the emails sent from our email account with our certificate.
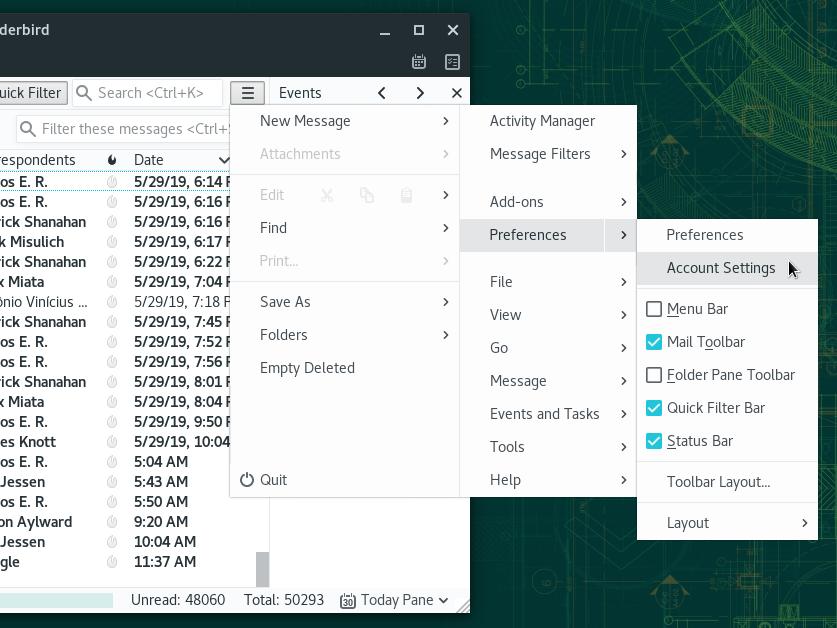
Open the Thunderbird menu and go to Preferences, Account Settings:
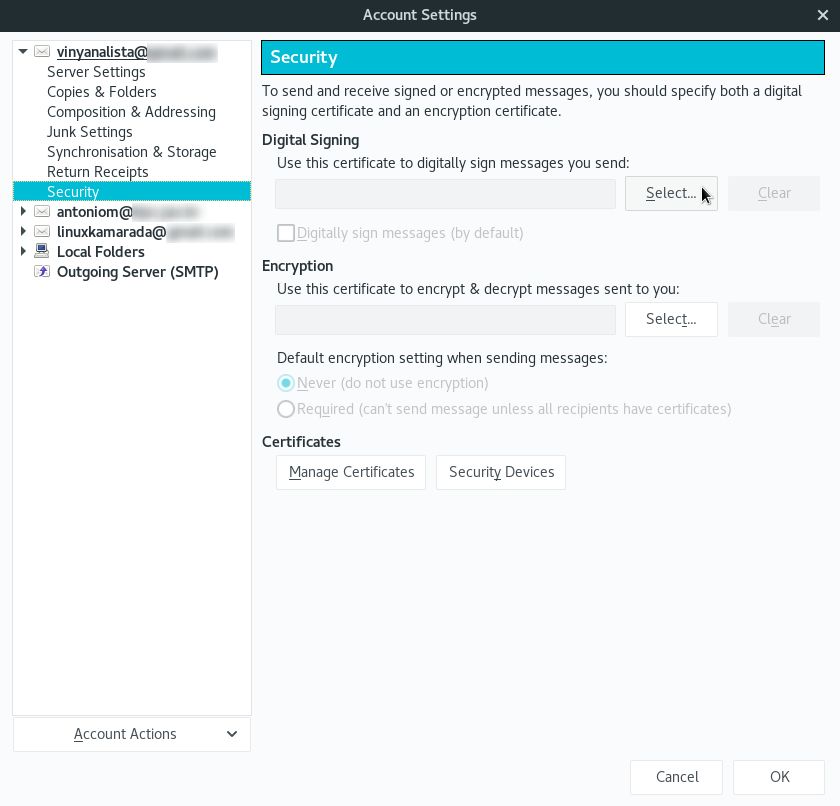
On the left panel, among the account settings, select Security and by the right, near Digital Signing, click Select:
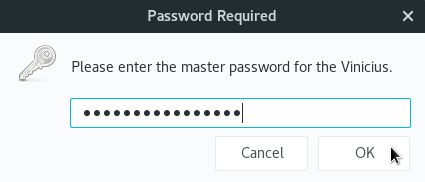
Enter the PIN for your token and click OK:
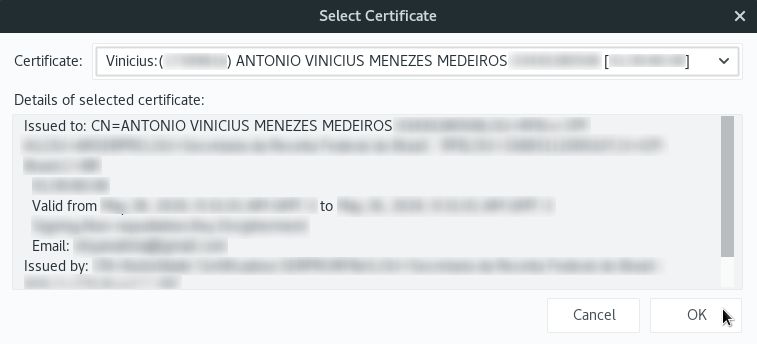
Select the certificate to be used for digital signing and click OK:
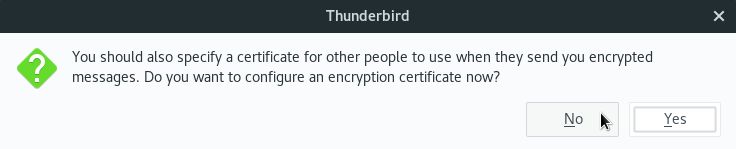
As we are going to set up criptography just for sending, not for replying, choose No:
Back to the Account Settings dialog, in case you want to always sign the emails you send, check the Digitally sign messages (by default) option.
Click OK to close the Account Settings dialog and go back to the Thunderbird main window.
Right now, digital signing is set up and ready to be used!
Sending digitally signed emails
On the Thunderbird main window, click the Write button:

As usual, fill in the From, To and Subject fields and type the message body.
Before sending, open the Security menu and make sure the Digitally Sign This Message option is checked (if you have setup Thunderbird to always sign the emails you send, that option should be already checked by default):
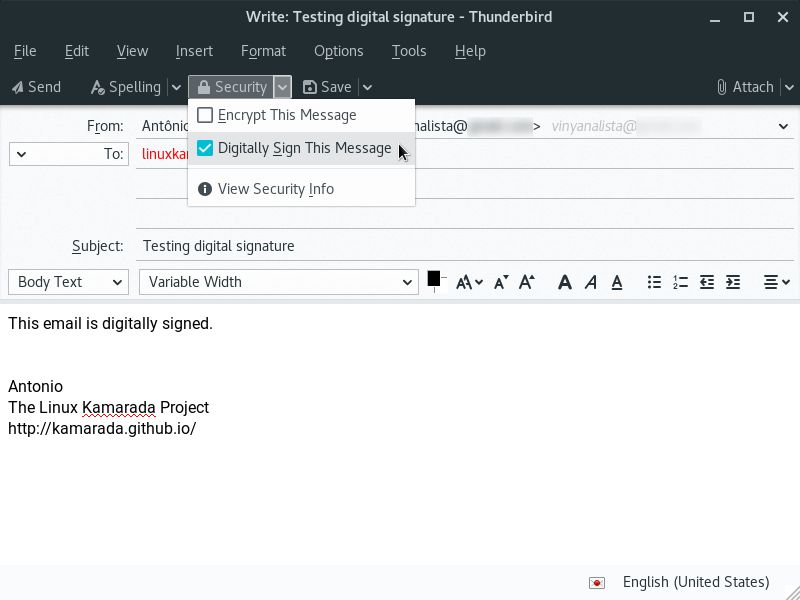
When you finish, click Send.
Thunderbird asks for the token PIN to sign the email right before sending.
Checking the digital signature of received emails
If the recipient uses Thunderbird, they can check the digital signature of the message:

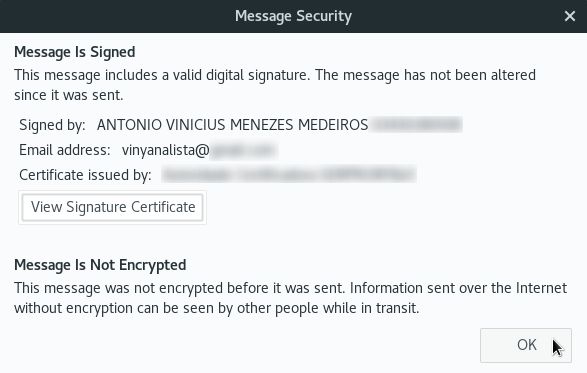
If Thunderbird tells the digital signature is not valid, the recipient may be missing your CA certificate. They need to add that certificate to their Thunderbird installation following the instructions presented on this page. After doing that, back to the message tab, Thunderbird will be able to validate the signature.
If the recipient uses a webmail, it may allow to check the digital signature of the message. For instance, that is possible with Gmail:
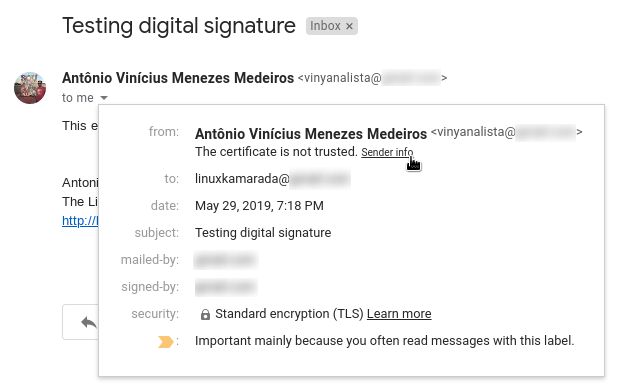
Note that Gmail does not trust a certificate that belongs to the hierarchy of the Brazilian root CA ICP-Brasil. Unfortunately, the definitive solution to this issue would require Google to install and trust the ICP-Brasil certificate on its servers.
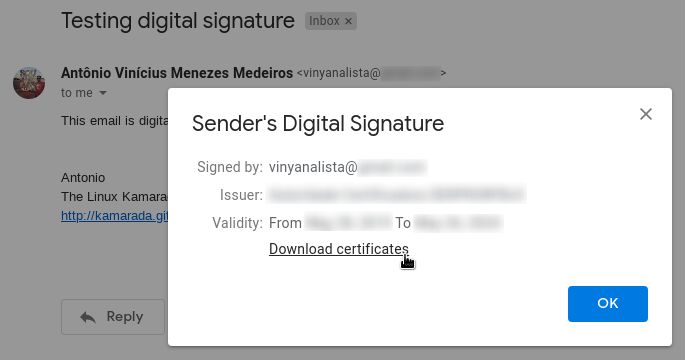
As a workaround, you can click the Sender info link and then click Download certificates:
Open the downloaded file (the sender certificate) and check its hierarchy by yourself:

Thunderbird bug: certificate could not be found
When trying to send a digitally signed email, you may face a Thunderbird bug:
Instead of signing and sending the email, Thunderbird shows the following error message:
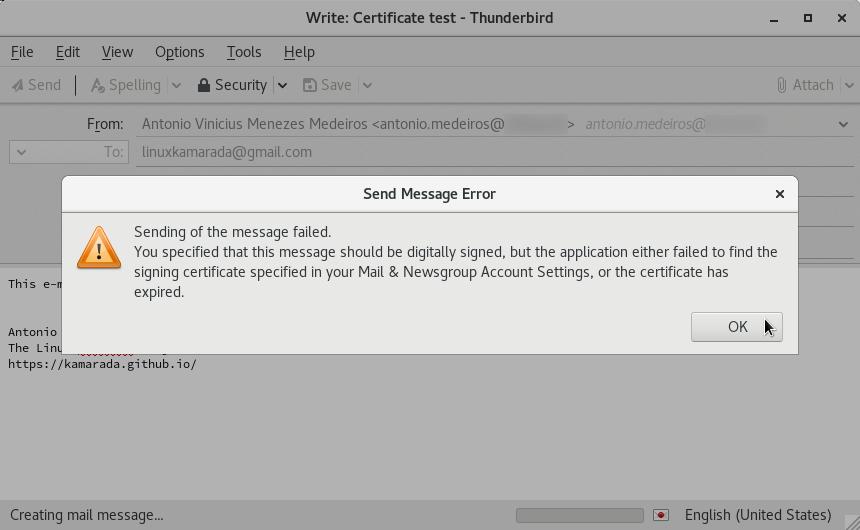
Send Message Error. Sending of message failed. You specified that this message should be digitally signed, but the application either failed to find the signing certificate specified in your Mail & Newsgroup Account Settings, or the certificate has expired.
That bug has been fixed on Thunderbird 69.0 (regular release) and 60.7.1 (ESR), which has been made available for openSUSE Leap 15.1 users through a security update.
If you faced that bug, check for updates to your system. You can read more info here:


