Today’s post is for developers. If you use the Git version control system with a service such as GitHub, GitLab or Bitbucket to host and manage your projects source codes, you know that by default Git connects to remotes using the HTTPS protocol, which requires you to enter username and password every time you run a command such as git pull or git push.
Using the SSH protocol, you can connect and authenticate to servers to use their services. The three mentioned services allow Git to connect via SSH instead of HTTPS. Connecting with public key encryption dispenses typing username and password for every Git command.
You are going to see in this post how to use GitHub, GitLab and Bitbucket with SSH.

Make sure an SSH client in installed
In order to connect using the SSH protocol, an SSH client must be installed on your system. If you use openSUSE, it should be already installed by default.
Just to make sure, open the terminal and run:
1
$ ssh -V
That command should output the version number of the SSH client being used:
1
OpenSSH_7.9p1, OpenSSL 1.1.0i-fips  14 Aug 2018
In case the system informs that the ssh command was not found, you can install the OpenSSH client running:
1
# zypper in openssh
Check for existing SSH keys
To connect using the SSH protocol, you need an SSH key pair (one private and the other public). If you have never used SSH, you can safely skip this topic and move on to the next. If you have ever used SSH (for instance, to remotely access a server), probably you already have an SSH key pair, in which case you don’t need to generate a new key pair.
To see if existing SSH keys are present, run:
1
$ ls -lah ~/.ssh
That command should list the contents of the ~/.ssh folder, in which the SSH client stores its configuration files:
1
2
3
4
5
6
7
8
total 28K
drwx------  2 vinicius users   94 Mar 17 14:55 .
drwxr-xr-x 54 vinicius users 4.0K Jul 14 02:44 ..
-rw-------  1 vinicius users 2.5K Mar  1 23:41 authorized_keys
-rw-r--r--  1 vinicius users   39 Dec 19  2018 config
-rw-------  1 vinicius users 3.3K Jul 18  2018 id_rsa
-rw-r--r--  1 vinicius users  748 Jul 18  2018 id_rsa.pub
-rw-r--r--  1 vinicius users 4.7K Jul  5 01:57 known_hosts
If you receive an error that there is no ~/.ssh directory or there are no files in it, don’t worry: it means you haven’t created an SSH key pair yet. If that is the case, proceed to the next topic.
By default, public SSH keys are named:
- id_dsa.pub;
- id_ecdsa.pub;
- id_ed25519.pub; or
- id_rsa.pub.
Inside my ~/.ssh folder, I have an SSH key pair (id_rsa.pub is the public key and id_rsa is the private key) created a year ago (Jul 18 2018).
For security reasons, it is recommended that you generate a new SSH key pair at least once a year. If you already have an SSH key pair that was created more than a year ago, it is recommended that you proceed to the next topic.
If you already have an SSH key pair and want to reuse it, you can skip the next topic.
Generate a new SSH key pair
To generate a new SSH key pair, run the following command (replace your_email@example.com with your email address):
1
2
3
4
$ ssh-keygen -t rsa -b 4096 -C "your_email@example.com"

Generating public/private rsa key pair.
Enter file in which to save the key (/home/your_user_name/.ssh/id_rsa):
It asks you where to save the private key (id_rsa).
Press Enter to accept the default location.
If you already have a private key, it asks whether it should overwrite:
1
2
/home/your_user_name/.ssh/id_rsa already exists.
Overwrite (y/n)?
If that happens, type y and press Enter.
Then, enter and re-enter a passphrase (think of it as a kind of password):
1
2
Enter passphrase (empty for no passphrase):
Enter same passphrase again:
The SSH key pair is created in ~/.ssh.
The whole interaction should look similar to the following:
1
2
3
4
5
6
7
8
9
10
11
12
13
14
15
16
17
18
19
20
21
22
23
24
your_user_name@your_host_name:~> ssh-keygen -t rsa -b 4096 -C "your_email@example.com"
Generating public/private rsa key pair.
Enter file in which to save the key (/home/your_user_name/.ssh/id_rsa):
/home/your_user_name/.ssh/id_rsa already exists.
Overwrite (y/n)? y
Enter passphrase (empty for no passphrase):
Enter same passphrase again:
Your identification has been saved in /home/your_user_name/.ssh/id_rsa.
Your public key has been saved in /home/your_user_name/.ssh/id_rsa.pub.
The key fingerprint is:
SHA256:CEnY8FOQmvISJpVp6oAlITemk1aWKRdViOFePP6/CKk your_email@example.com
The key's randomart image is:
+---[RSA 4096]----+
|o.=@X++.         |
|o*@O++           |
|=Bo+=+           |
|Oo+ oo..         |
|=+ . .. S        |
|...   o          |
| .   o .         |
|    . . o        |
|   E   . o.      |
+----[SHA256]-----+
your_user_name@your_host_name:~>
Add the private SSH key to the ssh-agent
If you don’t want to type your passphrase each time you use your SSH keys, you need to add it to the ssh-agent, which is a program that runs in background while you are logged in to the system and stores your keys in memory.
To start the ssh-agent in background, run the following:
1
$ eval "$(ssh-agent -s)"
That command outputs the ssh-agent process identifier:
1
Agent pid 2887
Then, add your SSH private key to the ssh-agent:
1
$ ssh-add ~/.ssh/id_rsa
Type your passphrase and press Enter:
1
Enter passphrase for /home/your_user_name/.ssh/id_rsa:
The command confirms that the private SSH key has been added to the ssh-agent:
1
Identity added: /home/your_user_name/.ssh/id_rsa (your_email@example.com)
Add the public SSH key to your account
Once you have an SSH key and have added it to the ssh-agent, you can set up connecting via SSH. Let’s see how to do that for each of the three servers: GitHub, GitLab and Bitbucket.
In all the three cases, the process is similar. Start by copying your public SSH key (~/.ssh/id_rsa.pub) file contents to the clipboard using the xclip command:
1
$ xclip -sel clip < ~/.ssh/id_rsa.pub
xclip is a command line utility that allows access to the graphical interface clipboard from the terminal. If it is not installed, you can install it running:
1
# zypper install xclip
GitHub
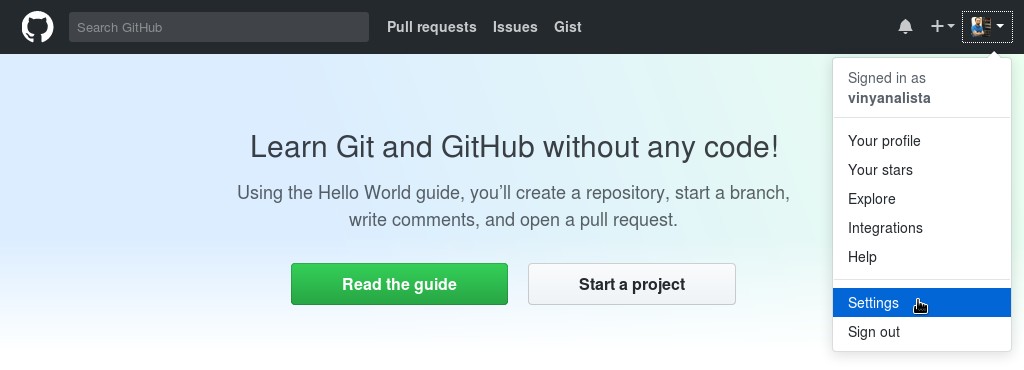
Using a browser, go to the GitHub home page at github.com and sign in to your account.
In the upper-right corner of the page, click your profile photo, then click Settings:
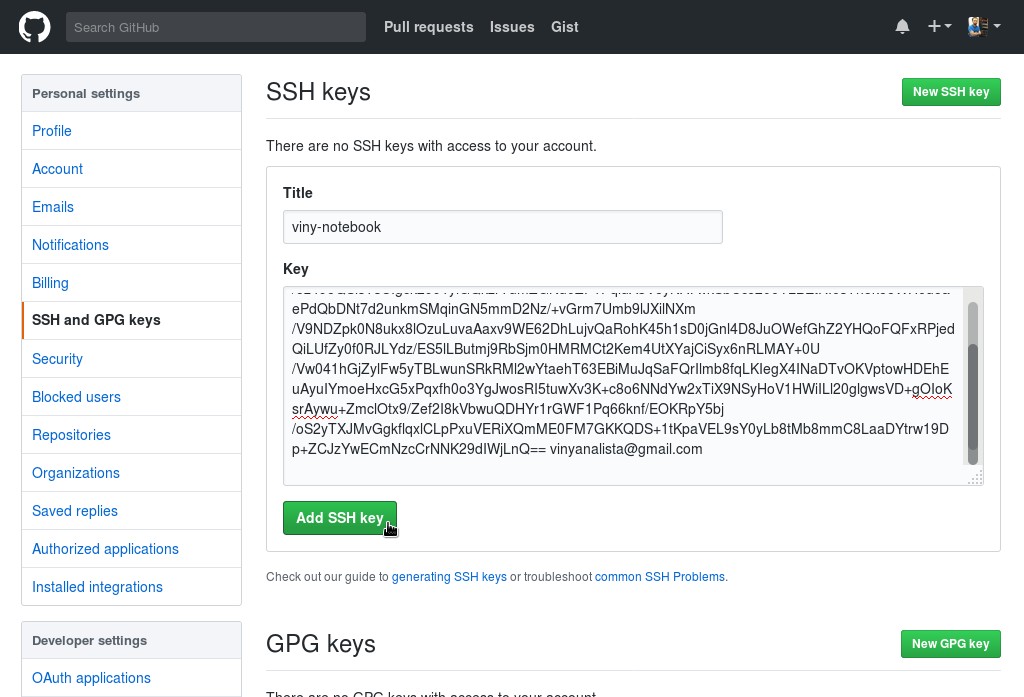
In the user settings sidebar, click SSH and GPG keys. Then click New SSH key.
Fill in the Title field with a descriptive label for the new key (for example, the name of your computer) and paste your public key into the Key field. Finally, click Add SSH key:
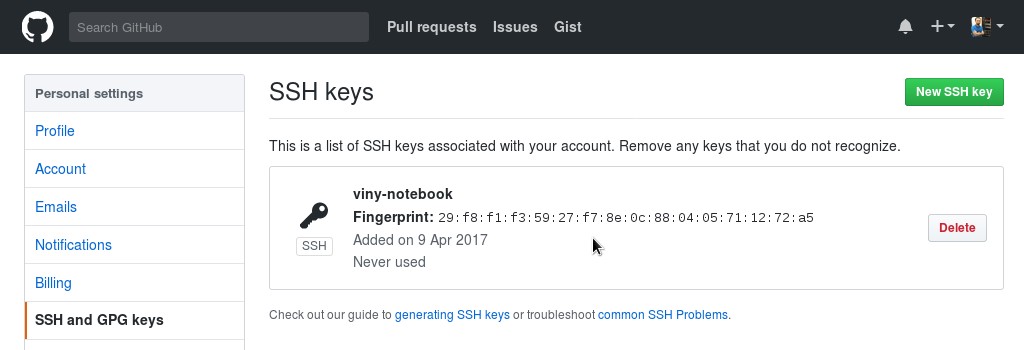
Now the key appears in the list of SSH keys associated with your account:
GitLab
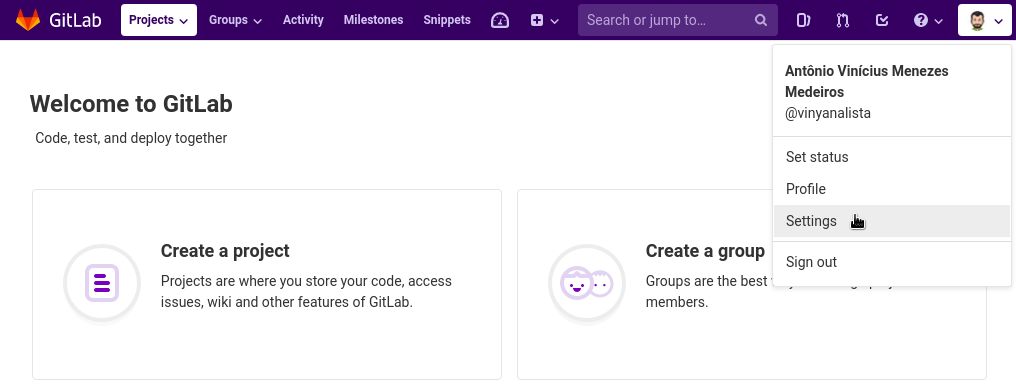
Using a browser, go to the GitLab home page at gitlab.com and sign in to your account.
In the upper-right corner of the page, click your profile photo, then click Settings:
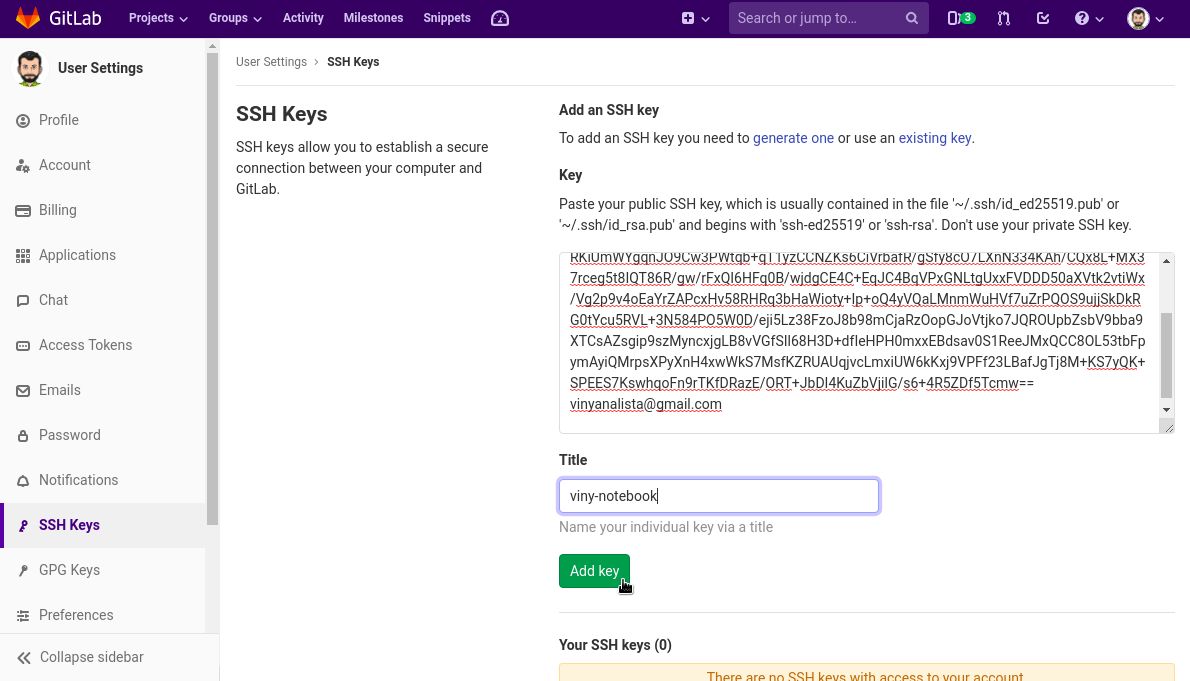
In the User Settings sidebar, click SSH Keys.
Paste your public key in the Key field. Fill in the Title field with a descriptive label for the new key (for example, the name of your computer). Finally, click Add key:
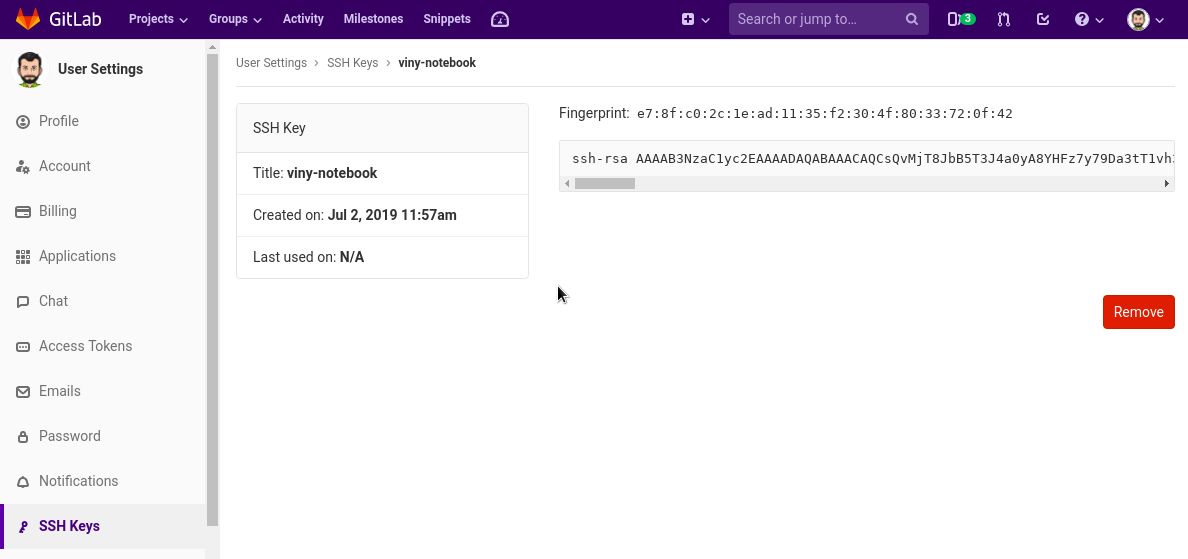
Now the key appears in the list of SSH keys associated with your account:
Bitbucket
Using a browser, go to the Bitbucket home page at bitbucket.org and log in to your account.
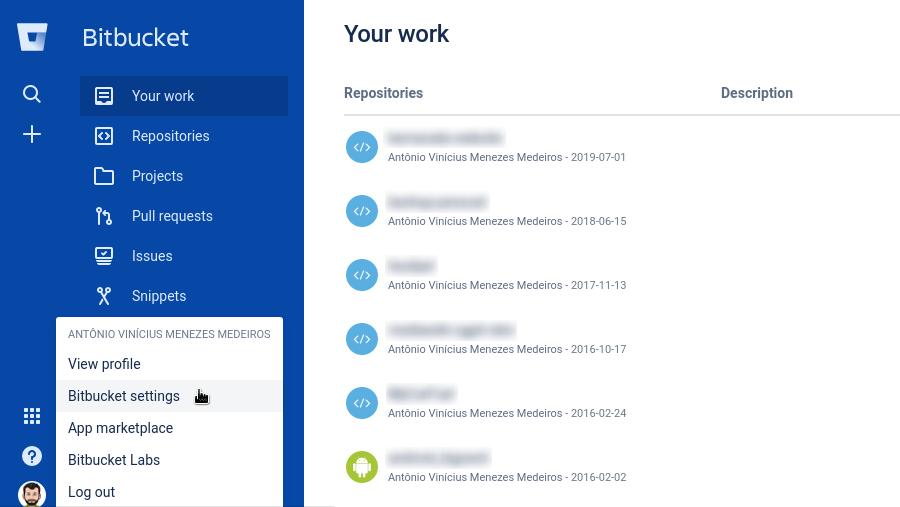
In the lower-left corner of the page, click your profile photo, then click Bitbucket settings:
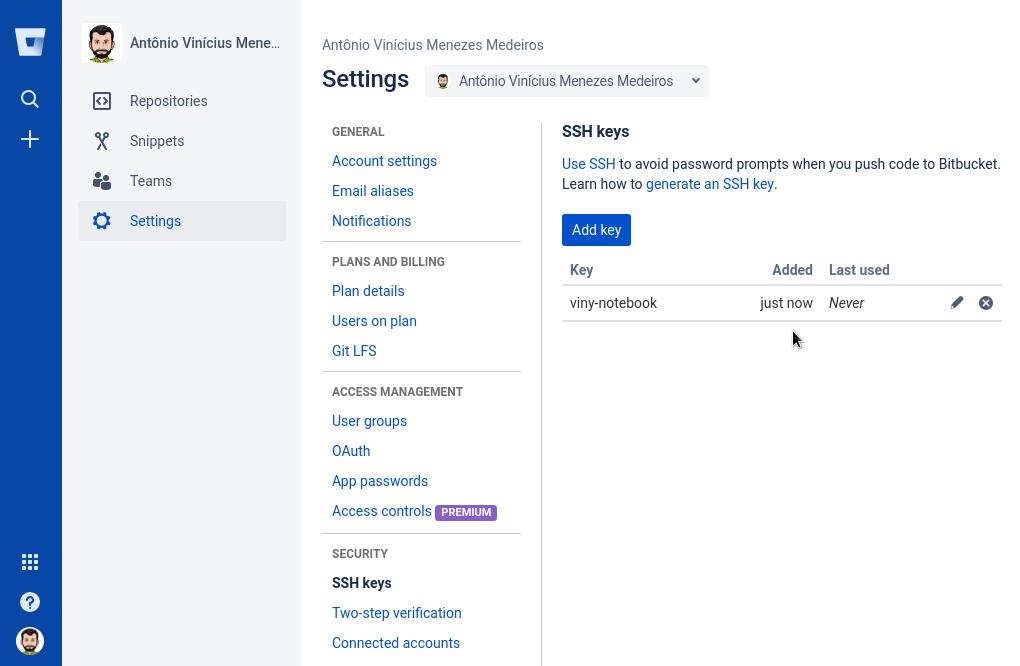
In the Settings sidebar, in the Security section, click SSH keys. Then, click Add key.
Fill in the Label field with a descriptive label for the new key (for example, the name of your computer) and paste your public key into the Key field. Finally, click Add key:

Now the key appears in the list of SSH keys associated with your account:
Test connecting via SSH
GitHub, GitLab and Bitbucket allow you to test whether SSH connection has been set up correctly before actually using it with Git.
GitHub
After you’ve added your SSH key to your GitHub account, open the terminal and run:
1
$ ssh -T git@github.com
That command attempts an SSH remote access to GitHub.
If that is the first time you connect to GitHub via SSH, the SSH client asks you if it can trust the public key of the GitHub server:
1
2
3
The authenticity of host 'github.com (140.82.113.4)' can't be established.
RSA key fingerprint is SHA256:nThbg6kXUpJWGl7E1IGOCspRomTxdCARLviKw6E5SY8.
Are you sure you want to continue connecting (yes/no)?
Type yes and press Enter. The SSH client adds GitHub to the list of trusted hosts:
1
Warning: Permanently added 'github.com,140.82.113.4' (RSA) to the list of known hosts.
Once added to the list of known hosts, you won’t be asked about GitHub’s public key again.
As this remote access via SSH is provided by GitHub just for testing, not for actual use, the server informs that you have successfully authenticated and terminates the connection:
1
Hi your_user_name! You've successfully authenticated, but GitHub does not provide shell access.
If you completed the test successfully, now you can use SSH with GitHub.
The whole interaction should look similar to the following:
1
2
3
4
5
6
7
your_user_name@your_host_name:~> ssh -T git@github.com
The authenticity of host 'github.com (140.82.113.4)' can't be established.
RSA key fingerprint is SHA256:nThbg6kXUpJWGl7E1IGOCspRomTxdCARLviKw6E5SY8.
Are you sure you want to continue connecting (yes/no)? yes
Warning: Permanently added 'github.com,140.82.113.4' (RSA) to the list of known hosts.
Hi your_user_name! You've successfully authenticated, but GitHub does not provide shell access.
your_user_name@your_host_name:~>
GitLab
If you have added your SSH key to your GitLab account, the test is very similar:
1
2
3
4
5
6
7
$ ssh -T git@gitlab.com

The authenticity of host 'gitlab.com (35.231.145.151)' can't be established.
ECDSA key fingerprint is SHA256:HbW3g8zUjNSksFbqTiUWPWg2Bq1x8xdGUrliXFzSnUw.
Are you sure you want to continue connecting (yes/no)? yes
Warning: Permanently added 'gitlab.com,35.231.145.151' (ECDSA) to the list of known hosts.
Welcome to GitLab, @your_user_name!
If you completed the test successfully, now you can use SSH with GitLab.
Bitbucket
If you have added your SSH key to your Bitbucket account, the test is very similar:
1
2
3
4
5
6
7
8
9
$ ssh -T git@bitbucket.org

The authenticity of host 'bitbucket.org (104.192.143.1)' can't be established.
RSA key fingerprint is SHA256:zzXQOXSRBEiUtuE8AikJYKwbHaxvSc0ojez9YXaGp1A.
Are you sure you want to continue connecting (yes/no)? yes
Warning: Permanently added 'bitbucket.org,104.192.143.1' (RSA) to the list of known hosts.
logged in as your_user_name.

You can use git or hg to connect to Bitbucket. Shell access is disabled.
If you completed the test successfully, now you can use SSH with Bitbucket.
Clone a repository using SSH
Now that we’ve got our SSH keys set up, let’s see how to clone a Git repository using SSH instead of HTTPS.
GitHub
At GitHub, go to a project’s repository, click Clone or download and copy the URL to clone the repository using SSH:
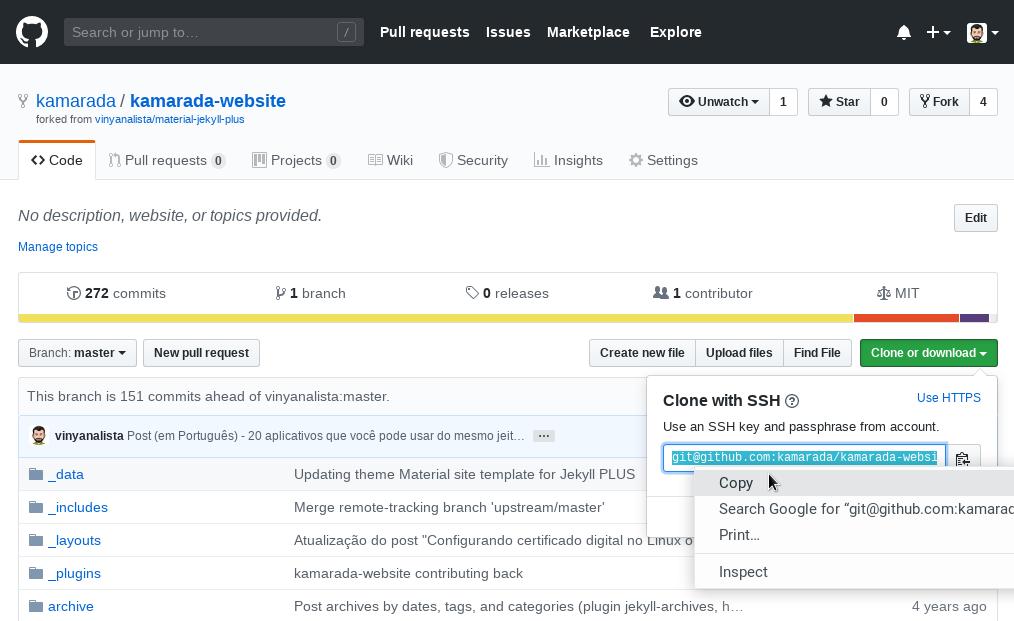
The URL of a GitHub repository looks like:
1
git@github.com:your_user_name/your_project_name.git
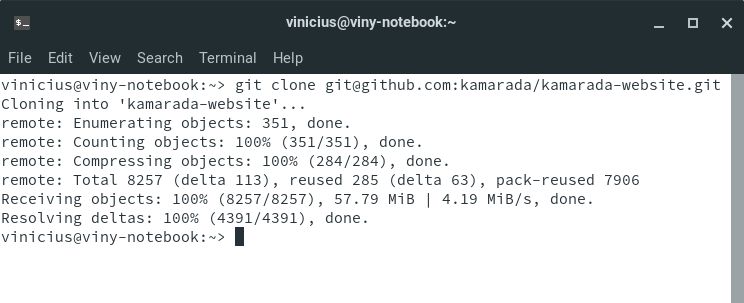
Open the terminal and run the git clone command passing the copied URL as argument.
Tip: to paste into the terminal, use Ctrl + Shift + V.
Note that now Git clones the repository without asking for a password:
GitLab
At GitLab, go to a project’s repository, click Clone and copy the URL to clone the repository using SSH:
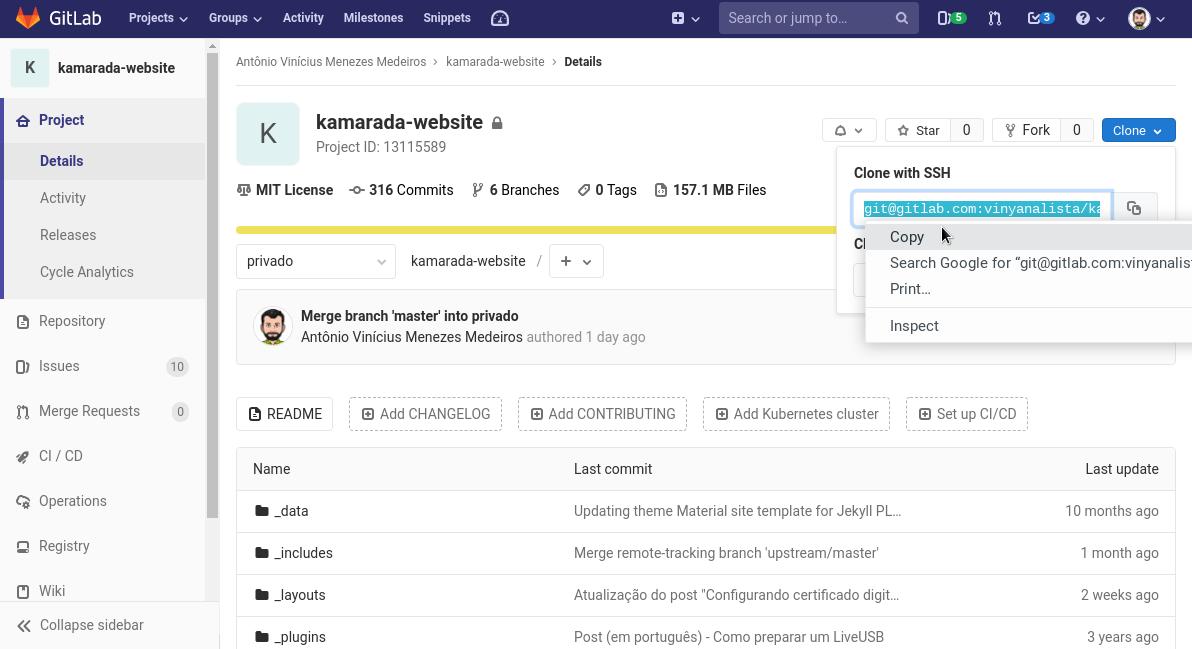
The URL of a GitLab repository looks like:
1
git@gitlab.com:your_user_name/your_project_name.git
Open the terminal and run the git clone command passing the copied URL as argument:
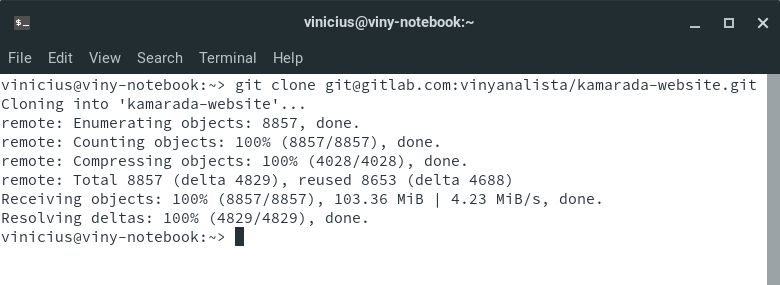
Note that now Git clones the repository without asking for a password.
Bitbucket
At Bitbucket, go to a project’s repository, click Clone and copy the command to clone the repository using SSH:
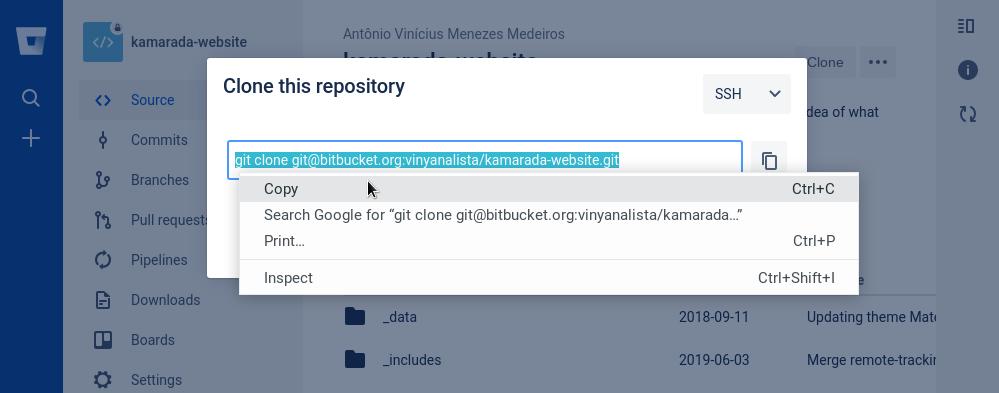
Note that, differently from GitHub and GitLab that present the URL, Bitbucket presents the entire git clone command, including the URL.
The URL of a Bitbucket repository looks like:
1
git@bitbucket.org:your_user_name/your_project_name.git
Open the terminal, paste and run the command you copied from Bitbucket:
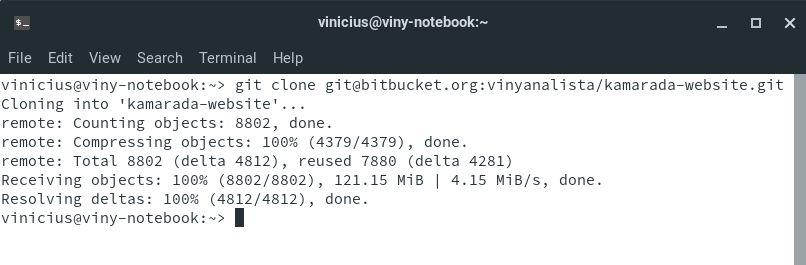
Note that now Git clones the repository without asking for a password.
Reconfigure existing repositories to use SSH
The repositories we clone from now on using SSH will continue to use SSH for future Git commands such as git pull and git push. But existing local repositories, previously cloned with HTTPS, will continue to use HTTPS, unless we set them up to use SSH.
To do that, open the terminal and change the current directory to a local repository.
List the existing remote repositories and their URLs with:
1
$ git remote -v
That command should output something like:
1
2
origin  https://your_server/your_user_name/your_project_name.git (fetch)
origin  https://your_server/your_user_name/your_project_name.git (push)
Change your remote repository’s URL with:
1
$ git remote set-url origin git@your_server:your_user_name/your_project_name.git
Run git remote -v once more to verify that the remote repository’s URL has changed:
1
2
origin  git@your_server:your_user_name/your_project_name.git (fetch)
origin  git@your_server:your_user_name/your_project_name.git (push)
Great. That done, Git will use SSH, instead of HTTPS, to synchronize that local repository with its remote equivalent.
References
I hope those tips can be useful to you as they have been to me since I started using Git. If you have any questions or trouble, don’t hesitate to comment! See you!
And always remember: have a lot of fun…


