Remote access software lets you remotely control (use) a computer from another computer. In some situations, remote access can be useful: to use the work computer while being at home (home office); to provide remote support to a colleague or customer; or even to avoid moving to a particular device on the other side of the house just to click on something.
There are some remote access programs. Today, we are going to take a look at NoMachine.
NoMachine is a remote access solution developed since 2003 by the Luxemburg-based company of the same name. It is cross-platform (available for use in various operating systems, including Linux, Windows, macOS, Android and iOS) and free of charge for personal use, but subscriptions are available for advanced features targeted at enterprises.
License
Note that NoMachine is not a free (libre) software, but a proprietary one.
I read the NoMachine license and, if I got it right, individual uses are allowed free of charge (without having to purchase a subscription), being examples of individual uses:
- remotely accessing the computer you use at work, from home;
- remotely accessing your home computer, from work; or
- remotely accessing another computer on the same local network (either at home or at work).
In the examples above, you can replace “work” with “university” or other educational institution.
What you are not allowed to do with the free version of NoMachine are commercial uses, such as providing paid support service for a customer. For commercial uses, visit the NoMachine website and purchase a subscription.
Client and server
In this tutorial, we are going to call the computer that is accessed as server (it serves the desktop, it makes its desktop available for use) and the computer that accesses it as client.
For example, if you are using your home computer to remotely access your work computer, your home computer is the client and your work computer is the server.
Those functions (client and server) are not fixed, but interchangeable: with NoMachine installed, both computers are able to act as either client or server.
Thus, if someday you remotely access your home computer from your work computer, in this new scenario your home computer is the server, while your work computer acts as the client.
Local network
Note that, at least in principle, NoMachine gives you remote access to computers on the same local network only.
In the previous examples, to remotely access the work computer, you would need to connect to the work network using a VPN technology such as one of the following (check availability with the company’s network administrator or IT staff):
To remotely access your home computer, you would need to configure port forwarding on your home router. To check if that is possible, as well as to get instructions on how to do that, contact your ISP.
No more talking, let’s roll up our sleeves!
As usual, I focus on openSUSE and Linux Kamarada, but the usage of NoMachine on other Linux distributions is possible and shouldn’t be much different.
Download
Download the NoMachine RPM package on both computers: client and server. An alternative is to download the package once and copy it to the other computer (e.g. using a USB stick).
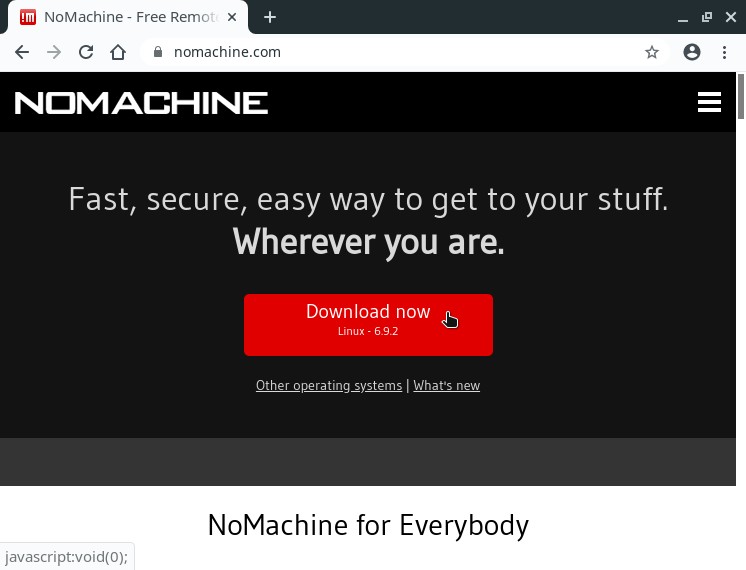
To download NoMachine, visit its website at nomachine.com and click Download now:
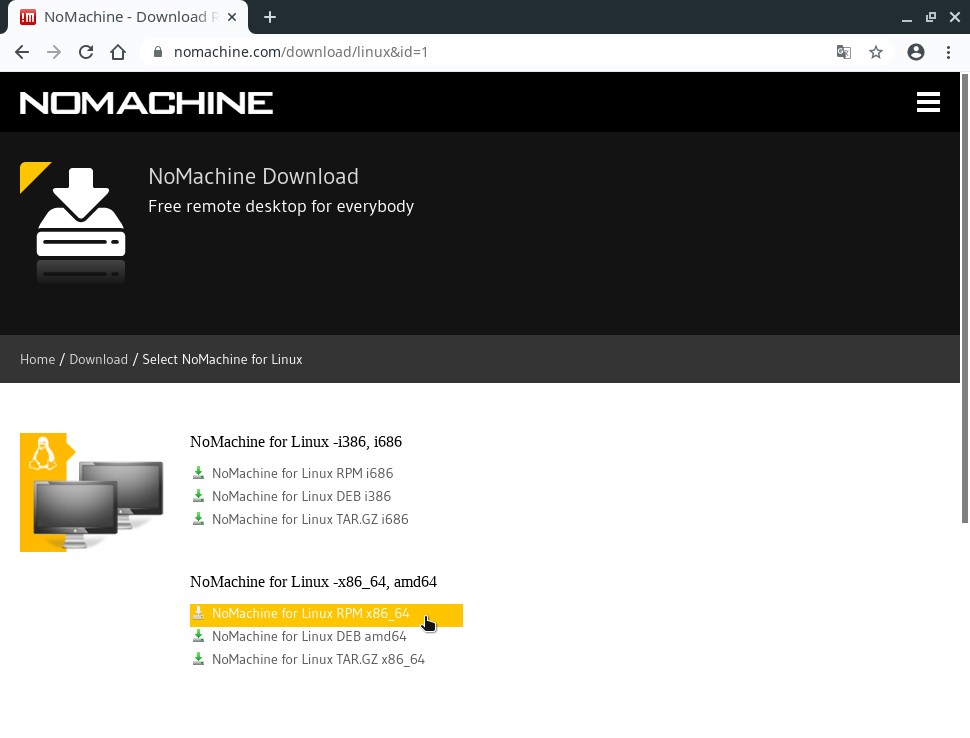
Among the download options, choose the RPM package for 64-bit Linux:
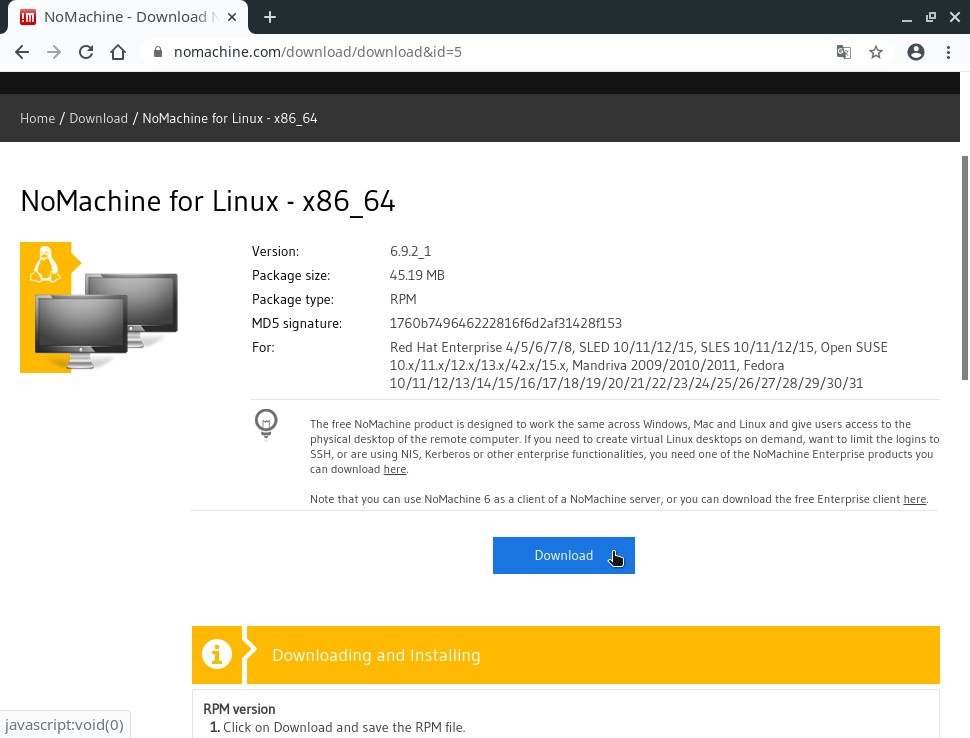
On the next page, click Download:
Your browser is going to download the RPM package probably to the Downloads folder (this is the default setting for most browsers) or ask where you want to save it.
Installation
When the download is finished, install NoMachine on both computers: client and server.
To install NoMachine, open the folder where the RPM package has been downloaded, right- click the package and click Open With Install/Remove Software:
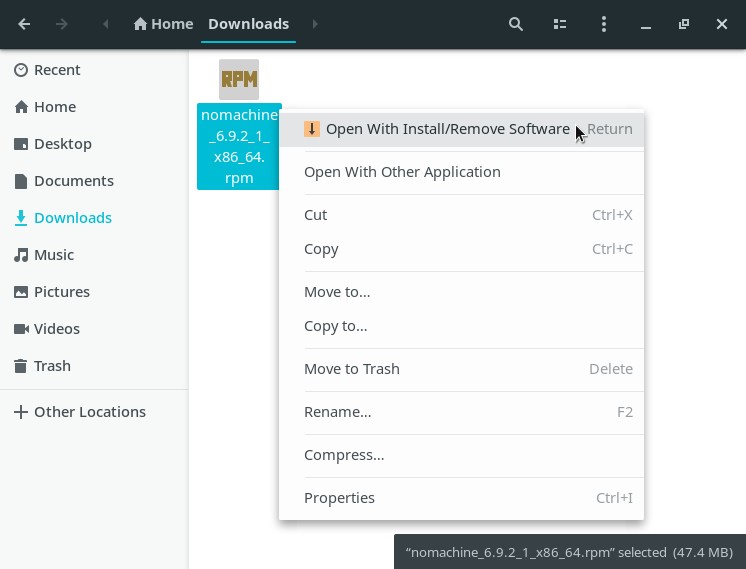
The YaST Control Center is started. It shows information about the package that is going to be installed:
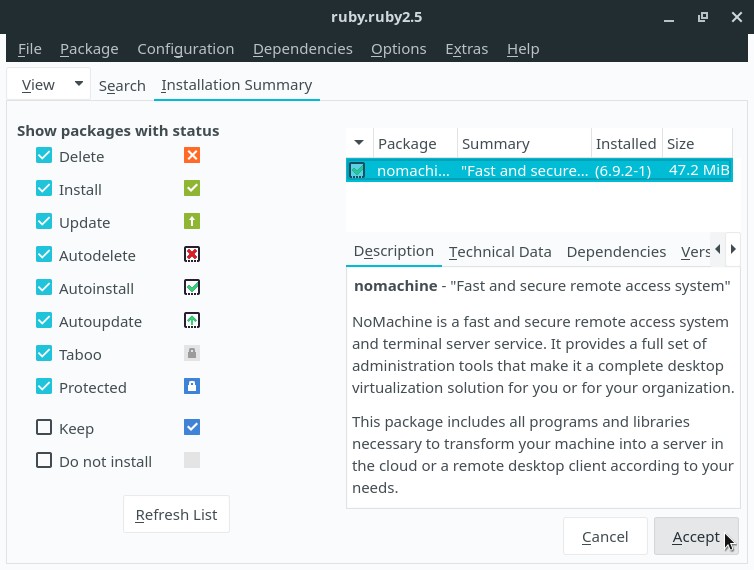
Click Accept.
YaST informs that the package is broken, but actually it was just unable to check its authenticity, since the package is not signed:

This error message is common when installing a manually downloaded RPM package (not a package retrieved from a known repository). You can safely click Ignore.
The package is installed. At the end, click Finish to close YaST:
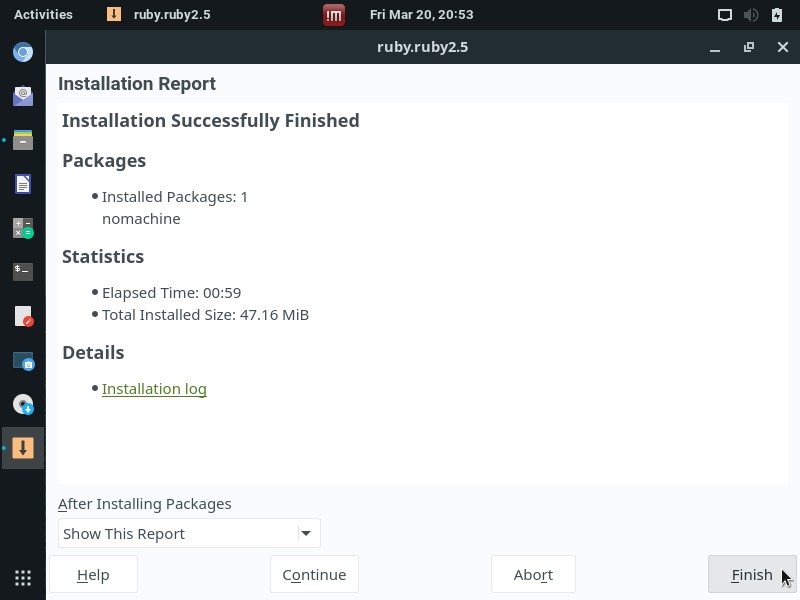
Notice that NoMachine has just added an icon to the GNOME top bar. It is already running and ready to be used!
Also note that the NoMachine RPM package installs both the client and the server applications and enables the NoMachine service on both computers — client and server — enabling both of them to assume either of these functions.
You download and install NoMachine on client and server computers the same way, but setting up and using are different procedures. Let’s start with the computer that is going to act as the server.
Finding the server’s IP address
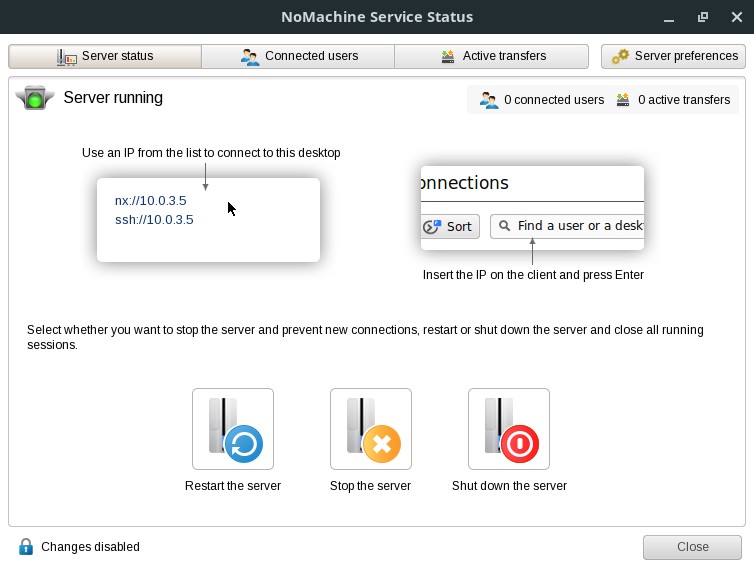
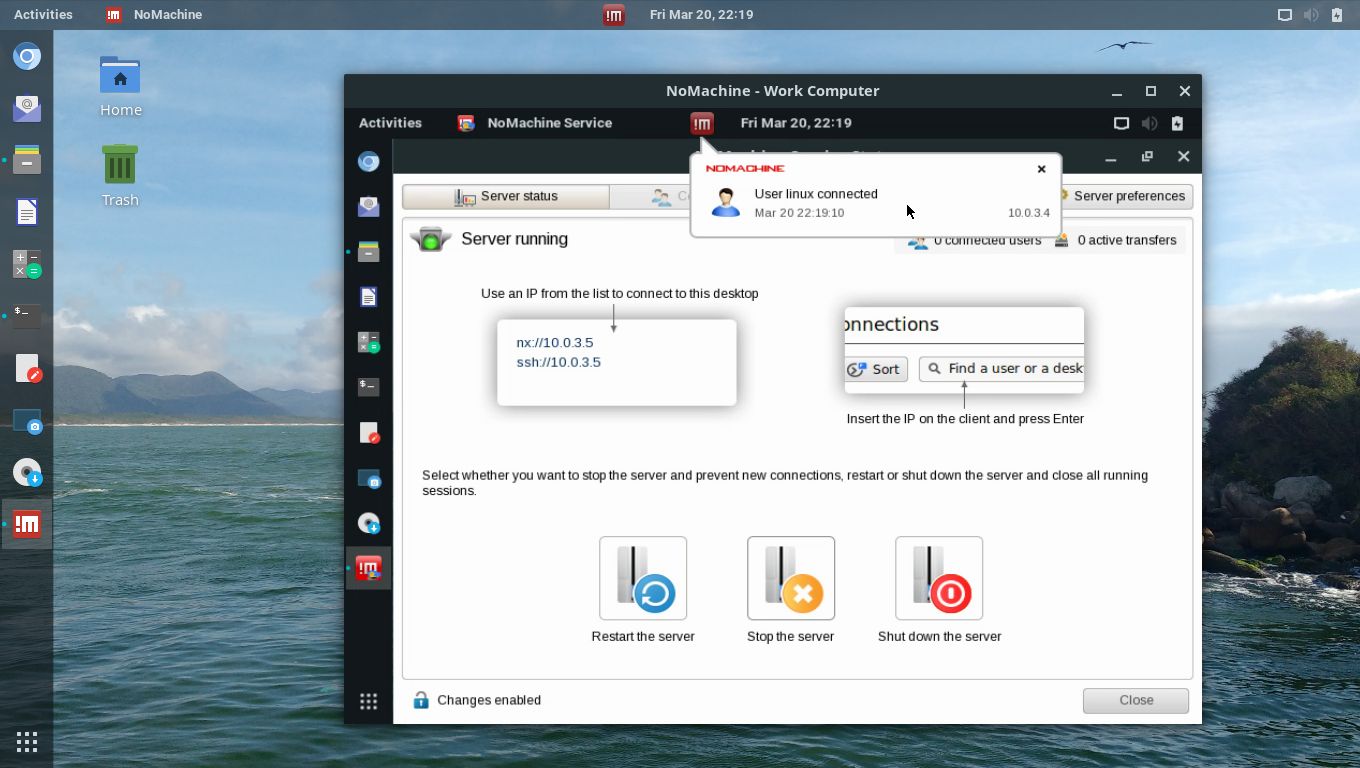
To connect to the server computer, you need to know its IP address. NoMachine tells you this information. To get it, click the NoMachine icon on the top bar. A menu with some options will appear. Click Show the service status:
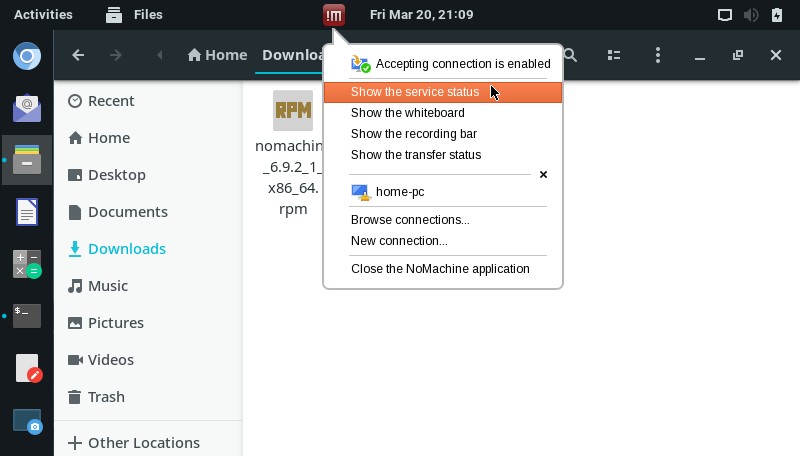
Take note of the server’s IP address (in this example, 10.0.3.5):
Alternatively, if the NoMachine icon does not appear for you on the GNOME top bar, open the Activities menu on the top-left screen corner, type nomachine and click the NoMachine Service icon:
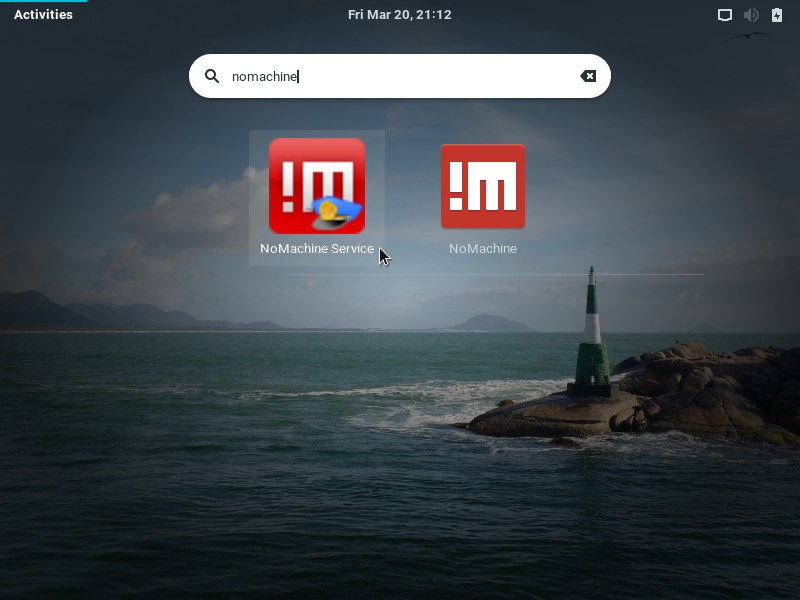
That same screen is opened and you can get the server’s IP address there.
Translating the server interface
Usually, NoMachine detects the system language and translates its interface automatically. In case that does not happen, it defaults to the English language.
If you want to change the server interface language, on the NoMachine Service Status window, click Server preferences on the top-right corner.
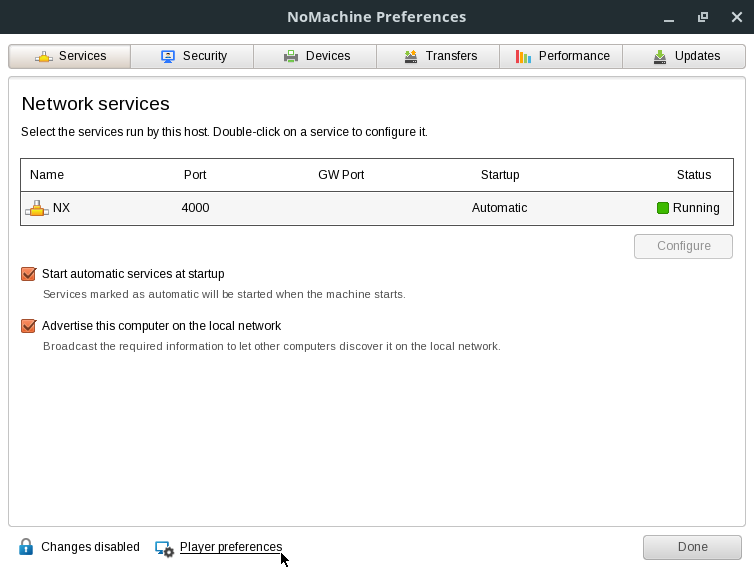
On the next screen, click Player preferences:
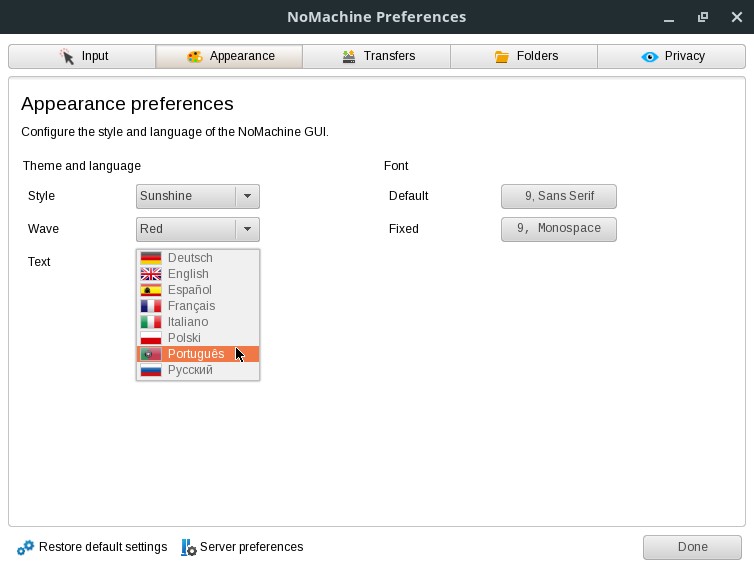
Then switch to the Appearance tab and in Text select your desired language:
You need to restart NoMachine for the translation to be applied. Click on the link that appears at the bottom of the screen (Restart the NoMachine Monitor for changes to take effect):

That done, NoMachine will restart. From now on, it will start already translated.
For this tutorial, I’m going to proceed with the default English language.
Starting remote access from the client
To start NoMachine on the client computer, open the Activities menu, type nomachine and click the NoMachine icon.
On the welcome screen, check Don’t show this message again and click Continue:
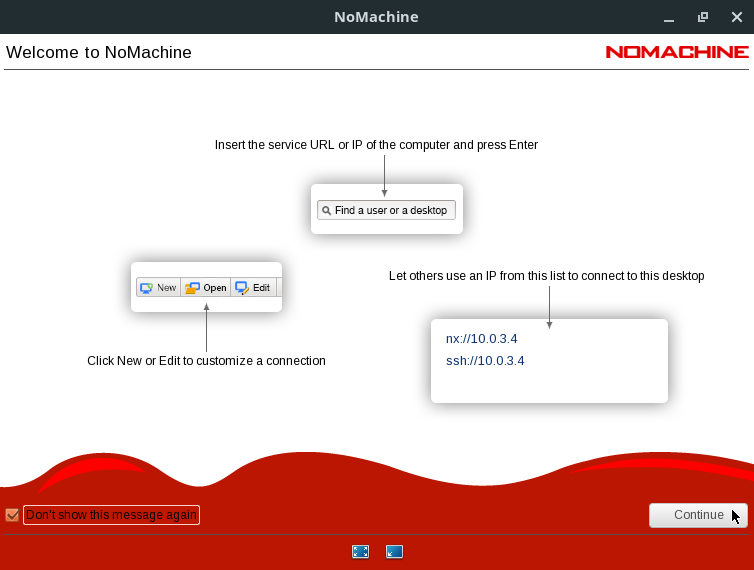
The NoMachine client automatically searches for NoMachine servers on the same network.
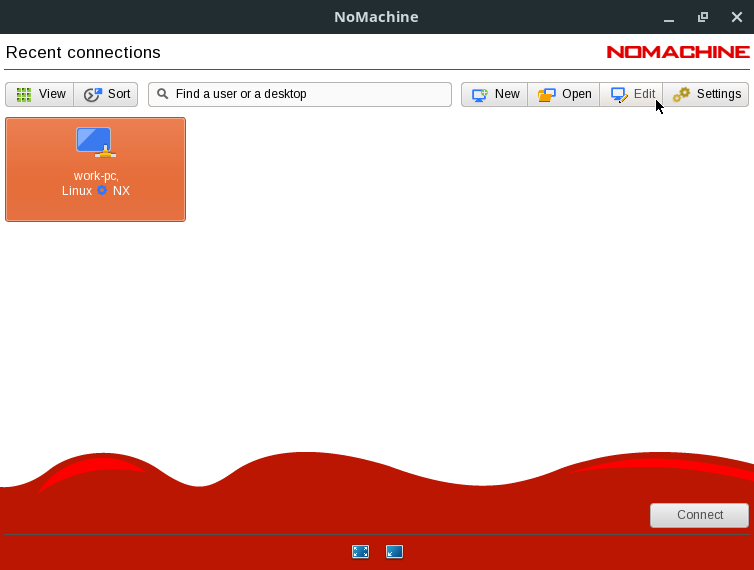
The client main screen shows the servers found, as well as any computers you have previously accessed:
Translating the client interface
If you want, you can change the client interface language in a similar way you did on the server: on the NoMachine client main screen, click Settings on the top-right corner.
Then switch to the Appearance tab and in Text select your desired language.
Restart NoMachine for the translation to be applied.
Remotely accessing a listed computer
If the server computer you want to remotely access appears in the list, before the first access, select it from the list and click Edit.
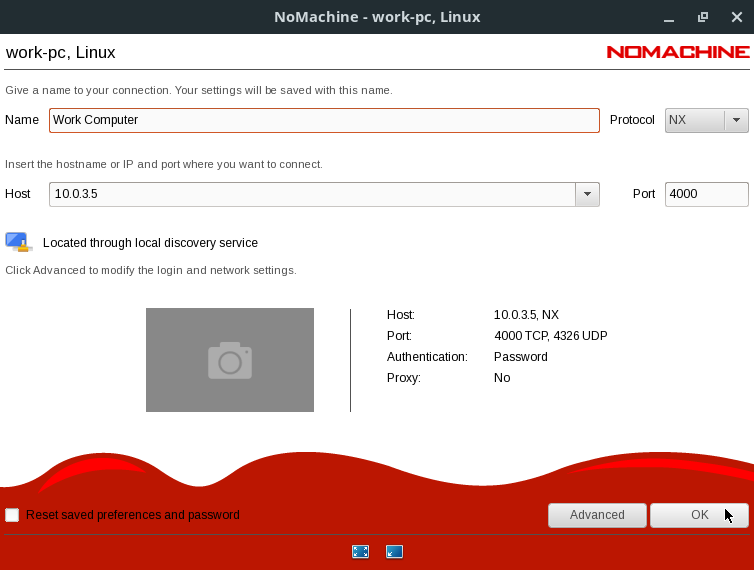
Enter a name for that computer (e.g. Work Computer) and click OK:
Now, back to the client main screen, double-click the computer you want to remotely access.
If this is the first time you remotely access that computer, NoMachine presents you some settings.
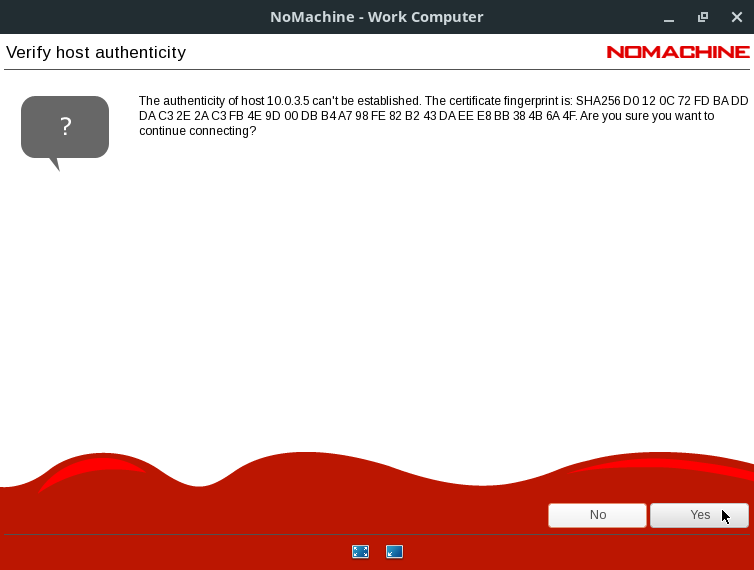
On the Verify host authenticity screen, click Yes:
Enter the Username (login) and Password of your user account on the server computer:
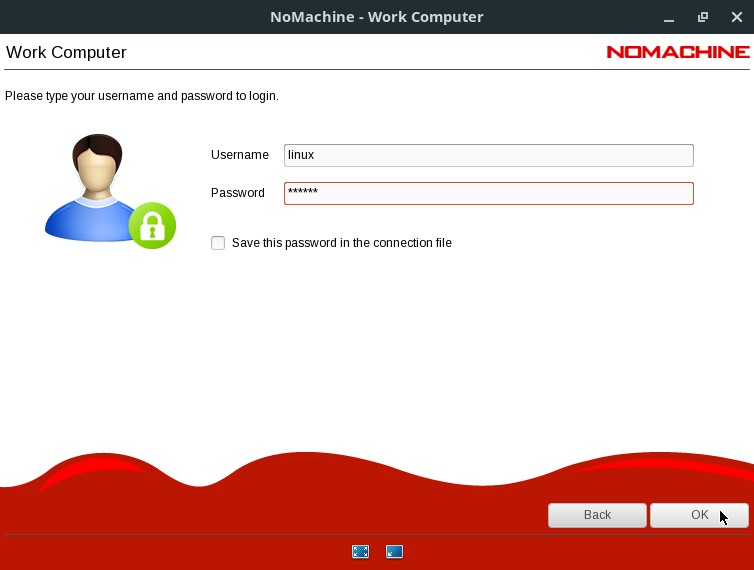
Optionally, check the option to remember your credentials. Click OK.
Once the connection is established, NoMachine presents you some tip screens:
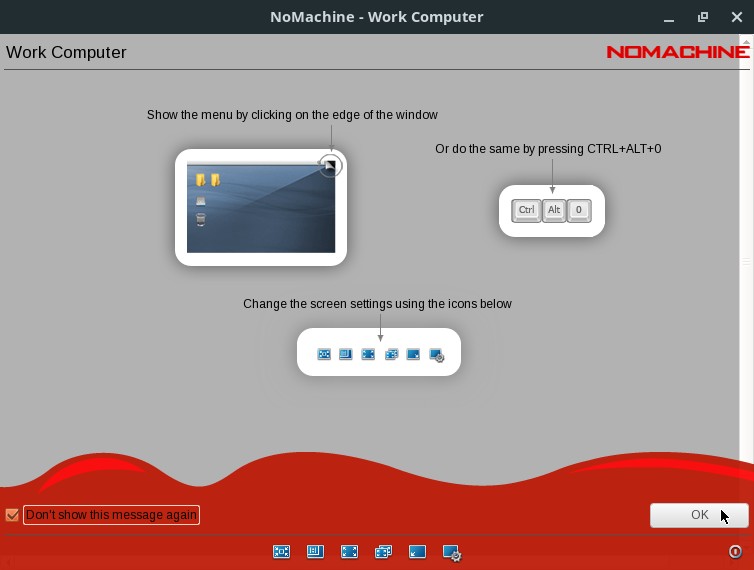
On each screen, carefully read its contents, check the option Don’t show this message again and click OK.
Finally, you will see the server computer’s screen in the NoMachine client window:
Each click inside this window is made on the server computer, also what you type appears there. You are literally using the server computer, but remotely, without sitting in front of it.
Note that a notification appears on the server informing that a remote access has been initiated. Also, if someone is in front of it and its screen is on, they will see what you do.
Remotely accessing a computer that is not listed
On the NoMachine client main screen, if the server computer you want to remotely access does not appear in the list, click the New button.
NoMachine starts the New connection wizard:

On the first screen, keep the default Protocol (which is NX) and click Continue.
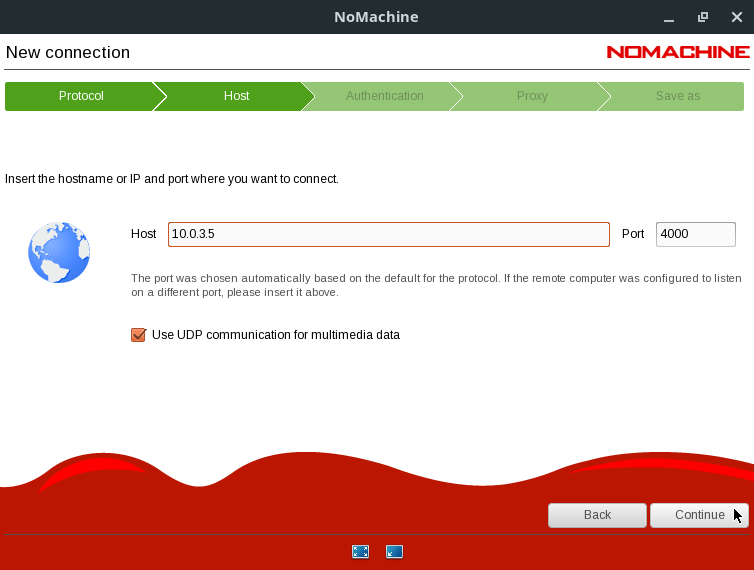
On the second screen, fill in the Host field with the server’s IP address and click Continue (alternatively, you can enter its hostname):
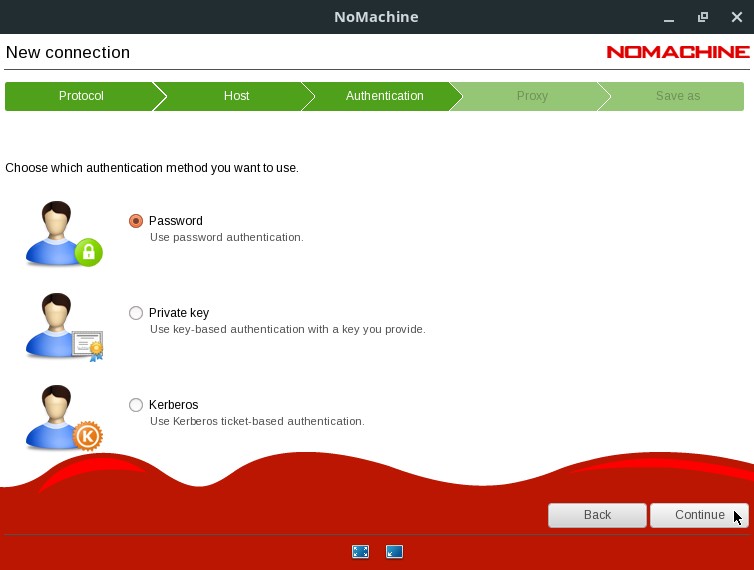
On the third screen, Authentication, leave the default option selected, which is Password, and click Continue:
Next, on the Proxy screen, if you are using a proxy to connect to the Internet, select the second option (Connect using a proxy) and enter the proxy settings. If you are not (I think this is the case of most people), leave the default option selected (Don’t use a proxy) and click Continue:

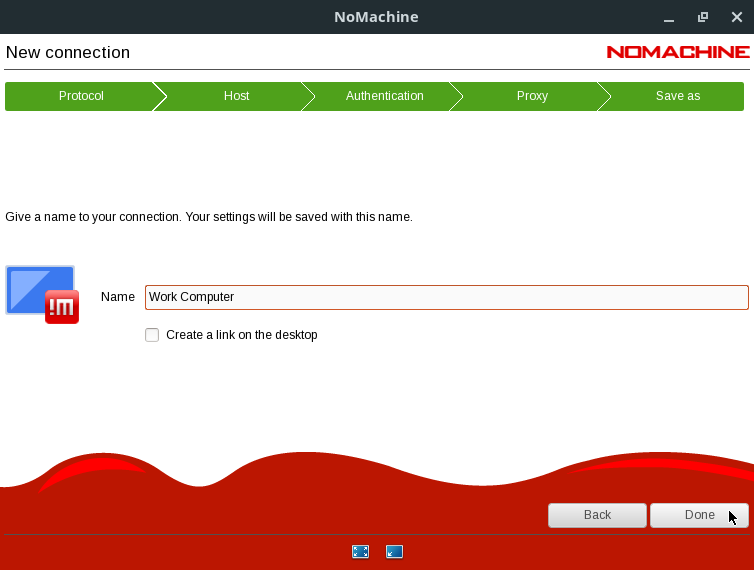
Finally, enter a name for this computer (e.g. Work Computer) and click Done:
Once the wizard is finished, this computer will appear on the NoMachine client main screen and you will be able to remotely access it by double-clicking it.
Configuring the firewall on the server
In the tests I did with Linux Kamarada, which brings the desktop-oriented firewalld as the default firewall, it was not necessary to do any additional firewall configuration for NoMachine to work on both the client and the server.
If you are having trouble connecting to the server, it should be enough to allow ports 4000/TCP and 4011-4999/UDP on the server.
If you use the iptables firewall on the server computer, to allow those ports, append these lines to your configuration script:
1
2
3
# NoMachine (ports 4000/TCP and 4011-4999/UDP)
iptables -A INPUT -p tcp --dport 4000 -j ACCEPT
iptables -A INPUT -p udp --match multiport --dports 4011:4999 -j ACCEPT
If you need more information about the ports used by NoMachine, take a look at:
Stopping and/or disabling the NoMachine service
If you always use a computer as a client, you can stop and/or disable the NoMachine service on that computer (you don’t need to, but you can do it).
For example, if you are using NoMachine for home office, and remote access is always from your home computer (client) to your work computer (server), never the other way around, you can disable the NoMachine service on your home computer.
If you want to stop the NoMachine service, click the NoMachine icon on the top bar, and then click Close the NoMachine application:
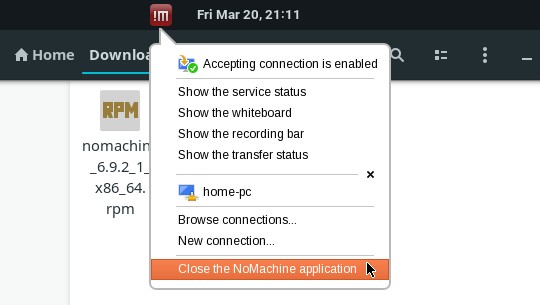
NoMachine asks whether to start the service the next time the computer is turned on. You are stopping the service. If you also want to disable it, answer No:

NoMachine asks you the administrator (root user) password, which you must provide to stop and/or disable the service.
Manually starting the NoMachine service
If you have stopped and/or disabled the NoMachine service, you can manually start it at any time. To do that, open the NoMachine Service app and click Start the server:
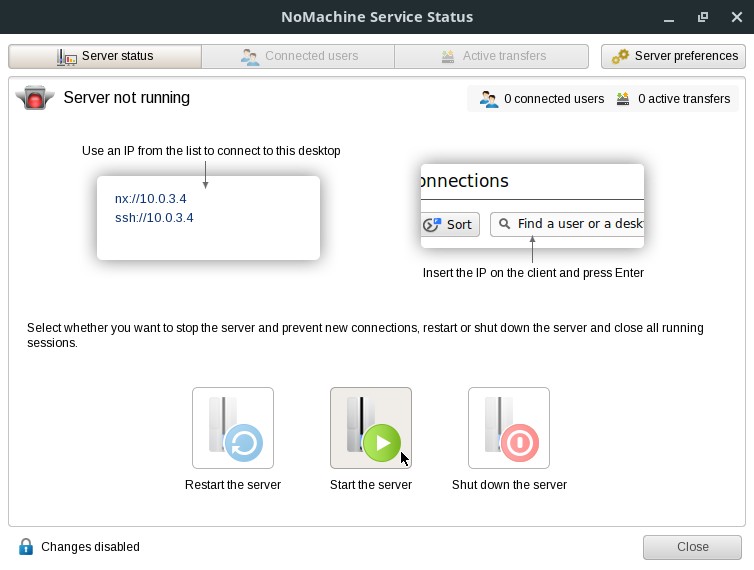
In the confirmation message, click Continue:
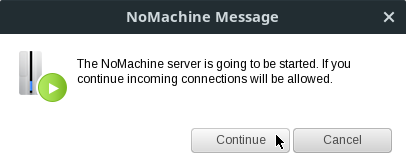
Provide the administrator (root user) password to start the service.
References
- NoMachine - Getting started with NoMachine
- Setup NoMachine NX On Ubuntu - Vultr.com
- NoMachine - Default ports used by NoMachine 4 or later
- NoMachine - How to shutdown NoMachine and disable the automatic startup at boot time
That’s it, guys! I hope that this text can help you in your remote accesses. NoMachine is quite easy to use and features an intuitive interface. But if doubts arise, you can leave comments.
See you!


