Did you know that you can install Windows and Linux using the same USB stick, without having to format it twice? Also, you can use the same USB stick to test live images of many Linux distributions, without having to format it again and again. Indeed, there are several tools to create bootable USB drives (good ones include Rufus for Windows, SUSE Studio Imagewriter and dd for Linux), but none of them is easier to use than the fairly new Ventoy.
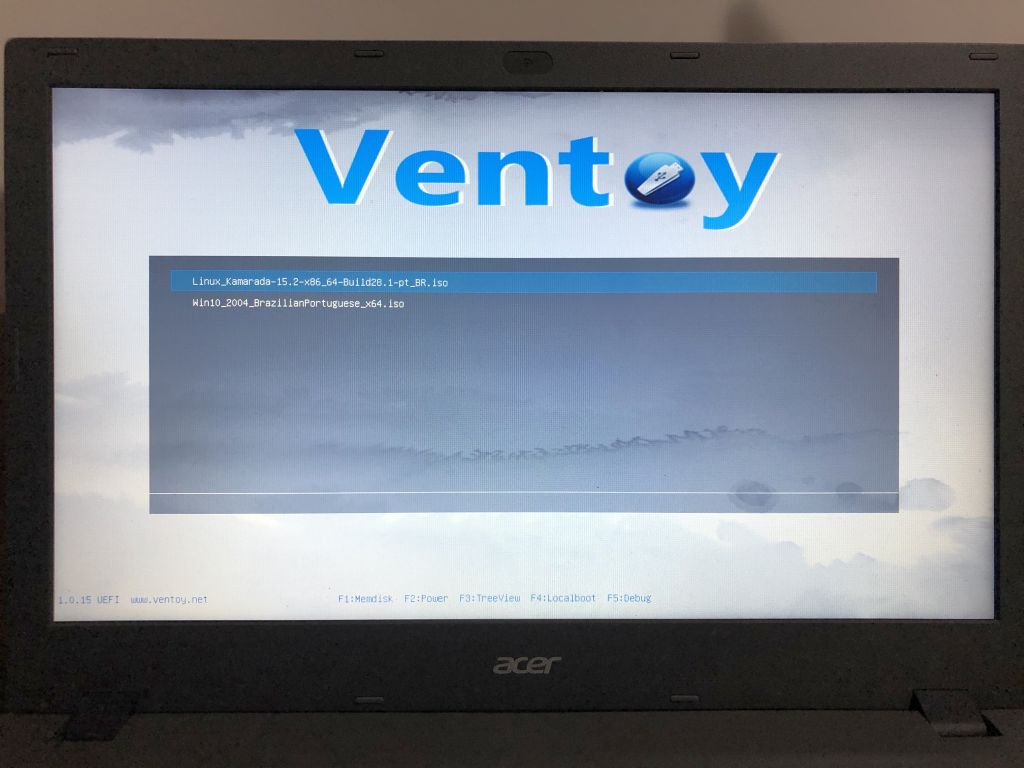
Ventoy is a free software tool to create bootable USB drives with ISO images. You format a USB drive and install Ventoy to it just once. Thereafter, you can simply copy some ISO files to the USB drive and boot from it. Ventoy presents a GRUB menu listing the ISO images present on the USB drive, from where you can choose which one to boot and start using it right away.
Ventoy supports legacy BIOS and UEFI (with and without secure boot), MBR and GPT partition tables, which makes it kind of universal.
Commonly, tools to create bootable USB drives extract the ISO image contents to the drive, allowing just one ISO image to be used at a time. That way, you need to reformat the drive every time you want to boot another ISO image. Besides that, tools usually prevent the drive from being used for other purposes (it’s not possible to copy other files). With Ventoy, you don’t need to format the drive again and again: you can copy and delete ISO images as you wish. You can also copy other files to drive, so you can continue to use it for other purposes.
You can find Ventoy very handy if you work on formatting and repairing computers, or if you like to try out different Linux distros. I myself started using Ventoy on the recommendation of a friend. I have been using it to test Linux Kamarada 15.2 Beta. Ventoy was very useful for me last week, when I installed Windows and Linux on my new SSD Kingston A400, which I received from warranty after the previous one suffered from the SATAFIRM S11 bug.
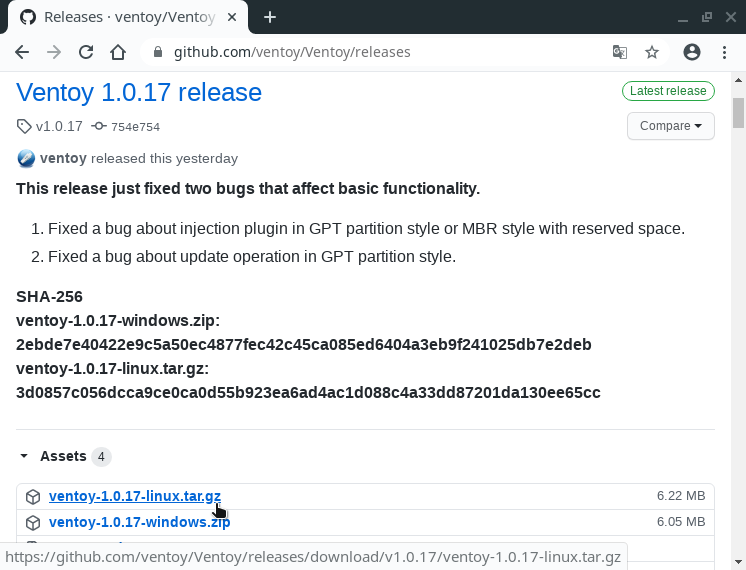
The first release of Ventoy (1.0.0) was made available on April 5th. The latest release (1.0.17) is just 4 days old, from July 25th. For future reference, to write this text I use this version.
What do I need to use Ventoy?
To use Ventoy, you need a USB drive (be it a USB stick, an external hard drive, a memory card, etc.) that is large enough to hold the ISO images you are going to use. For instance, the Linux Kamarada 15.1 ISO image is 1.5GB. If you are going to use just that image, you need at least a 2GB drive. The Windows 10 version 2004 ISO image is 4.9GB. To use both images, you need at least an 8GB drive, and so on.
In addition, you need a Windows or Linux PC to prepare the USB drive.
Before proceeding, please note that the USB drive will be formatted by Ventoy, so the data on the USB drive will be lost! If you want to keep the data on it, here's what you can do: copy the data to another location (e.g. to the computer), install Ventoy on the USB drive, then move the data back to the USB drive.
It is also recommended that you remove any other storage devices connected to your computer (such as other USB sticks, external hard drives, memory cards, etc.) to prevent them from being formatted by mistake.
No more talking, let’s see how to install and use this powerful tool!
How to install Ventoy to the USB drive
Start by downloading Ventoy for your operating system from the Ventoy releases page on GitHub:
Below are instructions on how to install Ventoy to the USB drive depending on the operating system you use.
How to install Ventoy using Windows
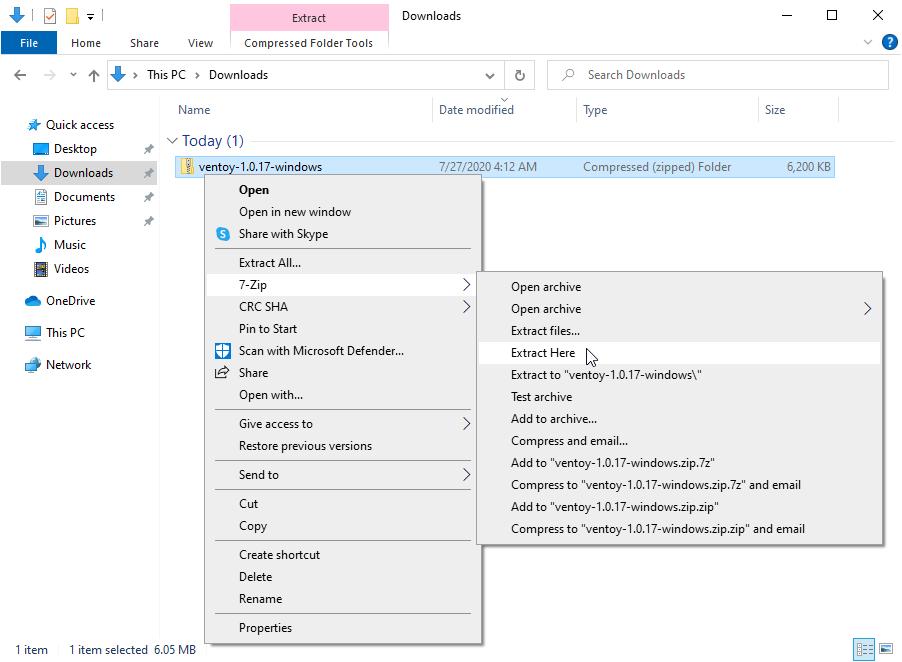
Download the .zip file corresponding to Ventoy for Windows.
When the download is complete, extract the contents of the archive. To do this, you can use the wizard that comes with Windows itself or a program such as 7-Zip:
Enter the extracted folder and launch the Ventoy2Disk executable by double-clicking it:

Optionally, you can translate the Ventoy interface to your language by opening the Language menu and selecting the desired language:
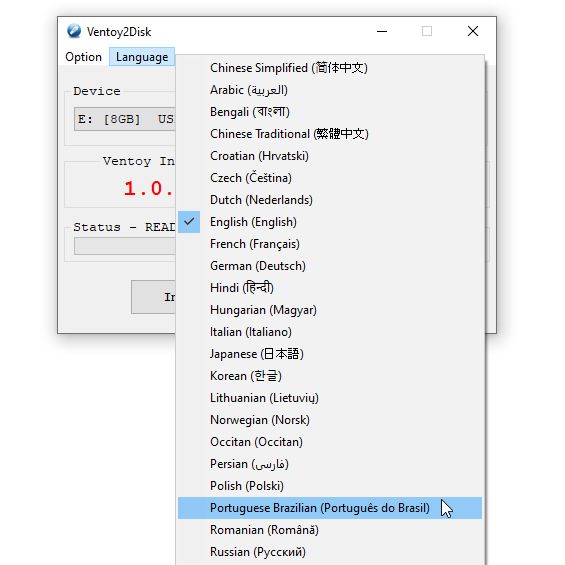
To this tutorial, I’m going to stay with the default language, which is English (English).
Select the USB drive from the Device list and click Install:
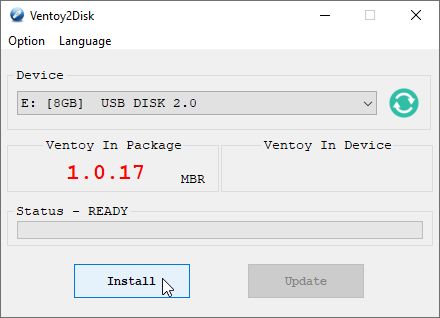
Ventoy warns you of the risk of data loss (what I said before). Click Yes:

Double check you are formatting the right device and click Yes:

After a few seconds or minutes, Ventoy finishes installing itself to the USB drive:

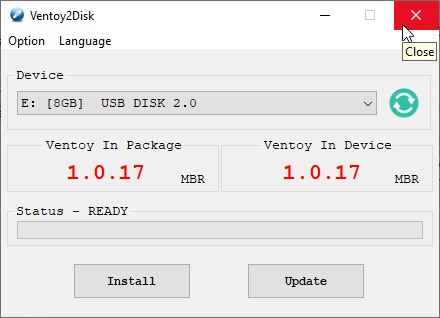
You can click OK to dismiss that dialog box and close the Ventoy window. Before closing, observe that the program now informs you which Ventoy version is installed on the device:
Now that your USB drive is ready, copy the ISO images you are going to use onto it:
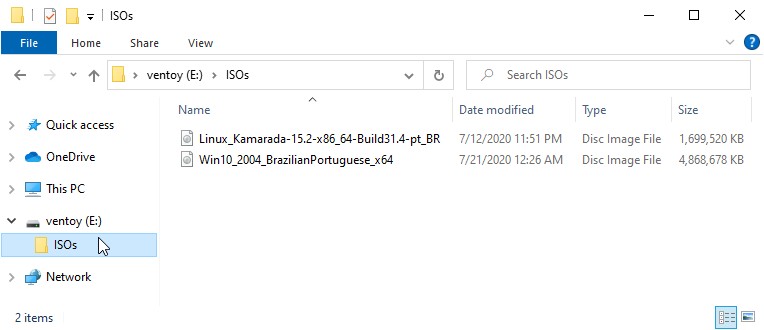
Note that you can organize them inside a folder, to keep them separated from other files on the USB drive. During boot, Ventoy searches all the directories and subdirectories recursively to find all the ISO files inside the USB drive.
How to install Ventoy using Linux
To show how to install Ventoy using Linux, I’m going to use Linux Kamarada 15.1.
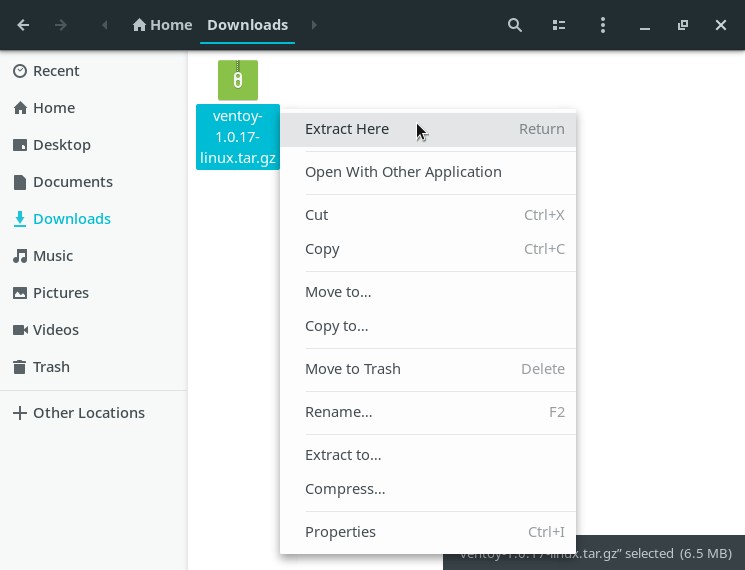
Download the .tar.gz file corresponding to Ventoy for Linux.
When the download is complete, extract the contents of the archive:
Enter the extracted folder and you will find the Ventoy2Disk.sh script:
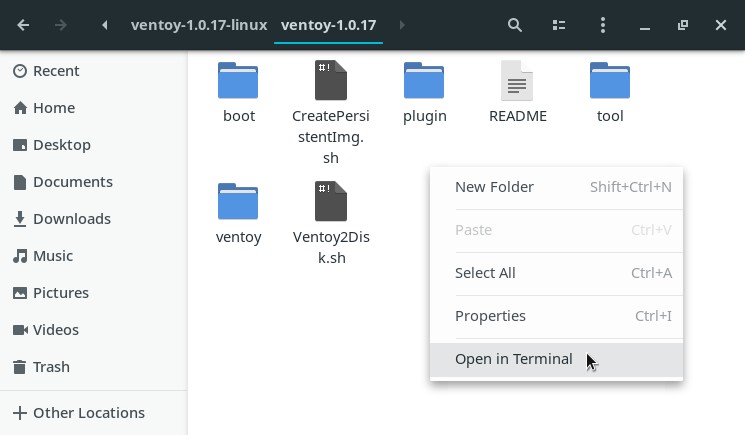
Open a terminal window from within this folder.
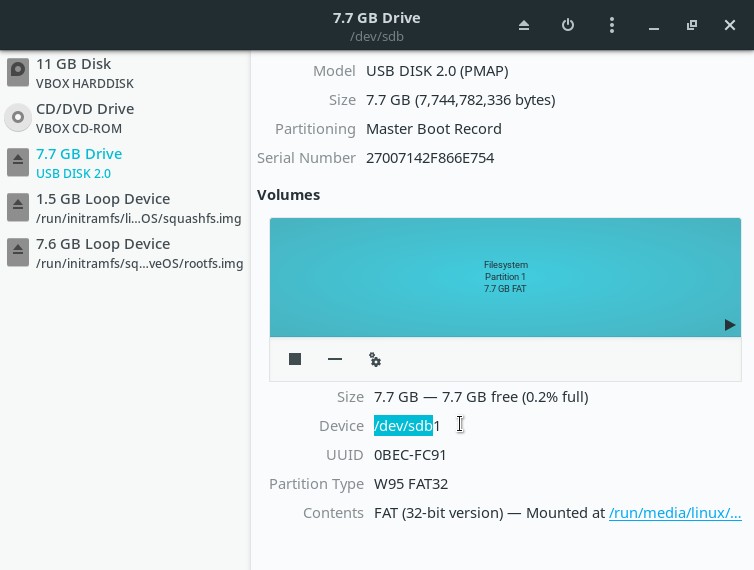
Before proceeding, you need to find out the device name of your USB drive. To do this, you can use the Disks app:
Or the fdisk command line utility:
1
2
3
4
5
6
7
8
9
10
11
12
13
14
# fdisk -l

[...]

Disk /dev/sdb: 7.2 GiB, 7744782336 bytes, 15126528 sectors
Disk model: USB DISK 2.0
Units: sectors of 1 * 512 = 512 bytes
Sector size (logical/physical): 512 bytes / 512 bytes
I/O size (minimum/optimal): 512 bytes / 512 bytes
Disklabel type: dos
Disk identifier: 0x789ef007

Device     Boot Start      End  Sectors  Size Id Type
/dev/sdb1        2048 15126527 15124480  7.2G  b W95 FAT32
In my case, the USB drive name is /dev/sdb.
Be sure to correctly identify the USB drive, as well as correctly type its name next, so as not to format another device by mistake.
We are ready to install Ventoy to the USB drive. Run the Ventoy2Disk.sh script as the administrator user (root), informing the device name as argument:
1
2
3
4
5
6
7
8
9
10
11
12
13
14
15
16
17
18
# sh Ventoy2Disk.sh -i /dev/sdb

***********************************************************
*                Ventoy2Disk Script                       *
*             longpanda  admin@ventoy.net                 *
***********************************************************

Disk : /dev/sdb
Modelo:  USB DISK 2.0 (scsi)
Size : 7 GB
Style: MBR


Attention:
You will install Ventoy to /dev/sdb.
All the data on the disk /dev/sdb will be lost!!!

Continue? (y/n)
Ventoy warns you of the risk of data loss and asks if you want to continue.
Type y (from yes) and then hit Enter:
1
2
3
4
Continue? (y/n)y

All the data on the disk /dev/sdb will be lost!!!
Double-check. Continue? (y/n)
Ventoy warns you once more (think twice). Again, type y and hit Enter:
1
2
3
4
5
6
7
8
9
10
11
12
13
14
15
16
17
18
19
Double-check. Continue? (y/n)y

Create partitions on /dev/sdb by parted in MBR style ...
Done
mkfs on disk partitions ...
create efi fat fs /dev/sdb2 ...
mkfs.fat 4.1 (2017-01-24)
success
mkexfatfs 1.3.0
Creating... done.
Flushing... done.
File system created successfully.
writing data to disk ...
sync data ...
esp partition processing ...
umount: /home/linux/Downloads/ventoy-1.0.17-linux/ventoy-1.0.17/tmp_mnt: target is busy.
rm: cannot remove './tmp_mnt': Device or resource busy

Install Ventoy to /dev/sdb successfully finished.
After a few seconds or minutes, Ventoy finishes installing itself to the USB drive.
Using Linux Kamarada 15.1, an error message was displayed, as you can see above. This is because Ventoy formats the USB drive with the exFAT file system, and support for that file system is not installed out-of-the-box on Linux Kamarada 15.1.
In case you see that error message on Linux Kamarada 15.1, openSUSE Leap, or another Linux distribution based on openSUSE, install the exFAT support with:
1
# zypper in fuse-exfat
Linux Kamarada 15.2 will come with native support for the exFAT file system.
Now that your USB drive is ready, copy the ISO images you are going to use onto it:
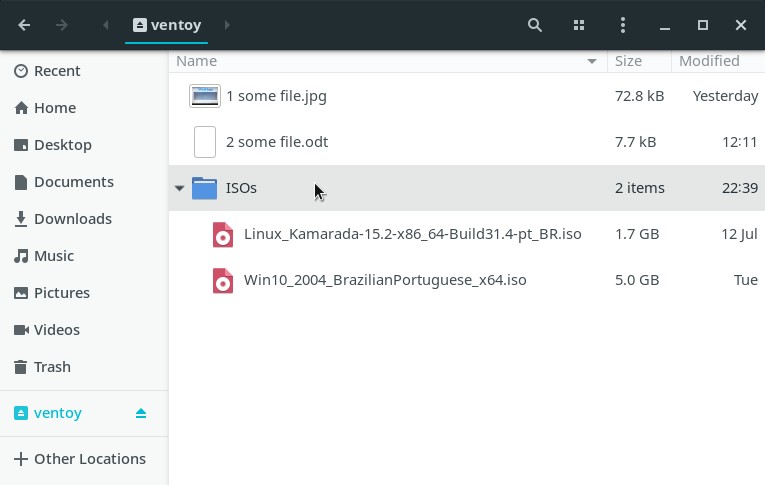
Note that you can organize them inside a folder, to keep them separated from other files on the USB drive. During boot, Ventoy searches all the directories and subdirectories recursively to find all the ISO files inside the USB drive.
Using the USB drive with Ventoy
After installing Ventoy to the USB drive and copying ISO images onto it, it’s time to use it: reboot your computer with the USB drive plugged in. Ventoy will list the ISO images on the USB drive in a menu, similar to the one presented on the first photo in this text. Select the desired ISO image and hit Enter to boot the system it contains.


