Continuing our series of posts about how to make an openSUSE-based distro, today I’ll show you how to create and build an RPM package on the Open Build Service (OBS). Remember that I use the openSUSE Build Service (build.opensuse.org), which is the free and public OBS reference server.
Actually, we already created a package in the first post, but I “put the cart before the horse” and explained how to create a package using the combination of Git and OBS. Remember that I said that OBS could be used for the entire process of storing and managing source code, but also building and packaging. In other words, OBS is not only a building tool, it also has its own version control system. Today you are going to see how a package can be born on OBS alone.
If you haven’t read the previous post yet, I recommend you start with it:
For what we are going to do today, ideally we should already have some basic knowledge about RPM packaging with rpmbuild, which you can acquire by reading the Fedora RPM Guide and other references. But I will try to show a hands-on view of how to build RPM packages with OBS. If you have any questions, you can comment or consult the references at the end of the text. In addition to the openSUSE documentation, I usually also consult the Fedora documentation, because it is another Linux distribution that uses the RPM package management system.
By the way, Fedora is the community version of Red Hat Enterprise Linux (just as openSUSE is the community version of SUSE Linux Enterprise) and Red Hat is the “mother” of RPM. (have you seen what the acronym RPM stands for?) Therefore, the Fedora documentation is a valuable source of information about RPM.
What are we going to package?
Among the packages I usually build for Linux Kamarada, I selected a package with a short spec file that clearly illustrates the minimum that should come in this file. Therefore, we are going to recreate the sound-theme-materia package for the next 15.6 release.
This package allows easily installing on openSUSE Leap and Linux Kamarada the Materia sound theme (actually, on Linux Kamarada, it comes already installed out of the box). This sound theme perfectly combines with the Orchis GTK theme. Both aim to bring Google’s Material Design (Android’s design) experience to the GNOME desktop and other desktops based on the GTK library.
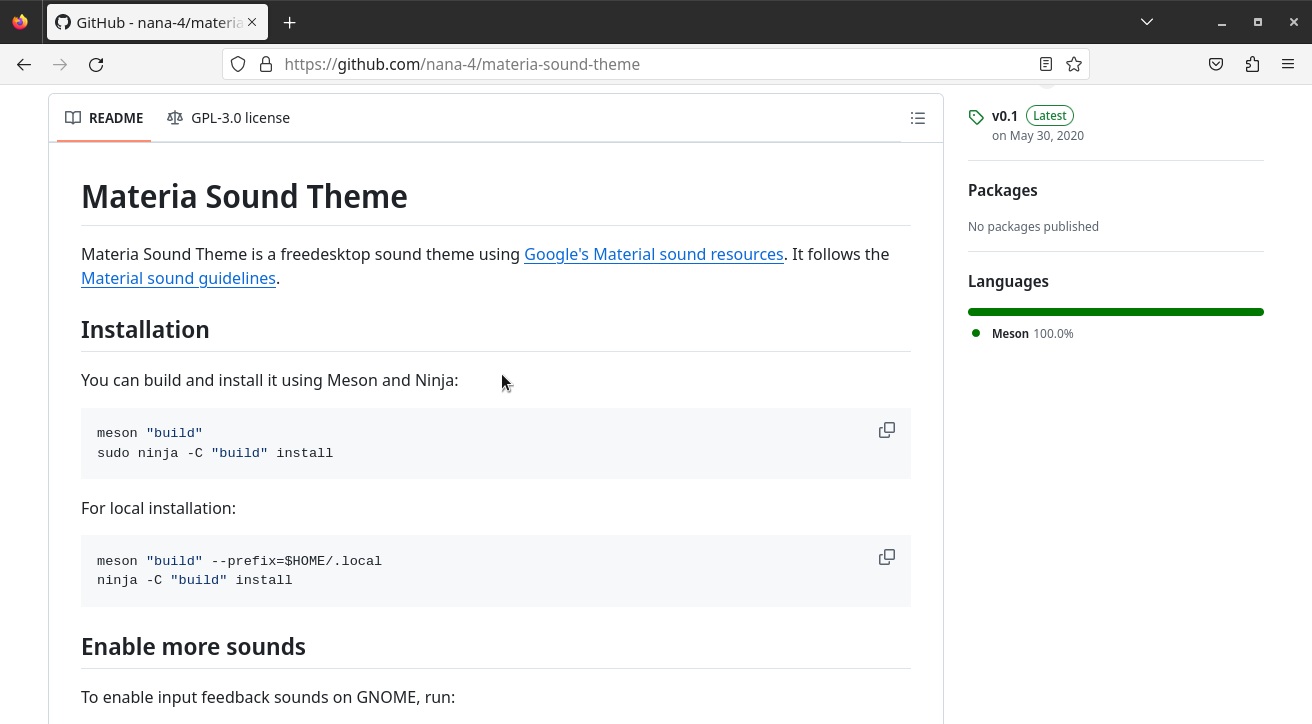
The source code for the Materia sound theme, as well as instructions for installing it from that source, are available on GitHub:
Before actually creating the RPM package, it is usually a good idea to try to compile and install the software on your own computer or a virtual machine, either to figure out its dependencies or to familiarize yourself with the process of compiling and installing it.
Although the developers named the original repository as materia-sound-theme, and it’s usually a good idea to name the package the same (actually, you can name the package whatever you want), I chose to name the package as sound-theme-materia to follow a pattern I’ve noticed on openSUSE. Here’s how other sound theme packages are named: sound-theme-freedesktop, sound-theme-yaru…
Creating the package on OBS
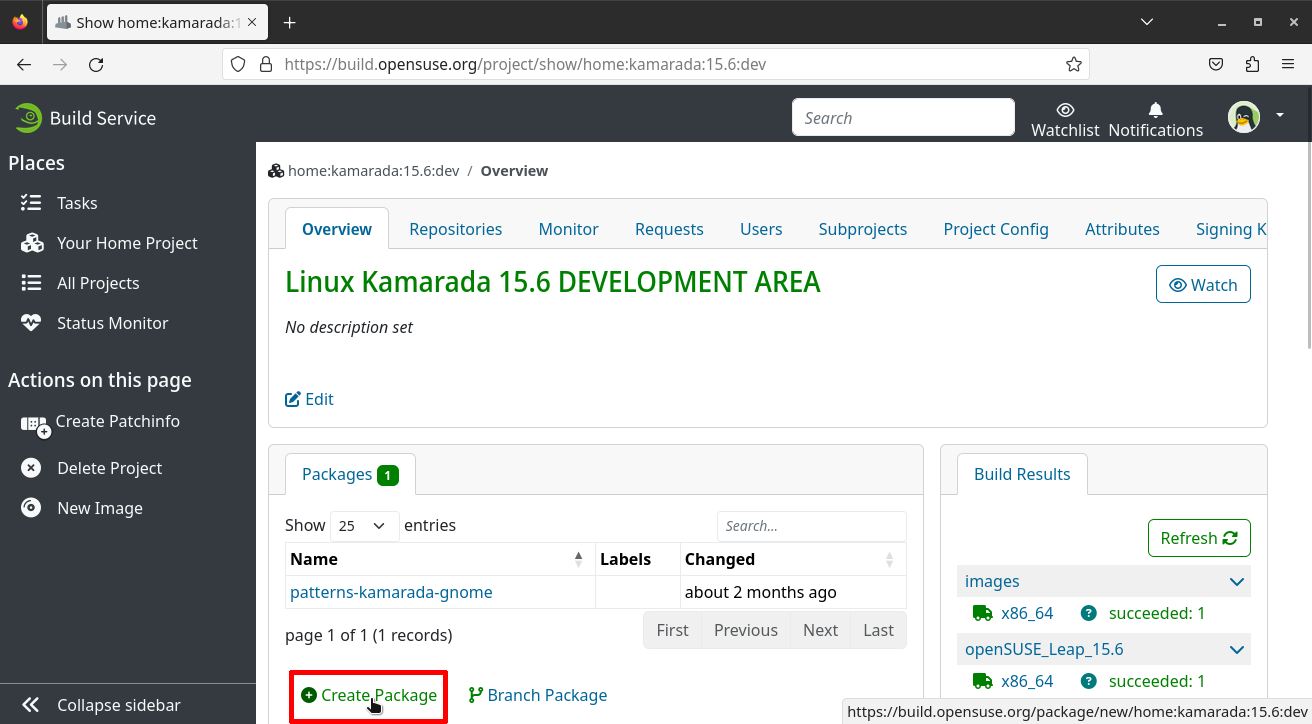
Once logged into OBS, access the project where you want to create the package (in my case, the distribution’s development project, home:kamarada:15.6:dev).
Switch to the Overview tab and click Create Package:
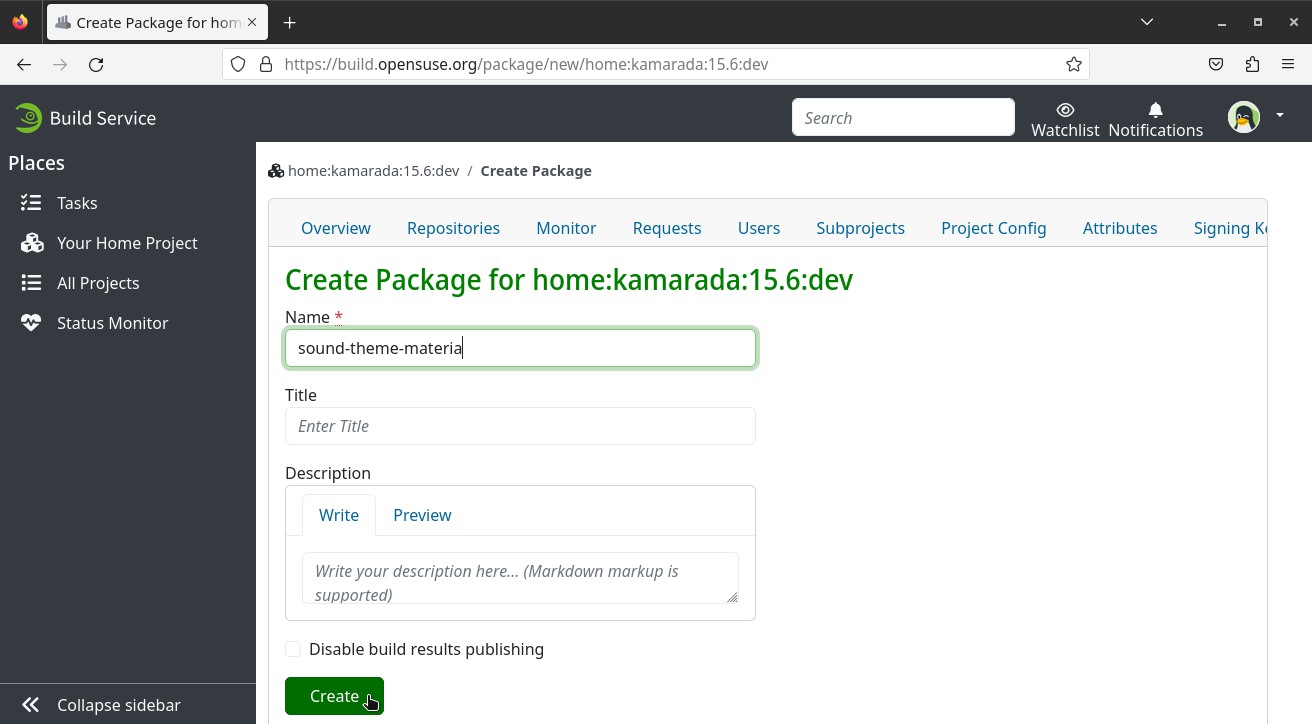
Give at least a Name to the package (in my case, sound-theme-materia) and click Create:
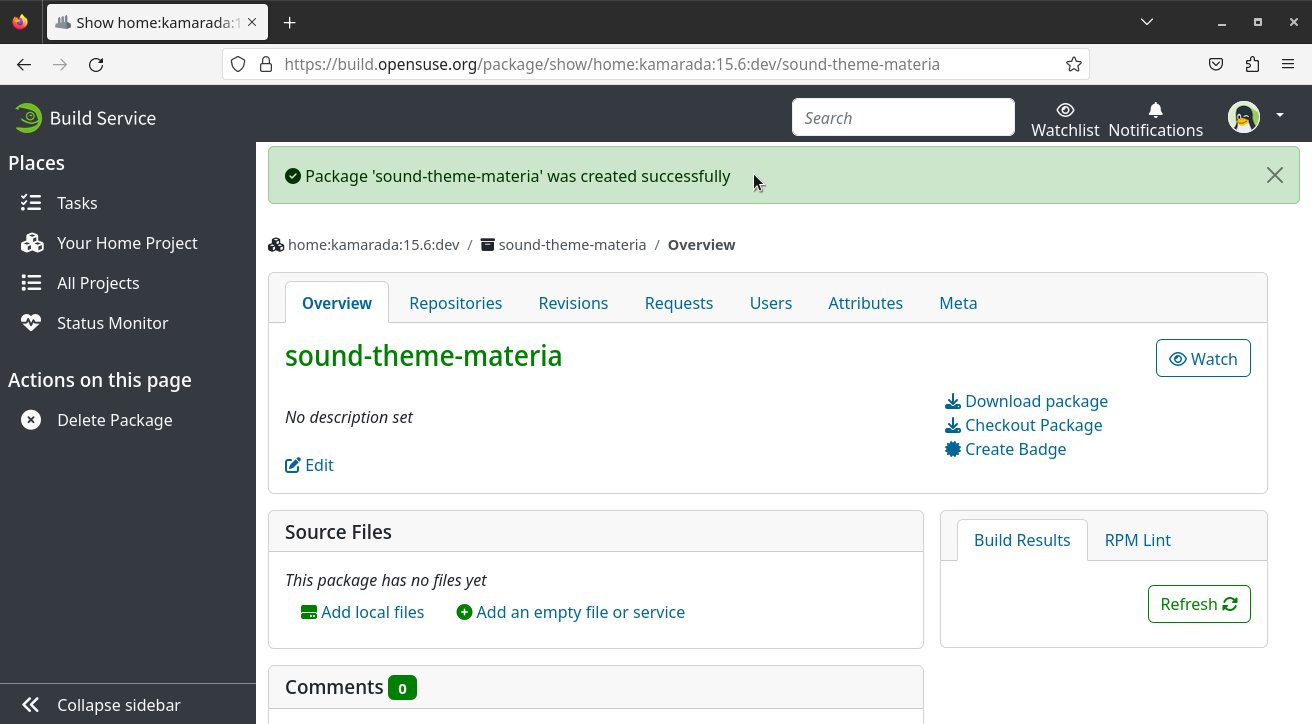
The package is created on OBS. For now, it has no files:
Checking out the package
Once the package has been created on OBS, we could work on it using just the OBS web interface. But let’s check it out to our computer to work on it locally (similar to cloning a Git repository).
As we saw in the previous post, we can checkout (create a local copy of) the entire project, if we haven’t done so already:
1
$ osc checkout home:kamarada:15.6:dev
If we already have a local copy of the project (and that is the case), to download this new package we have two options.
One way is to change to the project folder and check out just the package:
1
2
$ cd home:kamarada:15.6:dev
$ osc co sound-theme-materia
(you can abbreviate osc’s checkout option as just co)
The other is to change to the project folder and update the local copy, which will download not only the new package, but also any changes made to other packages that have not yet been synced to the local copy:
1
2
$ cd home:kamarada:15.6:dev
$ osc up
(here you can also use update or the abbreviation up)
Whichever option you choose, then change to the package folder:
1
$ cd sound-theme-materia
Downloading source code from upstream
In software development, we call the original authors or maintainers of software the upstream. You may already know this if you are used to fork Git repos.
For example, it may happen that the openSUSE Project identifies a bug on LibreOffice and fixes it first on its package, and then sends the fix to the upstream (the LibreOffice Project). Or – which I believe is more common – the bug is fixed first on the upstream and then the package is updated by the distribution. Either way, when the fix is released by the upstream, all distributions that package that software benefit from it, and everyone wins.
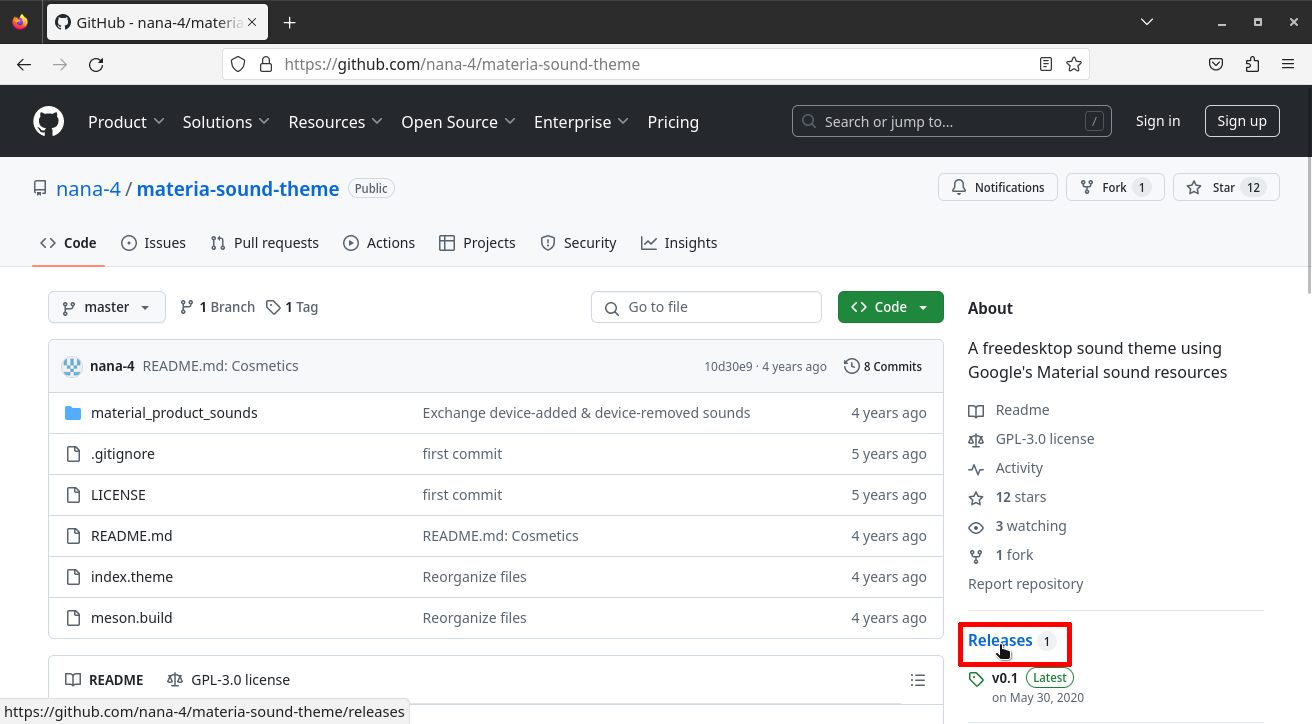
Back to our package… as I said, its source code is hosted on GitHub. So let’s go to the project page on GitHub and click Releases:
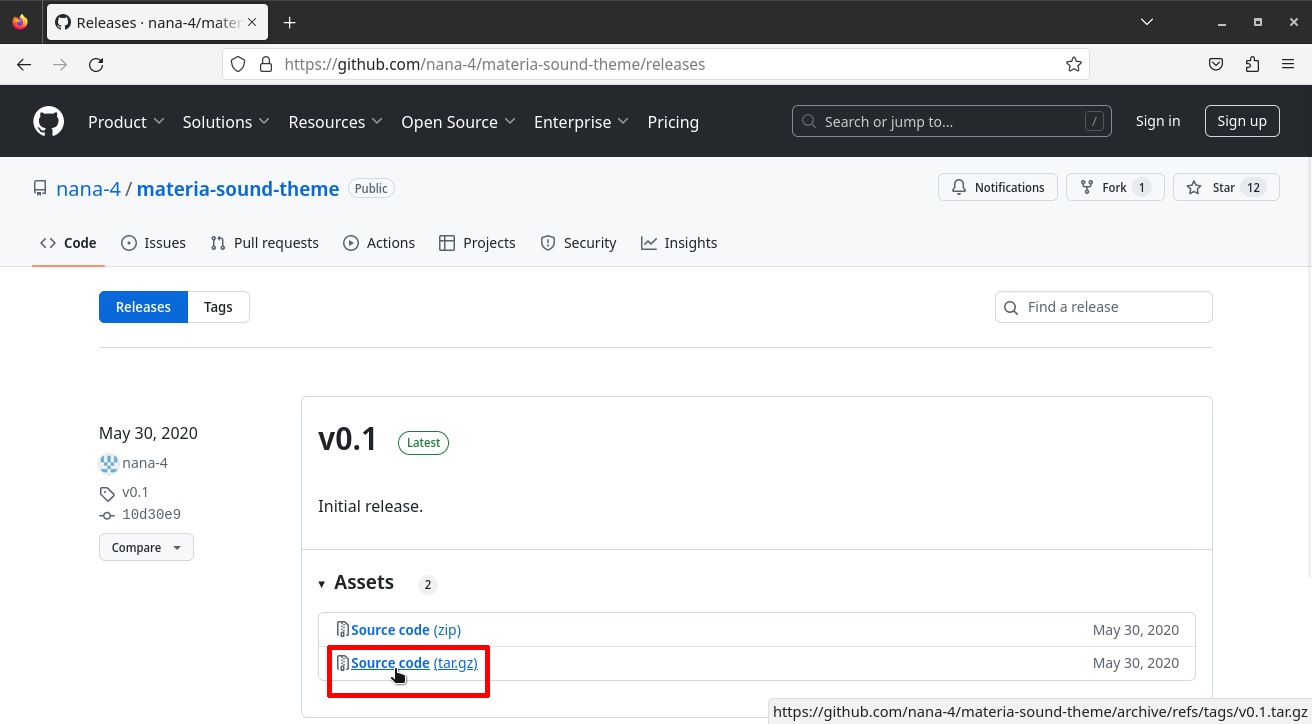
There has been only one version released, the v0.1. Download the source code for this version by clicking the Source code link (always prefer the .tar.gz format, as it is more Linux-friendly):
When the download finishes, move the file materia-sound-theme-0.1.tar.gz to the package folder.
Writing the spec file
The spec file (short for specification file) contains information about the package (such as name, description, version, author, website, license, etc.), the commands needed to compile and install it, its list of files, changelog, and possibly other information.
Every RPM package has a corresponding spec file. The spec file is a text file and is usually named after the package name.
For our sound-theme-materia package, let’s create an empty text file called sound-theme-materia.spec:
1
$ touch sound-theme-materia.spec
Open this file with your preferred text editor. This can be the default GNOME text editor (Gedit), or, if you’re a badass and prefer to edit the file using the terminal, nano, joe or vim. Linux Kamarada comes with these four options out of the box.
As we will see, the spec file has its own syntax, which must be followed so that its information can be understood by RPM, OBS and other programs.
Introductory section of the spec file
Start by copying and pasting to the spec file its introductory section:
1
2
3
4
5
6
7
8
9
10
11
12
Name:           sound-theme-materia
Version:        0.1
Release:        0
Summary:        Materia Sound Theme
License:        GPL-3.0
Group:          System/Libraries
Url:            https://github.com/nana-4/materia-sound-theme
Source:         https://github.com/nana-4/materia-sound-theme/archive/v%{version}.tar.gz#/materia-sound-theme-%{version}.tar.gz
BuildRequires:  fdupes
BuildRequires:  meson
BuildRequires:  ninja
BuildArch:      noarch
This section contains general information about the package. I explain each line below.
- Name: the name of the package. It should not contain spaces or other whitespace characters such as tabs or newlines. Use valid characters for file names. I suggest not getting too creative here. Think about who is going to type a command like this to install your package:
1
# zypper in sound-theme-materia
You can also search how similar packages are named for the distribution and name yours accordingly. I did it like this in this example. (sound-theme-freedesktop, sound-theme-yaru…)
-
Version: version of the package, preferably in the format of dotted numbers (x.y.z). Here we use the version provided by the upstream (
0.1). Keep in mind that this version number will be used by the system to compare the installed version with the version available in the repository, to determine whether the package should be updated. In our example, the next version of this package could be0.1.1or0.2, but not0.0.1. Look for information about semantic versioning. -
Release: it is a kind of version of the package itself. If this number has changed, but the version number has remained the same, it indicates that the package has changed, even if the packaged program has not. A good practice is to start at
0or1and increment this number each time you modify the spec file. So, for example, we are now creating release 0 of version 0.1. Let’s suppose that I released the package, but later I noticed a typo in the spec file. So I fix this typo, increment the release to 1 and publish the update. -
Summary: a one-line short description of the package. You should not exceed much more than 50 characters.
-
License: the software license. This information must also be obtained from upstream. The license should be declared using SPDX shortname format. Examples:
GPL-3.0,MIT,LGPL-2.1-or-later,GPL-2.0+,GPL-2.0-only,Apache-2.0, etc. -
Group: group to which the package belongs. Provides a classification for packages. Examples:
System/Libraries,Productivity/Office/Suite,Hardware/Printing, see more here and here. It is worth noting that this field is not mandatory, but actually deprecated. The Fedora documentation explicitly advises against its use. If you want to use it (for now, I have been using it), it is preferable to provide a group name listed in one of the mentioned links. -
Url: the official website of the package or a page where you can get more information about it. For example, the
Urlfor the chromium package ishttps://www.chromium.org/. In the case of the package I’m creating, since it doesn’t seem to have an official website, I provided the project’s GitHub page. -
Source: most packages have one or more files of source code, which you need to list in the spec file. Often (and this is the case here), there is a
.tar.gzarchive that contains the source code files. If the archive was downloaded from the Internet, you should provide the download link. This is for documentation and convenience only; the archive will not be downloaded when you build the package. We have already downloaded this archive before.
If you need to reference more than one source file, use a Source tag for each file, numbering all tags from zero: Source0, Source1, Source2… This is useful for separating code provided by upstream, which should be kept intact, as it came, and customizations made by the distribution, which can be listed as patches.
It is also common for the file to be fetched from a version control system such as Git (and that is also the case here). In these cases, the URLs for some services have well known patterns, and there are URL templates that you can reuse in the Fedora documentation.
It’s a good opportunity to talk about RPM macros, which can be understood as variables, functions and in some cases even scripts provided by the RPM packaging system to facilitate writing the spec file and make it more readable. Here we use the %{version} macro, which will be replaced by the package version, declared in Version.
You can consult lists of predefined macros, as well as how to define your own macros, at the following links:
- openSUSE:Packaging Conventions RPM Macros - openSUSE Wiki
- RPM Macros - Fedora Packaging Guidelines
- 9.7. Defining Spec File Macros - Fedora RPM Guide
- BuildRequires: dependency to build the package. Commonly, you need other programs to be previously installed on the system in order to compile the program’s source code. This information is provided by upstream, usually in the compilation instructions. In this example, we need the fdupes, meson and ninja packages to compile the sound theme. You can list all dependencies on a single line, separated by spaces or commas, or you can use one line for each dependency (which is more readable and also more common).
The sound theme we are packaging has no additional dependencies. But packages can also declare dependencies to run (Requires) and dependencies to install (PreReq), as well as other types of dependencies and/or conflicts with other packages (Conflicts). For more information, see the references at the end of this article.
- BuildArch: the target architecture of the package. If you are packaging files that are independent of the computer’s architecture (for example, shell scripts, data files, or sound themes, like this example), enter
noarch. Examples of common architectures include:i586,i686,x86_64andaarch64.
If you don’t know your computer’s architecture, use the command uname -m to find out. For instance, on my laptop (64-bit PC), this command returns x86_64. On my Raspberry Pi 4, this command returns aarch64.
Note that the BuildArch field actually refers to the computer where the package will be installed, which does not necessarily have the same architecture as the computer where the package will be built. With OBS, you can, for example, use your PC to create a package that will be installed on a Raspberry Pi. In this case, you should use BuildArch: aarch64.
Remaining sections of the spec file
Below are the remaining sections of the spec file. Copy and paste the following snippets into your spec file.
1
2
3
%description
Materia Sound Theme is a freedesktop sound theme using Google's Material sound
resources. It follows the Material sound guidelines.
In the %description section, you should provide a longer description of the package. Here you can use one line or more, as many as necessary, but all lines must be no longer than 80 characters (think of it as a margin). Blank lines separate paragraphs.
1
2
%prep
%autosetup -n materia-sound-theme-%{version}
The %prep section, short for prepare, lists commands (as in a script) to prepare the package for building. The source code is usually compressed inside a .tar.gz archive which is extracted in this section. Patches can also be applied in this section, either to fix bugs in the program or to apply distribution customizations.
This example uses the %autosetup macro, which does both of these tasks: it unpacks the source code (in this case, only one .tar.gz file) and applies any patches (in this case, none). The -n option specifies the folder that is created when the contents of the compressed file are extracted. Other common macros in the %prep section are %setup e %patch.
1
2
3
%build
%meson
%meson_build
The %build section lists commands (as in script too) to build the software, i.e. make it ready for installation. In this section, are common the %configure macro and the make command.
In this example, the %meson and %meson_build macros are used, related to the Meson build system, which is used to compile the sound theme we are packaging.
1
2
3
%install
%meson_install
%fdupes %{buildroot}%{_datadir}/sounds/
The %install section lists commands (as in script too) to install the software. These commands are executed on the packager’s computer, simulating the installation on the final user’s computer. Commonly this section is responsible for copying the compiled files from the compilation directory (represented by the %{_builddir} macro) to the directory that simulates the root of the computer where the package will be installed (%{buildroot}).
It is preferable, whenever possible, to use macros instead of fixed paths. For example, the %{_datadir} macro equals by default to the /usr/share path. For a list of path macros, see the RPM Macros page in the Fedora documentation.
In our example spec file, the %fdupes macro appears. It is relatively common and is used to replace any duplicate files with symbolic links.
1
2
3
%files
%defattr(-,root,root)
%{_datadir}/sounds/*
The %files section lists the files to go into the package, one file per line. You can use the wildcard character (*) to refer to multiple files. In addition to file paths, you can also provide paths to folders, declaring that all of those folders contents belong to the package.
1
%changelog
The %changelog section would normally list a package’s change history. But Open Build Service requires us to declare this section but leave it blank, and store the change history in a separate file, which is what we’ll look at next.
We’ve finished looking at the example spec file. Here, I’ve focused on what’s necessary to understand this example spec file, but there’s a lot more that can go into a spec file. For more information, see the references at the end of the article.
Writing the changes file
Each time you make changes to a package, you should add an entry to the change log describing the change. This is important not only to give you an idea of the package’s history, but also to allow users, other packagers, and testers to easily identify the changes you have made.
Open Build Service uses a separate file for the change log. This file has the same name as the spec file, but the extension is .changes instead of .spec.
To add a change log entry, run:
1
$ osc vc
(the changes file will be created, if it does not exist already)
The default text editor is used to open the changes file. The current date is suggested:
1
2
3
4
-------------------------------------------------------------------
Mon Nov  4 22:21:27 UTC 2024 - Antônio Vinícius Menezes Medeiros Medeiros <linuxkamarada@gmail.com>

-
Since I didn’t make any changes to this package for a while, instead of creating a new changes file, I’ll copy and paste the previous one. See the example:
1
2
3
4
-------------------------------------------------------------------
Sun Jul  5 01:25:41 UTC 2020 - Antônio Vinícius Menezes Medeiros Medeiros <linuxkamarada@gmail.com> - 0.1

- First packaging, initial release (v0.1)
For more information about the changes file, see:
Building the package locally
If the package is not for a different architecture than your computer, it may be a good idea to build the package before uploading it to OBS. This way, if something goes wrong, you can fix it before uploading. To build your package locally, run:
1
$ osc build
If there is ambiguity, it may be necessary to provide the distribution and architecture:
1
$ osc build openSUSE_Leap_15.6 x86_64
osc will need to download packages and asks if it can trust the repository:
1
2
3
4
5
6
7
8
9
Updating cache of required packages

The build root needs packages from project 'SUSE:SLE-15-SP3:Update'.
Note that malicious packages can compromise the build result or even your system.
Would you like to ...
0 - quit (default)
1 - always trust packages from 'SUSE:SLE-15-SP3:Update'
2 - trust packages just this time
?
Type 1 to always trust this repository and hit Enter.
Note that OBS (and osc) does not build the package directly on your system. It downloads all the necessary packages and creates a minimal chrooted Linux installation, then builds the package on that installation. By doing this, OBS ensures that the spec file is written correctly and that the package is not being built successfully just because it is on your computer. This ensures a reproducible build: the package can be built by anyone, on any computer, and the built package is always going to be the same.
When it finishes downloading the packages, osc will ask the root password to create the chroot environment and start building the package.
In the end, if everything goes well, you will have an output like this:
1
2
3
4
5
6
7
8
9
10
11
[   33s] RPMLINT report:
[   33s] ===============
[   33s] 2 packages and 0 specfiles checked; 0 errors, 0 warnings.
[   34s]
[   34s]
[   34s] kamarada-pc finished "build sound-theme-materia.spec" at Mon Nov  4 22:28:53 UTC 2024.
[   34s]

/var/tmp/build-root/openSUSE_Leap_15.6-x86_64/home/abuild/rpmbuild/SRPMS/sound-theme-materia-0.1-0.src.rpm

/var/tmp/build-root/openSUSE_Leap_15.6-x86_64/home/abuild/rpmbuild/RPMS/noarch/sound-theme-materia-0.1-0.noarch.rpm
The last lines indicate where you can find the source RPM package (.src.rpm) and the RPM package itself (.rpm). As a further test, you can install it on your computer or virtual machine (tip: to copy and paste in the terminal, use Ctrl + Shift + C and Ctrl + Shift + V):
1
$ sudo rpm -Uvh /var/tmp/build-root/openSUSE_Leap_15.6-x86_64/home/abuild/rpmbuild/RPMS/noarch/sound-theme-materia-0.1-0.noarch.rpm
Uploading the package to OBS
Once your package is how you want it, use the following commands to upload your work to OBS (if you’re already familiar with a version control system like Git, you’ll find the logic similar).
Check the folder status:
1
2
3
4
$ osc status
?    materia-sound-theme-0.1.tar.gz
?    sound-theme-materia.changes
?    sound-theme-materia.spec
In this case, none of the 3 files are in OBS version control. To add them, run:
1
2
3
4
$ osc add *
A    materia-sound-theme-0.1.tar.gz
A    sound-theme-materia.changes
A    sound-theme-materia.spec
Finally, to upload the changes to OBS, run:
1
$ osc commit
As with Git, the text editor opens for you to provide a commit message. The most recent change log entry is suggested. You can simply save the file and close the text editor.
1
2
3
4
5
Sending    materia-sound-theme-0.1.tar.gz
Sending    sound-theme-materia.changes
Sending    sound-theme-materia.spec
Transmitting file data ..
Committed revision 1.
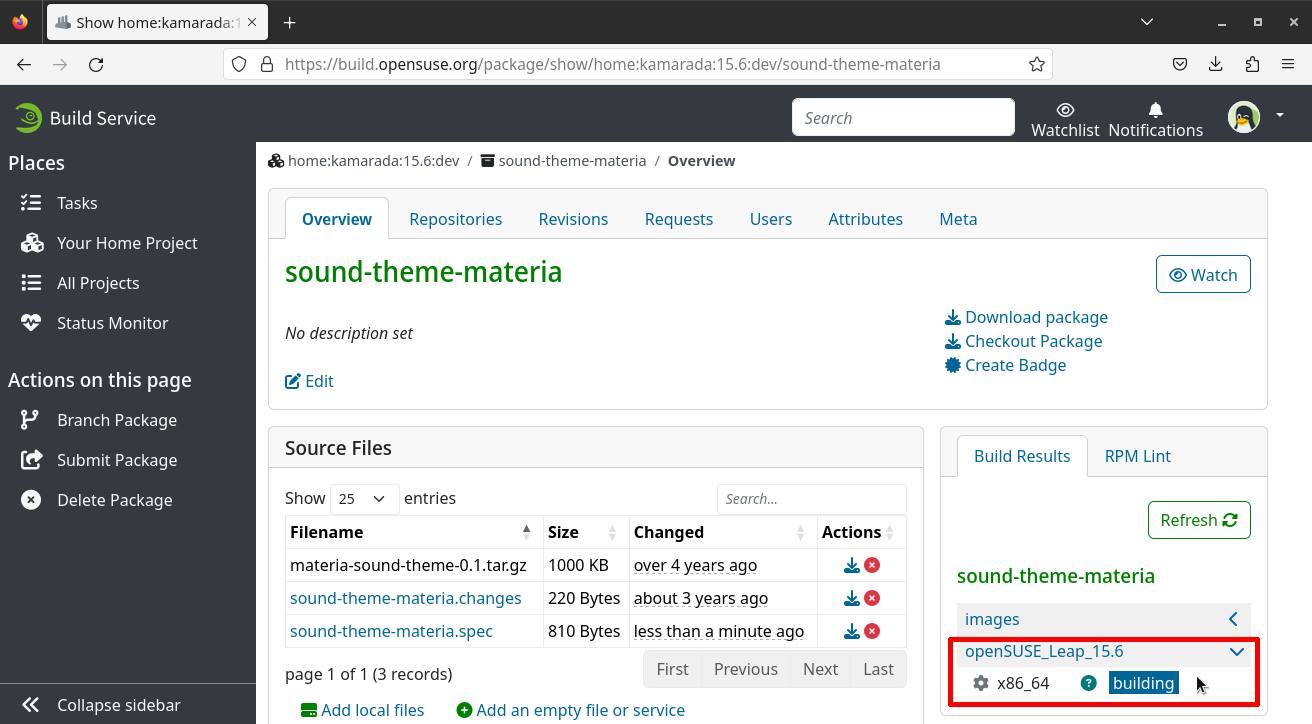
If you open your package page on OBS, you will see that it is being built:
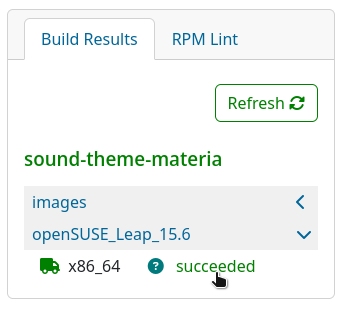
Since local building worked, it is likely that the remote building by OBS will also work:
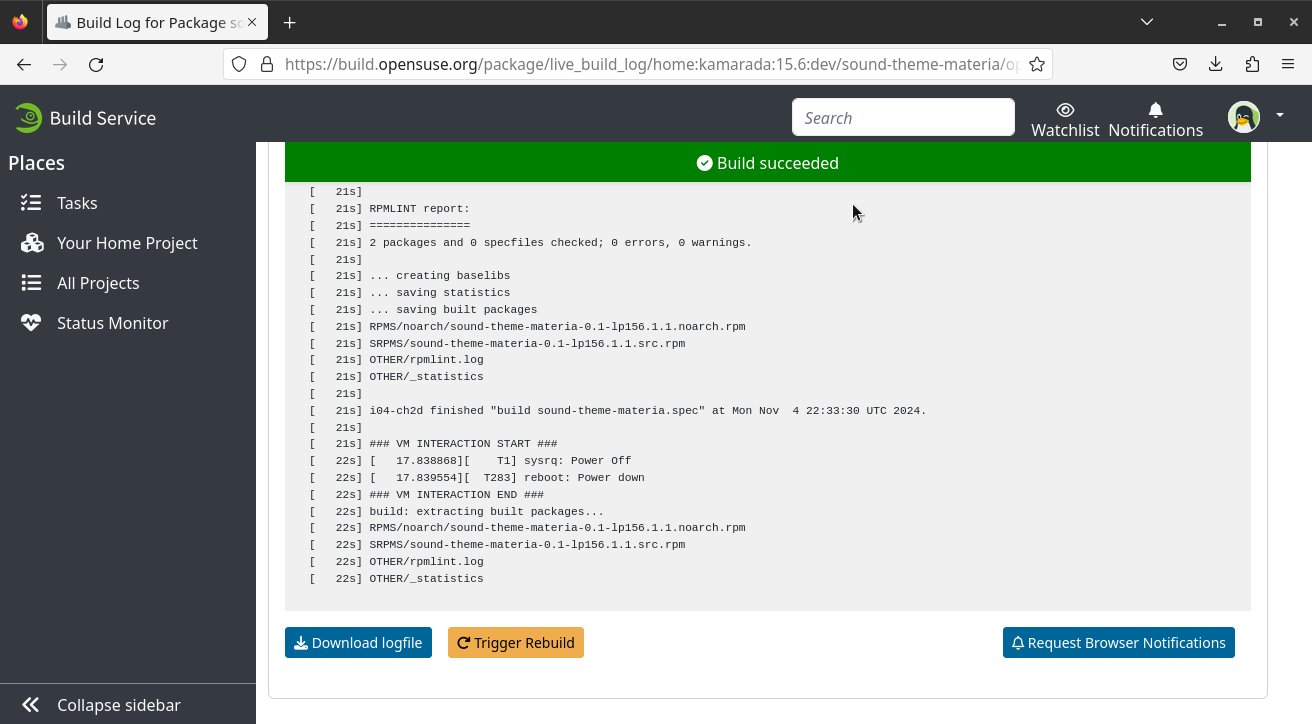
You can click the result (succeeded) to view the build log:
This log is useful when something goes wrong during building.
Back to the package page, you can use the Download package link to download the built RPM package to your computer.
Note that you can also find and install it from software.opensuse.org.
Conclusion
I hope this tutorial has helped you if you ever wondered how to build RPM packages with the aid of Open Build Service. Here, I showed a hands-on view using an existing RPM package as example, but I did not exhaust the subject. You can find more information about OBS and RPM in the following links.
