An emulator is a software that allows your computer to run software made for another device. A video game emulator allows your computer to run games made for that video game.
For years, there have been several emulators for various video games and they make the joy of the nostalgic, who want to play games of video games they own but don’t work anymore, or those who don’t have video games to play.
When I had my first contact with emulators, almost 20 years ago, I was using Windows and I needed to install an emulator for each video game I wanted to emulate, for example: to emulate Super Nintendo, I used Snes9x, to emulate Sega Genesis, I used Gens, and so on.
Is there an emulator for Linux capable of emulating all (or at least many) video games?
Today, yes, there is: we have RetroArch. Multi-platform free and open-source software, RetroArch is not actually an emulator, but an interface (frontend) for several emulators, a kind of emulation center, capable of running virtually every retro game imaginable. RetroArch interfaces with emulators through the libretro library (backend). Each emulator that libretro supports is encapsulated into what is called a libretro core.
The list of video games that RetroArch can emulate includes, but is not limited to:
- Atari 2600
- Nintendo Entertainment System (NES)
- Sega Genesis, also known as Mega Drive
- Game Boy, Game Boy Color (GBC), Game Boy Advance (GBA)
- Super Nintendo Entertainment System (SNES)
- PlayStation (PS, PS1, PSX), PlayStation 2 (PS2), PlayStation Portable (PSP)
- Nintendo 64 (N64)
- GameCube
- Nintendo DS
- Nintendo Wii
Did you like it? Then read on to see how to install and use RetroArch on Linux Kamarada and openSUSE.
Where to download games (ROMs)
Files that contain games are commonly called ROMs.
For cartridge-based video games, such as the Super Nintendo and the Sega Genesis, their ROMs are files that contain the contents dumped from the cartridges.
RetroArch does not come with ROMs. Also there are no ROMs to download here on the Linux Kamarada website. You can search for ROMs on web search engines like Google.
For example, try searching for sega genesis roms.
Tip: if you download a ROM compressed as a ZIP archive, you don’t need to unzip it, RetroArch can open it as is.
Installing RetroArch
There are two different methods for installing RetroArch on openSUSE: from the graphical interface using 1-Click Install or from the terminal using the zypper package manager — choose whichever method you prefer.
To install RetroArch using 1-Click Install, click the following button:
To install using the terminal, first add the needed repository:
1
# zypper addrepo -f http://download.opensuse.org/repositories/Emulators/openSUSE_Leap_15.1/ emulators
Then, install the RetroArch package:
1
# zypper in retroarch
On openSUSE, each libretro core has its own package. Several cores are already installed by default as RetroArch dependencies. Later on, you can open YaST’s Software Management, search for libretro and install or remove cores as you wish.
Right after installing, you should be able to launch RetroArch.
Starting RetroArch
To start RetroArch, if you use the GNOME desktop, click Activities, by the upper-left corner of the screen, start typing retroarch and click its icon:
The RetroArch main screen
Setting up controls
An interesting feature of RetroArch is that it has a global control configuration, which needs to be set up just once. RetroArch then adapts this global control configuration for each video game in the best possible way. If you used many emulators individually instead, you would have to set up controls on each of them.
RetroArch maps your real-world gamepad or keyboard buttons to a virtual controller called a RetroPad, then it maps the RetroPad buttons to the video games controllers buttons. A RetroPad does not exist in real life, it’s only a concept within RetroArch.
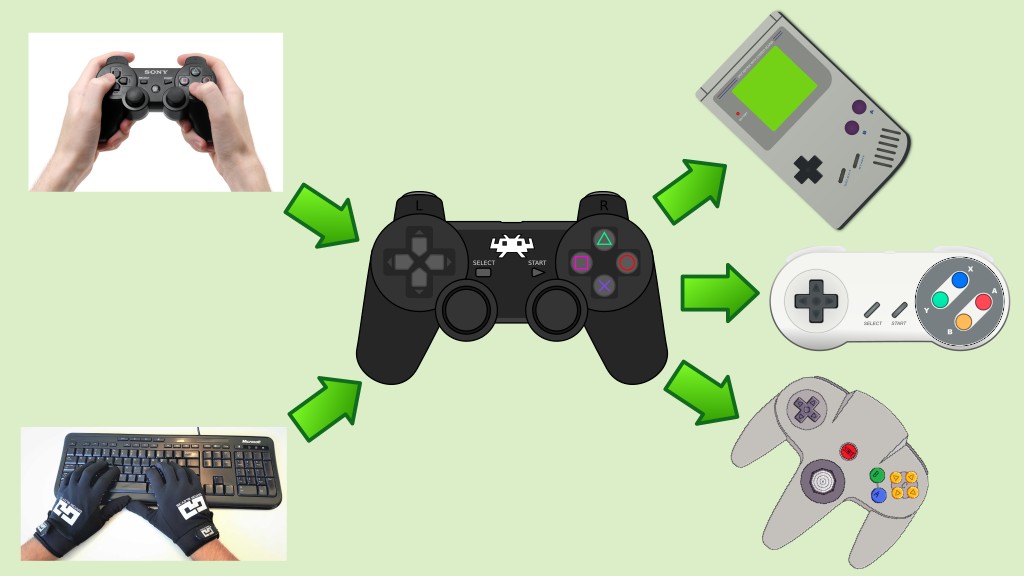
Your gamepad or keyboard is mapped to RetroPad, which in turn is mapped to the video games controllers.
RetroPad has the same layout of a Sony DualShock, the PlayStation controller. So, if you are going to buy a gaming controller, I recommend you to buy a gaming controller for PC with that same layout. I have a controller like that and it’s the best controller for emulation, because it has many buttons, so it can be mapped to any video game controller.
You can use a real controller with less buttons, that’s perfectly fine. However, if that is the case, you may be missing buttons to emulate some video games.
If you are going to play with a gamepad, plug it in. RetroArch should detect it:
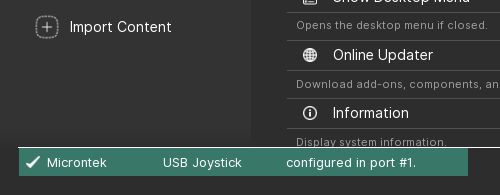
RetroArch is also able to automatically configure many gamepad models: you plug your gamepad and it just works, like a real video game. Possibly your gamepad is ready to use right now and you can just start playing.
To navigate the RetroArch menu, you can use your keyboard, mouse or the gamepad you just connected. To navigate using the mouse, simply click where you want to go.
To navigate the menu using the keyboard, use the arrow keys to move through the options, Enter to advance in the menu, Backspace to go back and Esc to quit RetroArch.
To navigate the menu using the gamepad, use the arrows to move through the options, O (circle) to advance in the menu and X (cross) to go back.
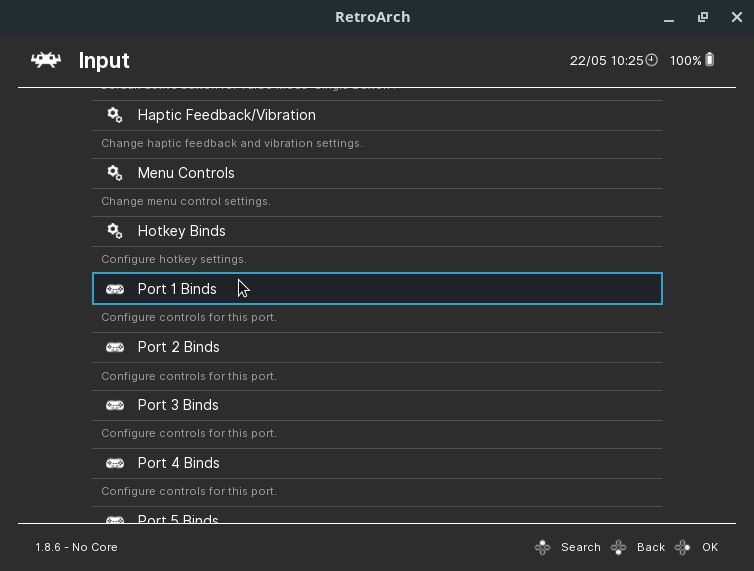
If you want to change the mapping of your keyboard or gamepad to the RetroPad, enter the Settings menu, navigate to Input and finally select Port 1 Binds:
In my case, RetroArch has already mapped my gamepad:
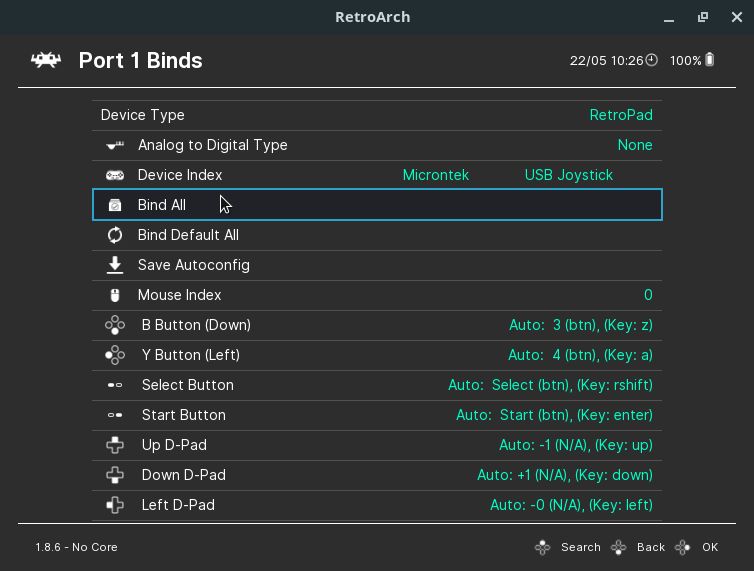
To quickly assign all buttons at once, choose Bind All.
Press the buttons following the RetroArch guidelines:
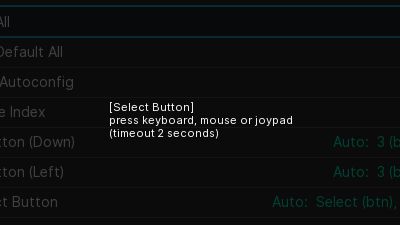
In the end, you will have all buttons mapped and you will be back to the menu.
If you are going to play two-player games, set up the second player controls in a similar way.
Starting a game
To start a game (open a ROM) in RetroArch, go back to the Main Menu and select Load Content. Navigate to the game folder:
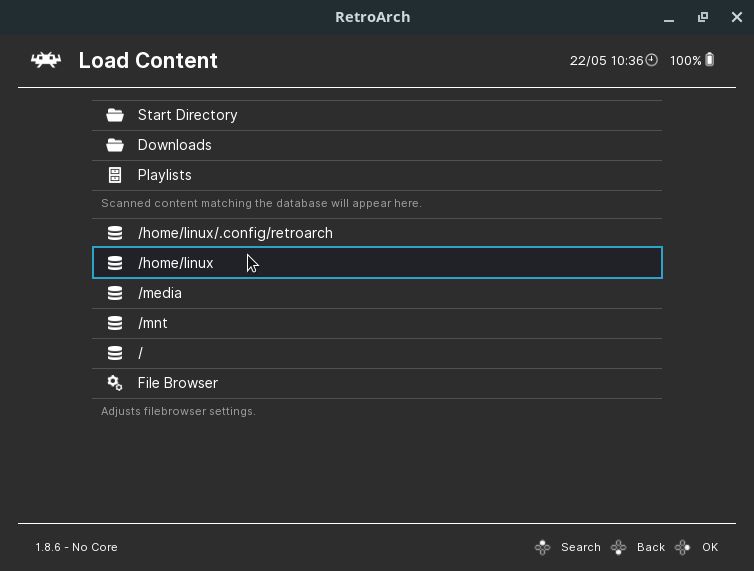
Find the game you want to start, select it once you have:

If the game is zipped, you will be presented with two options, Browse Archive or Load Archive:
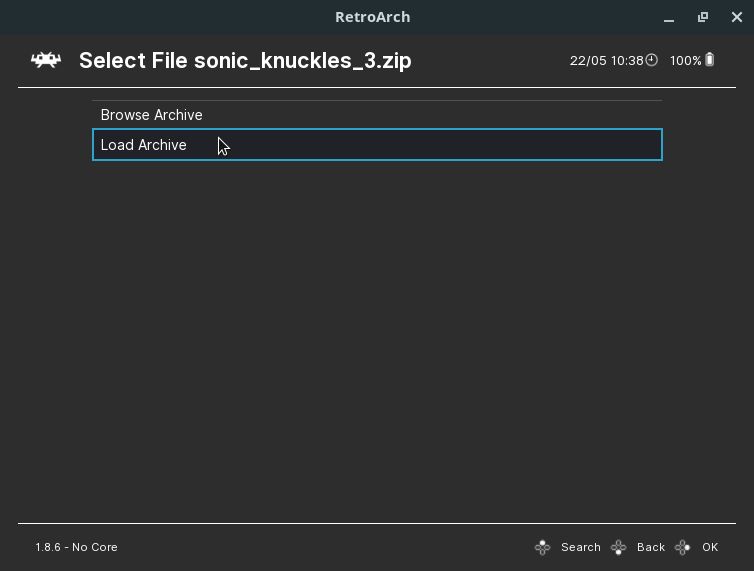
In most cases, the ZIP archive contains just one game and you can just load it.
Based on the selected file, RetroArch suggests some emulators (cores) to be used:
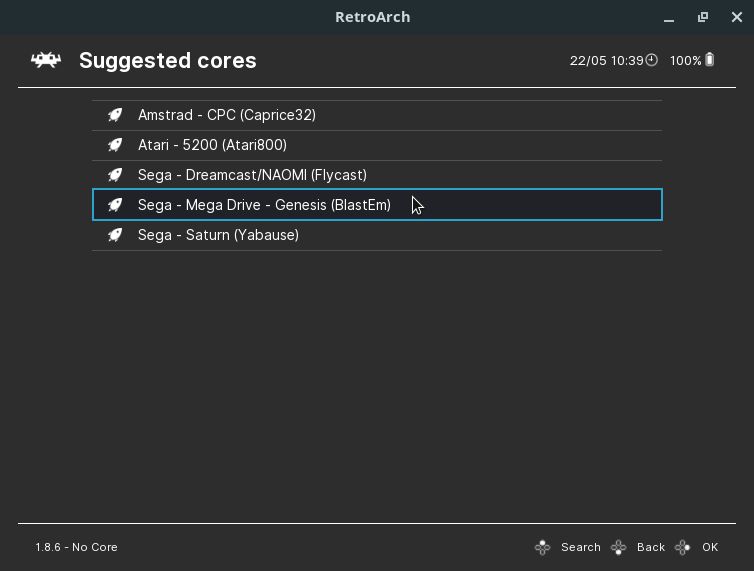
You should always choose the platform the game was supposed to run on. For example, I’m loading a Sega Genesis game. So, I’m going to select the Sega Genesis core, which is based on the BlastEm emulator.
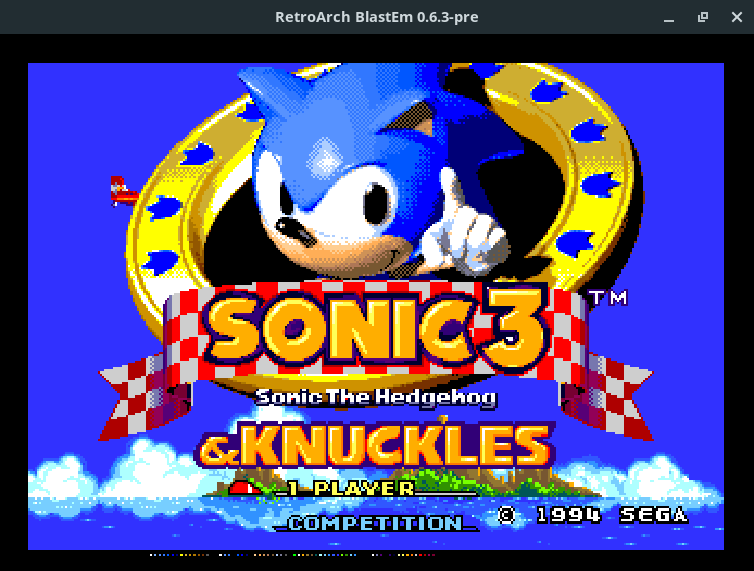
The game should start:
Accessing the in-game menu
If during the game you need to access the RetroArch menu, press F1.
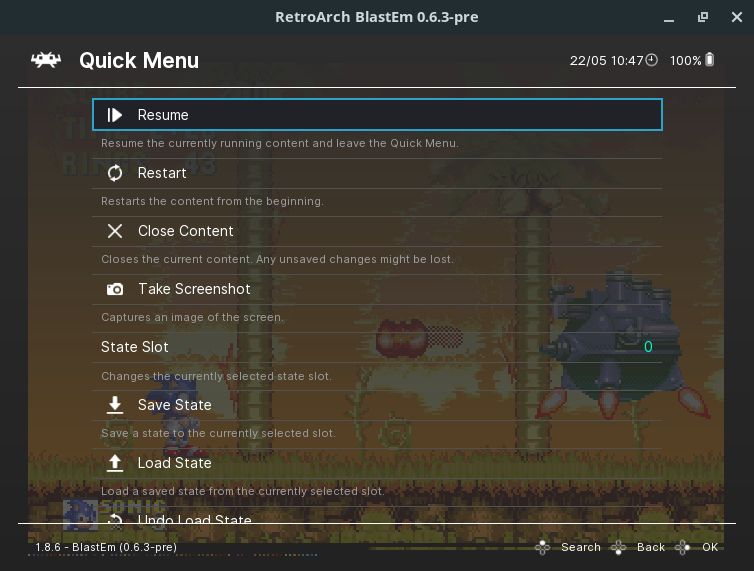
Saving and loading game states
An advantage the emulator offers over the video game is that you can save the game state, as well as resume from where you saved it, at any time you want.
Playing on RetroArch, you can save just like you would on the real video game (using the game’s own menu), or you can use one of the RetroArch slots.
Another advantage is that generally video games offer only one memory to save the game, so that only one game can be saved. RetroArch offers dozens of memories (state slots).
Note that the RetroArch in-game menu offers the Save State and Load State options, as well as the State Slot option that allows you to change the slot currently in use.
If you need to use one of those options quickly during the game, you can use the keys:
- F2 to save the game state
- F4 to load the game state
- F7 to increase the current state slot (from 0 to 1, from 1 to 2, and so on)
- F6 to decrease the current state slot (from 2 to 1, from 1 to 0)
Quitting the game
When you no longer want to play, you can just close the RetroArch window or press Esc. Note that if you haven’t saved the game, when you quit, your progress will be lost.
If you want to quit the current game but return to the RetroArch main menu, press F1 to open the in-game menu and choose Close Content.
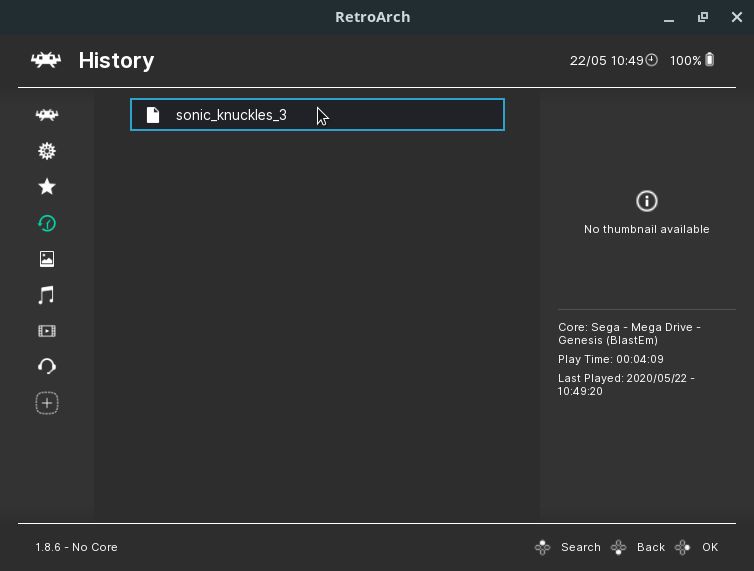
History
RetroArch allows you to easily access games you’ve already played by the History menu:
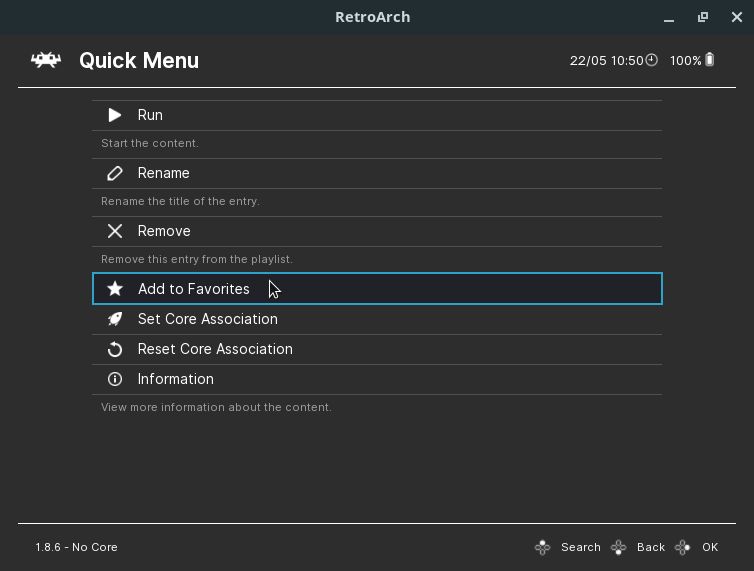
Favorites
You can also add games you like most or play often to the list of your favorite games, which is another way to easily access them. There are two ways to do this.
During the game, you can open the RetroArch menu and choose Add to Favorites.
Or you can go to the History menu, select the game and use that same option:
Then, to access your favorite games, go to the Favorites menu:

System requirements
RetroArch is, roughly speaking, a graphical user interface made up of menus. Thus, it has no minimum requirements and can be installed on any computer.
But each emulator has its own requirements. Therefore, which video games your computer is capable of emulating depends on your hardware.
To give you an idea, it’s very easy to use RetroArch on a Raspberry Pi 4 thanks to the RetroPie distribution (I can write about it in the future). You can check the technical specifications of the Raspberry Pi 4 computer in the text I wrote about it:
Raspberry Pi 4 has a considerable computing power for a credit-card sized computer. Although it’s simpler than most nowadays PCs (both desktops and laptops), a Raspberry Pi 4 is able to emulate a PlayStation perfectly fine.
Any working computer today should be able to emulate up to the fifth generation video games, such as PlayStation (launched in 1994) and Nintendo 64 (1996), or earlier ones, such as Super Nintendo (1990) and Sega Genesis (1988).
For a complete list of video games classified by generations, see Wikipedia:
Emulating newer and higher-spec video games, such as PlayStation 2 (2000), GameCube (2001), Nintendo DS (2004) and Nintendo Wii (2006), certainly requires higher-spec computers. In such cases, you may want to consult the respective emulators requirements on the emulators websites to see if your computer can emulate those video games.


