
This is a text for software developers and people on free software projects. If you follow my work, probably you already know that Linux Kamarada is moving to GitLab. If you too are thinking about moving your source code repositories from GitHub to GitLab, I prepared the following step-by-step instructions on how you can do this.
To illustrate the procedure, I’m going to show you how I migrated the Linux-Kamarada-GNOME repository, which has the Kiwi appliance used to build the distribution’s ISO image.
How it works
You can import your GitHub repositories to GitLab.com or to your self-hosted GitLab server.
Most resources of the projects are imported, such as: description, Git data (commits, branches, tags, etc), issues and pull requests (and their comments), wiki pages and more.
Note that what GitHub calls “pull requests”, GitLab calls “merge requests”.
References to issues and pull requests are preserved. When importing issues and pull requests, the importer attempts to find their GitHub authors and assignees on GitLab. For this association to succeed, each GitHub author and assignee in the repository must meet one of the following conditions prior to the import:
- Have previously logged in to a GitLab account using the GitHub icon.
- Have a GitHub account with a publicly visible email address that matches their GitLab account’s email address.
If a user referenced in the project is not found in the GitLab database, the project creator (typically the user that initiated the import process) is set as the author/assignee, but a note on the issue mentioning the original GitHub author is added.
If you want more details about the process, please refer to the GitLab documentation.
Now, let’s see it in practice!
Importing the repository to GitLab
Log in to your GitLab account.
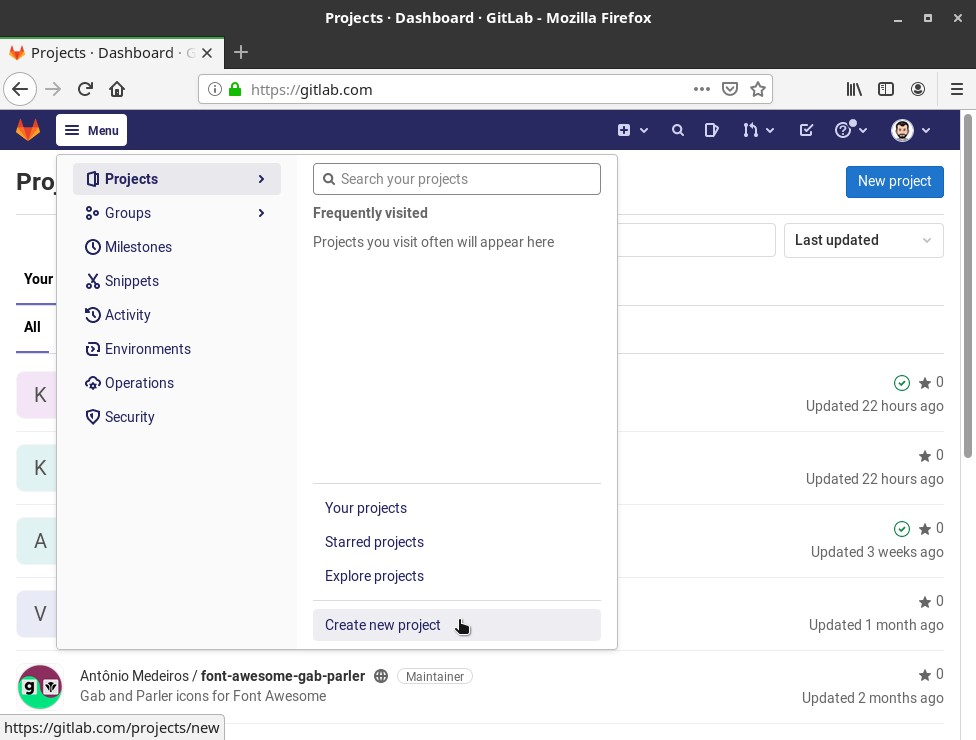
Then, from the top navigation bar, go to Menu > Projects > Create new project:
Choose to Import project/repository:

And then click GitHub:

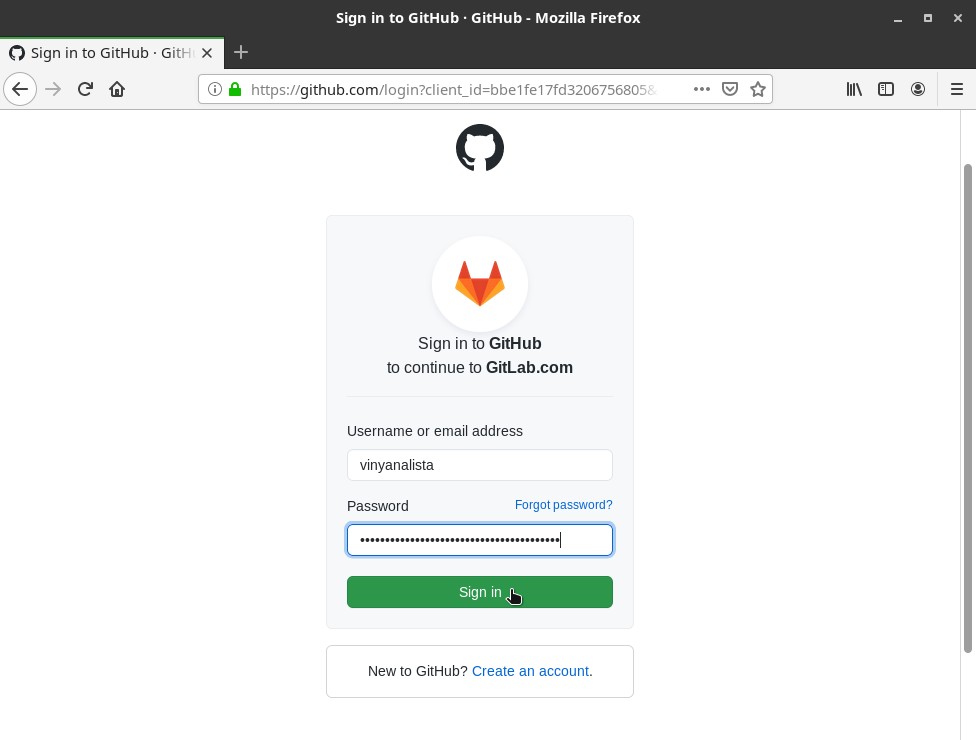
You are redirected to a page on GitHub to authorize GitLab. Sign in to your GitHub account:
You are redirected back to GitLab and all of your GitHub repositories are listed.
Look for the repository you want to import on the list (e.g. Linux-Kamarada-GNOME):

Choose to which namespace (group or user) the repository is going to be imported (e.g. the kamarada group, instead of my antoniomedeiros user account):
You can optionally rename the repository, if you want.
When you are ready, click the Import button nearby.
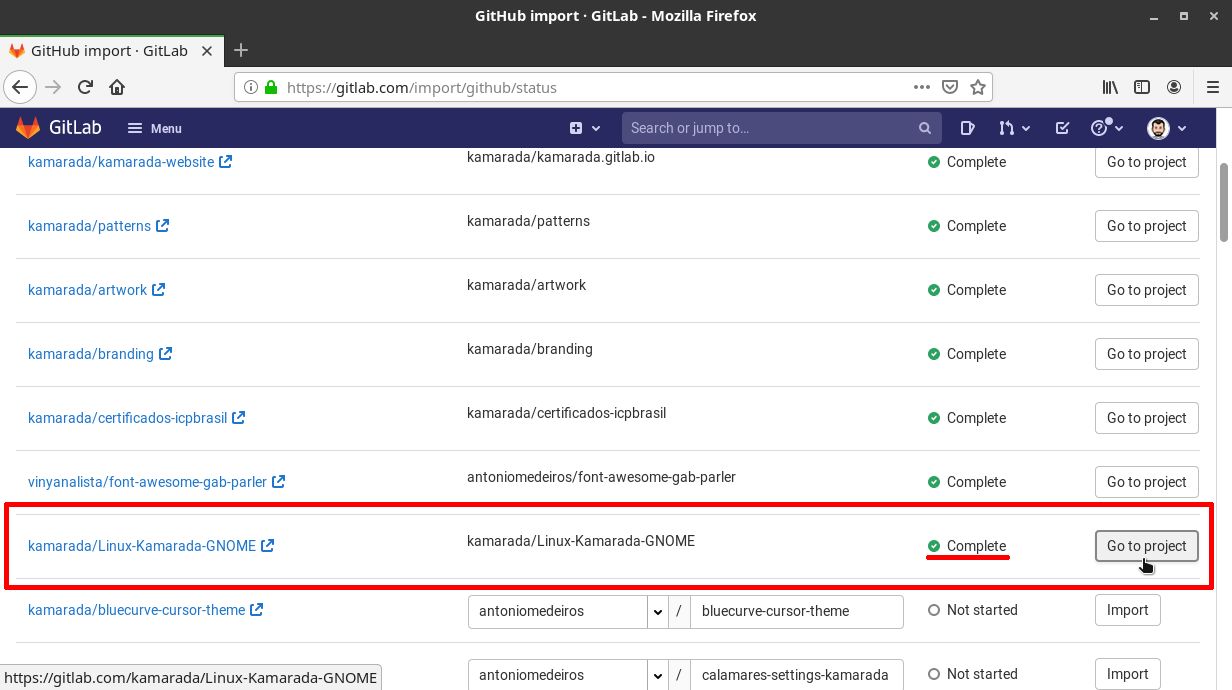
The Status column shows the import status of each repository. You can choose to leave the page open and it will update in real-time or you can return to it later.
Once a repository has been imported, you can click the Go to project button:
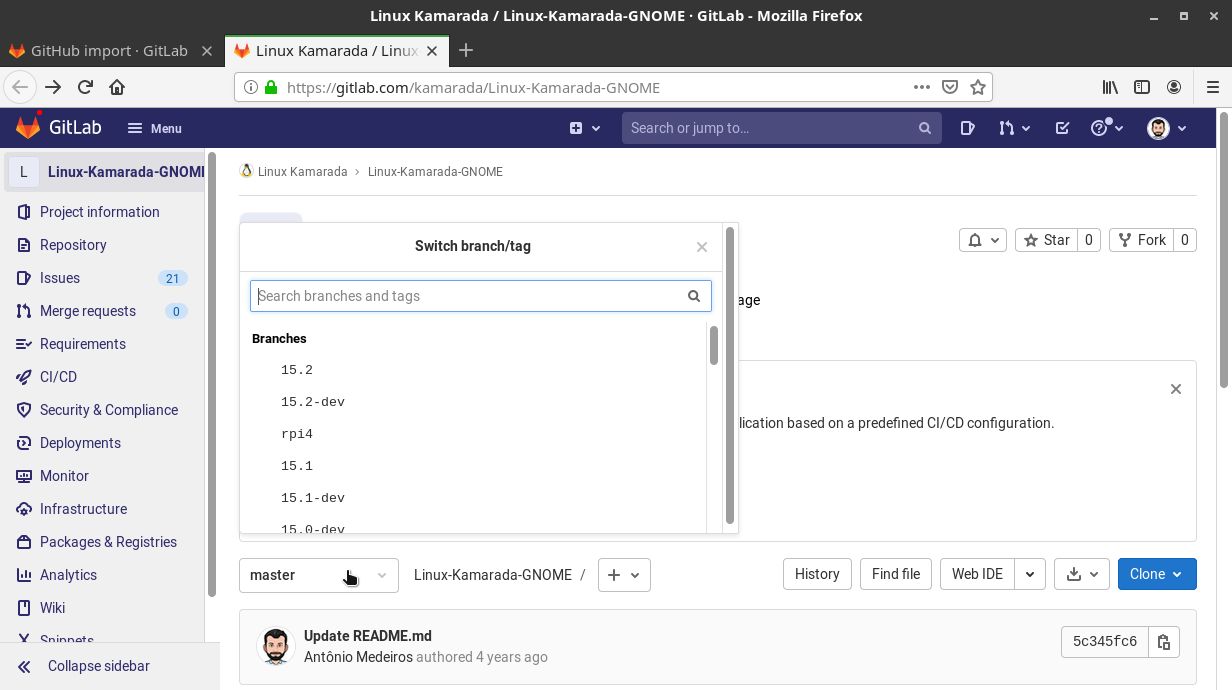
Make sure everything is in place. For example, branches were imported correctly:
Issues, both closed and open, were correctly imported as well:
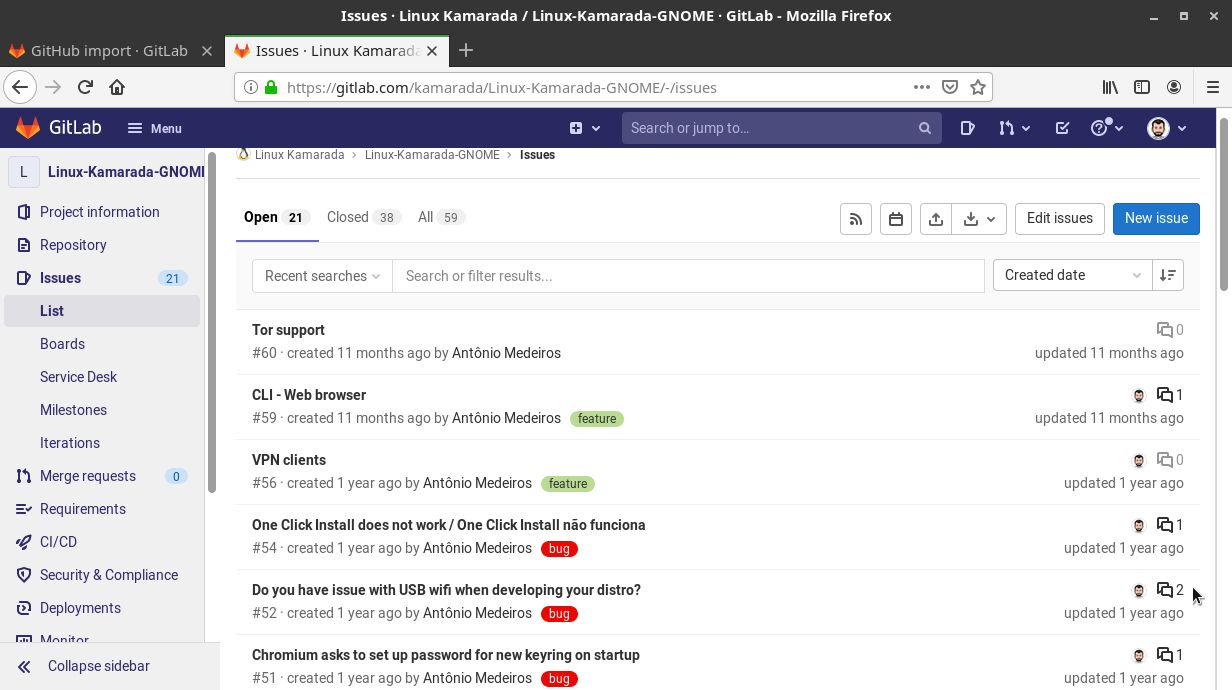
Note that the GitLab importer correctly translated my GitHub user vinyanalista to my GitLab user antoniomedeiros, but it has not found a GitLab equivalent for the GitHub user kevinsmia1939. GitLab imported his comments with my account and added notes at the beginning to clarify that they were actually made by him:

Maybe he doesn’t have a GitLab account, or if he does, it’s registered with another email address.
Updating the remote’s address
Now that your repository is on GitLab, if you have a clone of it on your computer, you need to point your local copy to the new remote repository.
To do this, open a terminal in your local repository folder.
List the configured remote repositories:
1
2
3
$ git remote -v
origin	git@github.com:kamarada/Linux-Kamarada-GNOME.git (fetch)
origin	git@github.com:kamarada/Linux-Kamarada-GNOME.git (push)
The default origin remote is pointing to GitHub. Let’s point it to GitLab.
Open the imported project on GitLab and copy its clone URL as if you were going to clone it:

Back to terminal, change the origin remote URL:
1
$ git remote set-url origin git@gitlab.com:kamarada/Linux-Kamarada-GNOME.git
If you list the remotes again, you’ll see that the default origin remote now points to GitLab:
1
2
3
$ git remote -v
origin	git@gitlab.com:kamarada/Linux-Kamarada-GNOME.git (fetch)
origin	git@gitlab.com:kamarada/Linux-Kamarada-GNOME.git (push)
From now on, every git pull and git push is going to retrieve and send commits to GitLab.
Optionally, if you still need to make changes to the old GitHub repository (like I needed to change files on the kamarada-website repository on GitHub, which diverged from the equivalent kamarada.gitlab.io on GitLab), you can add the old repository URL as a new remote, with another name (e.g. github):
1
2
3
4
5
6
7
$ git remote add github git@github.com:kamarada/Linux-Kamarada-GNOME.git

$ git remote -v
github	git@github.com:kamarada/Linux-Kamarada-GNOME.git (fetch)
github	git@github.com:kamarada/Linux-Kamarada-GNOME.git (push)
origin	git@gitlab.com:kamarada/Linux-Kamarada-GNOME.git (fetch)
origin	git@gitlab.com:kamarada/Linux-Kamarada-GNOME.git (push)
Doing that, you can make changes to both the old and the new repositories without having to make another clone (here, I won’t go into detail on how to manage this setup).
Making others aware of the move
It is recommended to close all issues and pull requests on GitHub, as well as to update the README file and the repository description, letting everyone know that the repository has moved to GitLab. You may also tell people on social media, on the project website, etc.
For instance, see what the Linux-Kamarada-GNOME repository now looks like after the noticing and archiving (I’ll talk about that next):
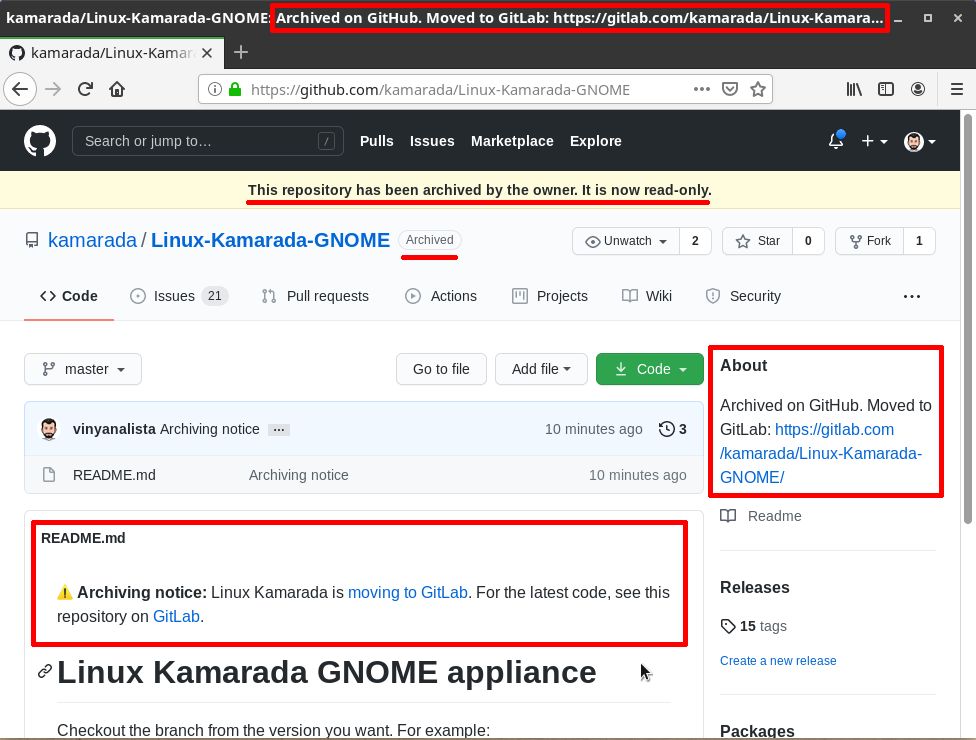
README file and repository description
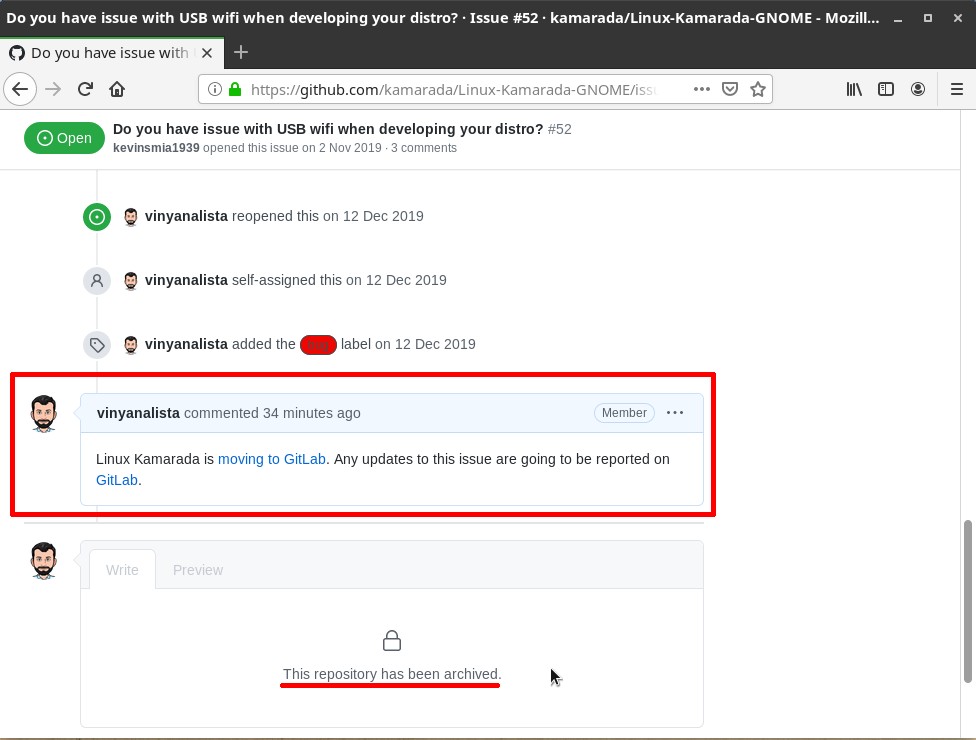
Comment on issue, made read-only by archiving
Actually, I didn’t close the issues: the ones that were open, I left them open, I just made comments with links to their new addresses on GitLab (the issue numbering is kept). As I had few open issues, I manually commented on each of them (but I did that on the open issues only). If you know any way to automate these comments — for a repository with a lot of open issues — please share it with me in the comments.
Archiving the GitHub repository
If you aren’t going to make any more changes to the old GitHub repository, you can archive it to make it read-only and indicate that it is no longer maintained. In case you change your mind in the future, GitHub allows you to unarchive repositories that have been archived.
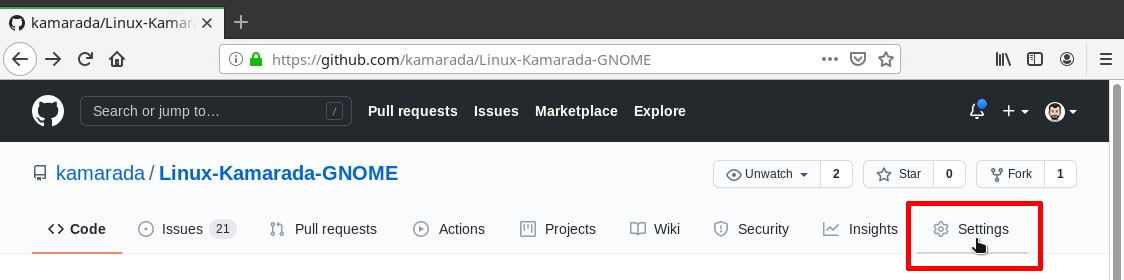
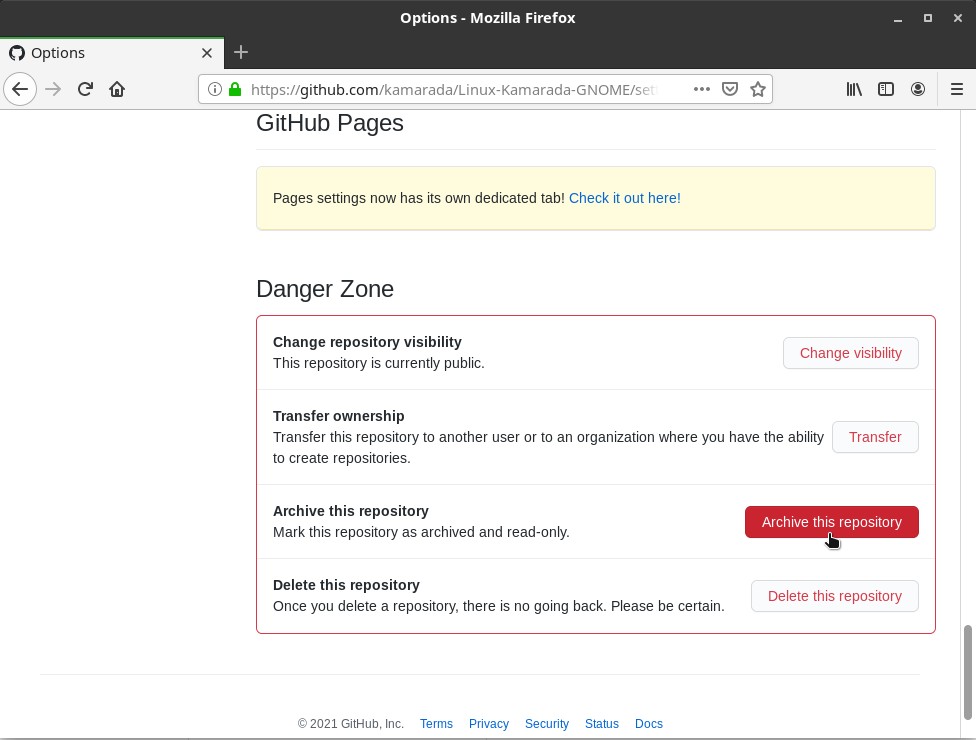
To archive the GitHub repository, navigate to the main page of the repository.
Under your repository name, click Settings:
Under Danger Zone, click Archive this repository:
Carefully read the warnings:
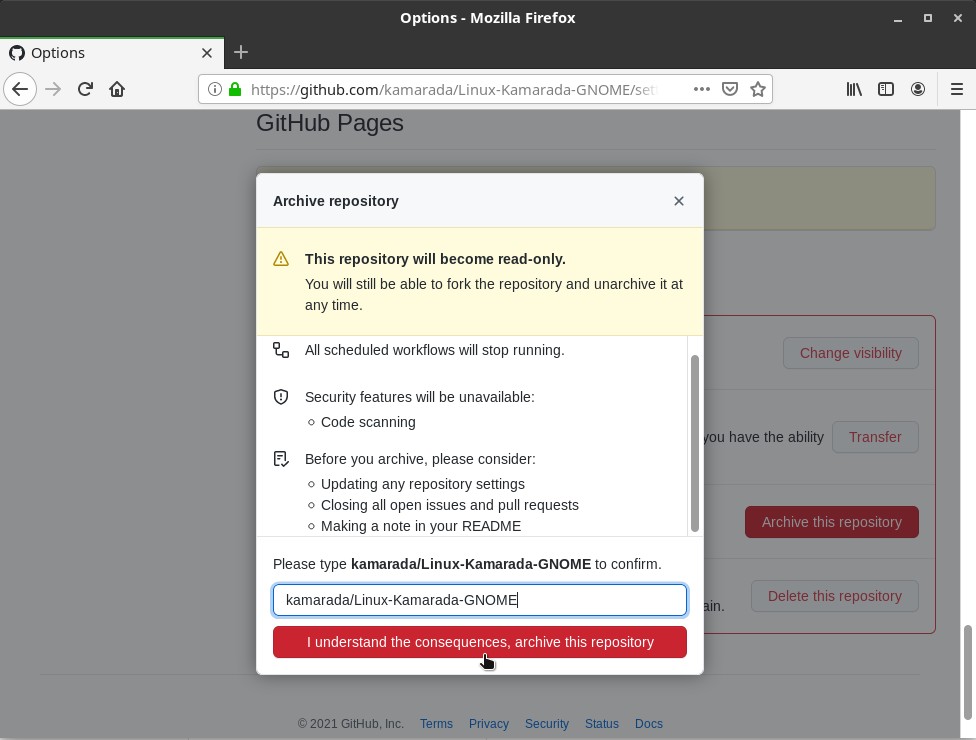
Then, type the name of the repository you want to archive and click I understand the consequences, archive this repository.
Conclusion
That’s it! Now you can see the new repository on GitLab: Linux-Kamarada-GNOME. And the old archived repository on GitHub: Linux-Kamarada-GNOME.
Over the next few days I’ll be migrating more repositories following this how-to. I hope it can be useful for you too.


