If you’ve been following this website for a while now, you’ve already seen some how-tos explaining how to upgrade openSUSE Leap from one release to the next.
The last time we had the debut of Linux Kamarada, which, in case you didn’t know it yet, is an openSUSE Leap based Linux distribution. In the last edition of this how-to, I showed how to upgrade from openSUSE Leap 15.1 to openSUSE Leap 15.2, and at the same time how to upgrade from Linux Kamarada 15.1 to Linux Kamarada 15.2. The same version numbers indicate the alignment between the distros and the procedure for upgrading them is very similar, so much so that they both fit in the same tutorial.
Today, the latest openSUSE Leap is 15.3, released in June 2021. Previously, openSUSE Leap 15.2 was released in July 2020 and, according to the openSUSE wiki, will reach its end of life on December 31, 2021. Therefore, users of openSUSE Leap 15.2 are recommended to upgrade to 15.3.
Linux Kamarada is currently at 15.2, released in September 2020. Linux Kamarada 15.3 is going to be released in the next few days. For now, we have 15.3 Beta, which presents considerable stability already. In my tests, upgrading Linux Kamarada from 15.2 Final to 15.3 Beta went flawlessly.
Since development is not finished yet, I don’t recommend upgrading to Linux Kamarada 15.3 to all users yet. But, if you feel “adventurous” enough and want to help in development, please feel free to test the upgrade process and report the problems you face, if any.
Upgrading from one openSUSE Leap release to the next is an easy and safe procedure. I always repeat the steps I learned reading the openSUSE wiki. It’s quite the same recipe since 2012, when I started using openSUSE. As Linux Kamarada is based on openSUSE Leap, upgrading it is done the same way, there is just one additional repository to setup.
If you are curious to check out previous editions of this how-to, here they are:
- How to upgrade from openSUSE Leap 42.1 to 42.2
- How to upgrade from openSUSE Leap 42.2 to 42.3
- There was no how-to showing how to upgrade from 42.3 to 15.0
- How to upgrade from openSUSE Leap 15.0 to 15.1
- Linux Kamarada and openSUSE Leap: how to upgrade from 15.1 to 15.2
In this post, you are going to see how to upgrade openSUSE Leap and Linux Kamarada from 15.2 to 15.3.
Note: not to be repetitive, what I say about openSUSE Leap applies to both distributions, when I mention Linux Kamarada I’m talking specifically about it.
A few recommendations
Upgrading openSUSE is a safe procedure, which should work for most cases, but requires some cautions. It is always good to remember the following recommendations.
You must be using the immediately previous openSUSE Leap release. It means that if you want to upgrade to 15.3, now you must be using 15.2. Hopping over one or more releases is not supported. It may work, but that is not guaranteeded. So if you use openSUSE Leap 15.1 now, for example, you should first upgrade to 15.2, and then to 15.3.
Your openSUSE Leap installation must be up to date with the latest updates for the release you are currently running. There are differences between upgrading and updating. Here, you are going to see how to upgrade, but you may need to update first. For more information about those differences and how to update openSUSE Leap, please read:
You should read about the openSUSE Leap release you are going to install. Take a look at the release notes, which list changes and glitches in the new release.
You must backup all important data. Even though upgrading openSUSE is a safe procedure (that resembles upgrading Debian, for those who know it), it is not perfect. Winning the lottery is difficult, but eventually someone wins. Something may go wrong during upgrade, although it is difficult, especially if you act cautiosly. I myself have been using openSUSE for some years now, and always have upgraded from one release to the next without a problem. Anyway, it never hurts to make a backup of your personal files as a precaution, especially if the /home directory is not on a dedicated partition. If the computer is one that should not be down for long (a server, for example), consider backing up the entire system, so you will be able to restore it immediately if something does not work as expected.
You should not use third party repositories during upgrade. Before upgrading, we are going to remove all third party repositories. Doing that may cause third party software to be removed during upgrade. If that happens, you may try to reinstall it later. It is not that you cannot upgrade with third party repositories enabled, but using only the official repositories is more guaranteed. That way, the base system will be upgraded to a new stable, solid and reliable base. Then, on top of that base, you can install whatever you want. Do differently only if you know what you are doing.
I also recommend that you read this entire how-to before you start. I’m going to break the upgrade process down into 6 steps for better understading. Once you know the whole process, you will be able to better schedule it. You can even use your computer as normal while you follow the step by step, but after you start actually upgrading, your computer will become usable again only after upgrading is completed.
1) Update your current system
Make sure your current openSUSE Leap installation is up to date. To do this, run zypper up as the root (administrator) user. It should inform you there is “nothing to do”:
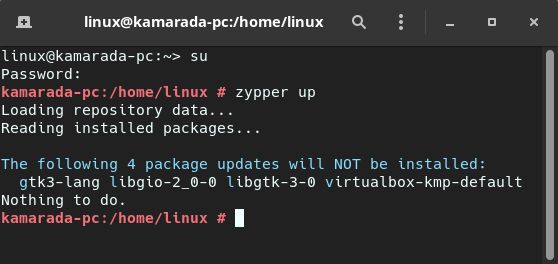
Linux Kamarada 15.2 users may have a problem with the virtualbox-kmp-default package, which has a conflict that does not allow for a complete update. This issue has already been reported by some users.
Only if you are not using Linux Kamarada on a VirtualBox virtual machine, it is safe to remove this package. To do this, you can run the following command:
1
# zypper rm virtualbox-kmp-default
But whatever your case, I recommend you to leave this package installed and proceed normally with the upgrade process. In my tests, this solved the problem.
If you need more information on how to update your system, please read:
2) Backup your current repositories
Actually, this step is optional.
You may want to back up your current list of repositories to return them after upgrading. openSUSE Leap saves repository settings in the /etc/zypp/repos.d folder. It has some text files, one for each repository.
Let’s copy the repos.d folder, in /etc/zypp/, to another one in the same place, called repos.d.old. It is easier to use the CLI for that.
Enter the CLI and switch to the root user, if you haven’t done that yet:
1
$ su
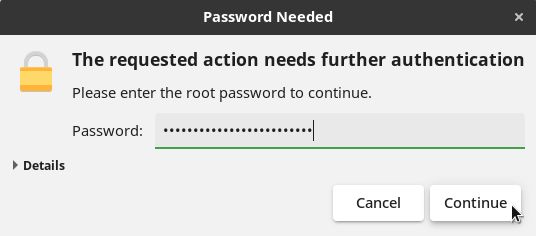
Enter the root password to continue.
If you have already upgraded following any previous edition of this same tutorial, you may still have the old backup. If that is the case, remove the existing repos.d.old folder:
1
# rm -rf /etc/zypp/repos.d.old
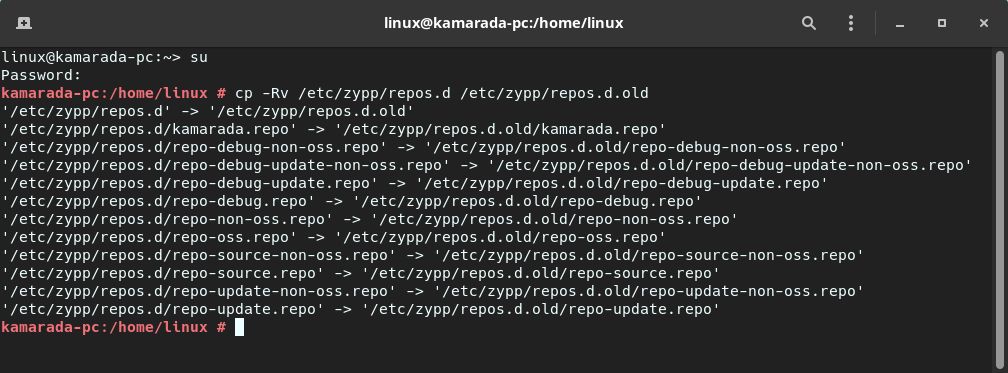
Then, order the copy:
1
# cp -Rv /etc/zypp/repos.d /etc/zypp/repos.d.old
If you have not made a backup of your data yet, consider doing that now.
3) Clean up repositories
As already mentioned, for upgrade we use only the official repositories. To be more precise, just two of them, in the case of openSUSE Leap:
- Main Repository: the main repository, contains open source software only.
URL: http://download.opensuse.org/distribution/leap/$releasever/repo/oss/
Calculated URL for 15.2: http://download.opensuse.org/distribution/leap/15.2/repo/oss/
- Main Update Repository: contains official updates for OSS packages.
URL: http://download.opensuse.org/update/leap/$releasever/oss/
Calculated URL for 15.2: http://download.opensuse.org/update/leap/15.2/oss/
Note that the system automatically replaces the $releasever variable with the distribution release currently being used. This variable is already used by default in new Linux Kamarada installations since version 15.2. If you were using 15.1 and upgraded to version 15.2 following my instructions, you too have your system setup to use it.
For Linux Kamarada, besides the above repos, we’ll also use the official Linux Kamarada repo, which is kindly hosted by OSDN mirrors in several countries. Users in Brazil are advised to use the C3SL mirror. The international edition of the Linux Kamarada 15.2 live image uses a mirror I picked at random from the list of OSDN mirrors. The single Linux Kamarada 15.3 live image (which can be used either in Brazilian Portuguese and International English) uses the C3SL mirror.
URL: http://c3sl.dl.osdn.jp/storage/g/k/ka/kamarada/$releasever/openSUSE_Leap_$releasever/
Calculated URL for 15.2: https://osdn.mirror.constant.com/storage/g/k/ka/kamarada/15.2/openSUSE_Leap_15.2/
If you are in another country, check the list of mirrors on the Linux Kamarada wiki on GitLab.
Let’s clean up our repositories removing any repository we won’t need (including any third party repositories).
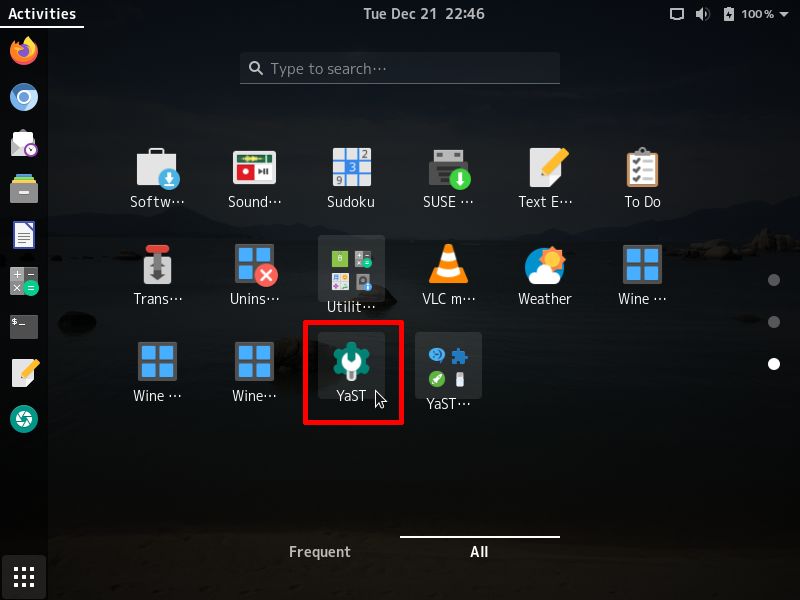
Start the YaST Control Center. To do this, click Show Applications, in the lower left corner of the screen, and click the YaST icon, at the end of the list:
You will be asked the root password. Type it and click Continue:
Within the Software category (the first one), click Software Repositories:

You are presented to your system’s repository list:
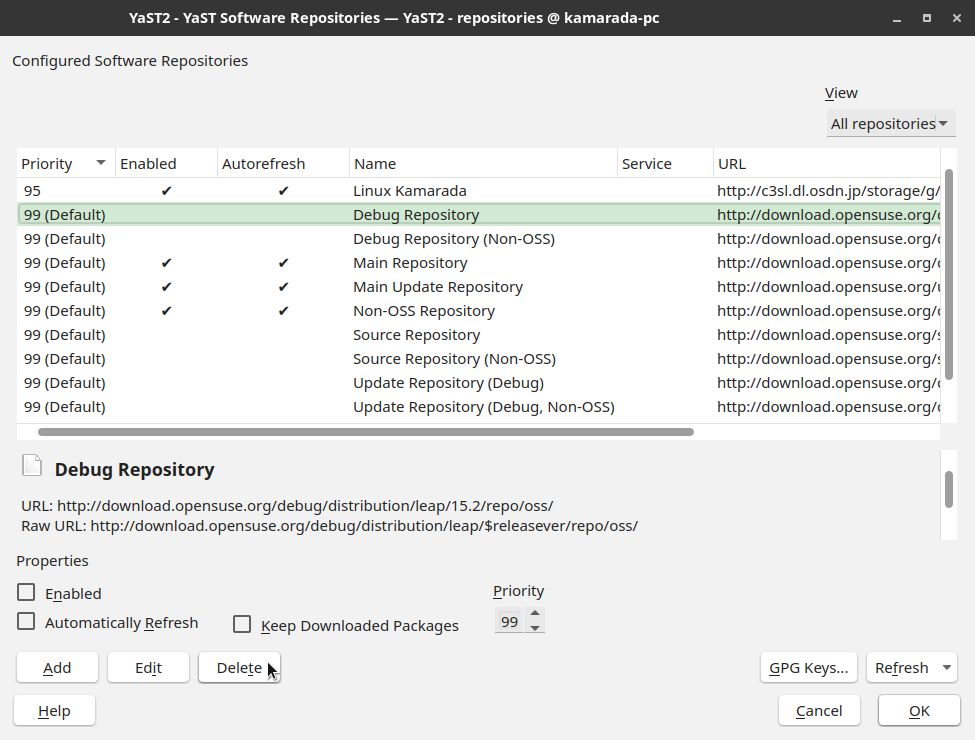
For each repository other than the ones listed above, select the repository from the list and click Delete. YaST asks you for confirmation. Click Yes:

Do that with all repositories, until the list has only the repositories listed above:
Maybe those repositories are named differently on your system. If that is the case, try to recognize them by their URL instead of their name. If you don’t find them, there is no problem: add them, providing the URLs above.
4) Switch to the new repositories
In previous editions of this how-to, in this step we used to edit the repositories one by one, replacing the previous release (15.2) with the new release (15.3). Now that we have the $releasever variable, this is no longer needed.
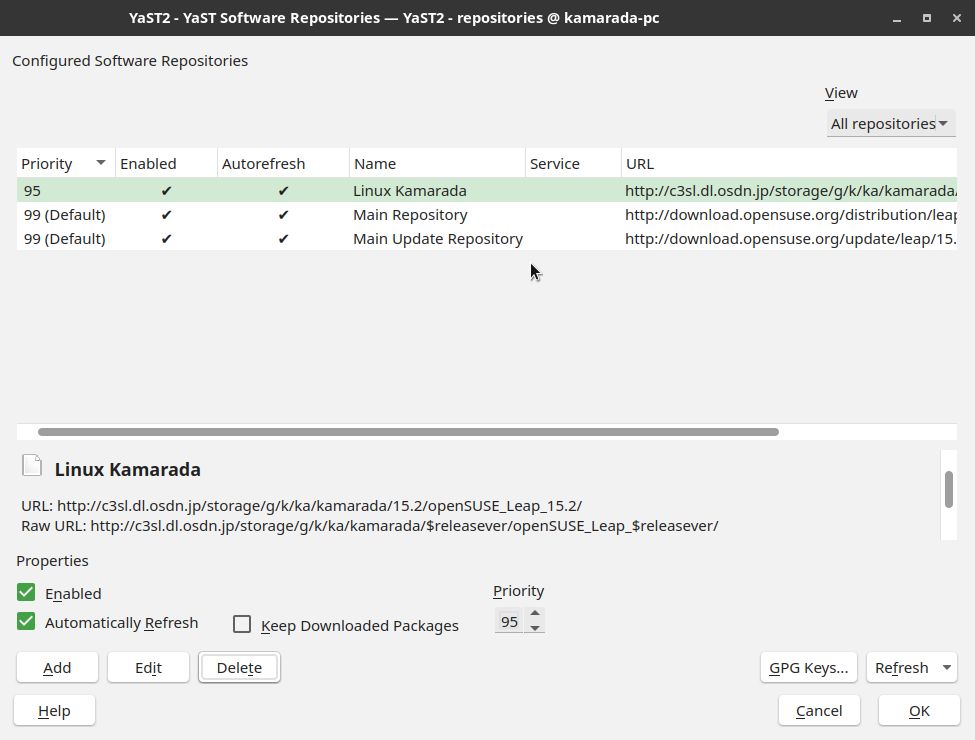
Just select each of your repos and make sure its Raw URL contains the $releasever variable:

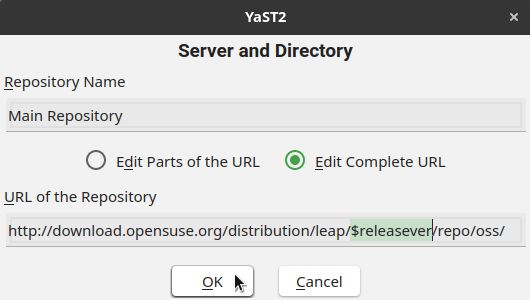
If the release (currently 15.2) appears somewhere in the Raw URL, click Edit. On the screen that appears, replace the release with $releasever and click OK:
In the case of Linux Kamarada, note that the $releasever variable appears twice:
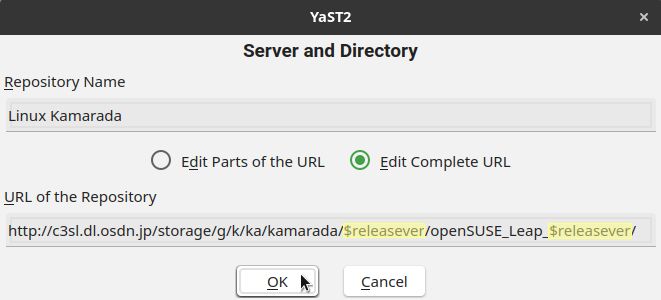
At the end, your system’s repository list should look like this:
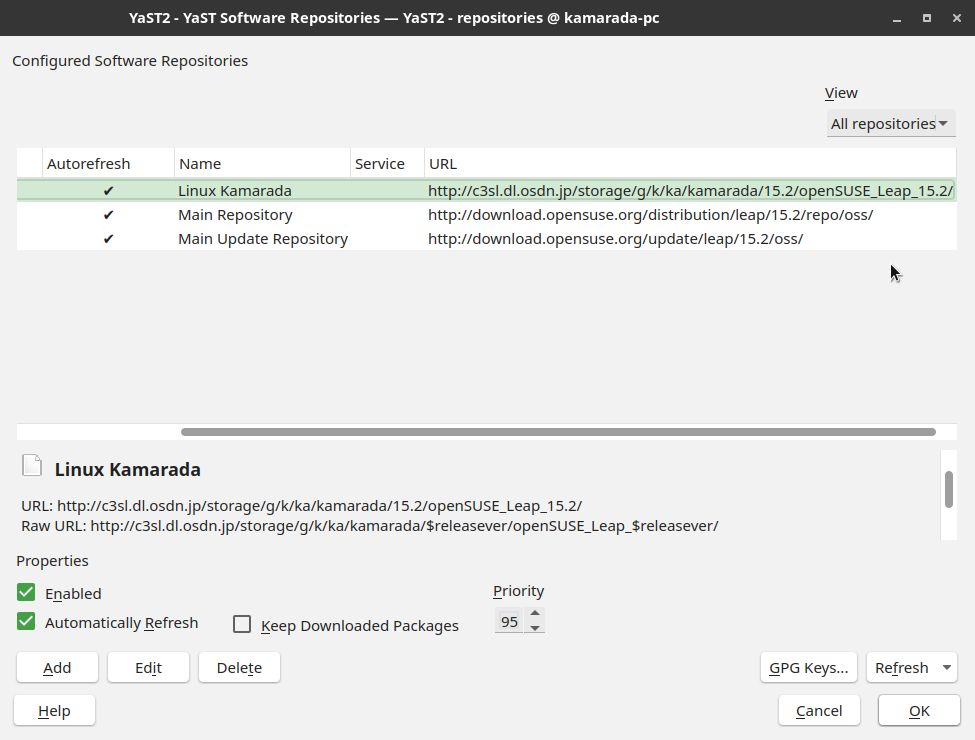
Click OK to save changes. You can close YaST.
5) Download packages
We can start downloading the packages of the new openSUSE Leap release.
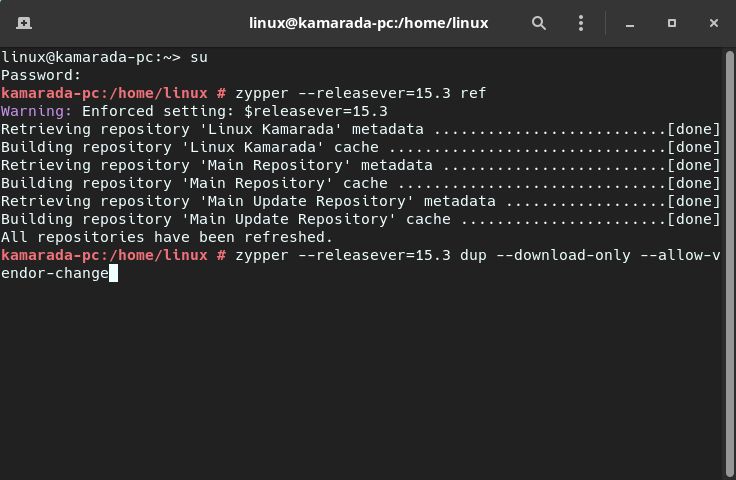
Back to the CLI, retrieve the list of available packages from the new repositories (observe that we use the --releasever option to indicate the use of the new version):
1
# zypper --releasever=15.3 ref
Then, run:
1
# zypper --releasever=15.3 dup --download-only --allow-vendor-change
(dup is an acronym for distribution upgrade):
If you’ve been guided by previous editions of this how-to, you’ll notice the addition of the --allow-vendor-change option. This is because openSUSE Leap 15.3 shares RPM packages with the SUSE Linux Enterprise 15 SP3 (not just the source code, as in previous releases, but even the already compiled, binary packages). Therefore, the zypper package manager would warn about many vendor changes during the upgrade. To accept them in advance, we added the --allow-vendor-change option.
The zypper package manager spends some time “thinking”. Soon after, it shows what it needs to do in order to upgrade openSUSE Leap to the next release.
It is possible that it needs to change some packages, as in the image below:
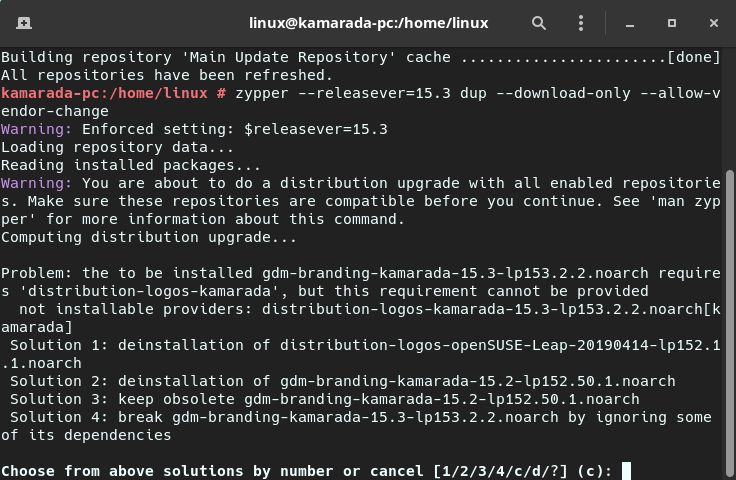
If this happens, carefully read the presented options and choose one of them.
In this case, zypper should replace the distribution-logos-openSUSE-Leap package with the distribution-logos-kamarada package. So, in the example above, you should choose Solution 1. To do this, type 1 and hit Enter.
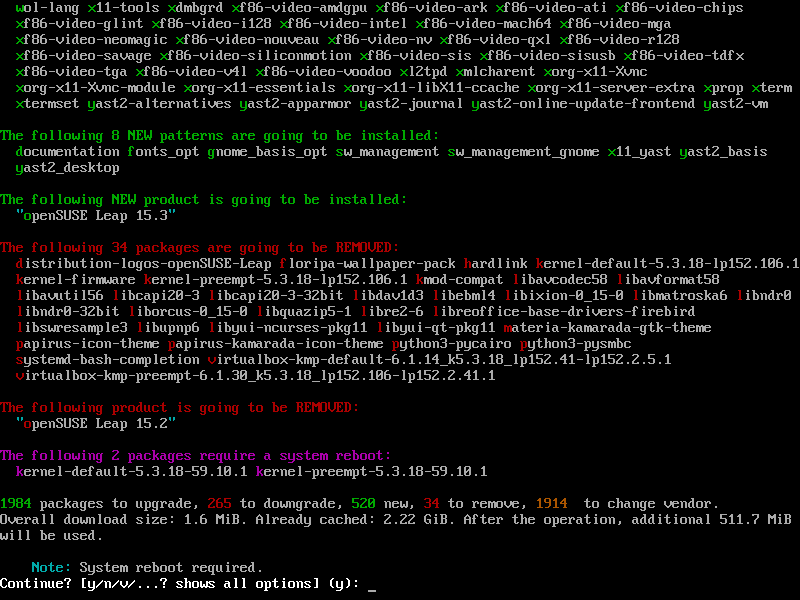
zypper lists the changes it’s going to make to the system (which packages are going to be upgraded, which ones are going to be removed, which ones are going to change vendor, etc.) and asks whether you want to continue:
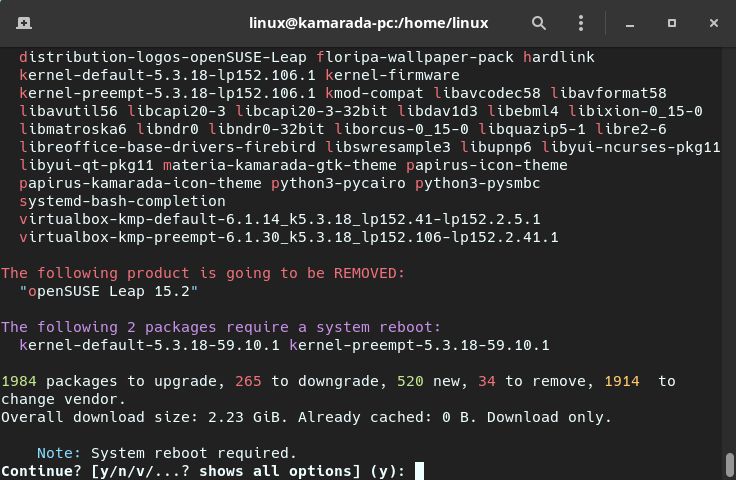
That list of actions is similar to that produced by zypper up, presented in the updating how-to. However, as we are now doing a distribution upgrade, and not an ordinary update, the list of what is needed to be done is much bigger.
Review that list carefully. You can go up or down using the scrollbar at the right of the window or the mouse wheel (scroll wheel) if you are using Terminal, or the Shift + Page Up / Shift + Page Down key combinations if you are using a purely textual interface (they also work in Terminal).
The default option is to continue (y). If you agree, you can just hit Enter.
Here is one more detail of the upgrade from Linux Kamarada 15.2 to 15.3:
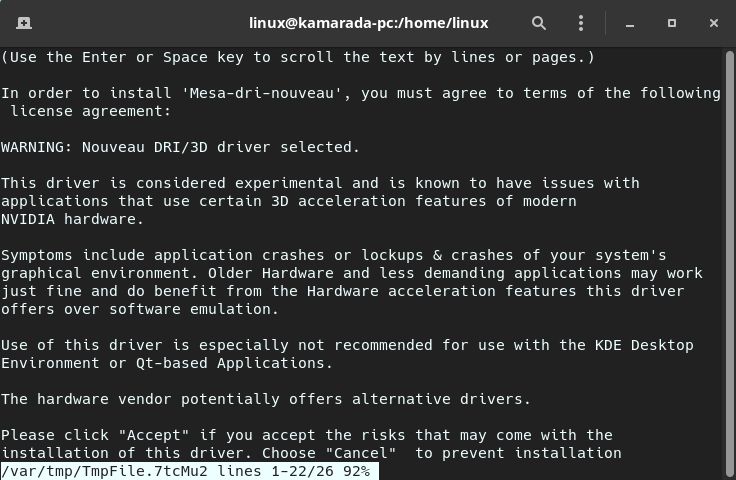
Since Linux Kamarada 15.3 includes the nouveau driver, zypper presents its license in a less style pager. Use the Enter or Space key to read the license to the end. When finished, hit q to exit the pager:

When asked if you agree with the terms of the license, type yes and hit Enter:

After that, downloading of the new packages will start. Meanwhile, you can use your computer normally. The upgrade itself has not started yet.
Note that zypper only downloads packages, it does not start upgrading:
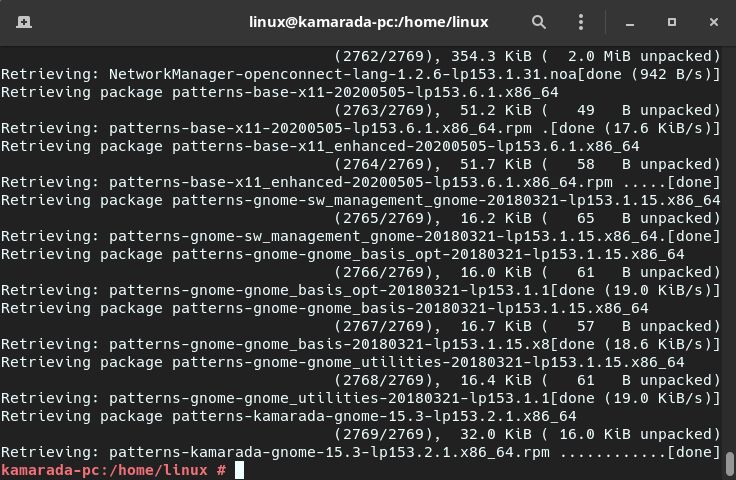
That’s because we invoked it with the --download-only option.
Finish what you are doing and save any open files so we can start upgrading. Note that upgrading may take several minutes and you will be able to continue using your computer only after it is complete.
6) Upgrade your system
Now that we have already downloaded all the packages needed to upgrade our openSUSE Leap from 15.2 to 15.3, we need to leave the desktop environment and use the pure textual interface to perform the upgrade. Here on, you cannot use the Terminal.
That is necessary because the desktop itself will be upgraded. If we run the upgrade while still using the desktop, it may stop/crash, causing the upgrade to abort, which in turn lefts the system in an inconsistent, unpredictable state.
Consider opening this page on another computer (or on a mobile device), print it or take note of the next actions.
If you are upgrading a laptop system, make sure its battery is fully charged and its AC adapter is plugged in. Do not remove the battery or unplug the AC adapter during the upgrade. We want to prevent any possibility of problem.
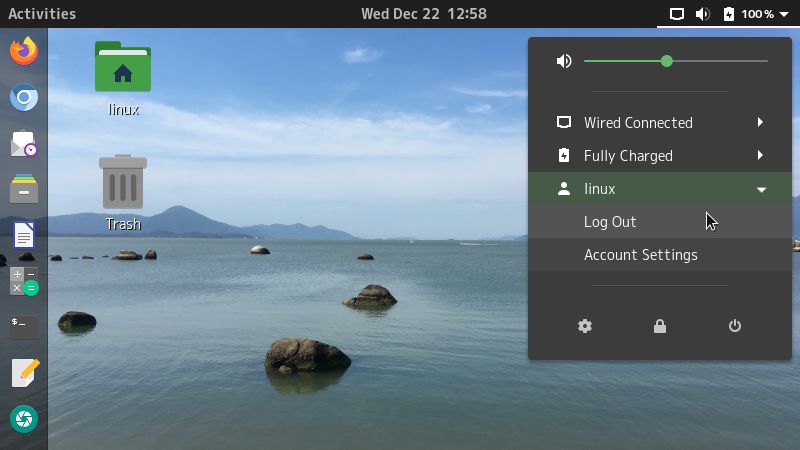
Logout by opening the system menu, on the right side of the top bar, clicking on your username and then choosing Log Out:
You are presented to the login screen where you could enter your username and password to start a new desktop session:
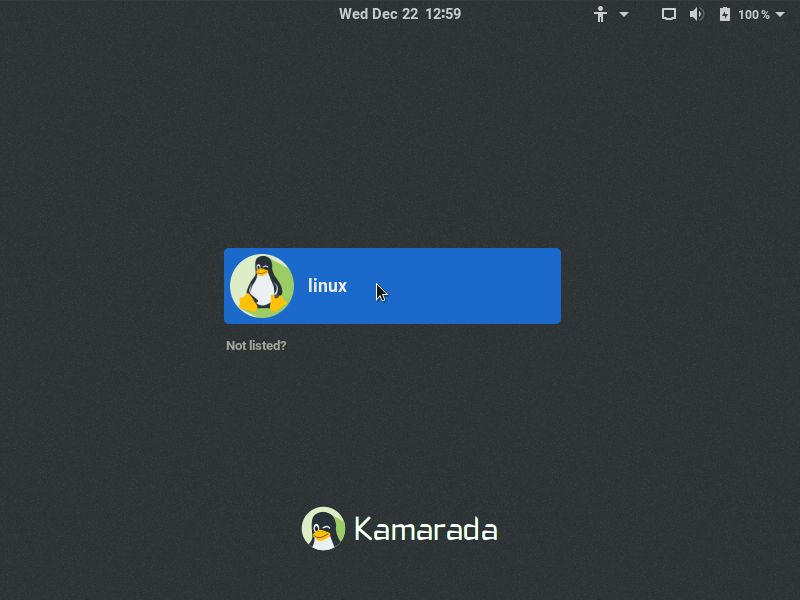
But that’s not what we want. Press the Ctrl + Alt + F1 key combination to switch to a purely textual interface:

If that was new to you, know that Linux provides six consoles (terminals) besides the graphical interface. You can use the keys F1 to F6 in that same combination (Ctrl + Alt + F1, Ctrl + Alt + F2 and so on) to switch between consoles, pressing Ctrl + Alt + F7 you can return to the graphical interface.
But let’s stand on the first console.
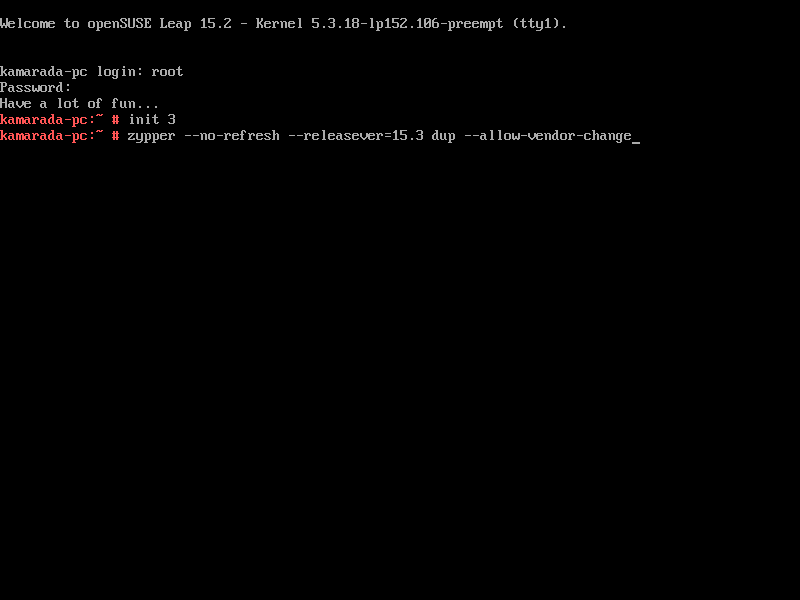
Login as root. To do that, type root and hit Enter, then enter the root password and hit Enter again.
Let’s switch from runlevel 5, the default runlevel, in which the system provides the GUI, to the runlevel 3, in which we have only the CLI and network connection.
To change to runlevel 3, run:
1
# init 3
Finally, we are going to start the distribution upgrade itself. Run: (mind the options we used before)
1
# zypper --no-refresh --releasever=15.3 dup --allow-vendor-change
The --no-refresh option makes zypper not retrieve the list of packages from repositories. Using that option, we ensure that zypper won’t try to download any package in addition to those we have already downloaded. That can be useful especially for laptops, which may lose the Wi-Fi connection when leaving the GUI.
As before, zypper is going to compute the upgrade and show what it is going to do (if it asks the same questions about changes and licenses, answer them the same way as before):
Note that all the needed packages have already been downloaded: at the end, zypper’s report shows “Overall download size: 0 B. Already cached: 2.23 GiB.”
Just hit Enter to start upgrading.
zypper skips downloading packages and goes straight to upgrading:
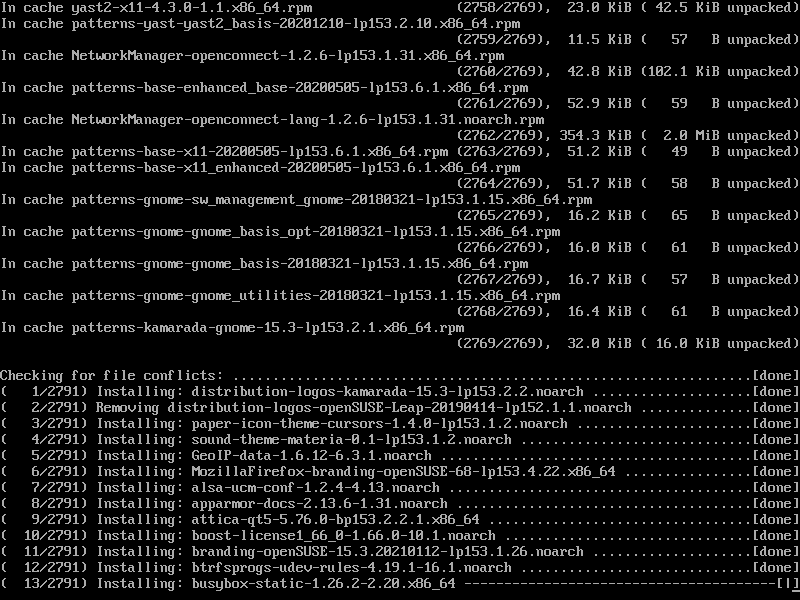
Distribution upgrade may take several minutes.
When it finishes, zypper suggests to restart. Let’s do that by running:
1
# reboot

That’s it! Have a lot of fun!
If you did everything up to here, now your computer is running Linux Kamarada 15.3 (or openSUSE Leap 15.3) and ready for use:

Make sure everything is in place.
Now you may return any repositories you removed. Remember to make the appropriate adjustments with respect to the openSUSE Leap version, replacing it by $releasever where it appears. It’s easy to do that using the CLI:
1
2
# sed -i 's/15.2/$releasever/g' /etc/zypp/repos.d.old/*
# mv /etc/zypp/repos.d.old/* /etc/zypp/repos.d/
That done, you can delete your repositories backup:
1
# rm -rf /etc/zypp/repos.d.old/
You may also try to install any program that perhaps has been removed during the upgrade.
Remember to regularly check for updates for your new distribution. Note that, after upgrading, the daily use of zypper does not require you to use the --releasever option .
If you find any difficulty during the upgrade or have any questions, don’t hesitate to comment!


