
We have been studying KIWI, the openSUSE tool for creating Linux system images. We have been creating live images with it, but KIWI can also be used to create virtual hard disks, images for ARM devices such as the Raspberry Pi and the PinePhone, among many other possibilities. What makes this tool even more interesting is that it can be integrated with another tool also from the openSUSE Project, the Open Build Service.
The Open Build Service (OBS) is a generic system to build and distribute binary packages from sources in an automatic, consistent, and reproducible way. If you develop software for Linux, OBS can be a great tool for you. It offers its own version control system, but can also be integrated with others, such as Git (GitLab, GitHub, etc). It can generate ready-to-install packages in various formats (RPM, DEB, etc) for various distributions (openSUSE, Fedora, Debian, Ubuntu, etc) and architectures (i586, x86_64, ARM, etc). OBS can also be integrated with KIWI, so OBS can also build all the different types of images that KIWI is able to build.
You can download OBS, install it on your own server, and use it locally on your network. Or, easier, you can use the reference server, which is publicly and freely available at build.opensuse.org – the same one used by the Linux Kamarada Project to build the ISO image that you can download from the Download page.
In today’s tutorial, you are going to see how you can use OBS to build KIWI images. You’ll also see how to optionally integrate it with Git (in this scenario, you would therefore use OBS + KIWI + Git) – and that’s what I do here at the Linux Kamarada Project.
Both KIWI and OBS have already been the subject of other posts here on the blog. You might want to check them out before continuing:
- KIWI: the openSUSE tool for creating Linux system images
- KIWI: creating an openSUSE Leap live image with GNOME desktop
- Integrating the Open Build Service with GitLab
- Integrating the Open Build Service with GitHub
- How to make an openSUSE-based distro (Linux Kamarada making of): getting started
- Building RPM packages with the Open Build Service (OBS)
- Linux Kamarada making of: updating packages for the next distribution release
How to use KIWI integrated with OBS is well documented:
But I think this documentation is more declarative and explanatory (“this should be this way because of that”), here we will try a more practical approach (“do this, then that”). Of course, you can refer to it anytime for more information.
Advantages of using KIWI with OBS
The KIWI + OBS combination has advantages over running KIWI alone locally:
- OBS will host the latest successfully built image for you, so you won’t have to worry about hosting it yourself;
- OBS will automatically rebuild your images if one of the included packages, one of its dependencies or KIWI itself get updated, so you will always have an image with all the available updates applied;
- the image building process will not be executed on your own computer, but on OBS, thereby saving you resources; and
- if a build fails, you will receive an email notification (if this is enabled in your OBS preferences).
Examples of images created with KIWI + OBS
To start, it’s best to take as a reference some image that is already built with the KIWI + OBS combination (and, depending on the image, with Git as well).
For example, check out the subprojects of the Virtualization:Appliances:Images project in OBS. The sample images in the kiwi official repository, in the build-tests folder, are created in these projects.
The x86/leap/test-image-live appliance folder, which we used as example in the first KIWI tutorial, is built on OBS in the Virtualization:Appliances:Images:Testing_x86:leap/test-image-live package.
In the mentioned subprojects, there are also examples of images created only with OBS + KIWI, without Git integration.
As we saw in the first KIWI tutorial, the openSUSE Leap 15.6 live images, which can be downloaded from download.opensuse.org, are built in the openSUSE:Leap:15.6:Images project.
Linux Kamarada also serves as example. The ISO image, which you can download from the Download page, has its source code hosted on GitLab, in the Linux-Kamarada-GNOME repository, 15.6 branch, and is built on OBS in the home:kamarada:15.6/Linux-Kamarada-GNOME package.
Links to the corresponding development version: GitLab and OBS.
OBS basics
I’m not going to dive into OBS basics here, I’ll write an entire post about them someday. By now, you can find how to get started with OBS here:
I assume that you are able to login with your openSUSE account at build.opensuse.org (if you don’t have an account yet, click the Sign Up link at the top of the page to create one).
Create an empty package on OBS for your appliance. To do this, click Your Home Project and then Create Package. Name it whatever you want.
Here, I’m going to use kiwi_tutorial, with an underscore, to differentiate from kiwi-tutorial, with a dash, the GitLab repository (we’ll come back to it later).
I also assume that you have installed osc, the OBS command-line client, on your machine. If you are using openSUSE, you can do that running:
1
# zypper install osc
Checkout your OBS home project using:
1
$ osc checkout home:kamarada
Enter the package directory:
1
$ cd home:kamarada/kiwi_tutorial
Copying the image source code to OBS
Let’s start from where we left off in the previous tutorial (commit 29e68afd).
To build our image using OBS + KIWI, we won’t need to touch the config.sh script. Copy it as is from the kiwi-tutorial folder to the kiwi_tutorial folder.
Also copy the appliance.kiwi file. We will adjust it later.
Instead of copying the root folder, I prefer to compress it into a .tar.gz file:
1
$ tar -czvf root.tar.gz root
Move this file to kiwi_tutorial.
Creating the images repository on OBS
An OBS project can have multiple repositories: the same source code can be used to build packages for openSUSE Leap 15.6, openSUSE Leap 15.5, openSUSE Tumbleweed, etc. And KIWI images are built in a separate repository called images.
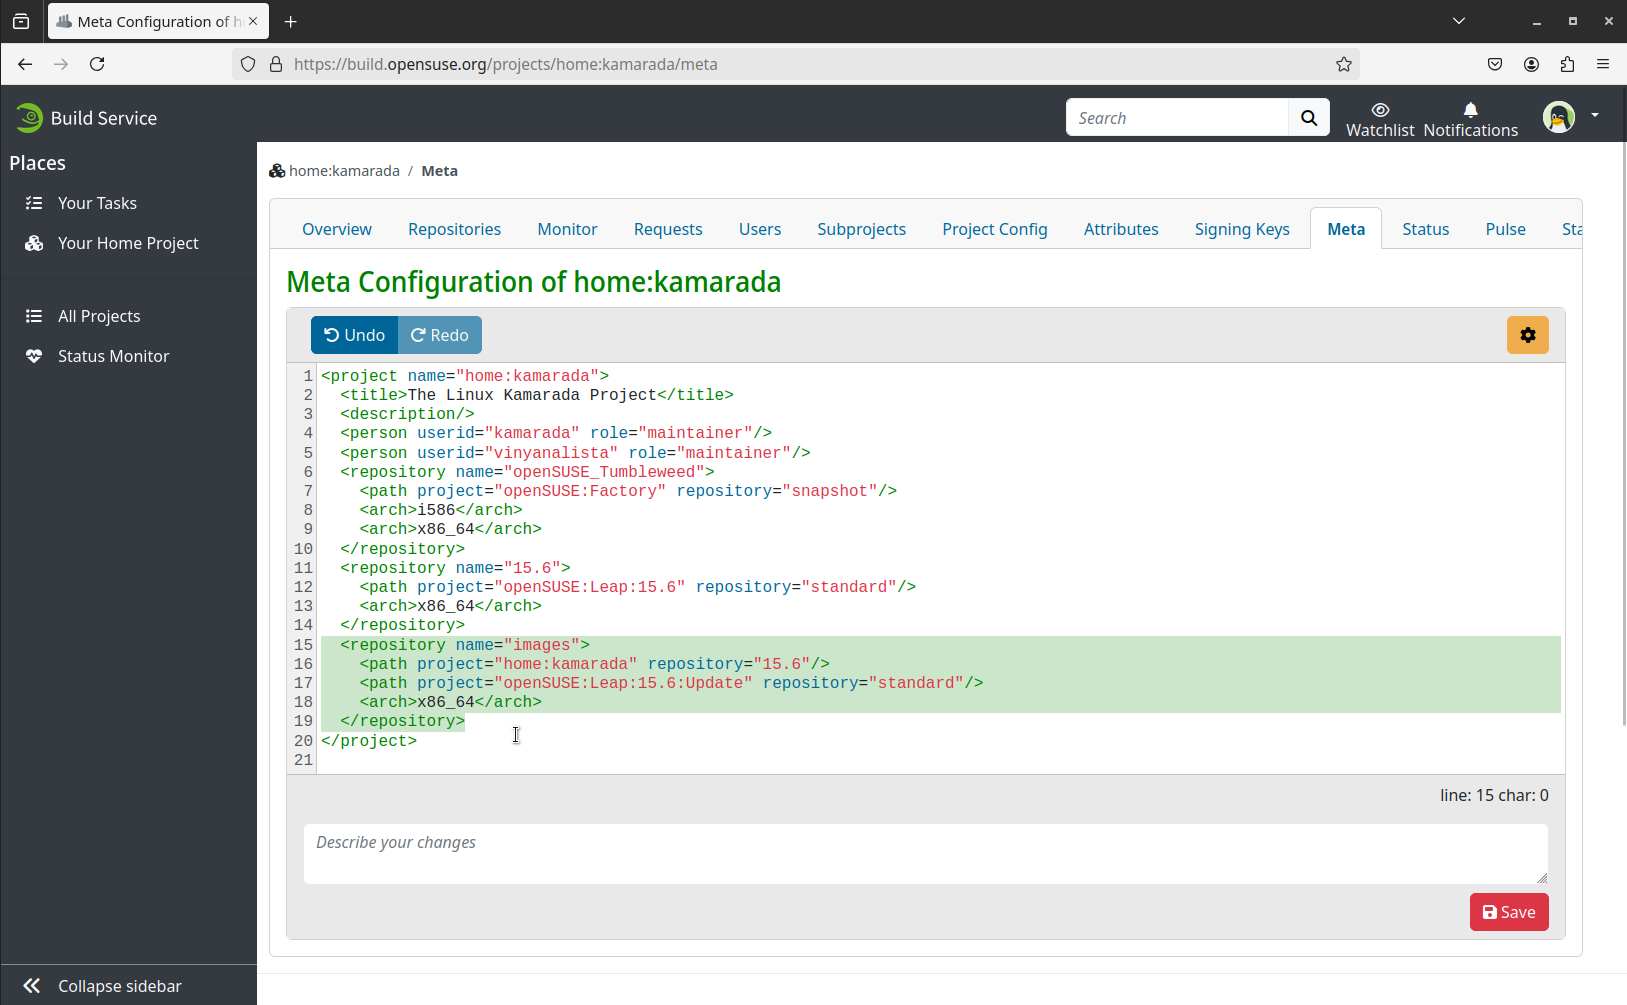
To create it, we are going to edit the project’s meta configuration.
On the OBS web interface, go to the project page and click the Meta tab:
Alternatively, you can do this locally using the terminal:
1
$ osc meta -e prj
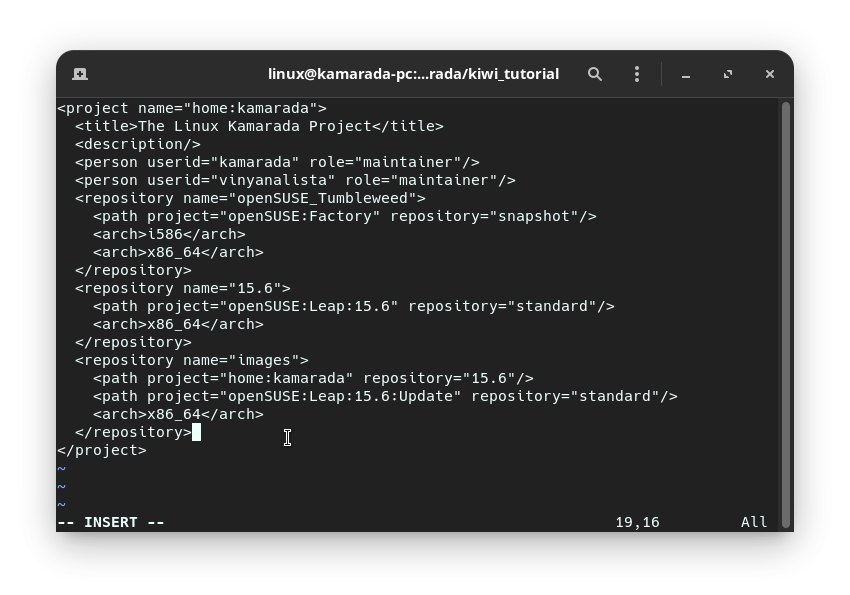
Create the images repository using the repository element. This element must be inserted as a child of the top-level project element:
1
2
3
4
5
6
<repository name="images">
  <path project="home:kamarada" repository="15.6"/>
  <path project="Virtualization:Appliances:Builder" repository="openSUSE_Leap_15.6"/>
  <path project="openSUSE:Leap:15.6:Update" repository="standard"/>
  <arch>x86_64</arch>
</repository>
This configuration not only creates the images repository, but also defines which repositories OBS should pull packages from to install into the image.
Configuring the appliance repositories
When using KIWI integrated with OBS, it is highly recommended to move the configuration of which repositories to use from the KIWI image description to the OBS project configuration.
Open the appliance.kiwi file. Uncomment (or insert) the configuration to use OBS repositories and comment (or remove) the other repositories. In the end, the repository configuration should look like this:
1
2
3
4
5
6
7
8
9
    <repository type="rpm-md">
        <source path="obsrepositories:/"/>
    </repository>
    <!--<repository alias="repo-update" imageinclude="true" priority="1" type="rpm-md">
        <source path="obs://openSUSE:Leap:15.6:Update/standard"/>
    </repository>
    <repository alias="repo-oss" imageinclude="true" priority="2" type="rpm-md">
        <source path="obs://openSUSE:Leap:15.6/standard"/>
    </repository>-->
We have already done the project configuration on OBS. Here are just a few notes.
The order in which you list repositories matters: if more than one repository provides the same package, it will be fetched from the first repository listed.
And the last repository is subject to path expansion: repositories it depends on are also considered by OBS.
So, since the openSUSE_Leap_15.6 repo of the Virtualization:Appliances:Builder project already uses the standard repo of the openSUSE:Leap:15.6:Update project (we can check this in the meta configuration of that project), we can simplify the meta configuration of our project:
1
2
3
4
5
<repository name="images">
  <path project="home:kamarada" repository="15.6"/>
  <path project="Virtualization:Appliances:Builder" repository="openSUSE_Leap_15.6"/>
  <arch>x86_64</arch>
</repository>
Project setup on OBS
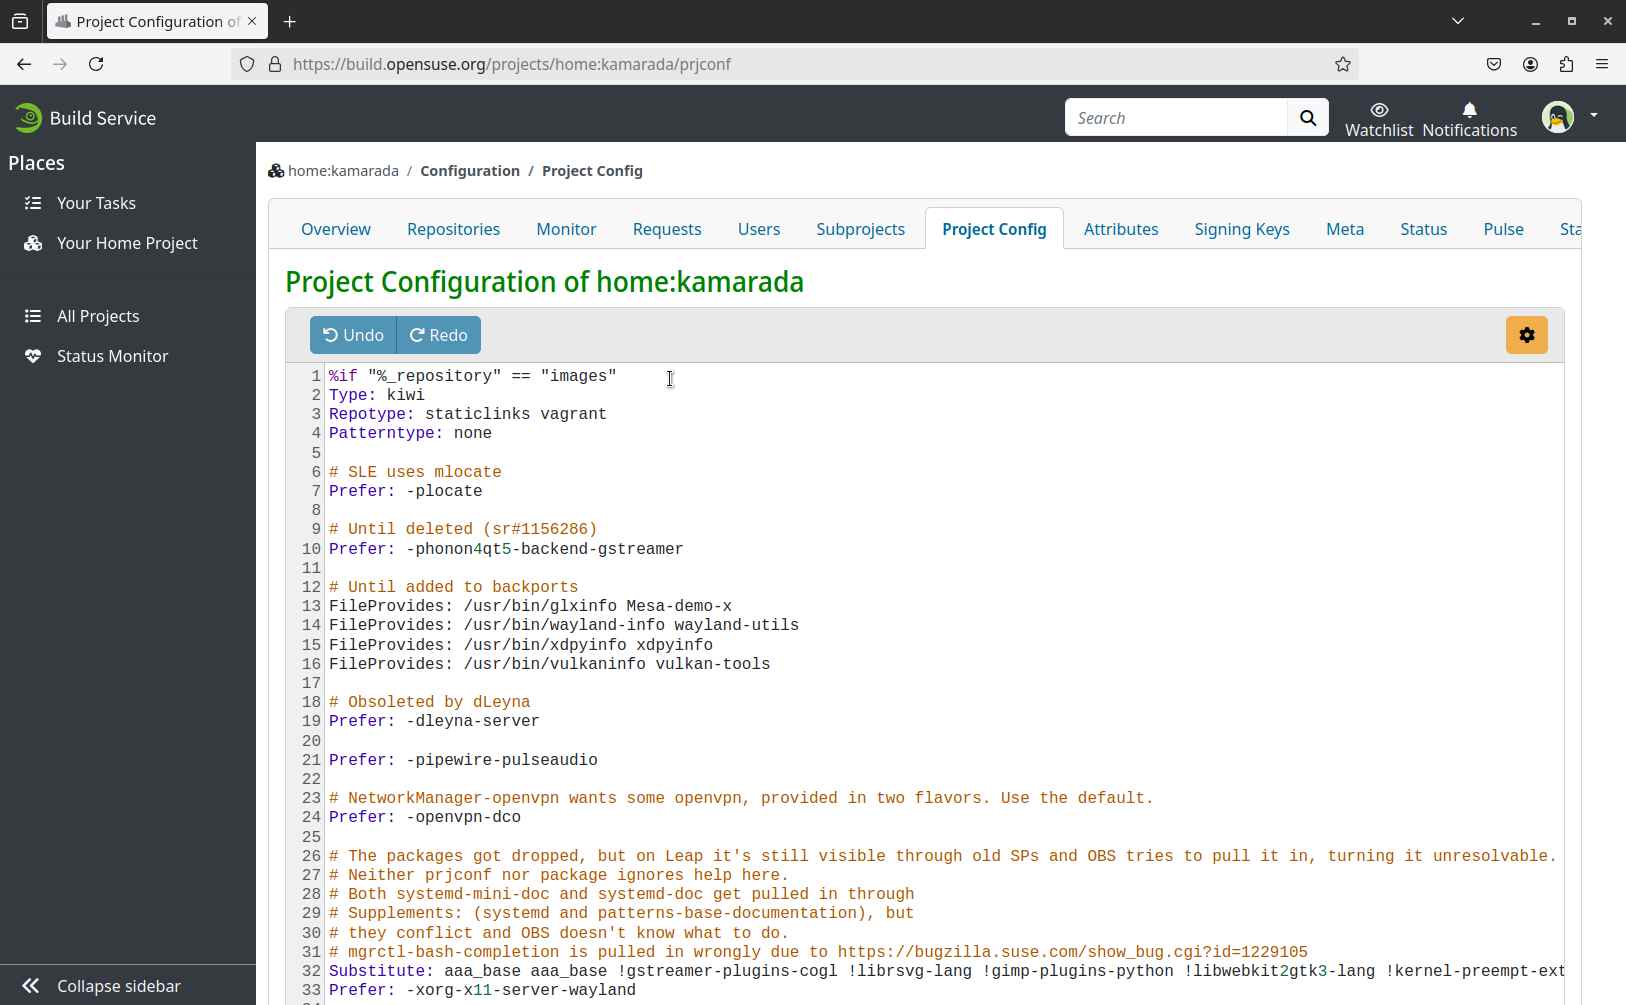
To use KIWI to create images, OBS requires a lot of tweaks to the project configuration.
On the OBS web interface, go to the project page and click the Project Config tab:
Alternatively, you can do this locally using the terminal:
1
$ osc meta -e prjconf
Instead of starting from scratch and doing all this configuration manually, the recommendation is to copy the current configuration of an existing project that uses KIWI into your own project. This provides a good starting point and you can adapt it as needed.
Here, I copied the openSUSE:Leap:15.6:Images project config. The only adjustment I made was to replace the python3-kiwi package with the python311-kiwi package.
If you want more information about the OBS project config, check out the KIWI and OBS docs:
Building the image locally
Although OBS is an online service, you don’t need to send every single change to test it. OBS allows you to build packages and images locally just as you would build them remotely using the osc build command. So if you can successfully build your image locally on your own computer with osc build, you can be sure that it will also build remotely on the OBS server. I think it’s a good idea to test at least before the first commit.
To build your image locally, run:
1
$ osc build images appliance.kiwi
Solving OBS “unresolvable” errors
Right away, when building the image for the first time, we come across a common error when using KIWI integrated with OBS:
1
2
3
4
5
6
Building appliance.kiwi for images/x86_64
Using local file: appliance.kiwi
Getting buildconfig from server and store to /home/linux/home:kamarada/kiwi_tutorial/.osc/_buildconfig-images-x86_64
Getting buildinfo from server and store to /home/linux/home:kamarada/kiwi_tutorial/.osc/_buildinfo-images-x86_64.xml
buildinfo is broken... it says:
unresolvable: have choice for pattern() = laptop: patterns-desktop-laptop patterns-desktop-mobile
When KIWI is run in OBS, dependencies are resolved by OBS, which will not start building the image if there is more than one package that could be chosen to satisfy a dependency of another package. It then shows errors like this:
1
unresolvable: have choice for SOMEPACKAGE: SOMEPAKAGE_1 SOMEPAKAGE_2
This can be solved by explicitly specifying one of the two packages in the project configuration via the following setting:
1
Prefer: SOMEPACKAGE_1
I prefer to add to appliance.kiwi:
1
2
<!-- OBS: unresolvable: have choice for pattern() = laptop: patterns-desktop-laptop patterns-desktop-mobile -->
<package name="patterns-desktop-mobile"/>
This way, I ensure that the same package will be used both in the local build using only KIWI and in the remote build using KIWI + OBS.
Make whatever changes you need to make, either in the project configuration or in the image description, and try the osc build command again.
Tip: if you are using an already installed system as a reference to set up your image, it may be useful to consult the list of packages installed on that system to know which package to choose.
To list all packages installed on the system, use:
1
$ rpm -qa --qf '%{name}\n' | sort > installed_packages
This outputs the list of installed packages to a text file that can be searched with the grep command:
1
2
3
4
5
6
7
8
9
10
11
12
13
14
15
$ grep tlp installed_packages

tlp
tlp-rdw

$ grep power installed_packages

cpupower
cpupower-bash-completion
cpupower-lang
libcpupower1
libupower-glib3
typelib-1_0-UpowerGlib-1_0
upower
upower-lang
Using this tip, I solved two more “unresolvable” errors that appeared for me:
1
2
3
4
5
<!-- OBS: unresolvable: tlp conflicts with power-profiles-daemon -->
<package name="tlp"/>

<!-- OBS: unresolvable: have choice for noto-sans-cjk-fonts needed by patterns-gnome-gnome_x11: google-noto-sans-cjk-fonts noto-sans-cjk-fonts -->
<package name="google-noto-sans-cjk-fonts"/>
Your appliance.kiwi file should now look like this.
Finally, osc build stops showing “unresolvable” errors and moves on:
1
2
3
4
5
6
7
8
9
10
11
12
13
14
15
$ osc build images appliance.kiwi

Building appliance.kiwi for images/x86_64
Using local file: appliance.kiwi
Getting buildconfig from server and store to /home/linux/home:kamarada/kiwi_tutorial/.osc/_buildconfig-images-x86_64
Getting buildinfo from server and store to /home/linux/home:kamarada/kiwi_tutorial/.osc/_buildinfo-images-x86_64.xml
Updating cache of required packages

The build root needs packages from project 'openSUSE:Leap:15.6'.
Note that malicious packages can compromise the build result or even your system.
Would you like to ...
0 - quit (default)
1 - always trust packages from 'openSUSE:Leap:15.6'
2 - trust packages just this time
?
In this case, osc will need to download packages and asks if it can trust the repository. Type 1 to always trust this repository and hit Enter. It may repeat this question several times, once for each repository that it needs to use. Answer them all the same way.
Note that OBS (and osc) does not run KIWI directly on your system. It downloads all the necessary packages and creates a minimal chrooted Linux installation, then installs KIWI and builds the image on that installation. By doing this, OBS ensures that the appliance description is written correctly and that the image is not being built successfully just because it is on your computer. This ensures a reproducible build: the image can be built by anyone, on any computer, and the built image is always going to be the same.
When it finishes downloading the packages, osc will ask the root password to create the chroot environment and start building the image.
In the end, if everything goes well, you will have an output like this:
1
2
3
4
5
6
7
8
9
10
11
12
13
[ 2976s] [ INFO    ]: 18:46:21 | Finalizing kiwi-tutorial.x86_64-15.6-Build.packages
[ 2976s] [ INFO    ]: 18:46:21 | Finalizing kiwi-tutorial.x86_64-15.6-Build.verified
[ 2976s] [ INFO    ]: 18:46:21 | Finalizing kiwi-tutorial.x86_64-15.6-Build.iso
[ 2976s] [ INFO    ]: 18:46:21 | --> Creating SHA 256 sum
[ 2982s]
[ 2982s] kamarada-pc finished "build appliance.kiwi" at Sat Apr 19 18:46:27 UTC 2025.
[ 2982s]


/var/tmp/build-root/images-x86_64/usr/src/packages/KIWI/kiwi-tutorial.x86_64-15.6-Build.verified
/var/tmp/build-root/images-x86_64/usr/src/packages/KIWI/kiwi-tutorial.x86_64-15.6-Build.iso
/var/tmp/build-root/images-x86_64/usr/src/packages/KIWI/kiwi-tutorial.x86_64-15.6-Build.iso.sha256
/var/tmp/build-root/images-x86_64/usr/src/packages/KIWI/kiwi-tutorial.x86_64-15.6-Build.packages
The last lines indicate where you can find the files generated by KIWI. Among them, in particular, the ISO image.
You can test it using VirtualBox, as you did in the previous tutorial.
Uploading the image to OBS
Once your image is how you want it, use the following commands to upload your work to OBS (if you’re already familiar with a version control system like Git, you’ll find the logic similar).
For some reason I don’t know, I noticed that the osc build command created a repos folder. If this happened to you too, delete it before continuing:
1
$ rm -rf repos
Check the folder status:
1
2
3
4
5
$ osc status

?    appliance.kiwi
?    config.sh
?    root.tar.gz
In this case, none of the 3 files are in OBS version control. To add them, run:
1
2
3
4
5
$ osc add *

A    appliance.kiwi
A    config.sh
A    root.tar.gz
Finally, to upload the changes to OBS, run:
1
$ osc commit
As with Git, the text editor opens for you to provide a commit message. Enter the message, save and close, and the files are sent:
1
2
3
4
5
Sending    appliance.kiwi
Sending    config.sh
Sending    root.tar.gz
Transmitting file data ...
Committed revision 1.
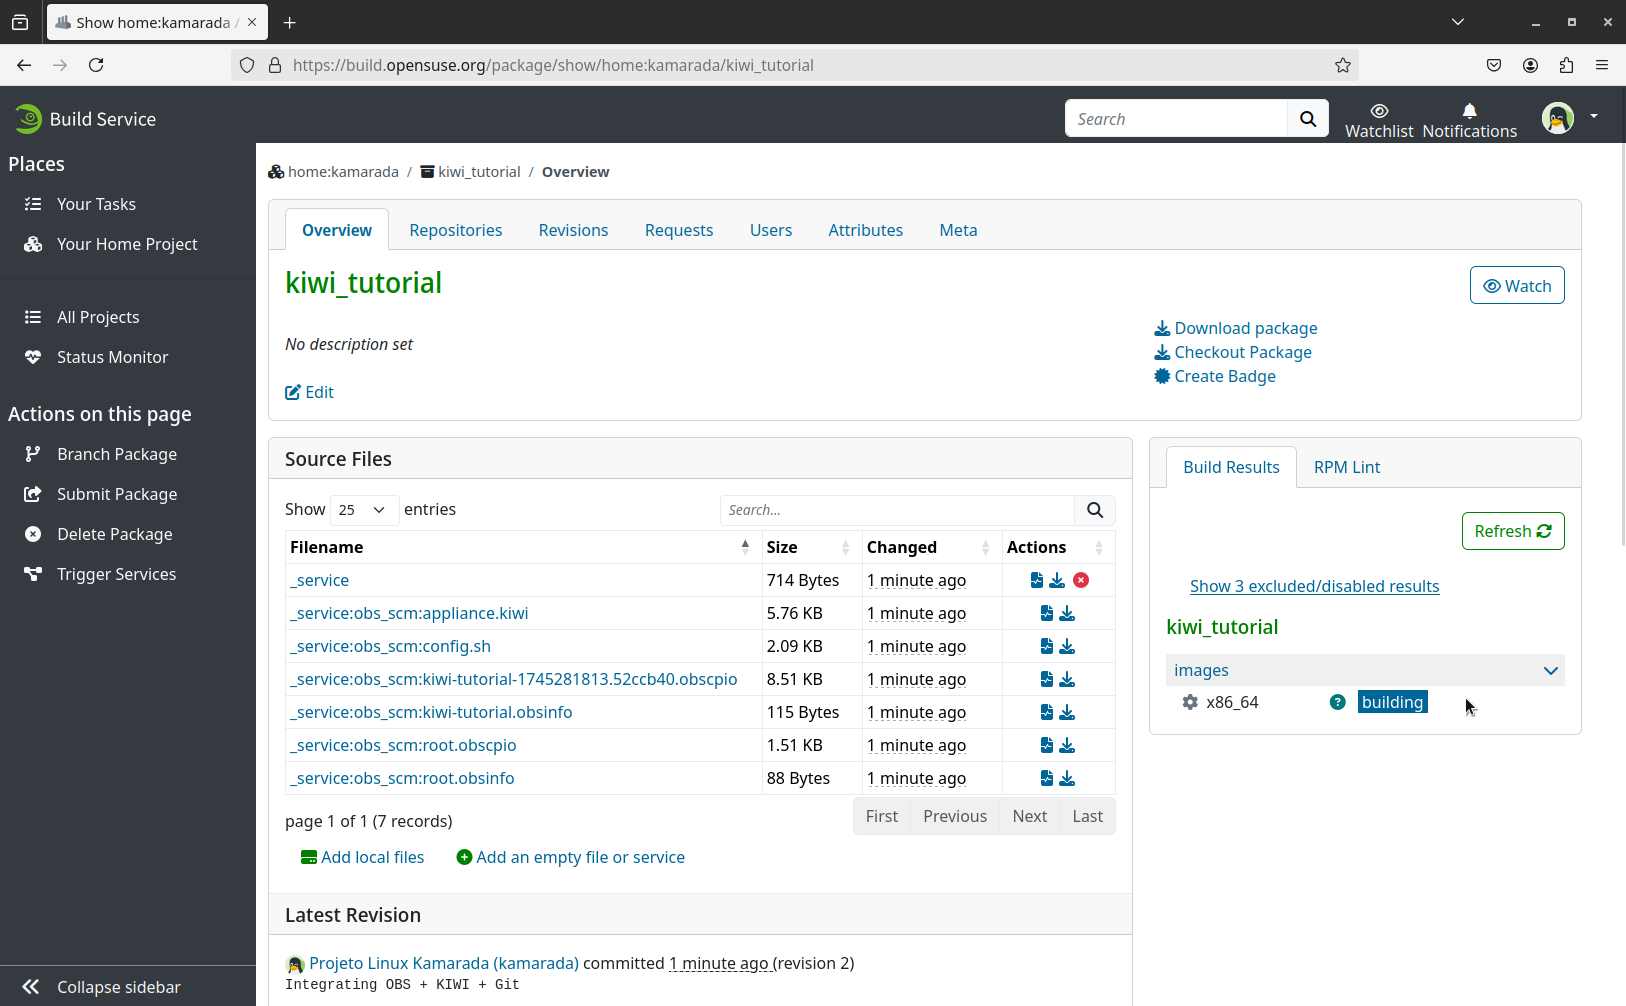
If you open your package page on OBS, you will see that it is being built:
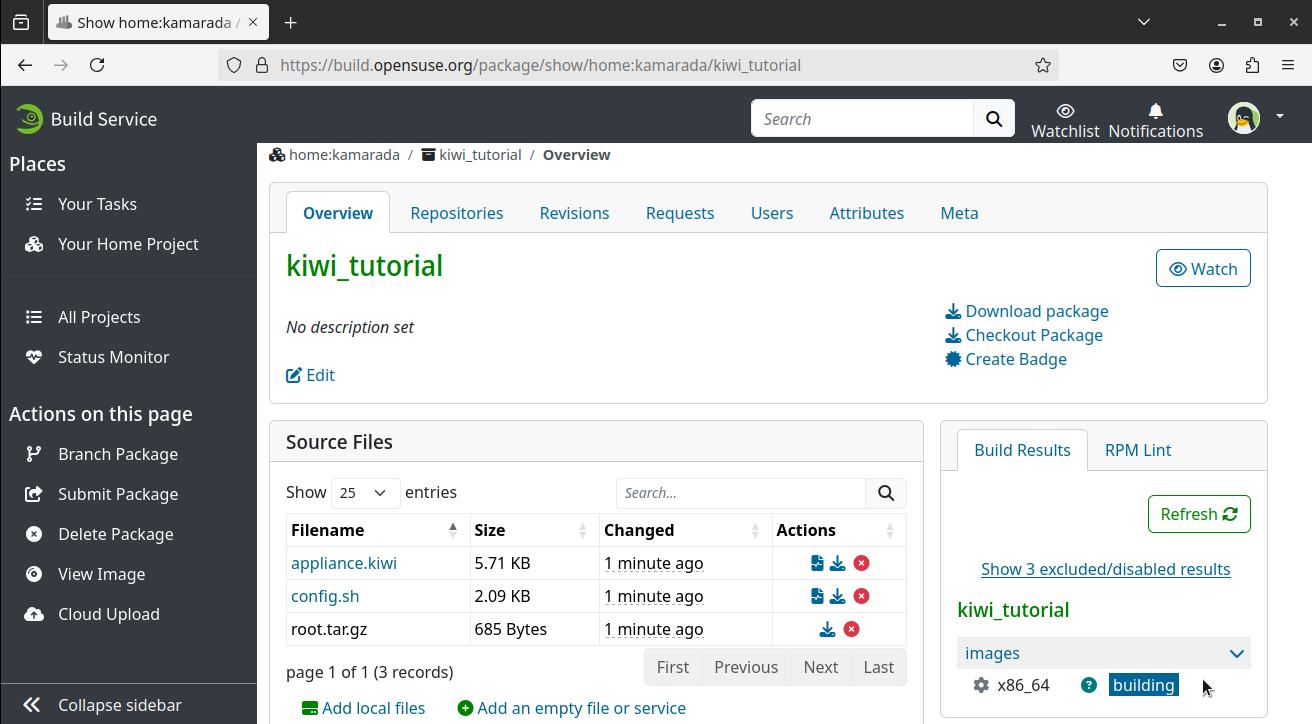
Since local building worked, it is likely that the remote building by OBS will also work:
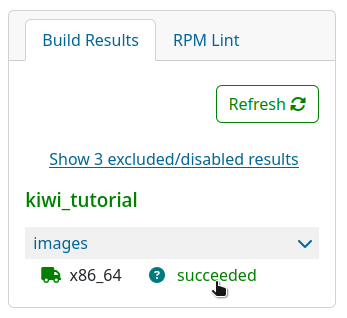
You can click the result (succeeded) to view the build log:
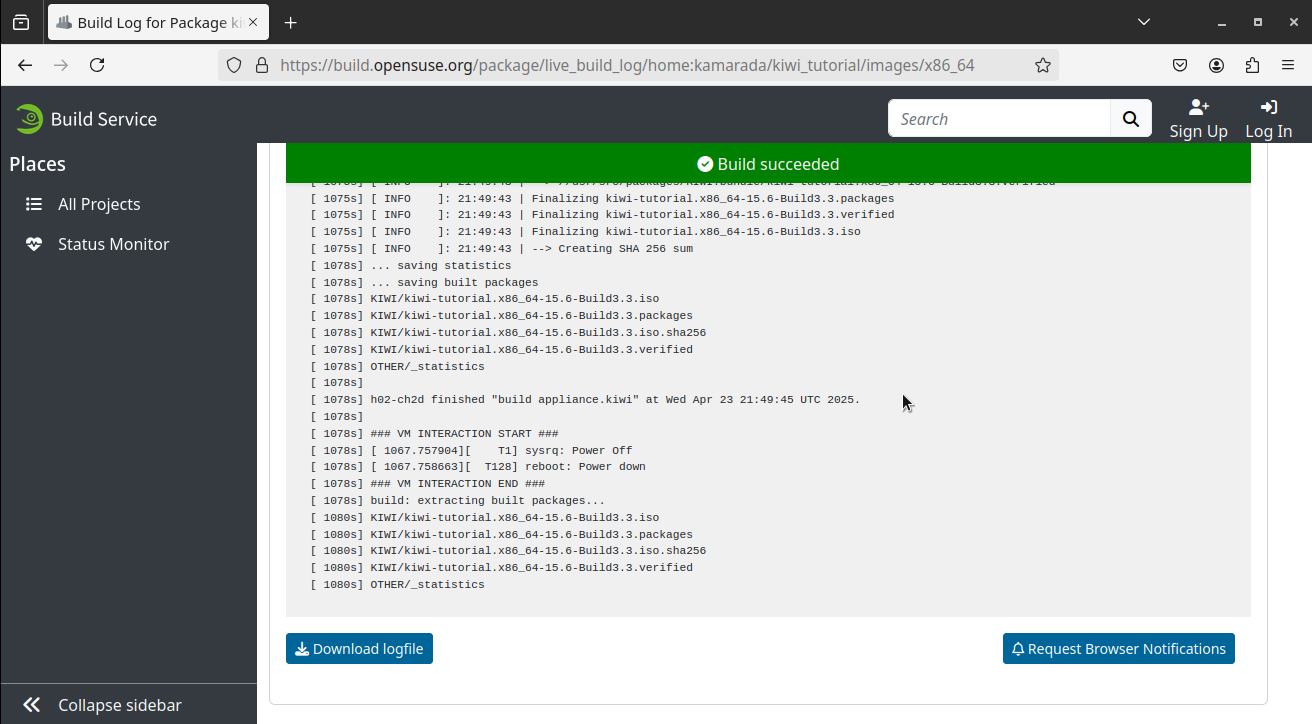
This log is useful when something goes wrong during building.
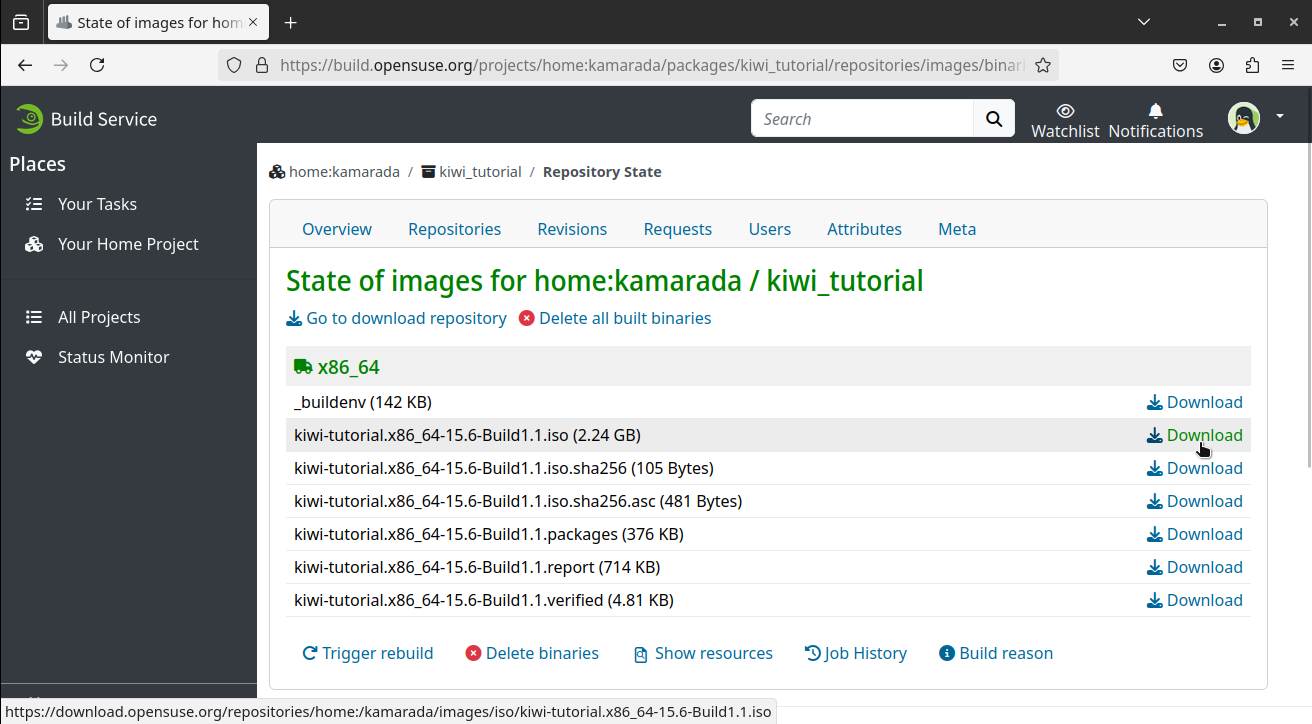
Back to the package page, you can click the images repo to download the built ISO image to your computer.
Integrating with Git
Optionally, if you prefer the Git version control, you can integrate OBS with Git, even in this scenario where OBS is used to build KIWI images. In this case, what will change a bit is the _service (compared to the scenario where OBS + Git are used to build RPM packages).
Next, I’m going to show you how I set up the kiwi_tutorial OBS project to get its source code from the kiwi-tutorial GitLab repo.
Using osc, set up the source service to retrieve sources from GitLab:
1
$ osc add https://gitlab.com/kamarada/kiwi-tutorial.git
An _service file is created in the project folder. We will return to it.
First, delete the other files in the folder, leaving only this one:
1
2
3
4
5
6
7
8
9
10
11
12
13
14
15
16
17
18
19
$ rm appliance.kiwi
$ rm config.sh
$ rm root.tar.gz
$ osc status

A    _service
!    appliance.kiwi
!    config.sh
!    root.tar.gz

$ osc rm appliance.kiwi
$ osc rm config.sh
$ osc rm root.tar.gz
$ osc status

A    _service
D    appliance.kiwi
D    config.sh
D    root.tar.gz
Now edit the _service file and exchange its contents with:
1
2
3
4
5
6
7
8
9
10
11
12
13
14
15
16
17
18
<services>
    <service name="obs_scm">
        <param name="scm">git</param>
        <param name="url">https://gitlab.com/kamarada/kiwi-tutorial.git</param>
        <param name="revision">master</param>
        <param name="extract">appliance.kiwi</param>
        <param name="extract">config.sh</param>
        <param name="exclude">root</param>
    </service>
    <service name="obs_scm">
        <param name="scm">git</param>
        <param name="url">https://gitlab.com/kamarada/kiwi-tutorial.git</param>
        <param name="revision">master</param>
        <param name="version">_none_</param>
        <param name="subdir">root</param>
        <param name="filename">root</param>
    </service>
</services>
Note that I’m using the master branch. If you are going to get the source code from another branch, change the value of the revision parameter.
Commit changes:
1
2
3
4
5
6
7
8
9
10
11
12
$ osc commit

osc commit
Deleting    appliance.kiwi
Deleting    config.sh
Deleting    root.tar.gz
Sending    _service
Transmitting file data .
Committed revision 2.
Waiting for server side source service run
........................
At revision 2.
Commiting to OBS automatically triggers the source service and the image build process. If you go to build.opensuse.org, you will see your image being built:
Note that, at least for now, the integration between OBS and Git is configured in a one-way direction: OBS can get the source code from Git, but for each new git push, you would have to access OBS and manually Trigger Services to build the image using the latest source code.
In order for Git itself to notify OBS of source code updates, you need to generate an authorization token. To see how to do this, continue reading from one of these tutorials:
Conclusion
If you want to create an openSUSE-based Linux distribution, or just a custom openSUSE image to use at work, or whatever your purpose is, I hope this tutorial has helped you extract the best from KIWI, OBS and Git, just like I do here at the Linux Kamarada Project.
If you have any questions, you can consult the official KIWI and OBS docs:
- Building in the Open Build Service - KIWI
- Documentation - Open Build Service
- openSUSE:Build Service Tutorial - openSUSE Wiki
Or write your questions in the comments. See you next time!


