This is the part 3 of our trilogy of posts about VirtualBox! You are going to see how to create a virtual hard disk and install Linux on the virtual machine, as well as tips for using VirtualBox daily. As the guest operating system, I’m going to use the openSUSE-based Kamarada Linux distribution.
In the previous posts, you’ve seen what virtualization is, what VirtualBox is, how to install it on Windows and Linux, how to create a virtual machine and how to use it to try Linux.
If you fell into this page, I recommend that you start your reading from the previous posts:
Prevent LiveCD/DVD ejection
Some guest operating systems, such as Ubuntu, eject live media on shutdown:
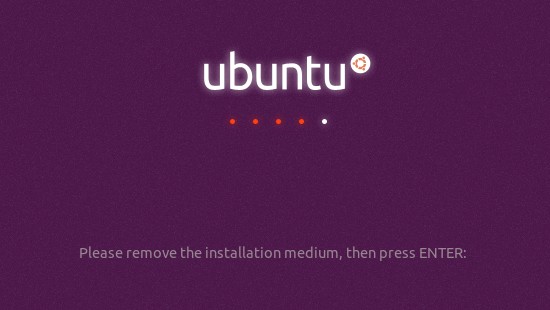
Please remove the installation medium, then press Enter
On a physical computer, the LiveDVD would now be ejected.
On a VirtualBox virtual machine, the virtual DVD drive becomes empty. To start the VM again, you would have to reinsert the ISO image into the virtual DVD drive, as we have seen in part 1. If you repeatedly start the VM with live media, having to reinsert the ISO image every time is unnecessarily laborious.
Fortunately, VirtualBox provides an option to prevent live media ejection. To enable it, select the virtual machine on the VirtualBox start screen, click Settings, open the Storage section, select the virtual DVD drive and enable the LiveCD/DVD option:
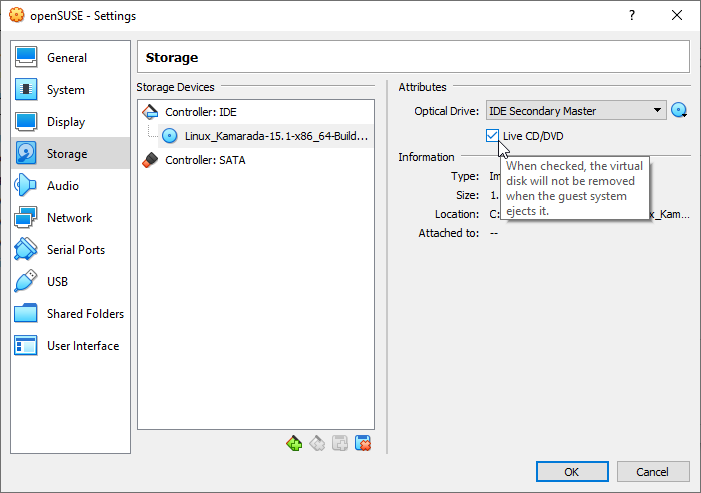
From now on, when you shut the VM down, live media will no longer be removed. You can start the VM again without having to manually reinsert the ISO image.
Creating a virtual hard disk
If you have followed this trilogy of posts about VirtualBox, until now you have booted Linux on the virtual machine from a live image. That way, any changes you make to the guest OS are lost when you shut the VM down. For having a first contact with Linux, a live image is great, but using Linux on a daily basis doesn’t look like that.
To get a better idea of how it is to use Linux on a real computer, let’s install Linux on the virtual machine. Before doing that, we need to create a virtual hard disk.
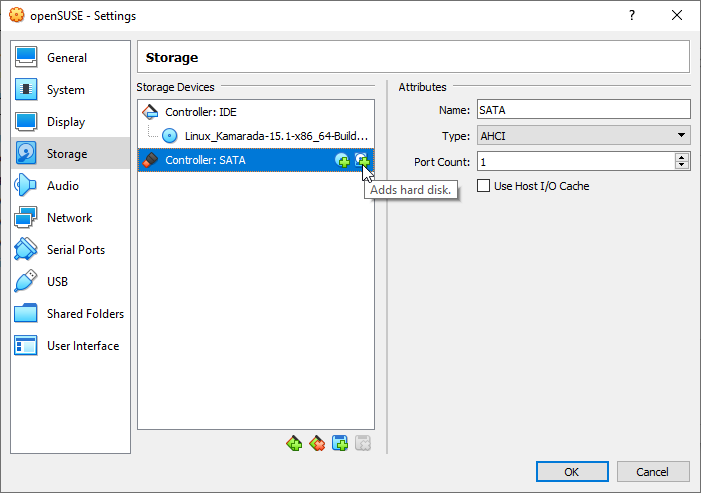
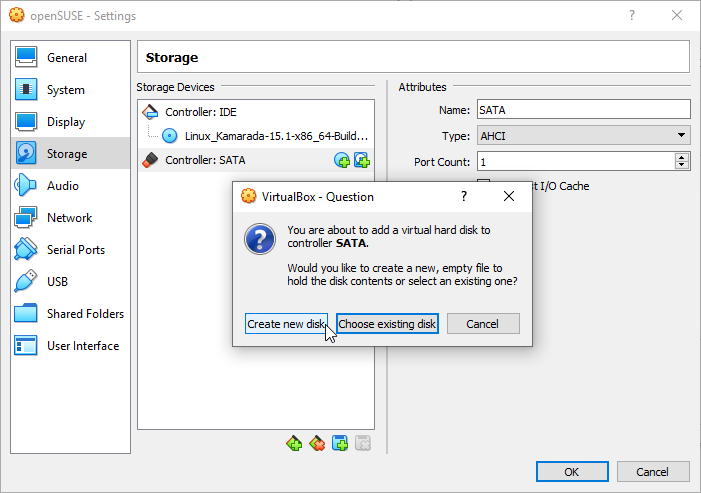
With the VM shutdown, select it on the VirtualBox start screen, click Settings, open the Storage section, select the Controller: SATA and click the Add hard disk icon:
VirtualBox asks if you want to create a new disk or use an existing one. Click Create new disk:
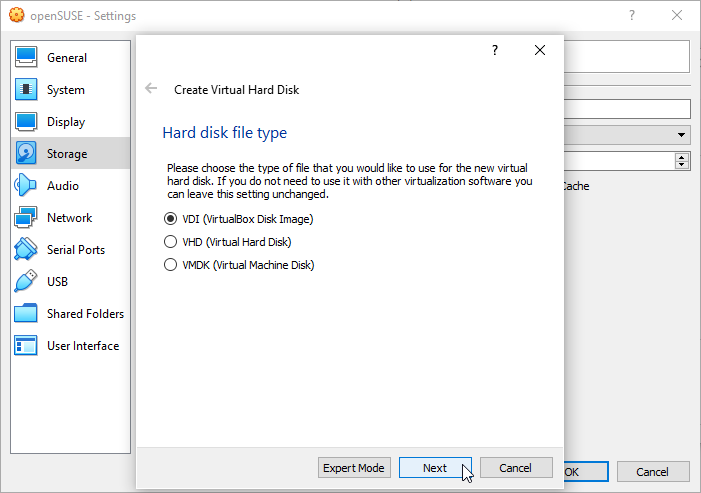
VirtualBox supports some types of virtual hard disks. Probably you don’t want to use this disk with other virtualization software, so keep the VirtualBox native format VDI (VirtualBox Disk Image) selected and click Next:
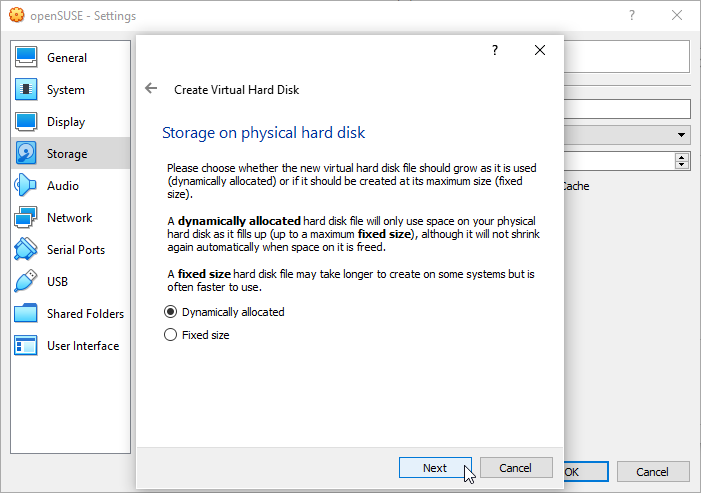
A virtual hard disk, from the host OS point of view, is a file. You can choose between:
- create a Fixed size file, which immediately has the same size as the virtual disk’s wanted capacity (e.g. for a 10GB virtual disk, VirtualBox creates a 10GB file), or
- create a Dynamically allocated file, which has the same size as the virtual disk space actually in use (this file is initially very small and grows in size when the guest OS stores new data, limited to the maximum capacity chosen).
I recommend that you keep the Dynamically allocated option selected and click Next:
Enter a file path and size for the virtual hard disk — 20GB is enough to install Linux Kamarada (or openSUSE) and test it with comfort — and click Create:
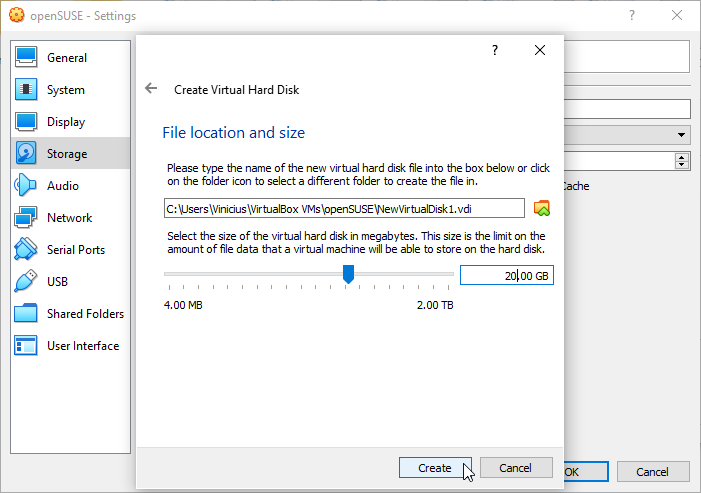
That’s it: virtual hard disk created and ready to be used. Back to the Settings dialog box, click OK to close it and return to the VirtualBox start screen.
Installing Linux on the virtual machine
Make sure the Linux ISO image is in the virtual DVD drive and start the virtual machine.
Start the Linux Kamarada installer by clicking its icon on the dock:
(just out of curiosity, the installer is a free software called Calamares)
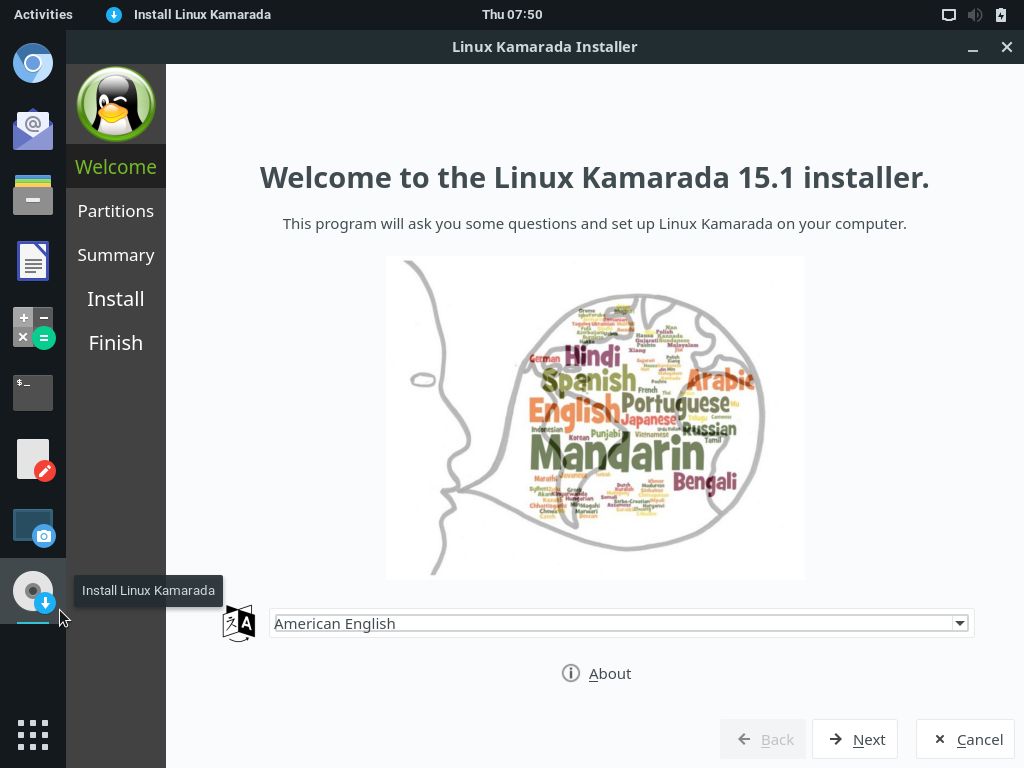
On the first installer screen, select your language (for the purpose of this post, I’m going to stay with the default American English) and click Next.
On the second screen, Partitions, you can partition the hard disk. Since you are going to use this virtual machine just to try Linux and it will be the sole system installed on the virtual disk, you don’t need not worry about partitioning, just choose to Erase disk and click Next:

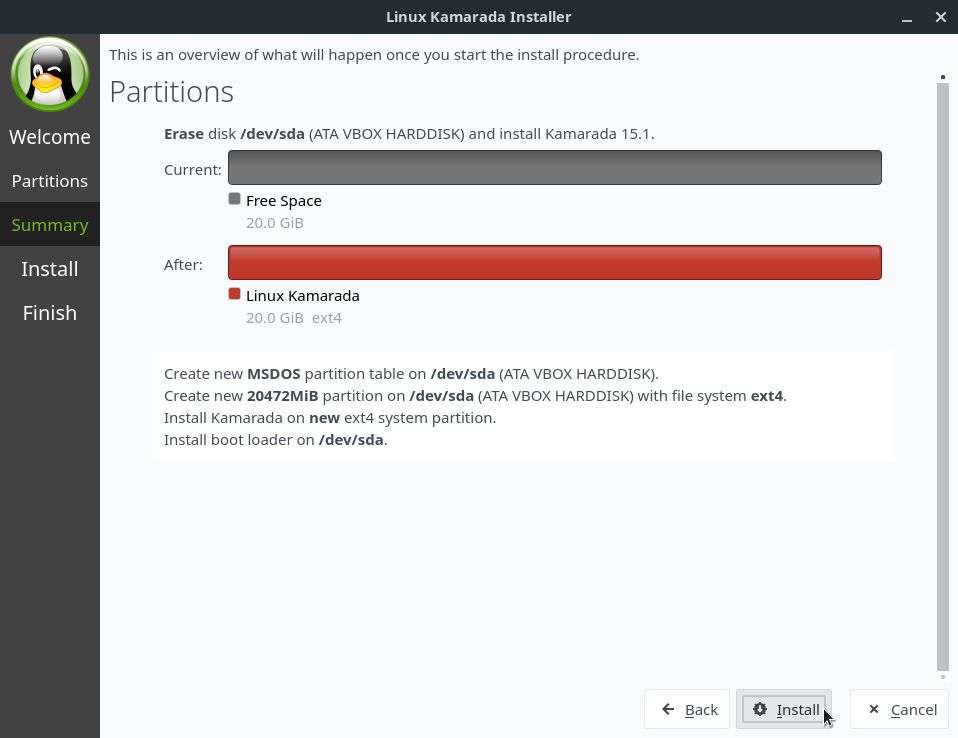
On the next screen, Summary, the installer summarizes the installation settings. Make sure everything is alright and click Install:
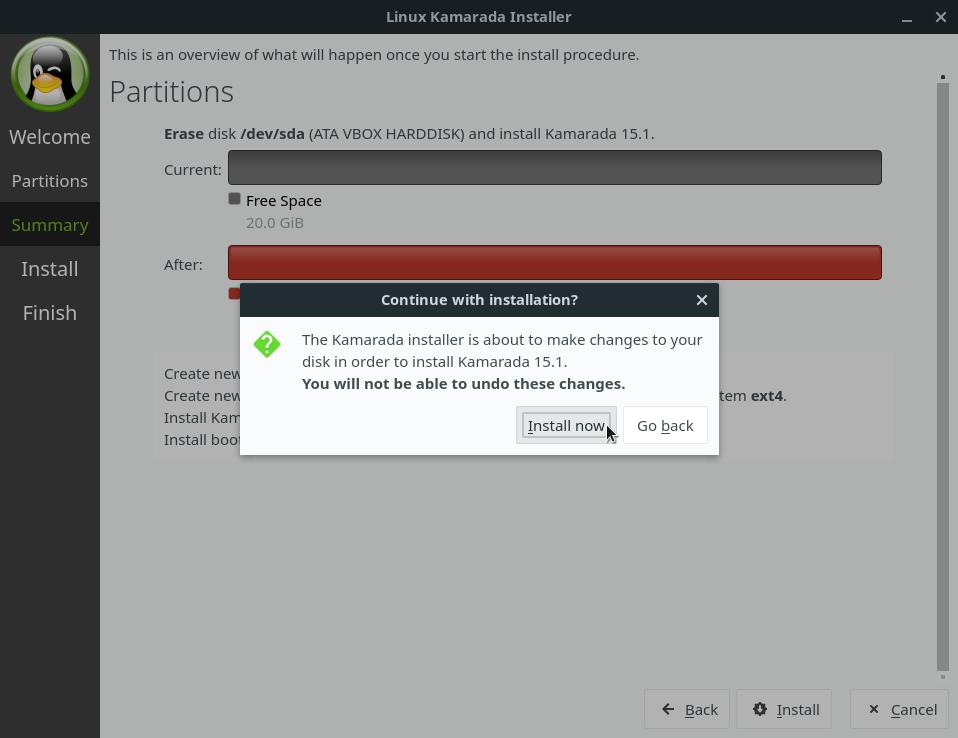
Note that we reached the point of no return: once the installation has started, you cannot undo changes made to the disk. Click Install Now:
Wait for the installation of Linux Kamarada, which may take a few minutes:
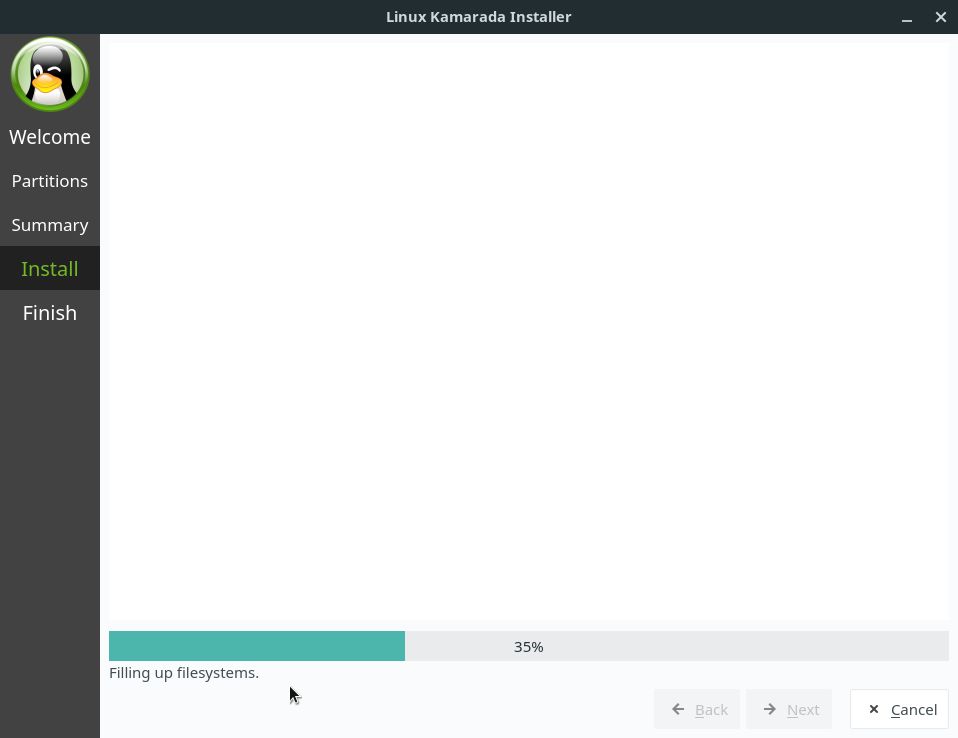
You can go have a coffee and come back later.
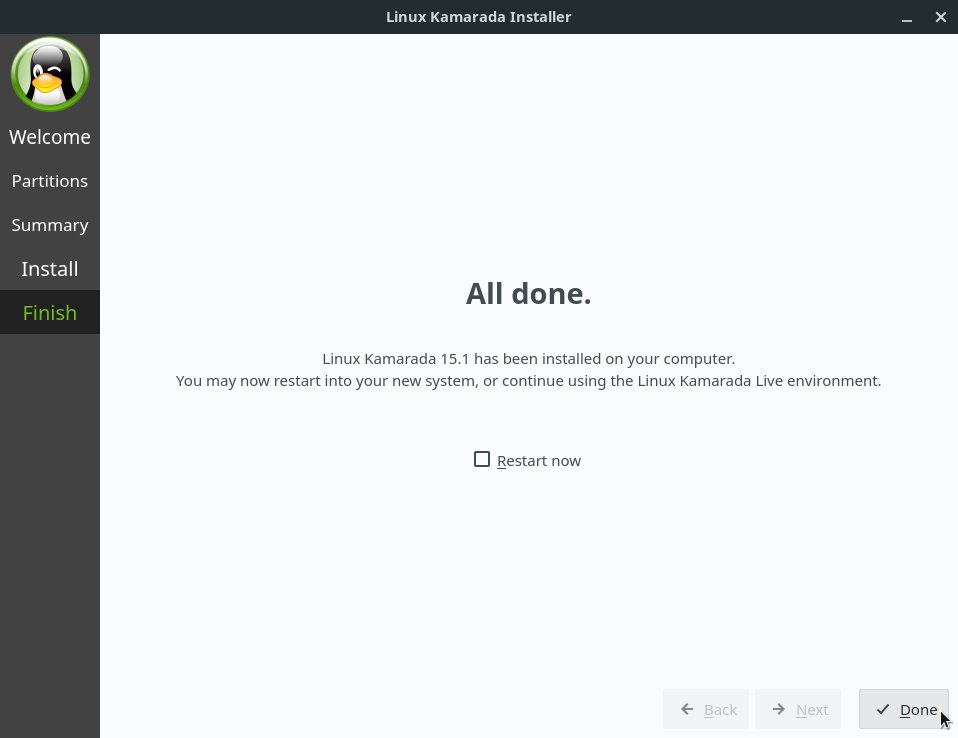
When installation is finished, do not check Restart now, click Done:
Shut the virtual machine down as usual (as we have seen in part 1).
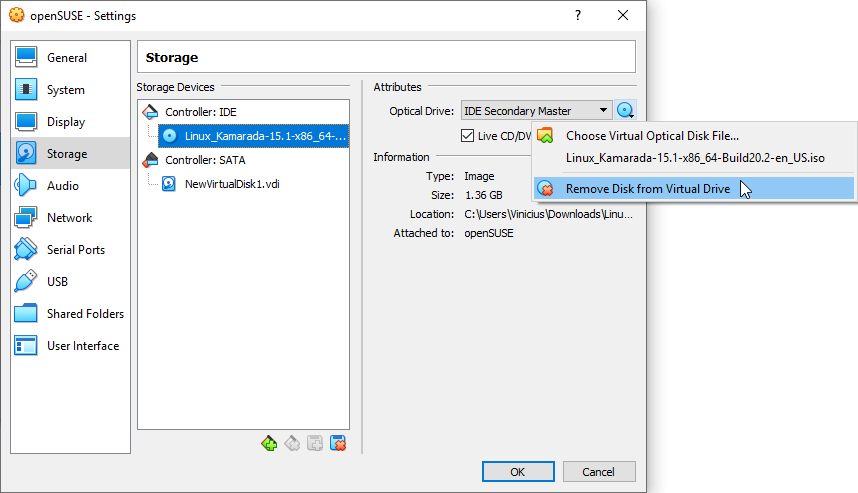
Remove the ISO image from the virtual DVD drive (as if you were ejecting a DVD from a physical computer DVD drive). To do that, access the virtual machine settings, open the Storage section, select the virtual DVD drive, click the media icon and then, on the drop-down menu that appears, click Remove Disk from Virtual Drive:
Click OK to close the Settings dialog box and return to the VirtualBox start screen.
Now start the virtual machine. This time, it will boot from the virtual hard disk.
On the first use, Linux Kamarada presents a wizard to assist you on some basic configuration:
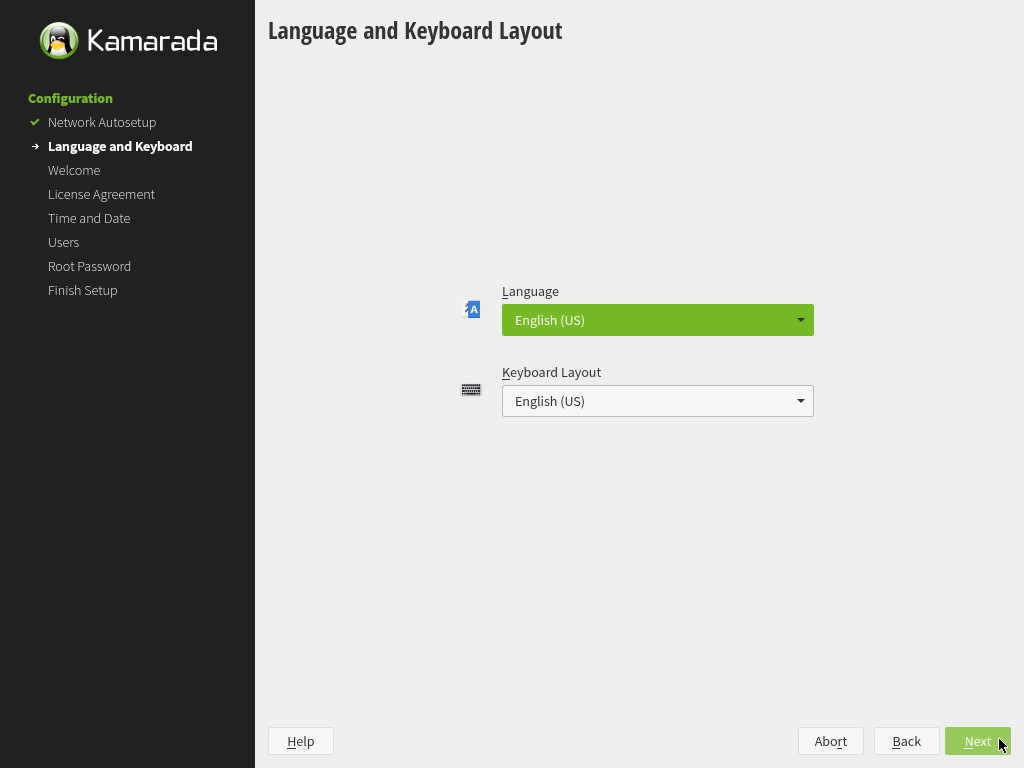
(just out of curiosity, that wizard is a YaST module called Firstboot)
On the first screen of the wizard, select your Language and Keyboard Layout and click Next.
On the welcome screen, click Next:

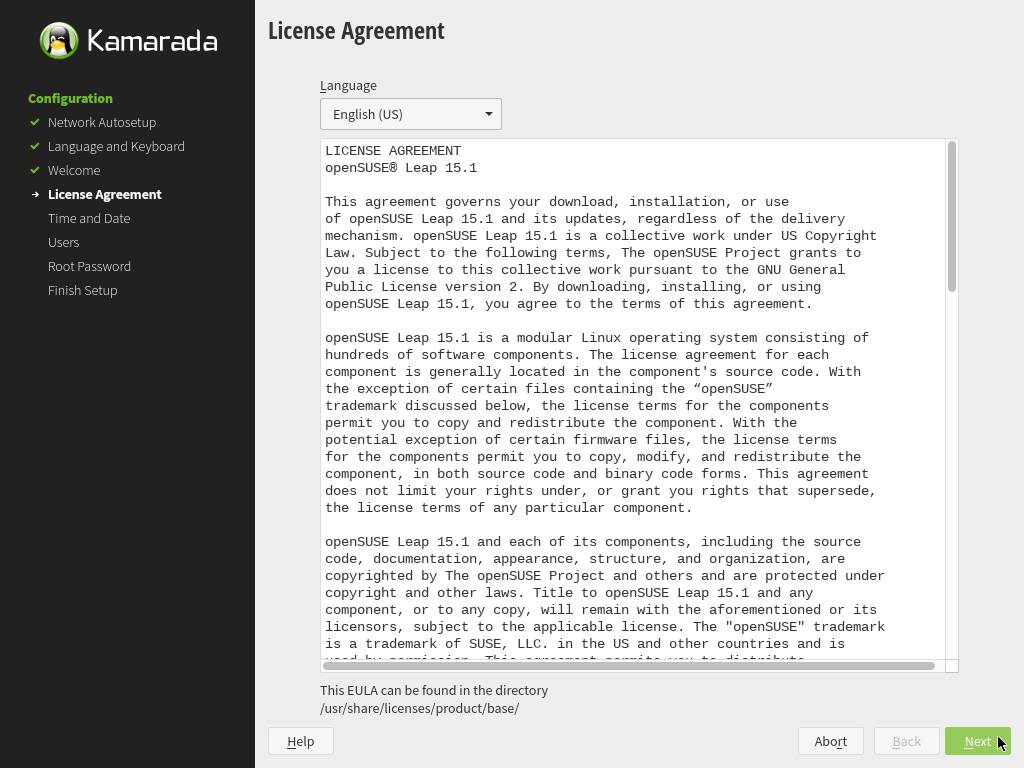
On the next screen, you are presented to the openSUSE Leap license, which is the same license adopted by Linux Kamarada. You don’t need to worry about this license: since openSUSE is a free software, its license does not limit your use. You can read it just to know your rights as an openSUSE / Linux Kamarada user. When you finish, click Next:
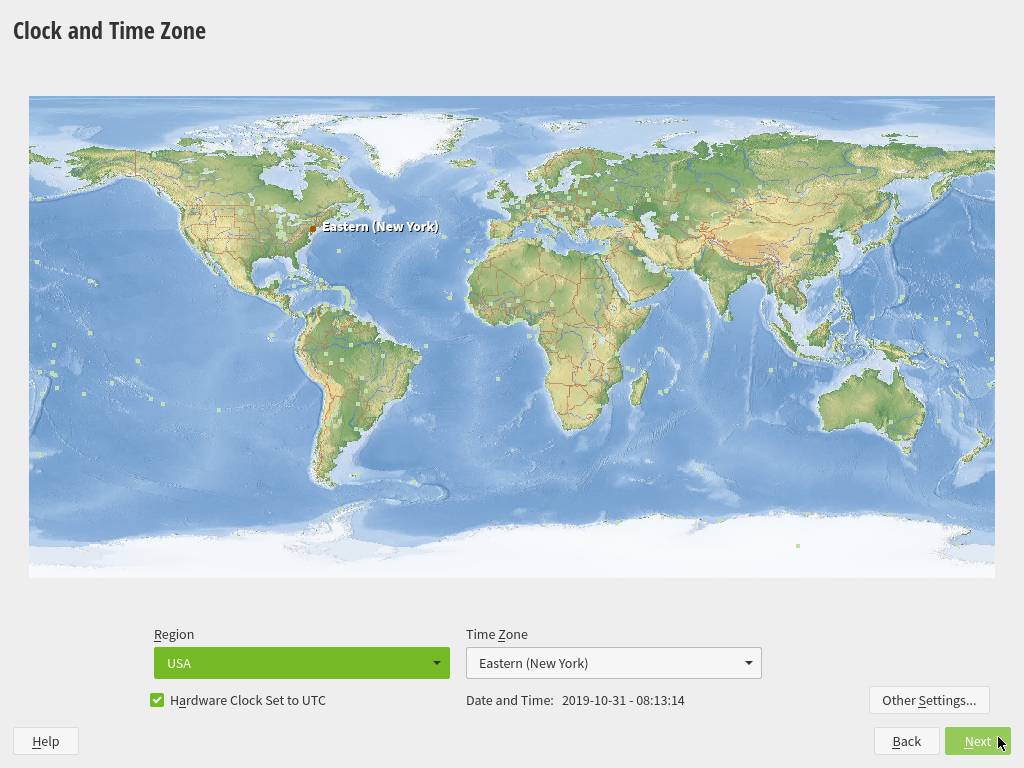
On the next screen, Clock and Time Zone, adjust your time zone, date and time settings as needed and then click Next (tip: if you need to change the time zone, click the map):
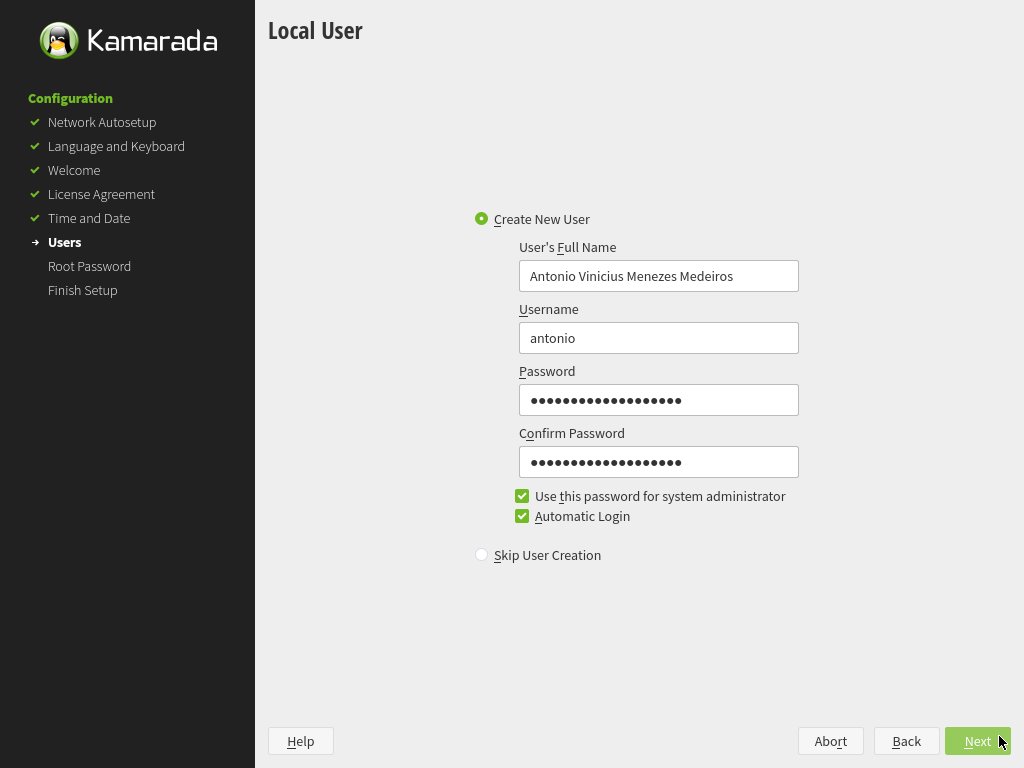
On the next screen, you are going to create an user account for you. Enter your full name and the desired username and password. To make it easier to use the VM, I recommend checking the Use this password for system administrator and Automatic Login options. When you finish, click Next:
On the last wizard screen, just click Finish:
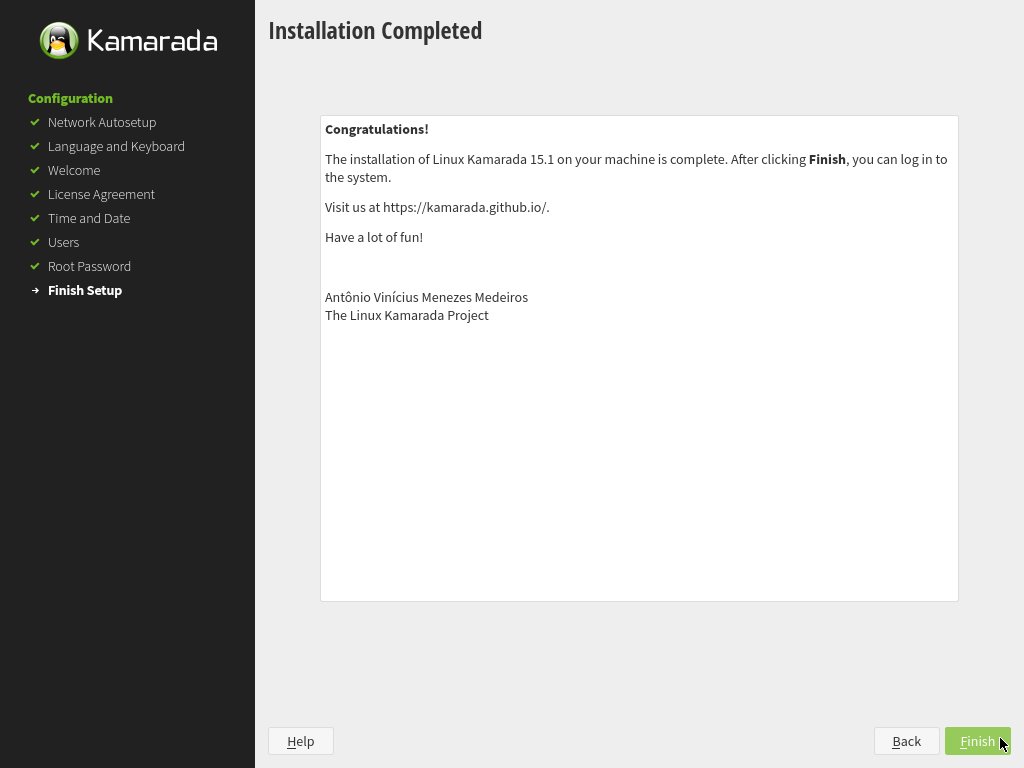
That’s it! Linux Kamarada is installed on the virtual machine and ready to be used:
Now let’s take a look at some tips that can make using VirtualBox easier and more interesting.
Bridged virtual networking mode
Depending on what you want to do, you may need the virtual machine to communicate with other devices on the local network, such as a printer or a file server.
If you haven’t changed the default virtual machine networking settings, you may have noticed that the virtual machine can communicate with the local network, but the opposite is not true (other local network devices are not able to reach the virtual machine).
In case you haven’t noticed it, run a simple test: on the guest OS, open the terminal and find out the IP address of the virtual machine by running the following command.
1
$ ip -c a
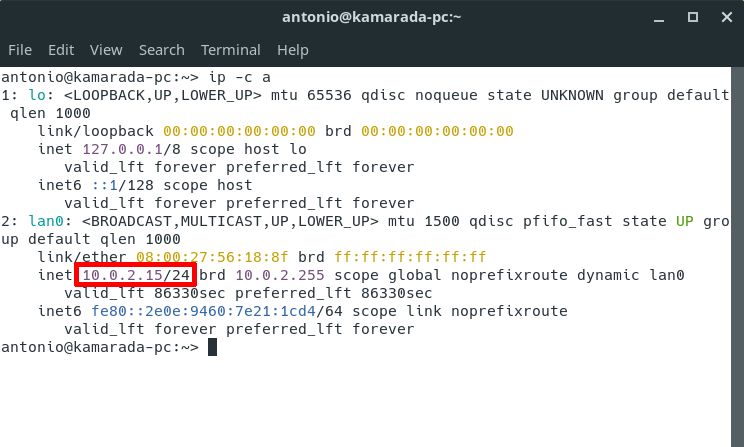
For instance, my virtual machine has been given the IP address 10.0.2.15/24.
On the host OS, find out the IP address of the real machine. For instance, 10.0.0.10/24.
Back to the guest OS terminal, ping your real machine:
1
2
3
4
5
6
7
8
9
10
$ ping 10.0.0.10
PING 10.0.0.10 (10.0.0.10) 56(84) bytes of data.
64 bytes from 10.0.0.10: icmp_seq=1 ttl=63 time=0.219 ms
64 bytes from 10.0.0.10: icmp_seq=2 ttl=63 time=0.535 ms
64 bytes from 10.0.0.10: icmp_seq=3 ttl=63 time=0.697 ms
64 bytes from 10.0.0.10: icmp_seq=4 ttl=63 time=0.534 ms
^C
--- 10.0.0.10 ping statistics ---
4 packets transmitted, 4 received, 0% packet loss, time 3052ms
rtt min/avg/max/mdev = 0.219/0.496/0.697/0.173 ms
(press Ctrl + C to stop the ping command)
It works. Now from the host OS try to ping the virtual machine:
1
2
3
4
5
$ ping 10.0.2.15
PING 10.0.2.15 (10.0.2.15) 56(84) bytes of data.
^C
--- 10.0.2.15 ping statistics ---
4 packets transmitted, 0 received, 100% packet loss, time 3053ms
It does not work.
That happens because VirtualBox by default enables one virtual network adapter for the virtual machine and selects the NAT (Network Address Translation) mode for it. This way the guest OS can connect to the outside world using the host OS network stack, which translates guest network requests as if they were from the host. The guest is able to reach local network, but local network is not able to reach the guest, only the host at most. That is similar to what your ISP router does to your home computer: your computer is able to browse the web, but the world is not able to reach your home computer, only your modem at most.
NAT is the simplest VirtualBox networking mode. Usually it does not require any configuration on either the host or the guest. Also, it is sufficient for browsing the web, downloading files, etc. For those reasons, it is the default networking mode and is good for most use cases.
However, VirtualBox is extremely flexible in how it virtualizes networking and provides other modes.
Besides NAT, other mode I often use is bridge: using this mode, VirtualBox sends guest OS network requests using the real machine’s network adapter directly, circumventing the host OS network stack. In practice, it is as if the real machine and the virtual machine were connected directly to the same router. The host is no longer “between” the guest and the router, but “besides” the guest.

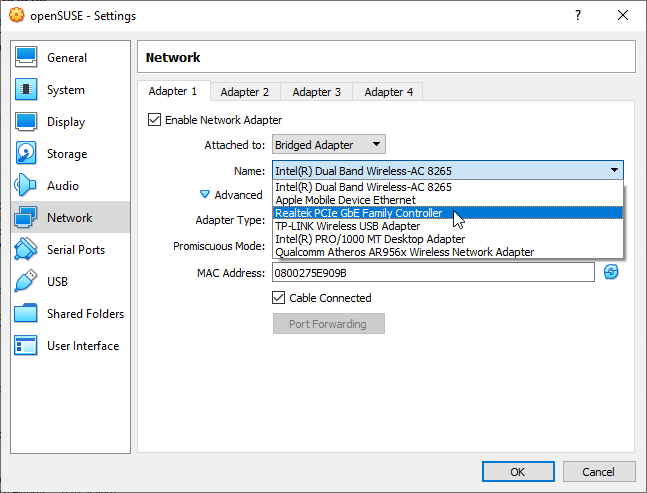
To enable bridged networking, with the VM shut down, access the VM settings, open the Network section, and change the Attached to option to Bridged adapter:

In case the real machine has more than one network adapter, you can select which one is going to be bridged with the virtual network adapter on the Name field right below:
When you are finished, click OK. Start the virtual machine and repeat the previous tests. Note that the virtual machine now receives an IP address from the same network as the real machine, which in its turn can now ping the virtual machine.
In addition to NAT and bridged adapter, VirtualBox provides other networking modes, which may be useful for other use cases. If you want to learn more about VirtualBox networking modes, take a look at the VirtualBox User Manual.
Extension Pack
The VirtualBox software is split into two components: a base package, which consists of all open source components licensed under the GPLv2, and an Extension Pack, with some additional Oracle proprietary components which extend the functionality of the base package.
In my opinion, the main advantage of installing the Extension Pack is being able to virtualize USB 2.0 and USB 3.0 ports (the base package only supports USB 1.1). The Extension Pack adds some other features, which are listed on the VirtualBox User Manual.
The base package was what we downloaded and installed in previous posts.
To download the Extension Pack, go to the VirtualBox official website at:
And click the Download VirtualBox 6.0 banner.
On the next page, under Oracle VM VirtualBox Extension Pack, click All supported platforms:
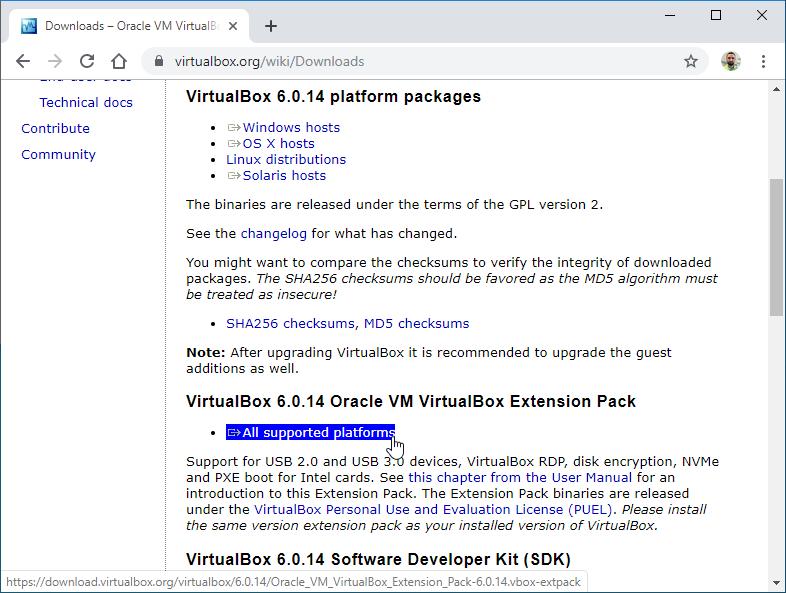
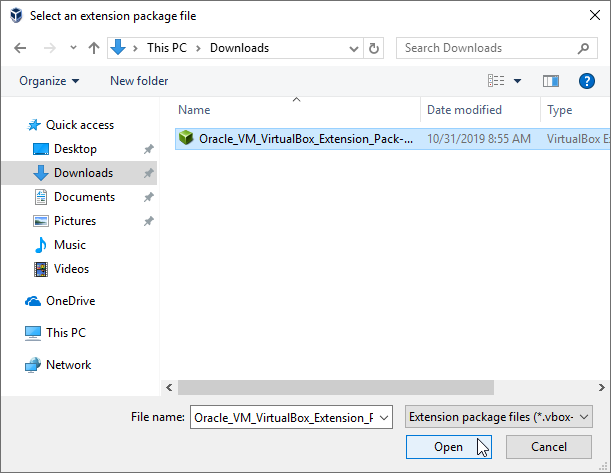
You are going to download a file with a .vbox-extpack extension.
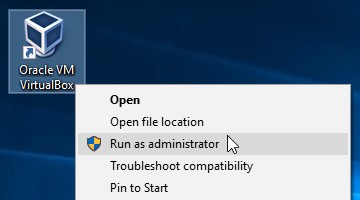
If your host OS is Windows, you need to start VirtualBox as an administrator:
If your host OS is Linux, that is not needed: you can start VirtualBox as usual.
Then, open the File menu and click Preferences:
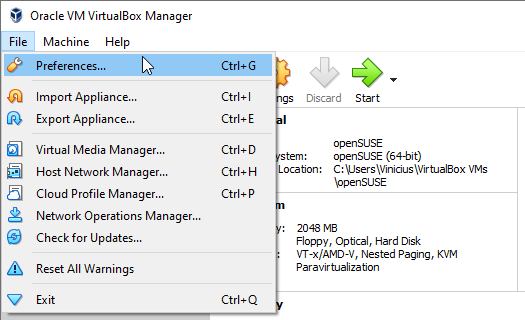
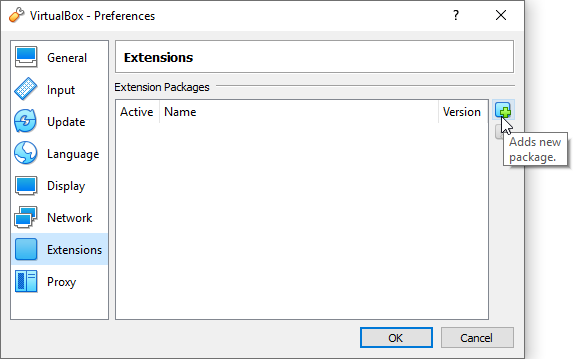
By the left, select Extensions. By the right, click the Add button:
Select the Extension Pack file you downloaded and click Open:
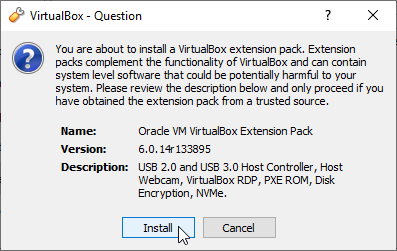
On the confirmation dialog box, click Install:
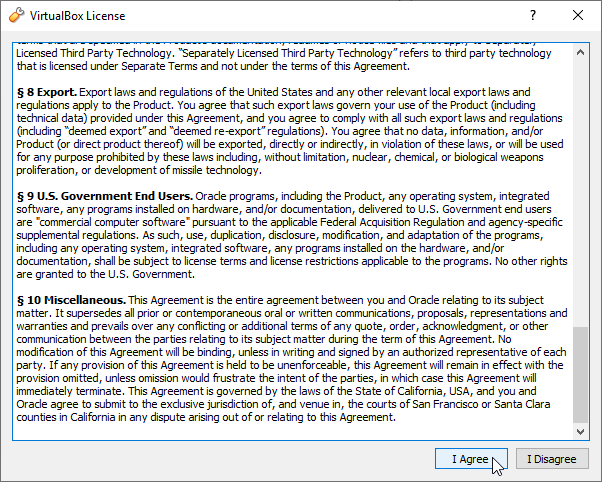
Read the Extension Pack license (or at least scroll it until the end) and click I Agree:
Now, if you are using Linux, you are asked the administrator (root user) password, which you must provide to continue.
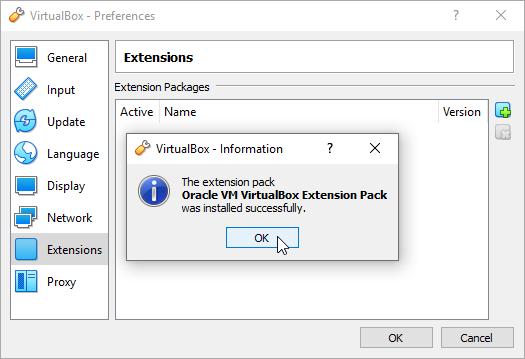
VirtualBox reports that the Extension Pack has been installed successfully, click OK:
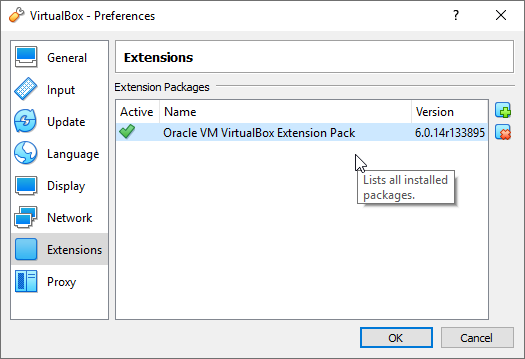
Note that the Extension Pack now appears in the list of installed extensions:
Click OK to close the Preferences dialog box and return to the VirtualBox start screen.
Note: you should always use the same version of Extension Pack as your installed version of VirtualBox. When you update VirtualBox to a new version, go to the VirtualBox official website, download and install the equivalent version of the Extension Pack.
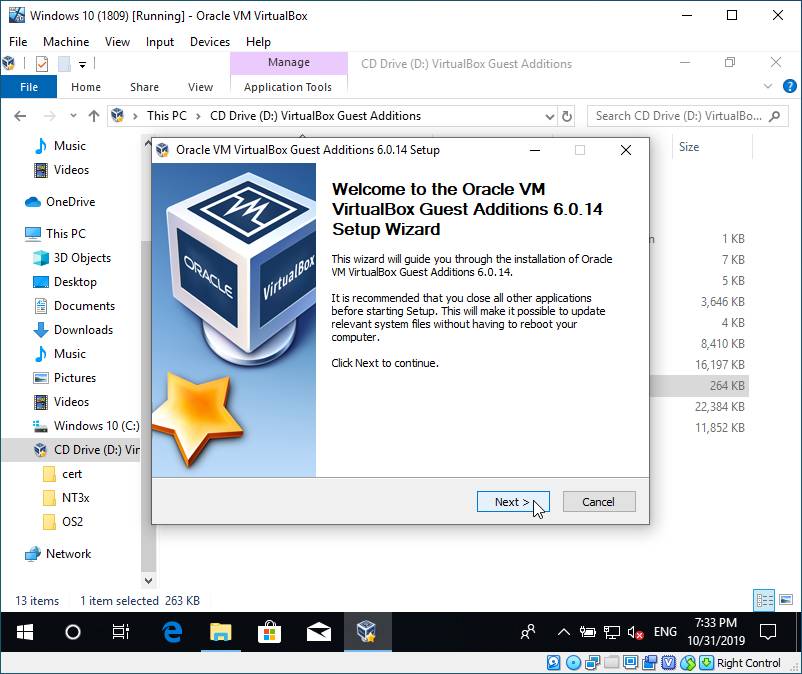
Guest Additions
VirtualBox offers drivers that can be installed inside a virtual machine to improve performance of the guest OS and provide closer integration between host and guest systems with the addition of extra features. These drivers are called Guest Additions. It is recommended to install them so the VM usage becomes faster and more convenient.
If the guest OS is Linux Kamarada, good news: Guest Additions come installed out-of-the-box.
If the guest OS is openSUSE, the easiest way to install Guest Additions is to get them from the official distribution repositories, which can be done by running the following command (on the guest OS, as root):
1
# zypper in virtualbox-guest-{tools,x11}
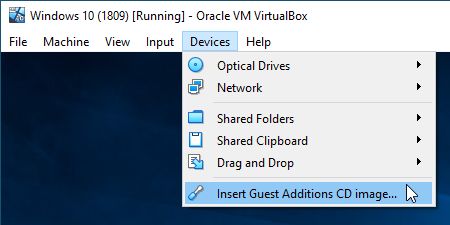
In general, VirtualBox provides an ISO image with Guest Additions ready for installation on Windows or Linux. On the VM window, open the Devices menu and click Insert Guest Additions CD image:
If the guest OS is Windows, the Guest Additions installer should be started automatically when the ISO image is inserted. If not, you can manually start it from the virtual DVD drive:
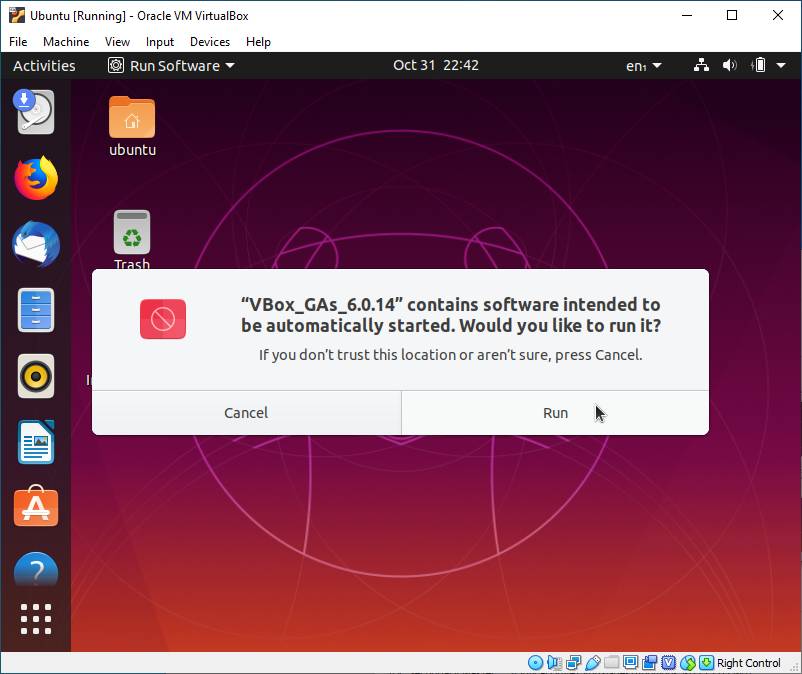
If the guest OS is Ubuntu, the system asks whether you want to run the Guest Additions installer when the ISO image is inserted:
If you need more information on how to install Guest Additions, refer to the guest OS documentation or the VirtualBox User Manual.
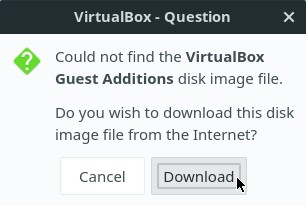
Note: if the host OS is Linux Kamarada or openSUSE, VirtualBox does not come with the Guest Additions ISO image and asks you permission to download it.
Clicking Download, the download is started, but it always ends with an error:
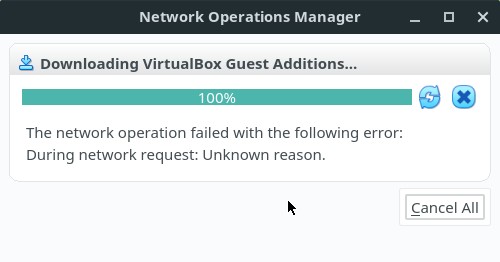
The network operation failed with the following error: During network request: Unknown reason.
This is a known openSUSE bug and there are people already working on it:
While it is not fixed, a possible workaround is to manually download the Guest Additions ISO image and then manually insert it into the virtual DVD drive.
You can download the Guest Additions ISO image at:
Resizing the virtual machine’s window
With Guest Additions installed, when you resize the VM window, the guest OS display resolution is automatically adjusted, as if you had manually entered an arbitrary resolution in the guest OS video settings. This allows you to use virtually any display resolution in the VM, even if it’s not one of the most common resolutions (such as 1024x768, 1366x768, 1920x1080, etc).
For example, if the VM runs Linux Kamarada as guest with a resolution of 1024x768 pixels and you then resize the VM window to make it 100 pixels wider, the Guest Additions will automatically adjust the Linux Kamarada display resolution to 1124x768.
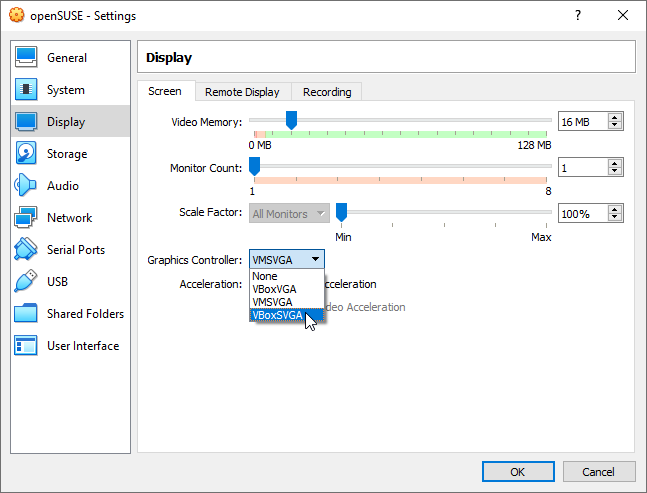
Note: if the guest OS is Linux Kamarada or openSUSE, it may happen that you resize the VM window and the guest resolution is not automatically adjusted.
This is another known openSUSE bug:
A possible workaround is to shut the VM down, access the VM settings, open the Display section and change the Graphics Controller from the default controller (VMSVGA) to any of the others (VBoxVGA or VBoxSVGA):
Another option, if you don’t want to restart the VM, is to run (on the guest OS, as root):
1
# VBoxClient --vmsvga
That done, resizing the VM window should cause the guest resolution to be adjusted as expected.
Shared clipboard
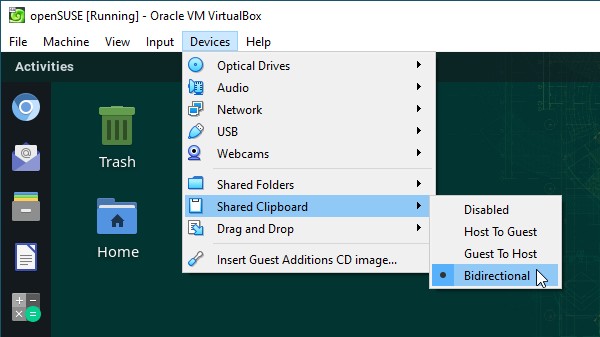
With Guest Additions installed, you can share the clipboard of the guest with that of the host. Doing so makes it possible to copy and paste text from the virtual machine to the real machine and vice versa.
To enable clipboard sharing, on the VM window, open the Devices menu, then the Shared Clipboard submenu and finally select Bidirectional:
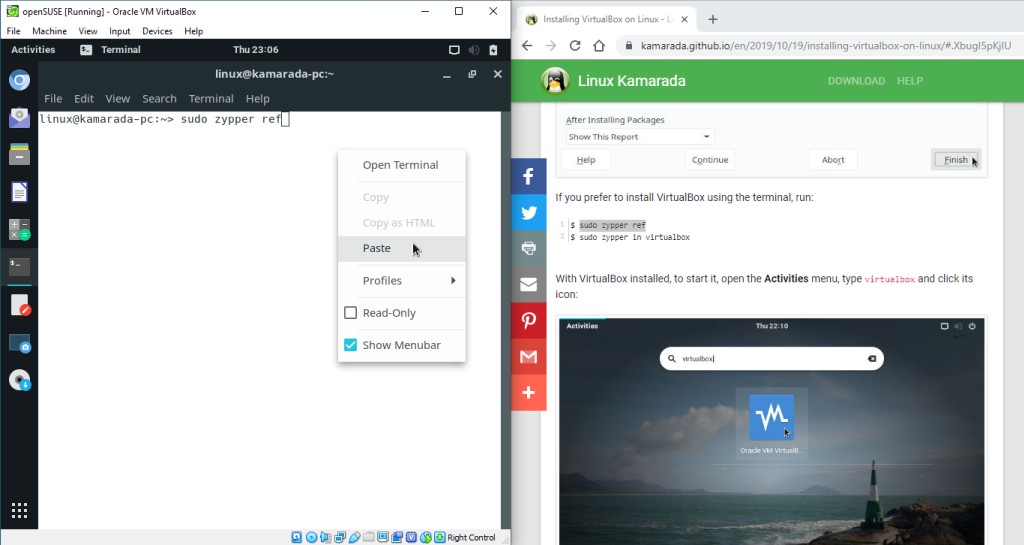
Do you know how you can use this facility? For example, you can open a Linux how-to on your favorite web browser on the host OS and copy commands to the Linux terminal on the guest OS:
Those two Guest Additions features are just the ones I use the most. If you want to know other features provided by Guest Additions, take a look at the VirtualBox User Manual.
That’s all, folks!
In this trilogy of posts about VirtualBox, I shared what I believe to be the basics to get started and top tips for using this virtualization software on a daily basis. Maybe the concept of a virtual machine is new to you, but you may have noticed that the VirtualBox interface is very intuitive: as you use it, you realize how it works, and questions that eventually come up fade away with practice.
I hope this text was helpful. If you have any questions, don’t hesitate to comment!
References
To write this post, I consulted the VirtualBox User Manual:


