This is the part 3 of our trilogy of posts about how to transact bitcoins using the Electrum Bitcoin wallet. We have bought or received (from friends, family, customers, donators, etc) some bitcoins. Now with the bitcoins in our wallet there is only two things we can do: hold or transfer (for paying for a good or service, donating, converting to fiat currency, etc).
Today you are going to see how to transfer bitcoins out of your desktop non-custodial wallet. As an example, we are going to use as the transfer destination the exchange’s custodial wallet. Additionally, you are going to see how to sell bitcoins in case you need to convert them to fiat currency (United States dollar, Brazilian real, etc).
If you fell into this page, I recommend that you start your reading from the previous posts:
- Bitcoin for beginners with the Electrum wallet — part 1: basic concepts and setup
- Bitcoin for beginners with the Electrum wallet — part 2: buying and transferring bitcoins to the wallet
In this trilogy of posts, I’m using Binance as example of exchange. But of course, to buy and sell bitcoins any exchange will do. In case you have any doubt about Binance, please refer to the Binance Support. I’m also leaving links to Binance Support texts where you can find more information about Binance rules, fees and procedures.
Deposit: transferring crypto from wallet to exchange
To exemplify the transfer of bitcoins from the Electrum wallet, let’s see how to return the bitcoins we got in part 2 to the exchange. The following steps are the same if you are making a payment or donation.
As I said previously, Bitcoin transactions can be made at any time, including non-business hours and weekends. Also, remember that on every Bitcoin transaction there is a fee to be paid to miners, so you can’t transfer your total Bitcoin balance. But Electrum, different from Binance, allows you to customize the fee. If you need your transaction to be confirmed faster, you need to pay a higher fee. If you choose to pay a lower fee, take care not to choose a fee so low that your transaction never gets confirmed.
Bitcoin fees are a complex topic and deserve a post for their own. But trying to explain briefly, transaction fees are calculated based on two factors: the transaction length (the more number of bytes needed to encode a transaction, the higher the fee) and the market fee density (fees get higher on days when the network is congested by more people making transactions).
There is a Twitter bot, the @CoreFeeHelper, that tweets fee estimates hourly. On the days I took these screenshots, fees were unusually high (actually, they were at record-highs):
Next: 278.9 sat/byte $39.46
— Bitcoin Core Fee (@CoreFeeHelper) April 20, 2021
1h: 268.3 sat/byte $37.96
6h: 172.7 sat/byte $24.44
12h: 106.1 sat/byte $15.02
1d: 31.2 sat/byte $4.42
3d: 6.0 sat/byte $0.85
1wk: 5.0 sat/byte $0.72
Min: 15.7 sat/byte $2.23
Block height: 679,960
Mempool depth: 70
Just for you to have an idea, compare with the fee estimates from today, when I write:
Next: 46.1 sat/byte $6.75
— Bitcoin Core Fee (@CoreFeeHelper) May 3, 2021
1h: 7.5 sat/byte $1.11
6h: 6.1 sat/byte $0.91
12h: 6.1 sat/byte $0.91
1d: 6.1 sat/byte $0.91
3d: 6.0 sat/byte $0.88
1wk: 6.0 sat/byte $0.88
Min: 1.9 sat/byte $0.28
Block height: 681,714
Mempool depth: 80
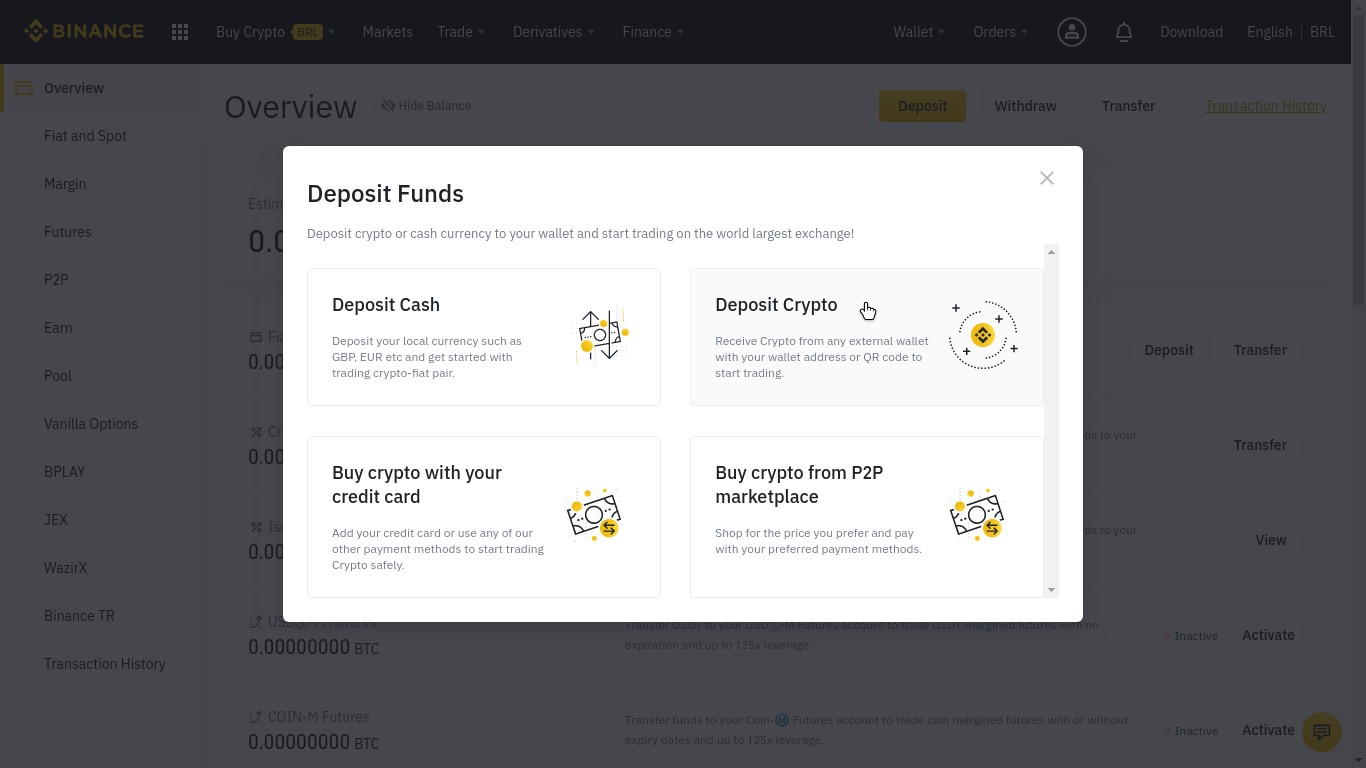
To deposit crypto on Binance, once you are logged in, go to Wallet > Overview, click Deposit at the top right corner of the screen and choose Deposit Crypto:
By the left, choose the crypto that you want to deposit (in our case, BTC):
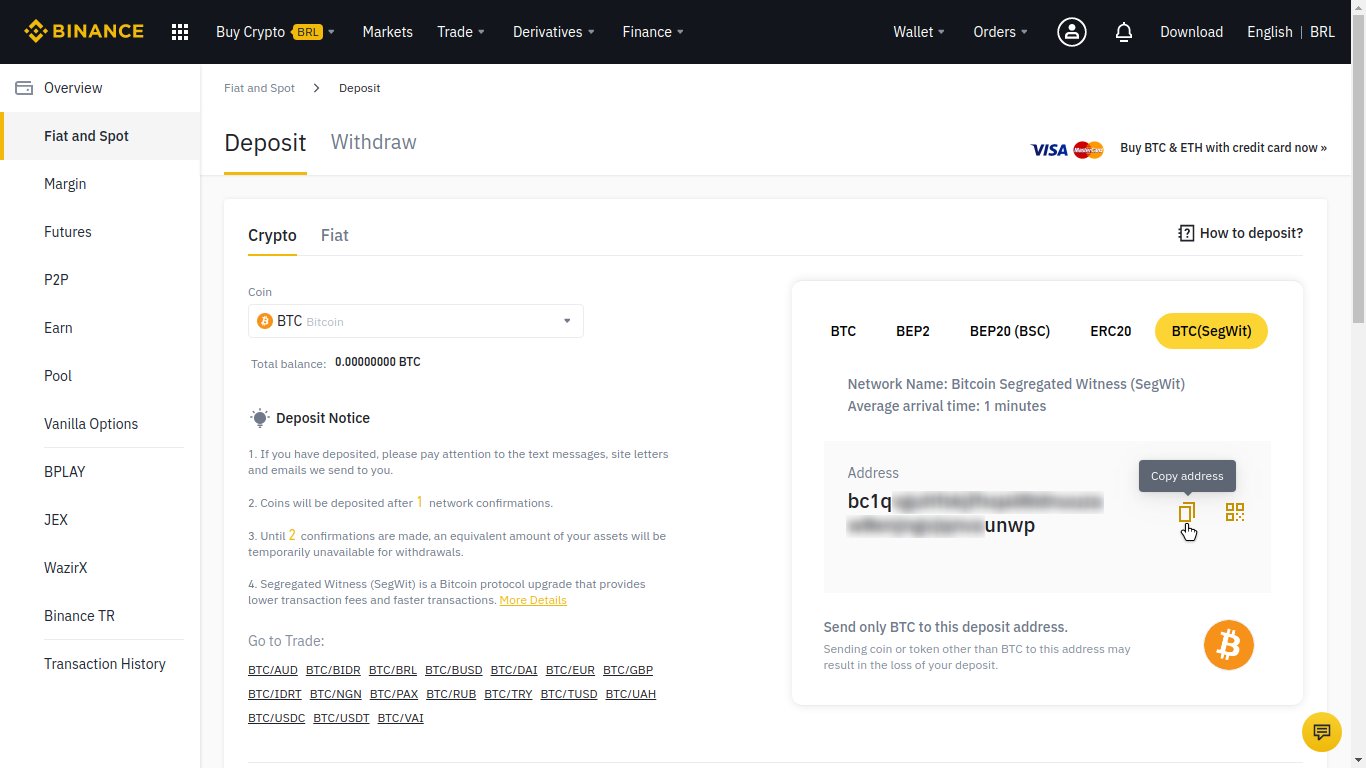
Next, by the right, choose the deposit network. In our case, BTC (SegWit).
I’ll not dive into details here, but SegWit (Segregated Witness) is an addition to the Bitcoin protocol which allows faster transactions with lower fees. Segwit addresses start with bc1. If you look at the receiving address in part 2, that’s the case of our wallet.
Copy the deposit Address provided by Binance.
Now, open Electrum and select the Send tab:
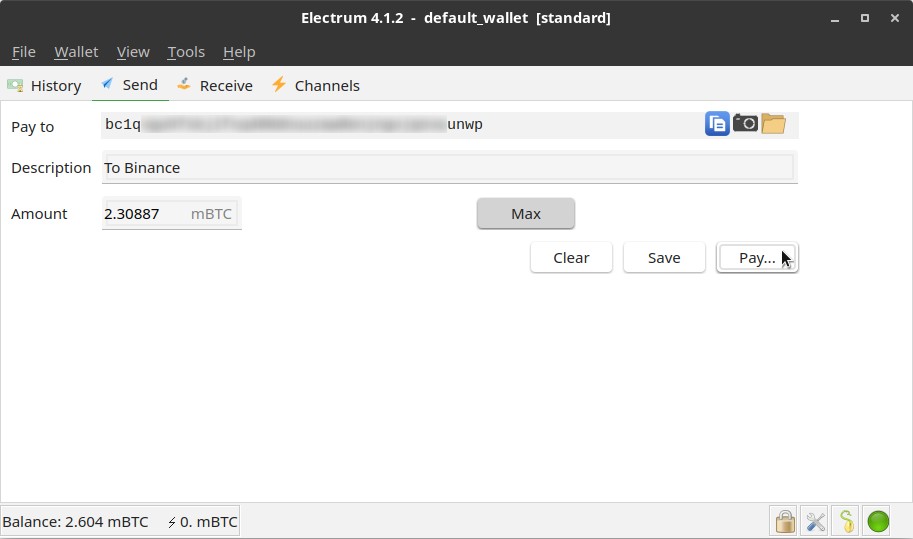
Paste the address you copied from Binance into the Pay to field.
Enter the Amount of bitcoins to transfer or click Max (maximum) to transfer your whole balance (that’s what I did here).
Optionally, add a Description to help you identify this transaction later on your history.
When you are ready, click Pay to go to the next screen.
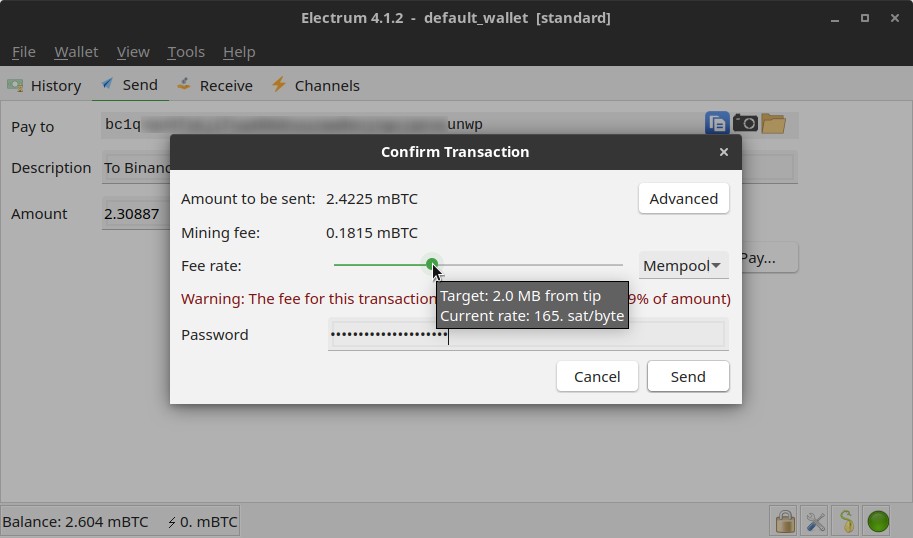
Adjust the Mining fee by moving the slider labeled by Fee rate. Sliding left decreases the fee; sliding right increases it. According to the estimates reported by the @CoreFeeHelper bot (reproduced above), paying a fee of 165 sat/byte, this transaction may take between 6 to 12 hours to confirm.
The total amount of the transaction is the sum of the Amount to be sent and the Mining fee.
Enter the wallet Password. Now, review all the information on the screen. If you continue, there will be no return. Click Send to broadcast your transaction to the Bitcoin network.
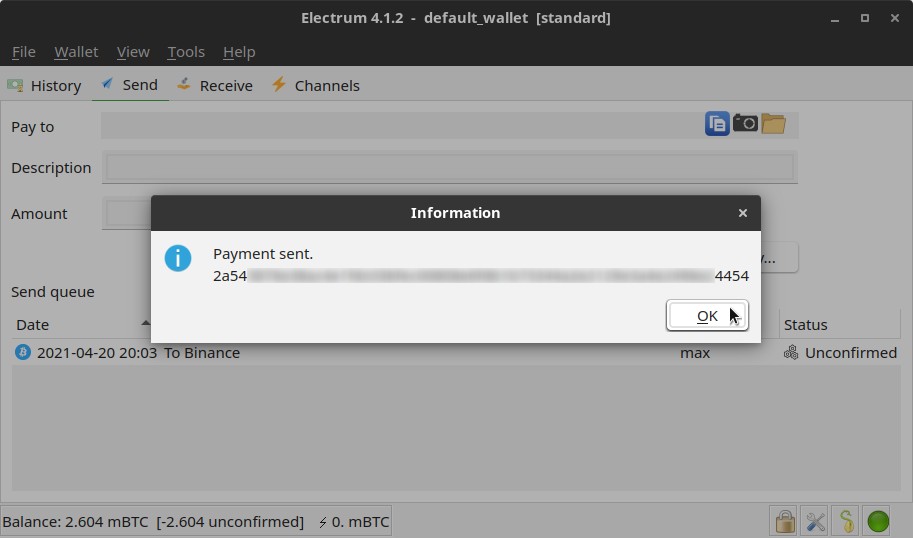
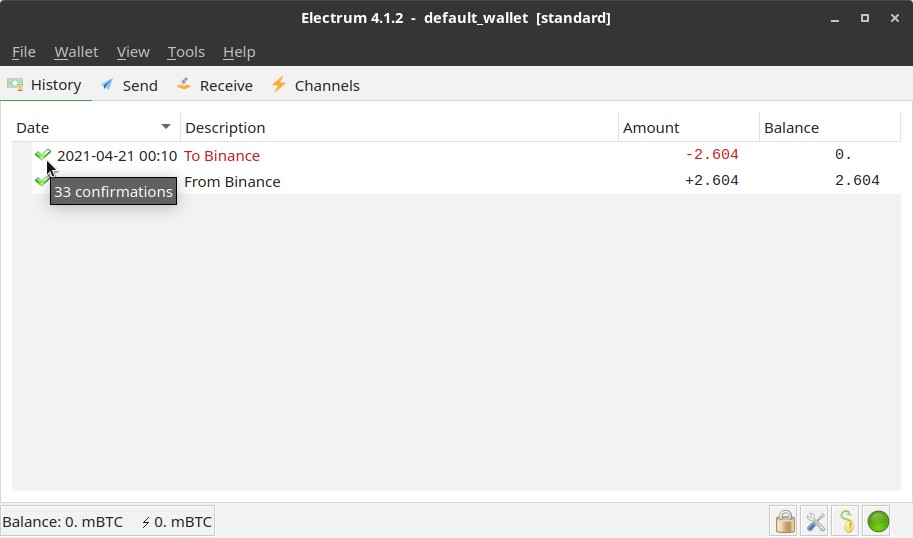
After broadcasting your transaction, switch to the History tab. From here you can monitor the status of your outbound transaction just like you did for your inbound transaction:
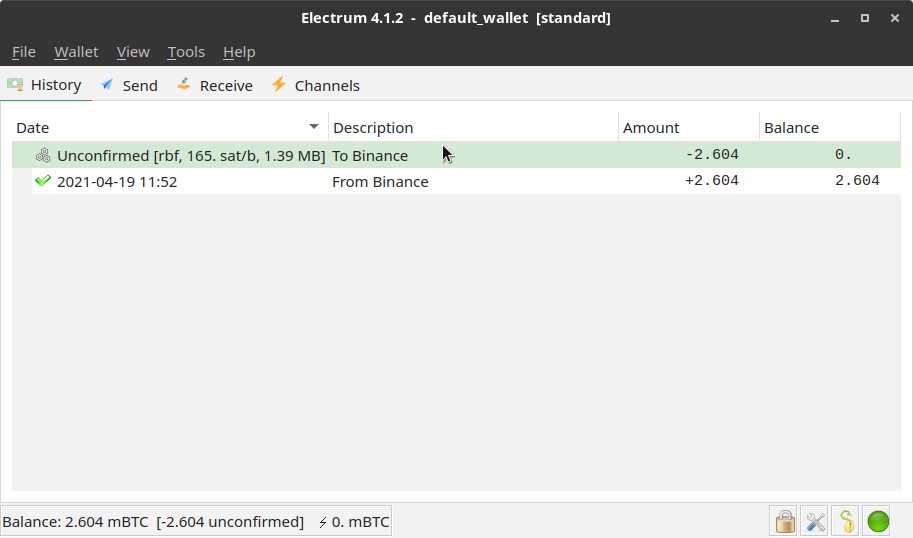
As your transaction receives confirmations, Electrum updates the transaction icon:
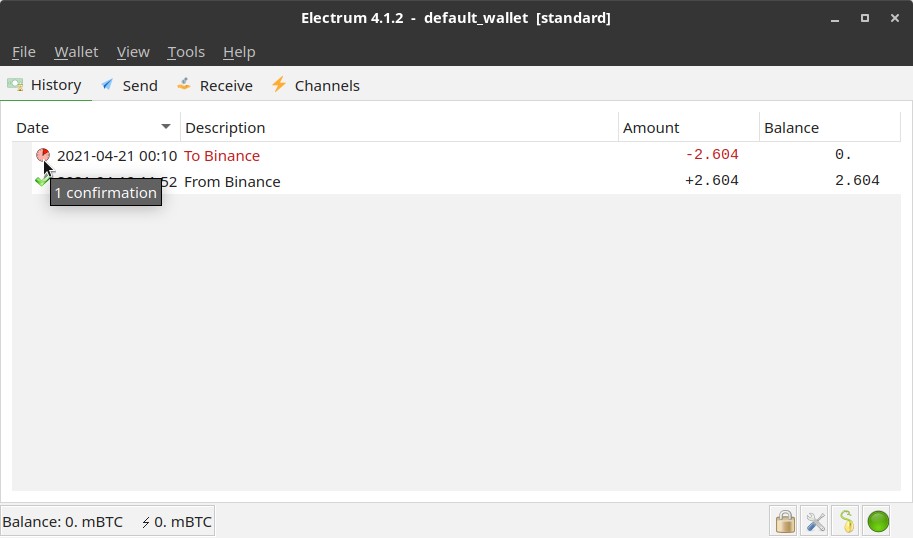
After some confirmations (usually at least six), the transaction appears as confirmed, with a checkmark next to its timestamp. Hours later, you can see that the transaction continues to receive confirmations:
Note: when sending bitcoins, it’s a good practice to always ask the receiver’s address. That’s because, different from bank account numbers, Bitcoin addresses change. I’ll not dive into details here, but if you want to know more, read about change addresses and address reuse.
Binance notifies you by email that the deposit has been received.
In case you need more information about the Binance deposit process, please refer to the following pages of the Binance Support:
- How do I Deposit/Withdraw Cryptocurrency
- How to Deposit Cryptos to Binance
- About Segregated Witness (SegWit)
Sell: converting crypto into fiat
Just out of curiosity, there are people who buy Bitcoin and hold it with no intention of selling it. This attitude is known in the crypto community by the slang HODL. Originated from a misspelling of “hold”, it is commonly explained as an acronym for “Hold On for Dear Life”. So, HODL is a verb, just as “hold”. And people who HODL are known as HODLers. They are Bitcoin holders to the max (a.k.a. Bitcoin maximalists). Followers of this ideology won’t sell their bitcoins because they truly believe that cryptocurrencies will eventually replace fiat currencies and form the basis of all future economic structures. They, therefore, see the fiat exchange rate of cryptocurrencies as irrelevant. They just buy Bitcoin and won’t sell it.
If you are a HODLer (or want to become one), you can just jump to the conclusion and references, there is nothing left for you to learn in this tutorial.
But in case you need to convert Bitcoin to fiat currency, on Binance you can do that anytime, even on non-business hours and weekends, as long as you have available balance in Bitcoin.
As you use Binance, you are going to see that there may be some ways of doing the same thing. Although there is a Sell Crypto link on the Buy Crypto screen from part 2, I found a more interesting exchange rate going another way: Trade > Convert.
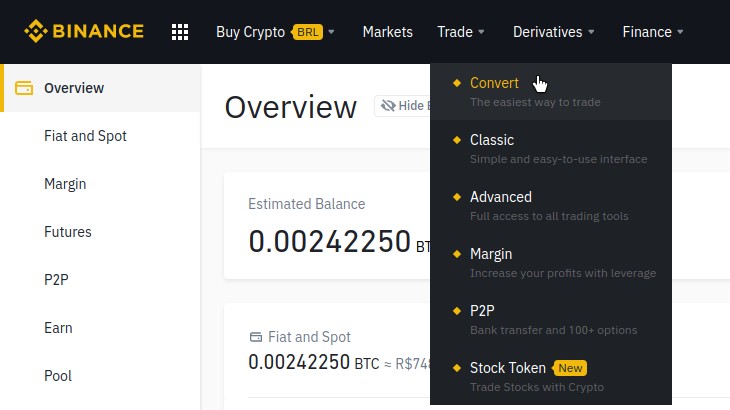
Select the currency to convert From (in our case, BTC) and the currency to convert To (in my case, BRL):

You can choose to enter how much you want to sell (at the top part) or how much you want to gain (at the bottom part). Here, I clicked MAX to convert my whole BTC balance to BRL.
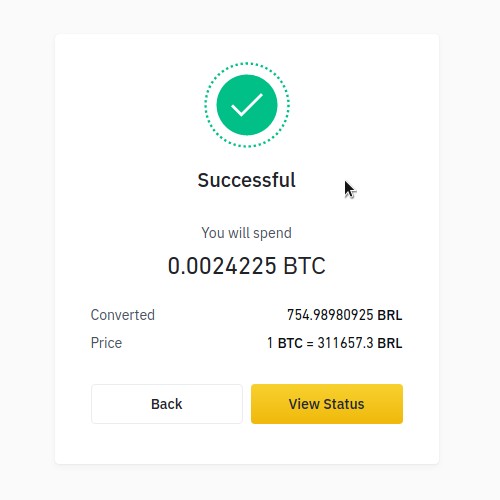
Click Preview Conversion. If you approve the quote shown to you, click Convert:

The conversion is done instantly and your fiat balance gets updated on your wallet overview:
In case you need more information about the Binance convert process, please refer to:
Withdraw: transferring fiat from exchange to bank
To withdraw fiat currency from Binance, go to Wallet > Fiat and Spot:

Click Withdraw on the line corresponding to the fiat currency (in my case, BRL):
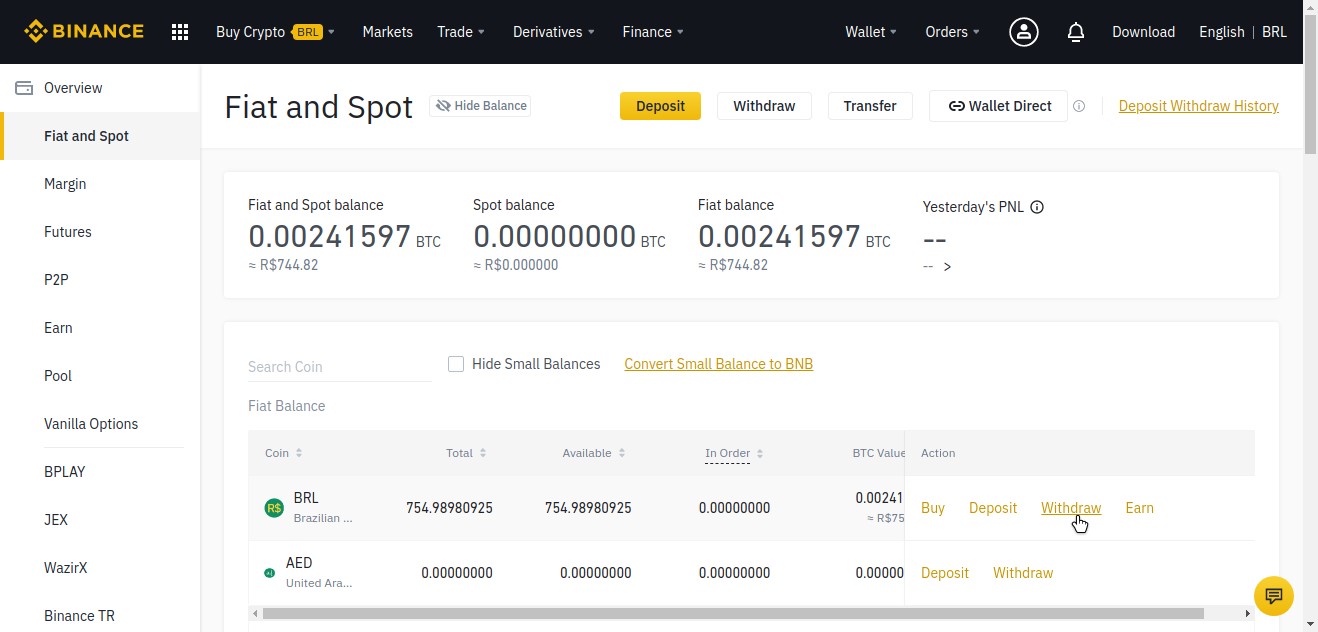
By the left, select the payment method. By the right, enter the withdrawal Amount (here, I clicked Available to withdraw all my BRL balance), as well as any other needed information:
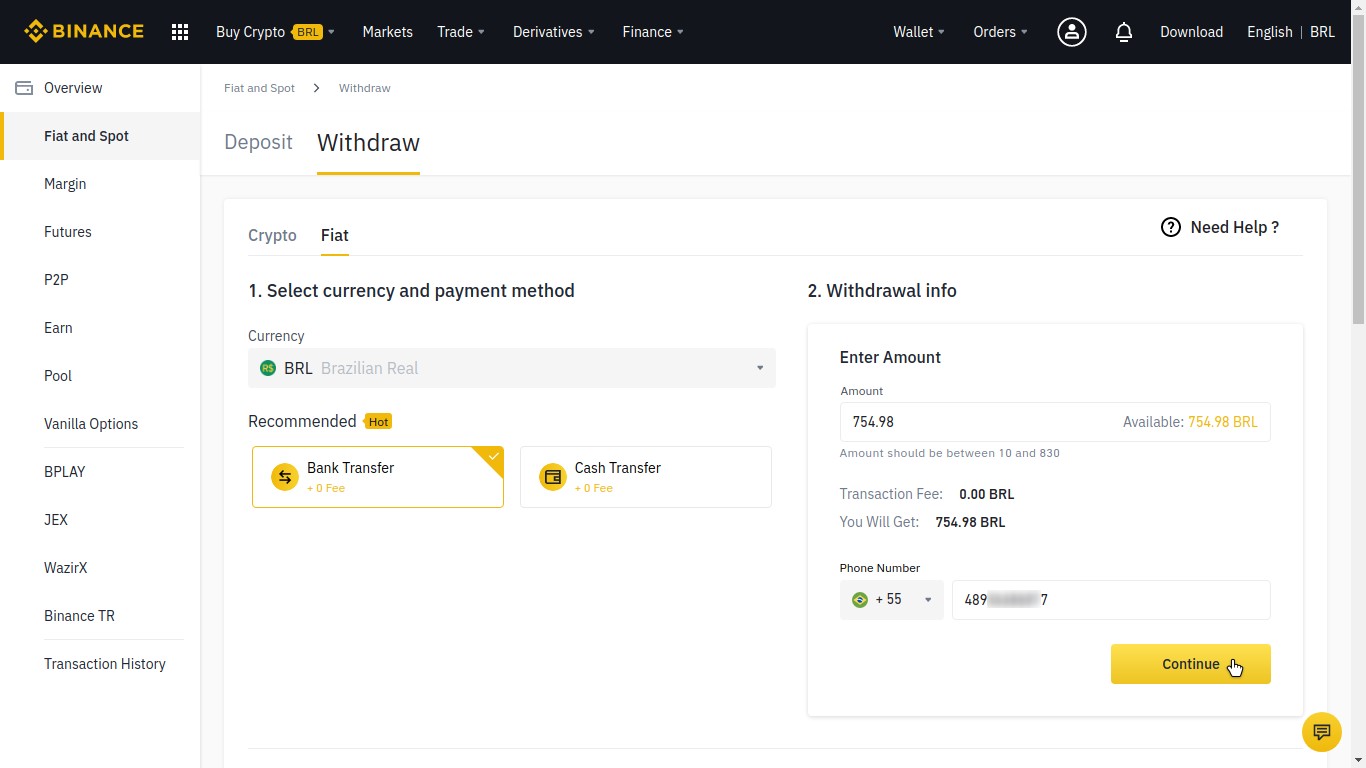
Follow the on-screen instructions, which may change depending on the currency and payment method. You can find more information on the following text on Binance Support:
- How to withdraw BRL on Binance to a bank account (this probably interests Brazilian users only)
Conclusion
In this 3-part how-to series, you have learned what Bitcoin is and how it works, installed and set up the Electrum wallet and seen how to use Bitcoin in practice, receiving and sending Bitcoin transactions with Electrum and converting Bitcoin from/to fiat currency with Binance.
You already have the minimum necessary knowledge to get started with Bitcoin. I hope you make good use of it.
If you like this subject, follow Linux Kamarada to be notified of other texts like this.
References
This 3-part how-to series was largely inspired by this great how-to by Richard Apodaca:
Other sources from where I retrieved information were linked through the texts.


