
In the previous post, you learned about KIWI, the tool developed by the openSUSE Project to create Linux system images. You saw that this image can be a live ISO to be burned to a CD/DVD/USB and used on a PC, or a VDI virtual disk to be used in VirtualBox, a .raw file that will become a memory card on a Raspberry Pi, among other possibilities. You learned basic KIWI concepts, saw where to get example images, installed KIWI on your computer and created your first image.
If you just stumbled upon this post, start your reading from the previous post:
The image we created in the previous post provides the user with a command line interface and some basic utilities. Although it is a working Linux system, it is not a typical one. It is not like the one you download from the Ubuntu website, for example, with a graphical user interface and several applications.
Today, we will see which files make up the source code (the description) of the image and modify it so that we end up with an image with a GNOME desktop and several applications, similar to the default openSUSE Leap installation.
Before continuing, copy the test-image-live folder to another location, outside of the kiwi folder. Rename it to whatever you want (here, I’ll use kiwi-tutorial) and enter that folder. From now on, we’ll be working on it.
1
$ cd kiwi-tutorial
Image description structure
A KIWI appliance is structured in a folder containing files and folders that define the system image. Let’s look at the main files and folders.
1
2
3
4
5
$ ls -1

appliance.kiwi
config.sh
root
The appliance.kiwi file is an XML file that contains the image description, which is a collection of general settings such as metadata (name, version, description), which packages and patterns to install, image formats (ISO, virtual disk, container, etc.), users and passwords, etc.
The image description file does not necessarily have to be called appliance.kiwi, it can be called config.xml, or it can have any name plus the .kiwi extension. KIWI first looks for a config.xml file. If it cannot be found, it considers the first *.kiwi file.
You can find detailed information about the elements that make up this XML file in the KIWI documentation.
The root folder contains files and folders that will be copied into the system during the prepare step, after all the packages listed in appliance.kiwi have been installed. Any already present files will be overwritten. Instead of a folder named root, it may also be an archive named root.tar.gz.
The config.sh script is run at the end of the prepare step, after users have been set and the root folder contents have been applied. It is typically used for additional tweaks such as setting permissions, enabling services, etc.
The appliance folder may have other files and scripts. For more information, see the KIWI documentation.
Setting up repositories
KIWI installs packages into an appliance from the repositories defined in the image description (appliance.kiwi file). At least one repository must be defined. Otherwise, KIWI cannot fetch any packages.
A repository is added to the description via the repository element, which is a child of the top-level image element.
Our image is currently configured to use the OBS repositories:
1
2
3
<repository type="rpm-md">
    <source path="obsrepositories:/"/>
</repository>
This is a special setting available only for use with OBS. It allows you to configure the repositories of the image from OBS itself, without modifying the image description. We’ll talk about this in another post, when we explore how to use KIWI integrated with OBS.
Let’s configure the image to use the official openSUSE Leap repositories:
1
2
3
4
5
6
<repository alias="repo-update" imageinclude="true" priority="1" type="rpm-md">
    <source path="obs://openSUSE:Leap:15.6:Update/standard"/>
</repository>
<repository alias="repo-oss" imageinclude="true" priority="2" type="rpm-md">
    <source path="obs://openSUSE:Leap:15.6/standard"/>
</repository>
Adding packages
KIWI allows us to customize the package selection via the packages element. Within this element, each package to be installed (or removed) must be listed via a package element.
Our image currently contains a minimal selection of packages for a command line interface:
1
2
3
4
5
6
7
8
9
10
11
12
<packages type="image">
    <package name="bind-utils"/>
    <package name="patterns-openSUSE-base"/>
    <package name="systemd"/>
    <package name="plymouth-theme-bgrt"/>
    <package name="grub2-branding-openSUSE"/>
    <package name="iputils"/>
    <package name="vim"/>
    <package name="grub2"/>
    <!-- ... -->
    <package name="dracut-kiwi-live"/>
</packages>
This type of image is known as JeOS (Just enough Operating System).
Let’s add packages so that we have a GNOME desktop and a few more apps:
1
2
3
4
5
6
7
8
9
10
11
12
13
14
15
16
17
18
19
20
21
22
23
24
25
26
27
28
29
30
31
32
    <packages type="image">
        <namedCollection name="enhanced_base"/>
        <namedCollection name="x11_enhanced"/>
        <namedCollection name="gnome_basis"/>
        <namedCollection name="gnome_utilities"/>

        <!-- X.Org drivers and fonts -->
        <package name="xf86-video-fbdev"/>
        <package name="xf86-video-vesa"/>
        <package name="xorg-x11-driver-video"/>
        <package name="xorg-x11-fonts"/>

        <!-- VirtualBox and VMware support -->
        <package name="virtualbox-kmp-default"/>
        <package name="virtualbox-guest-tools"/>
        <package name="xf86-video-vmware"/>
        <package name="xf86-input-vmmouse"/>
        <package name="open-vm-tools"/>
        <package name="open-vm-tools-desktop"/>

        <!-- Some GNOME apps -->
        <package name="gnome-terminal"/>
        <package name="nautilus"/>
        <package name="gnome-calculator"/>
        <package name="gedit"/>
        <package name="file-roller"/>
        <package name="gnome-system-monitor"/>

        <package name="MozillaFirefox"/>

        <package name="bind-utils"/>
        <!-- ... -->
The namedCollection elements specify patterns to be installed.
Your appliance.kiwi file should now look like this.
Setting up users and automatic login
Now let’s tweak some of our image settings using the config.sh script.
Since we now have the GNOME desktop, let’s start by changing the default runlevel from 3 (multi-user, text mode with networking) to 5 (multi-user, graphical mode with networking):
1
2
3
4
#======================================
# Setup default target, multi-user GUI
#--------------------------------------
baseSetRunlevel 5
Add to the end of the config.sh script:
1
2
3
4
5
6
7
8
9
10
11
12
13
14
15
16
17
18
19
20
21
22
23
24
25
# Sysconfig update
baseUpdateSysConfig /etc/sysconfig/displaymanager DISPLAYMANAGER gdm
baseUpdateSysConfig /etc/sysconfig/windowmanager DEFAULT_WM gnome

# /etc/sudoers hack to fix #297695
# (Installation Live DVD: no need to ask for password of root)
# https://bugzilla.novell.com/show_bug.cgi?id=297695
sed -i -e "s/ALL ALL=(ALL) ALL/ALL ALL=(ALL) NOPASSWD: ALL/" /etc/sudoers
chmod 0440 /etc/sudoers

# Create LiveDVD user linux
/usr/sbin/useradd -m -u 999 linux -c "Live User" -p ""

# delete passwords
passwd -d root
passwd -d linux
# empty password is ok
pam-config -a --nullok

# bug 544314, we only want to disable the bit in common-auth-pc
# https://bugzilla.novell.com/show_bug.cgi?id=544314
sed -i -e 's,^\(.*pam_gnome_keyring.so.*\),#\1,'  /etc/pam.d/common-auth-pc

# Automatically log in user linux
baseUpdateSysConfig /etc/sysconfig/displaymanager DISPLAYMANAGER_AUTOLOGIN linux
Your config.sh file should now look like this.
The code is commented and self-explanatory. But in short, what we are doing is:
- set GDM as display manager and GNOME as desktop;
- configure sudo to not ask for a password (interesting configuration since we are creating a live image);
- create a normal user called
linux(it may be more interesting to create users inconfig.shthan inappliance.kiwi); - leave users
linuxandrootpasswordless (another setting that makes it easier to use live images); and - configure the system to automatically log in the
linuxuser (another typical setting on live images).
baseSetRunlevel and baseUpdateSysConfig are ready-to-use functions provided by KIWI that allow you to easily adjust various system settings.
After all these improvements have been made, let’s create our image again.
Before running KIWI again, we need to manually delete the /tmp/myimage folder, because KIWI does not do this itself and otherwise it will warn that there are files in this folder and stop:
1
$ sudo rm -rf /tmp/myimage
Now we can run KIWI:
1
$ sudo kiwi system build --description . --target-dir /tmp/myimage
The process may take longer because we now have more packages to install.
Finally, test the new image:
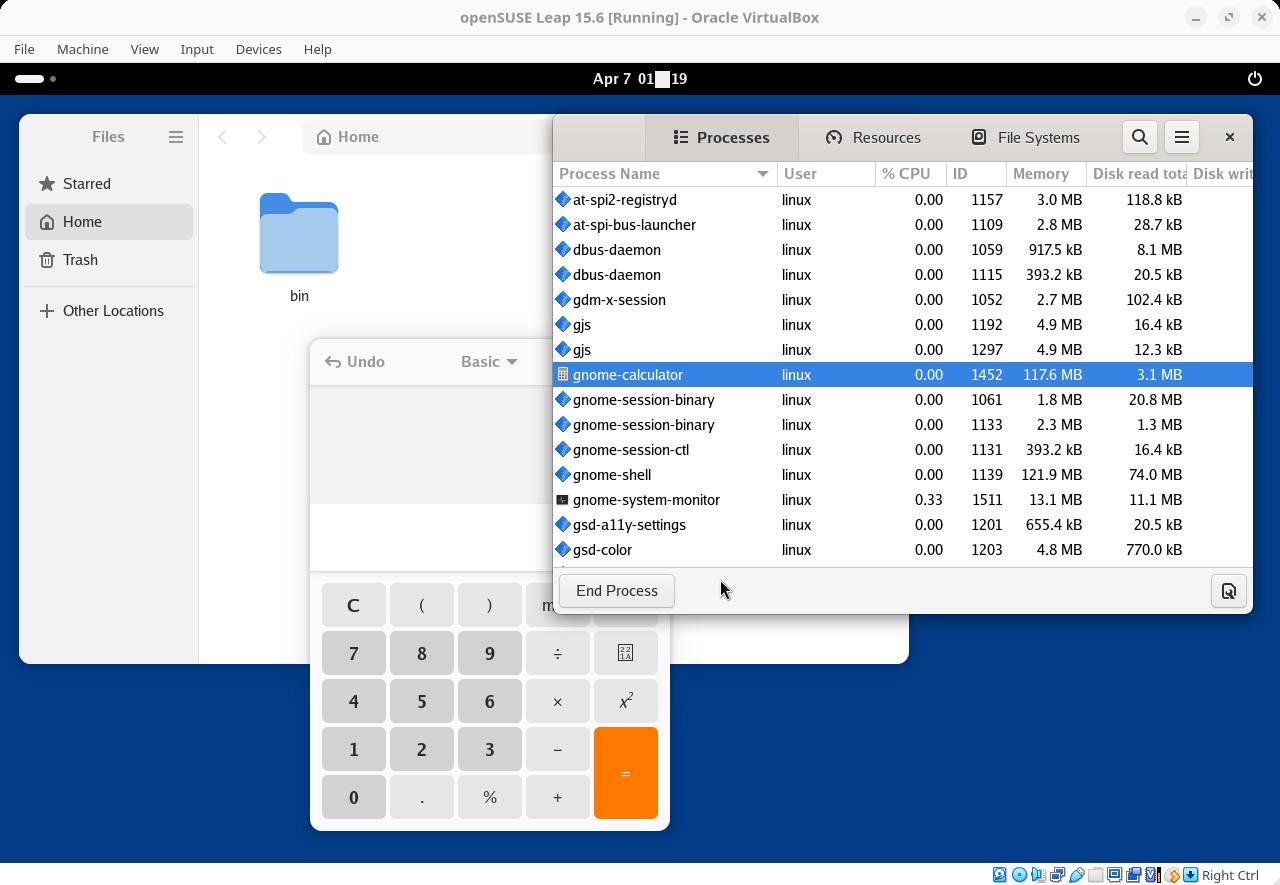
Note that while we can use the GNOME desktop and some basic apps, there is still a lot to do to make this image truly usable. For instance, networking is not working.
A more complete image
When we download the openSUSE Leap 15.6 installation media from get.opensuse.org and choose the GNOME desktop from the installation options, several applications are installed along with it:
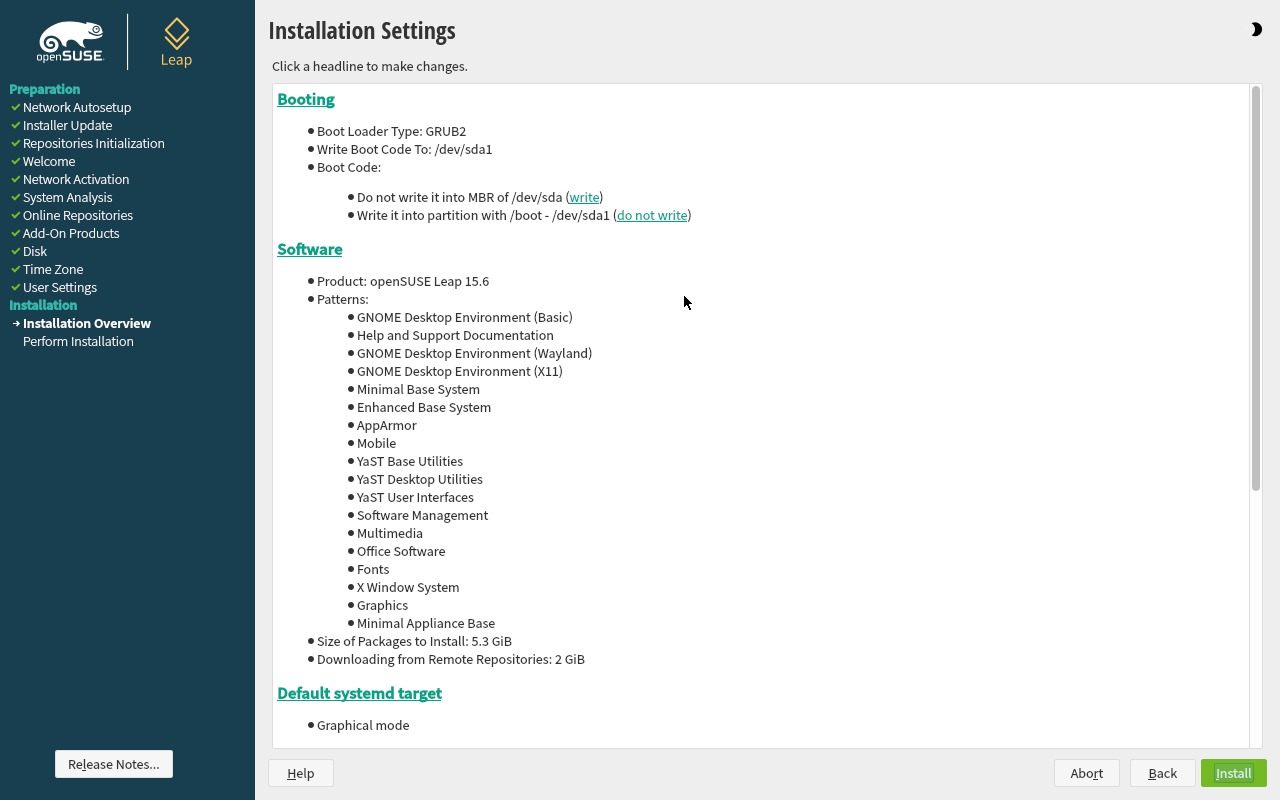
Before performing the actual installation, the installer presents a summary of the installation settings. Note in this summary that the software selection is described in terms of patterns.
We can use this same pattern selection in our image:
1
2
3
4
5
6
7
8
9
10
11
12
13
14
15
16
17
18
19
20
21
22
23
24
25
26
27
28
29
30
31
32
33
34
35
36
37
38
39
40
<packages type="image" patternType="plusRecommended">
    <!-- GNOME Desktop Environment (Basic) -->
    <namedCollection name="gnome_basic"/>
    <!-- Help and Support Documentation -->
    <namedCollection name="documentation"/>
    <!-- GNOME Desktop Environment (Wayland) -->
    <namedCollection name="gnome"/>
    <!-- GNOME Desktop Environment (X11) -->
    <namedCollection name="gnome_x11"/>
    <!-- Minimal Base System -->
    <namedCollection name="base"/>
    <!-- Enhanced Base System -->
    <namedCollection name="enhanced_base"/>
    <!-- AppArmor -->
    <namedCollection name="apparmor"/>
    <!-- Mobile -->
    <namedCollection name="laptop"/>
    <!-- YaST Base Utilities -->
    <namedCollection name="yast2_basis"/>
    <!-- YaST Desktop Utilities -->
    <namedCollection name="yast2_desktop"/>
    <!-- YaST User Interfaces -->
    <namedCollection name="x11_yast"/>
    <!-- Software Management -->
    <namedCollection name="sw_management"/>
    <!-- Multimedia -->
    <namedCollection name="multimedia"/>
    <!-- Office Software -->
    <namedCollection name="office"/>
    <!-- Fonts -->
    <namedCollection name="fonts"/>
    <!-- X Window System -->
    <namedCollection name="x11"/>
    <!-- Graphics -->
    <namedCollection name="imaging"/>
    <!-- Minimal Appliance Base -->
    <namedCollection name="minimal_base"/>

    <!-- X.Org drivers and fonts -->
    <!-- ... -->
Notice that we added the patternType attribute to the packages element.
This optional attribute allows you to control the installation of dependent packages. You can assign it one of the following values:
-
onlyRequired: only patterns and packages that are required (Requires:) by the patterns and packages listed inappliance.kiwiwill be installed. Thus, only the packages that are actually needed will be installed, and the final image size will be smaller; -
plusRecommended: the patterns and packages that are required and also recommended (Recommends:) by the specified patterns and packages will be installed. This way, the image is more complete, but it may end up with a larger size as well.
If the patternType attribute is not specified, onlyRequired is assumed by default.
Your appliance.kiwi file should now look like this.
Let’s also make some changes to the config.sh script so that the image uses NetworkManager instead of wicked and firewalld instead of SuSEfirewall2:
1
2
3
4
5
6
7
8
9
10
11
12
#======================================
# Activate services
#--------------------------------------
suseInsertService sshd
suseRemoveService wicked
suseRemoveService SuSEfirewall2
suseInsertService NetworkManager
suseInsertService firewalld

#======================================
# Setup default target, multi-user GUI
# ...
Your config.sh file should now look like this.
After these changes, delete the /tmp/myimage folder and run KIWI again:
1
2
$ sudo rm -rf /tmp/myimage
$ sudo kiwi system build --description . --target-dir /tmp/myimage
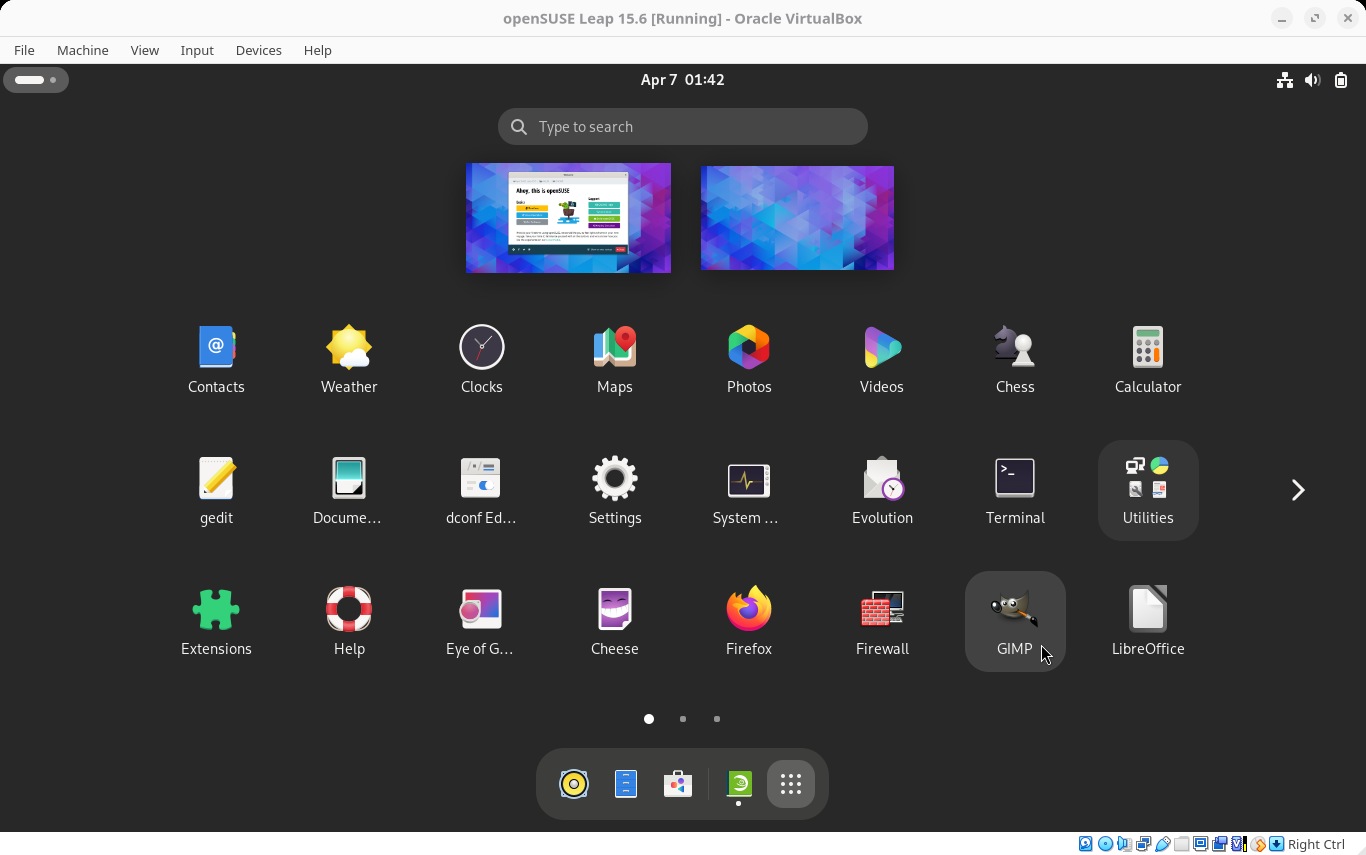
Finally, test the new image, which should now be much more interesting:
Another test you can do is to format a USB drive with Ventoy, copy the ISO image to it and test it on your own computer (real machine, instead of virtual machine):
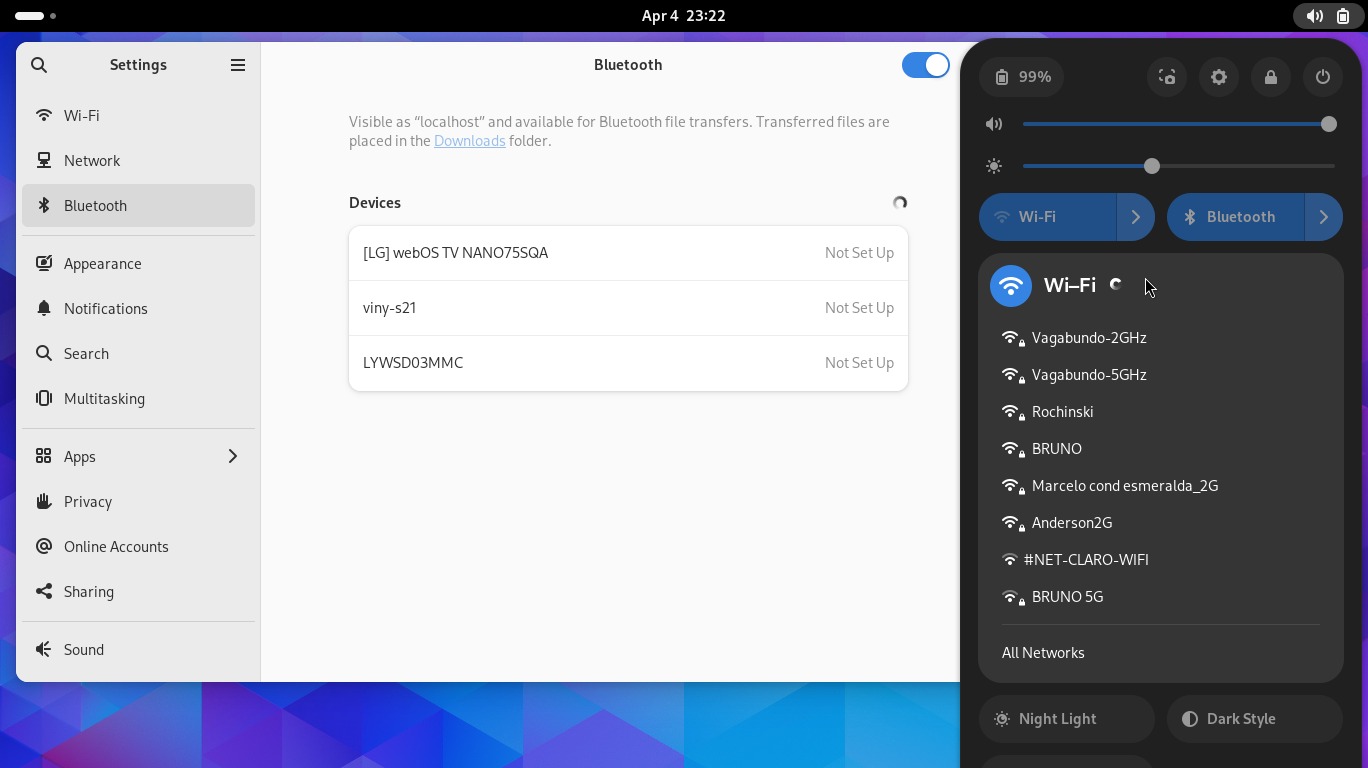
Note that even Wi-Fi and Bluetooth work in this image!
Conclusion
I made the source code for the image available in the kiwi-tutorial repository in the Linux Kamarada GitLab.
With what we’ve seen so far, you are now able to use KIWI locally on your computer to create ISO images based on openSUSE Leap, just like Linux Kamarada.
Why did I say “locally”? Because it is also possible to use KIWI integrated with OBS, but that is a topic for another post.
The tutorial on how to integrate KIWI with OBS is now available.
It is not my goal here to exhaust the subject, which is extensive, by the way. Perhaps you would like to continue your studies on KIWI by consulting the references.
Or perhaps you would like to see how you can build Linux Kamarada on your own computer with KIWI.
References
The official KIWI website is also its documentation and the most complete source of information about KIWI:
I found a version of this same documentation as a single HTML on the SUSE website:
(it may be easier to find what you are looking for by pressing Ctrl + F on this page)
Remember that the image description examples are also good references for what you can do with KIWI.
If you want to contact other people to exchange ideas about KIWI, you can use:
-
the
kiwi-imagesGoogle Group (even if you don’t have a Google account, you can subscribe as if it were an email discussion list); or -
the
#kiwi:matrix.orgMatrix room.


