When I say openSUSE Leap is a mature and stable Linux distribution, I’m not talking about other distributions’ concept of stability: old software that has been frozen, thoroughly tested and fixed. Each new openSUSE Leap release brings very fresh software components (released within the same month or year) that work well together. That is the result of the technology and effort employed in developing the distribution, which works fine on home desktops, workstations and also on servers!

In this post you are going to see how to install and set up a server with openSUSE Leap. This howto resembles that on how to install openSUSE on a desktop. They differ only by the differences between desktops and servers and by the text mode, which is the preferred way of using servers.
Before installation
Before starting, there are a few things you should be aware of.
openSUSE Leap supports a large variety of hardware devices. 32-bit processors are an exception to the rule: they are not supported anymore, but servers equipped with 64-bit processors are already very common.
I could talk about the system requirements for using openSUSE. But, if it already runs smoothly on desktops, what about servers, which are much bigger in numbers (processor’s clock rate and number of cores, memory and hard disk, etc). Linux, in general, is a lightweight system.
Here I’m going to recommend specifications for “a good start”:
- 2GB of RAM;
- 10GB hard disk; and
- if possible, a dual core processor.
Since network environments differ dramatically, it is difficult to recommend with precision how you should size your server hardware. Observe that the specs I suggested above can be achieved even with an ordinary computer and may be more than enough for some services but not suitable for others.
If the new server will only serve DHCP, the specs above are more than necessary. If you are setting up a firewall for a home or small office network, those specs are adequate too. But if you need a file server or a web server, depending on the expected number of concurrent accesses and the size of the files, pages or downloads being served, the specs above may be insufficient.
As a rule of thumb, you should always try to size your server beyond what you need today. For example, if you estimate that 9GB is enough to store your files today, it is wrong to think that the above setup (10GB hard disk) is enough. Your new file server should have a hard disk of 20GB or more so it may suffice for a few years.
If you are going to install openSUSE Leap on a virtual machine, it’s easy to resize specs as needed. openSUSE can be installed as a guest system on top of various virtualization hosts (hypervisors), including XenServer and VMware vSphere.
I’m gonna leave the link for the openSUSE minimum system requirements for those who are curious to check them (on an earlier post, I have already mentioned the requirements for using openSUSE on a desktop).
Make sure your server is connected to the Internet and protected against power outages by a nobreak. Let’s get it started.
Getting started
As we are installing openSUSE on a server, I recommend you to use the official network installation medium instead of the Linux Kamarada LiveDVD (not that it does not serve our purpose, just it’s not the most appropriate media for that).
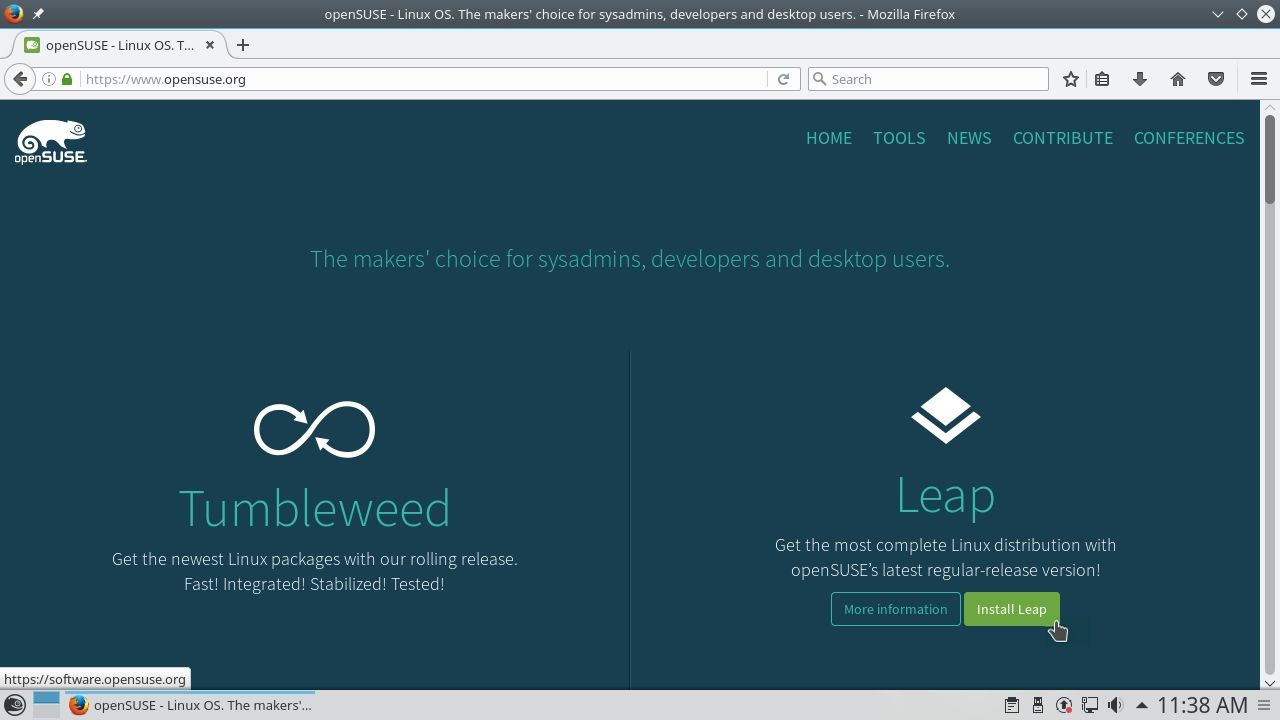
To download the network installation medium, go to the openSUSE’s official website at www.opensuse.org, hover over Leap and click on Install Leap:
Close to Network, click on Direct Link:

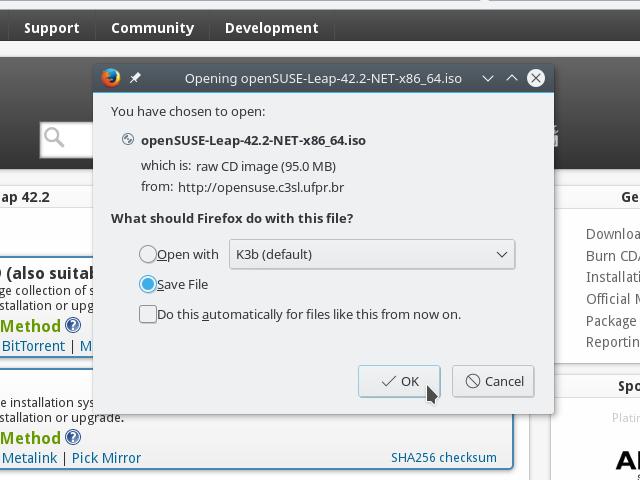
Select Save File and click on OK:
Your browser will start downloading the network installation medium:
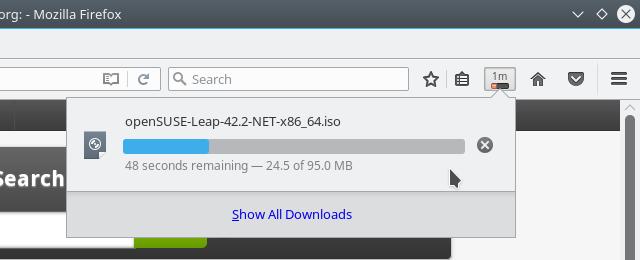
It should not take too long, since that media contains just a minimal system, which is used only to boot the server, download and start the installer.
After finished downloading the installation medium, let’s check its integrity: still at the openSUSE Leap 42.2 official downloads page, close to Network, click on SHA256 checksum. The checksum file should be downloaded at the same folder where was downloaded the installation medium.
Then, open a terminal on that folder and run:
1
$ sha256sum -c openSUSE-Leap-42.2-NET-x86_64.iso.sha256
That command should return something like:
1
openSUSE-Leap-42.2-NET-x86_64.iso: OK
Indicating that you have got a file identical to the original one, i.e. the download was not corrupted.
Now, burn the ISO image you just downloaded to a CD or DVD and insert it in your server DVD drive. Or, if your server is actually a virtual machine, load the ISO image into the virtual DVD drive. Then, in both cases, restart your server.
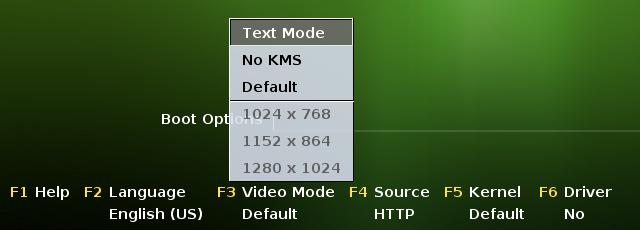
Within moments, you will see the bootloader menu:

If you want, you can change the Language that will be used during installation: hit F2, then select the desired language using the arrow keys and hit Enter:
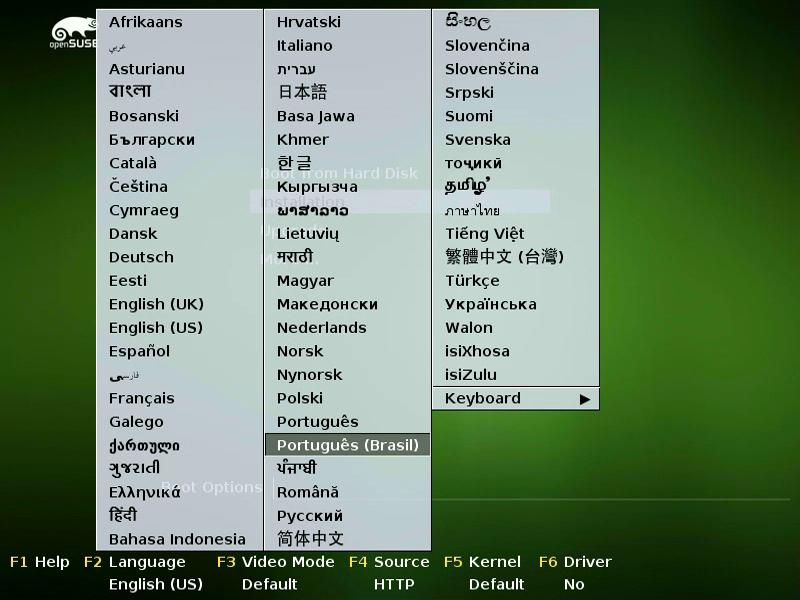
The bootloader menu gets translated into the language you selected.
This tutorial assumes you will continue with the English (US) language (default).
Similarly, hit F3 to switch the Video Mode to Text Mode:
Hit F4, and in Network Config choose DHCP:
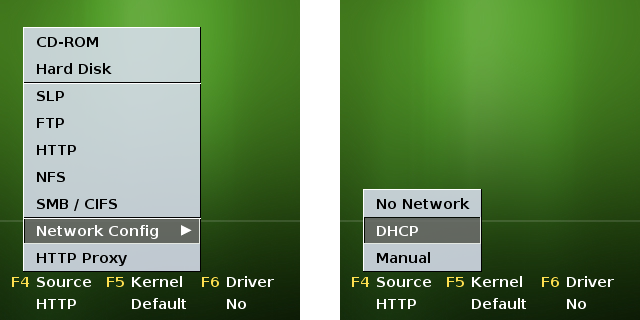
Usually server network settings are set up by hand. But my own experience was that I was not able to inform the network settings at boot time, because when I pressed the slash key (/) to type the network prefix (e.g. 192.168.25.100/24) actually nothing showed up. Probably that happened because the bootloader did not properly recognize my keyboard layout. So, to make things easier, I decided to use DHCP by now, leaving the proper network configuration for later.
Finally, on the bootloader menu, select Installation and hit Enter to start the installer.
1) Language, keyboard layout and license
On the first screen, you are presented to the language and keyboard layout settings and the openSUSE Leap license:
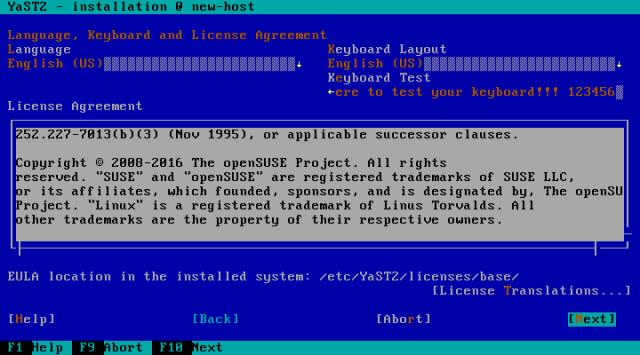
Check that the language and keyboard layout settings are as desired.
On text mode, you are not able to interact with the installer using the mouse, just the keyboard. To move from one field to the next, you can use the Tab key.
Note that each field label has a highlighted letter (Language, Keyboard Layout, Keyboard Test, Next, etc.). You can also select a field by pressing the Alt key together with its label highlighted letter. For instance, use the Alt + L key combination to access the Language field.
To open a dropdown menu (such as Language or Keyboard Layout), select the desired menu and hit the down arrow key. Select an option using the up and down arrow keys and then confirm using the Enter key.
The installer offers a text field in which you can type something to test your keyboard.
You don’t need to worry about the software license: since openSUSE is a software libre, its license does not limit your use. You can read it just to know your rights as an openSUSE user. To do so, hit Tab until the License Agreement text area seems highlited and use the up and down arrow keys or the Page Up and Page Down keys to scroll the text up or downwards, respectively.
When you finish, select Next and hit Enter.
2) Installation options
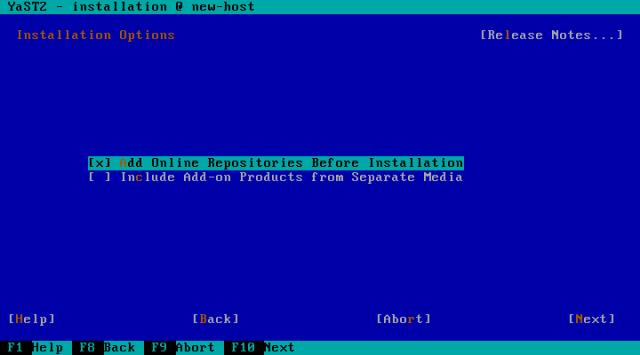
On that screen, you have got two choices:
- Add Online Repositories Before Installation: by default, only the main repository is used for installation. Activating that option, you allow the installer to use packages from the other official repositories, including the update repository, which ensures that the system will be installed with the most current packages and you won’t have to manually apply updates after installation; and
- Include Add-on Products from Separate Media: activating that option, you can install software from additional repositories (semiofficial repositories and/or third-party repositories). Right now, that may be useful only if you need to install any driver beforehand. Otherwise, you can wait to install any third-party software after the system itself is installed.
Check the first option (Alt + A) and then choose Next (Alt + N).
3) Partitioning
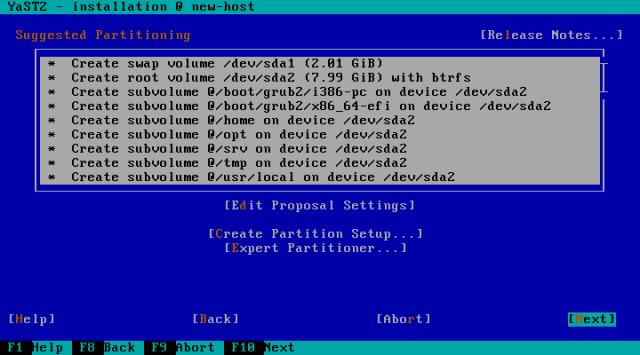
By default, openSUSE proposes to create three new partitions:
/(root), for system files;/home, for personal files of users; and- swap, which is used as a supplement for RAM, similar to the page file in Windows.
I’m not going to dive into details about partitioning here, as that would be a subject for an entire (and long) post. If you need more information, I suggest you take a look at the openSUSE Leap official documentation.
Note that the /home partition is not always useful on servers. Consider a DHCP server, for instance, probably only the network administrator will have a personal folder. So, as an alternative to the partitioning setup proposed by the openSUSE installer, here I suggest again “a good start” (following those specs):
- a swap partition of 1GB; and
- a
/partition with the remaining disk space (9GB).
Some notes about the swap partition: some time ago, it was recommended that the swap partition size should be double of the RAM size. Since the Linux kernel 2.4.10, that does not apply anymore. Nowadays, there is a consensus that having a swap partition is a must for both servers and desktops, but there is no consensus about a recommended size. The official openSUSE documentation (here and here) recommends creating a swap partition of at least 256MB. If needed, it’s preferable to add more RAM to the system instead of adding more swap space. For hibernation, the swap partition must be at least as big as the RAM, but hibernation is more common on laptops and desktops than on servers. Documentation of other Linux distributions that may help deciding the swap partition size: Ubuntu and Red Hat.
Let’s see how we can create a new partition setup following my suggestion.
On the Suggested Partitioning screen (see the above picture), choose Create Partition Setup (Alt + C).
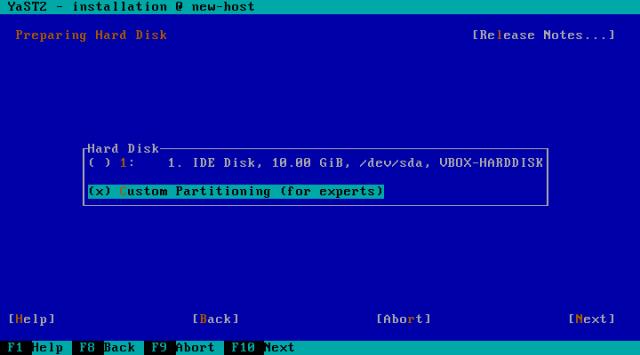
On the next screen, select Custom Partitioning (Alt + C) and then Next (Alt + N):
The next screen (Expert Partitioner) lists the available hard disks:
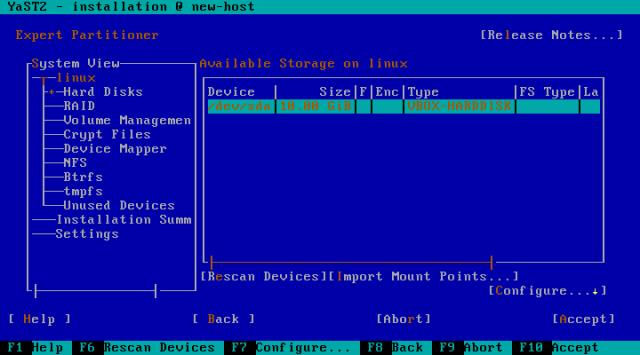
Select the only disk available and hit Enter.
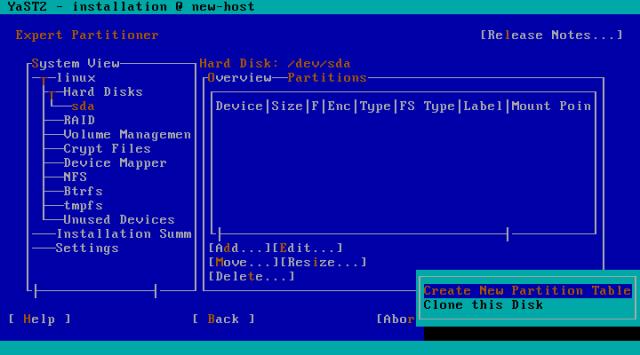
The next screen lists the partitions in the selected disk (by now, none).
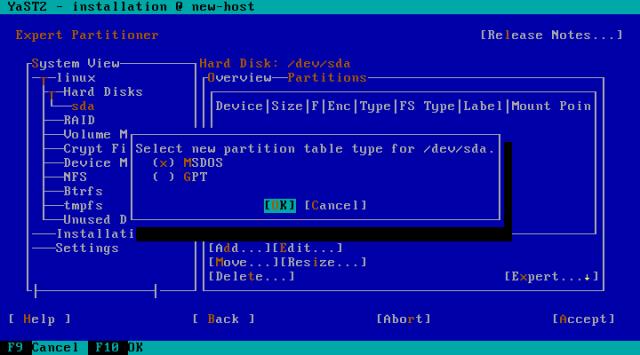
Let’s create a new empty partition table for that disk. Choose Expert, select Create New Partition Table and hit Enter:
Select MSDOS as the new partition table type and choose OK:
The partitioner warns about destroying hard disk data:
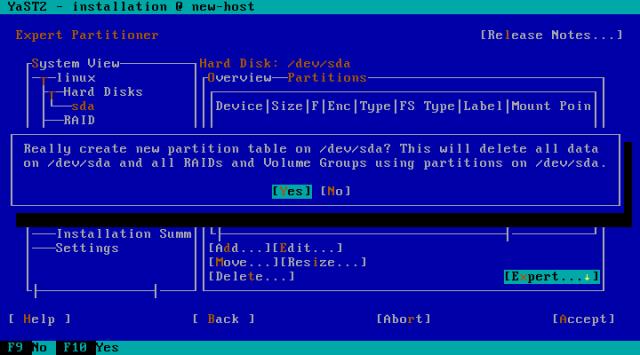
As the disk has not been used yet, we can safely continue choosing Yes.
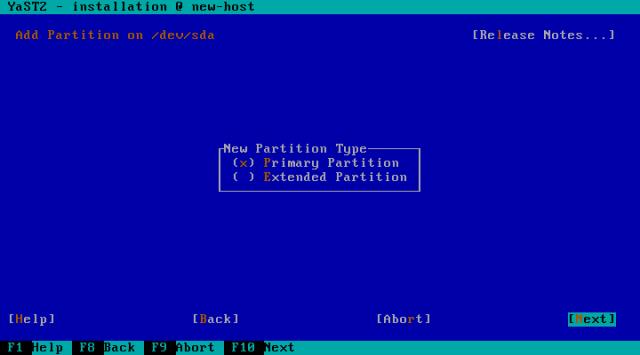
Now, back to the list of patitions, choose Add to create the first partition, the swap partition of 1GB.
Select Primary Partition as the new partition type and choose Next:
In Size, type 1GB. Then, choose Next:
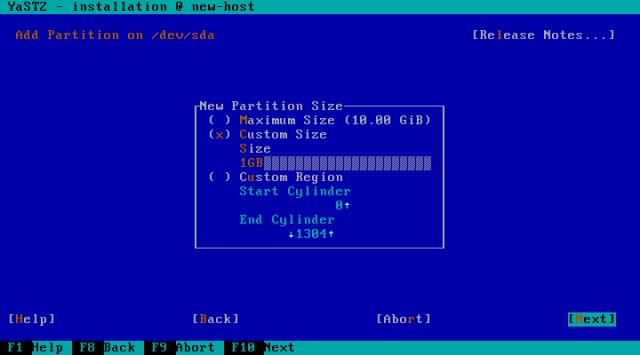
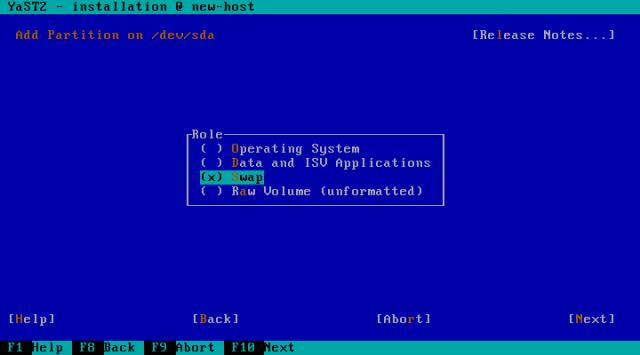
In Role, select Swap. Then, choose Next:
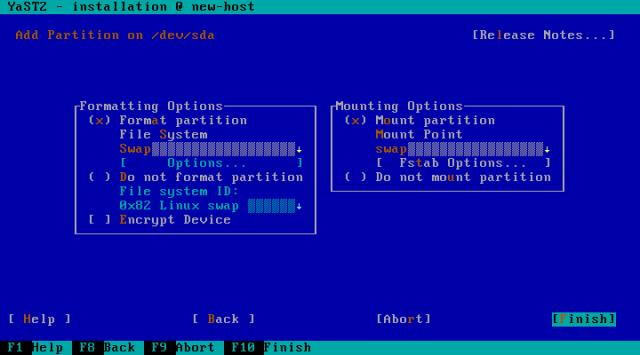
The next screen allows us to configure several options of the new partition. But when it comes to swap, we don’t need to change a thing: the default settings suggested by the installer are satisfying. We can just choose Finish:
Back to the list of partitions, now we have the swap partition being listed.
Let’s choose Add once more to create our second partition, the / partition with the remaining disk space (9GB).
Select Primary Partition as the new partition type and choose Next.
On the next screen, select Maximum Size and then choose Next:

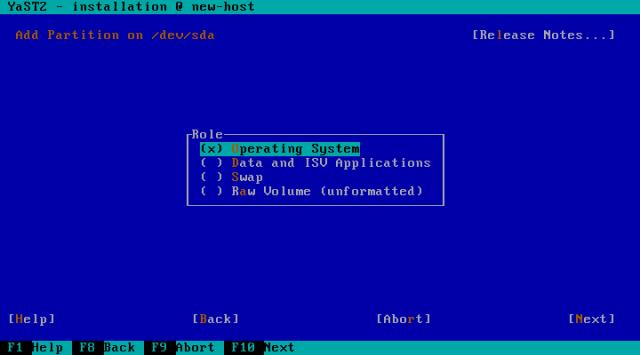
In Role, select Operating System. Then, Next:
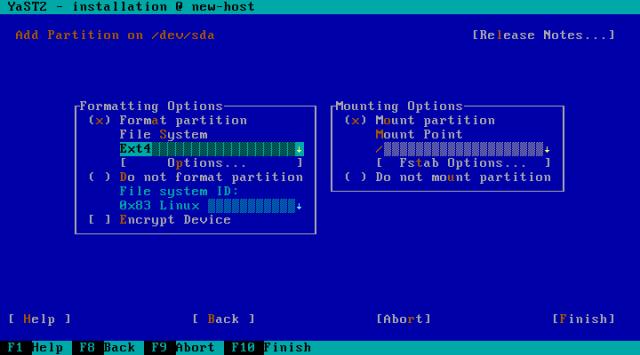
In Formatting Options, let’s just change the File System to the more traditional Ext4. Finally, choose Finish:
Back to the list of patitions, now we have both the partitions created:
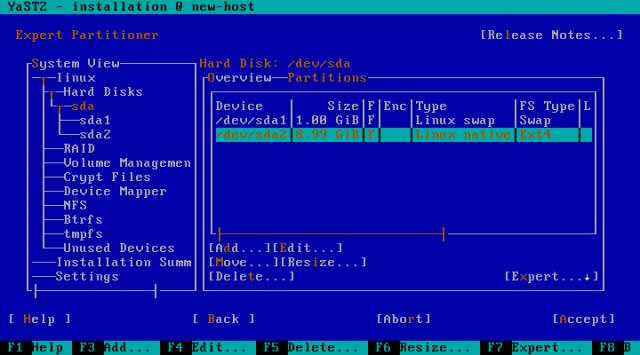
Choose Accept.
The Suggested Partitioning screen now shows our custom partitioning:
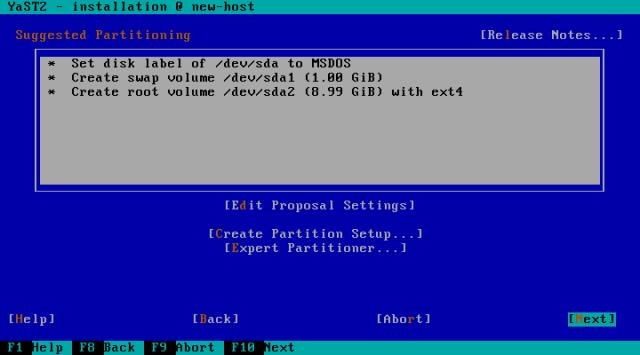
Choose Next.
4) Clock and time zone
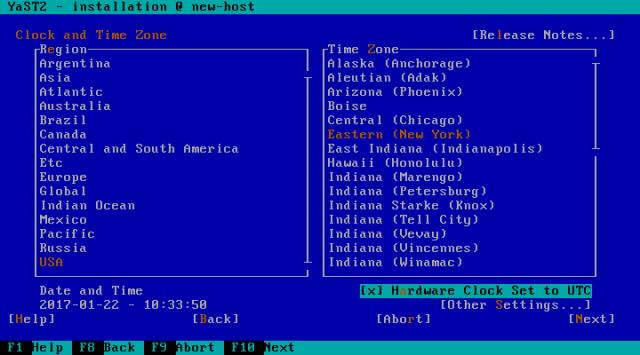
Check that your time zone, date and time settings are correct.
If you need to change the time zone, first select a Region (e.g. Brazil), then select a Time Zone (e.g. São Paulo).
As your server is going to run Linux only, keep the Hardware Clock Set to UTC option checked (it is already checked by default). If you need further information about that option, please refer to the Sync your system time with NTP post.
When you finish, choose Next (Alt + N).
5) Online repositories
If you have selected the Add Online Repositories Before Installation option earlier, the List of Online Repositories screen lets you choose which official openSUSE Leap online repositories will be used during installation:
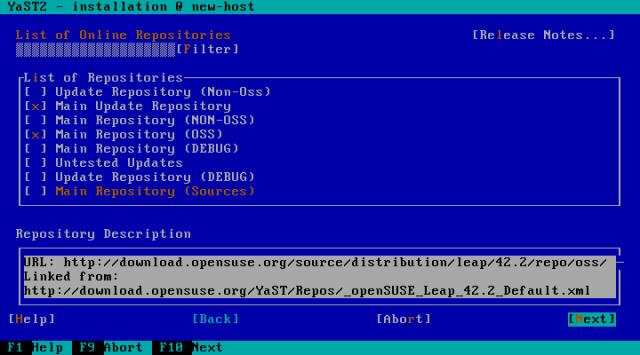
Enable only the following repositories:
-
Main Repository (OSS): the main openSUSE Leap repository, contains open source software only; and
-
Main Update Repository: contains official updates for OSS packages.
To enable or disable a repository on that list, select the desired repository using the up and down arrow keys and press the spacebar.
When you finish, choose Next.
6) Desktop selection
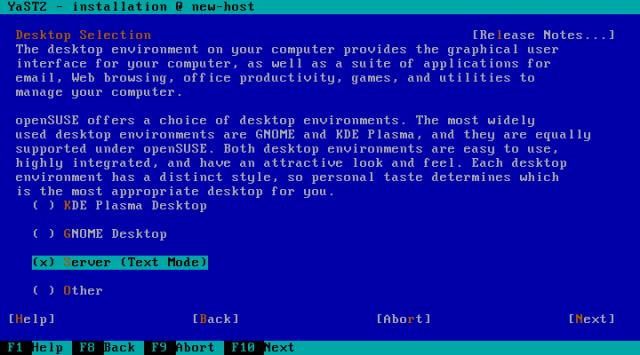
On that screen, the installer offers some of the desktop environments available for openSUSE. Since graphical interfaces are not really common on servers (it makes more sense to use applications such as LibreOffice, Mozilla Firefox or KMines on desktops), let’s choose Server (Text Mode) with Alt + S and then Next with Alt + N.
7) Username and password
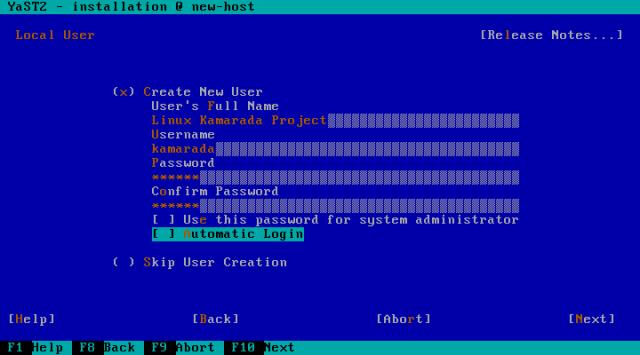
On that screen, you are going to create an user account for you to access the server. Enter your full name and the desired username and password.
Note that the installer suggests to:
- use the same password for the administrator user (in Linux, it is called superuser or root); and
- automatically log in your user account when the server turns on.
Those options are suggested for convenience, but actually they make your system a little less secure. As we are setting up a server and security is a concern, uncheck both the Use this password for system administrator and Automatic Login options, so that an username and password must be provided to access the server.
When you finish, choose Next (Alt + N).
The installer may complain about your password if it is considered easy to guess:
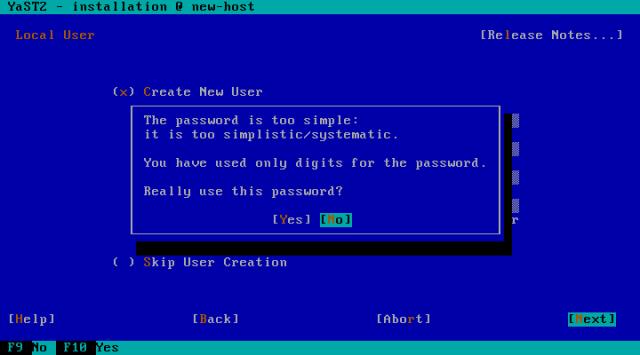
If that is the case, it is strongly recommended that you choose No and set up a safer password.
If you need help on how to elaborate a strong password, you may check this Lifehacker’s post Four Methods to Create a Secure Password You’ll Actually Remember.
On the next screen, as you have unchecked the Use this password for system administrator option, you are asked to enter a password for the root user:
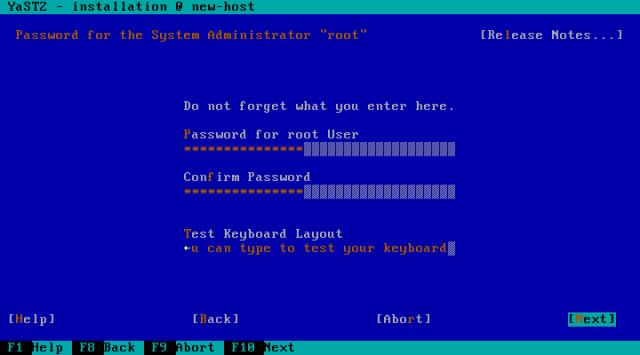
When you finish, choose Next.
8) Installation overview
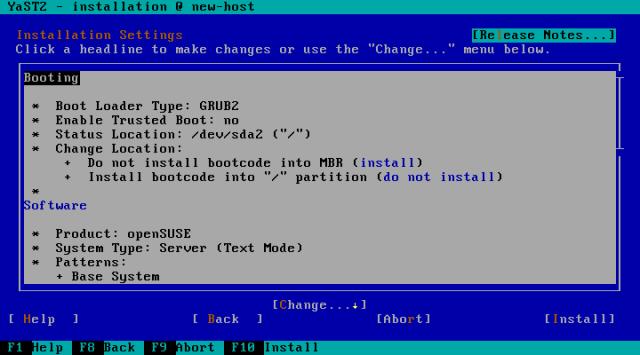
On the last screen before the real installation takes place, you can review the installation settings. Check that everything is as desired. Use the up and down arrow keys to inspect the overview. Once you choose Install, there will be no way back.
If you need to change any setting, select the respective headline using the up and down arrow keys and hit Enter to go to the corresponding screen.
Please observe that by default both the firewall and remote access via the secure shell (SSH) are disabled:
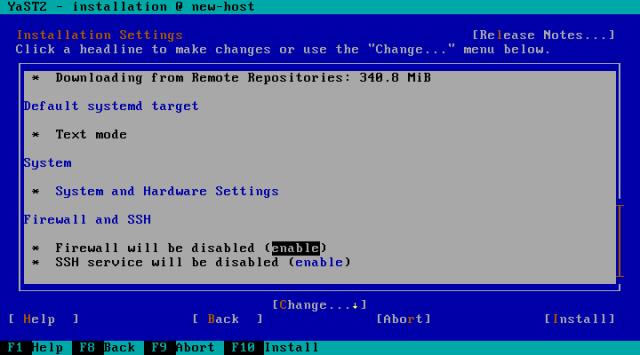
Select enable and hit Enter to turn the firewall on. Do that for SSH too:
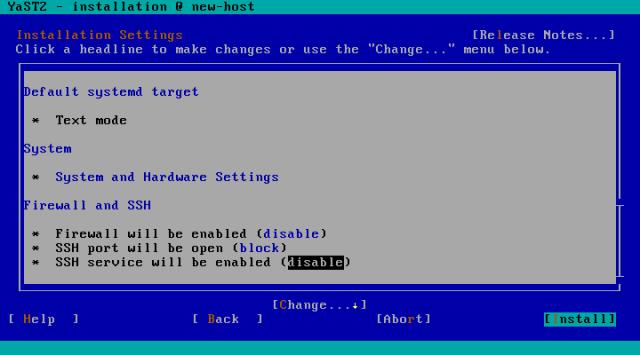
If there is nothing else to change, choose Install (Alt + I).
A confirmation message is shown:
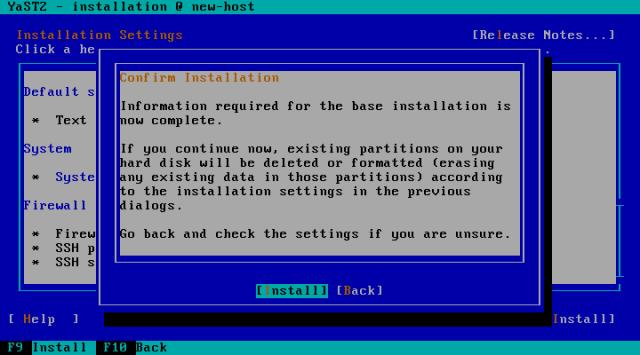
Choose Install (Alt + I) to start de facto installing openSUSE Leap.
9) Actual installation
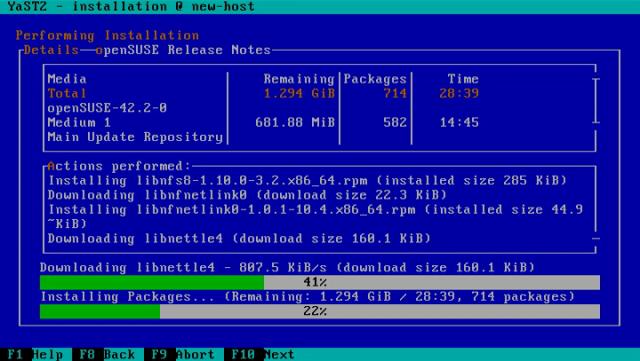
Now the actual installation is performed. That screen shows its progress in detail.
Please note that, since packages are downloaded from the Internet, the installation may take longer or may be faster depending on the speed of your connection.
When the installation is done, the installer asks you to reboot the server:
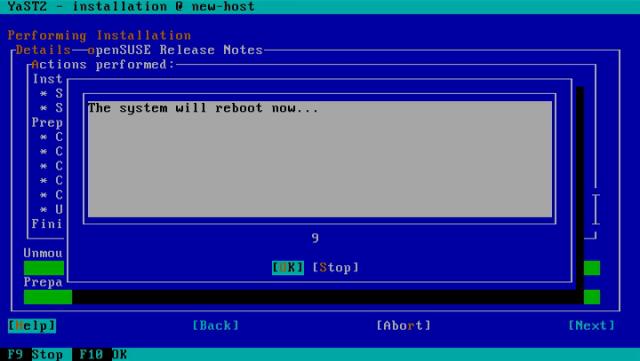
You just need to hit Enter or wait for the server to restart by itself.
While the server is restarted, you can remove the openSUSE installation medium, it is no longer needed.
Server installed
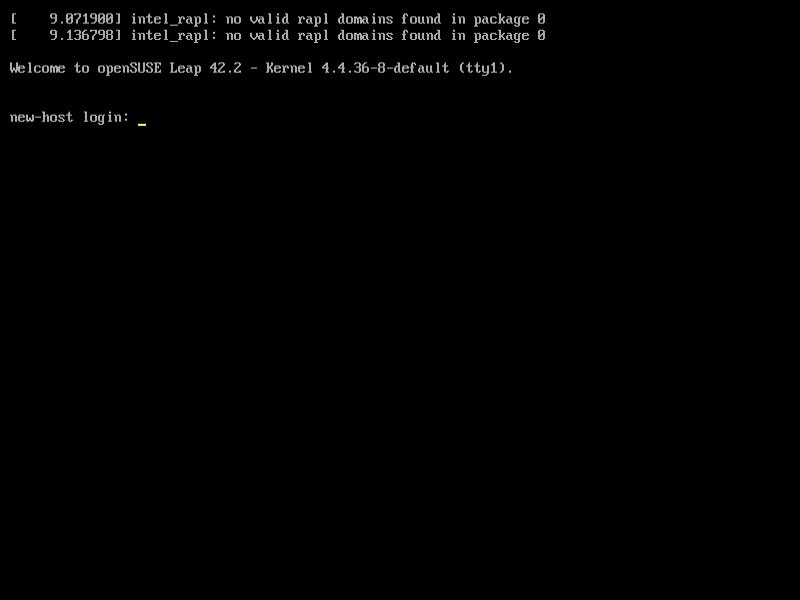
Installation is now complete. The operating system is already on the hard disk. But there are still a few basic settings that need to be adjusted before the server can be actually considered ready to use.
As I realized that this post is already very long, I decided to split it into two parts. I left some details for the next post.
Follow the Linux Kamarada Project to read the second part as soon as it’s published!
Sorry for the long wait, the second part of this tutorial is here. (click)


