On the previous post, we booted our Raspberry Pi 4 with an openSUSE image. Unlike Raspbian, openSUSE doesn’t show us a first-time configuration wizard. So, let’s see what are the first things we need to set up on our Raspberry Pi with openSUSE so that it’s really ready for everyday tasks.
If you landed here without passing by the previous post, I recommend you to start your reading by it (unless, of course, you already got openSUSE running on your Raspberry Pi):
Remember that I chose to use the XFCE desktop, but it’s OK if you chose another one. We are going to adjust almost all the settings via the YaST Control Center, present in every openSUSE installation, it’s not specific to XFCE.
If you are going to use your Raspberry Pi as a server and, because of that, chose the JeOS image, without a desktop, I recommend that you read this text instead of the current one:
- How to install openSUSE Leap Linux on a server (part 2) (although this text talks about openSUSE Leap, the same instructions apply for openSUSE Tumbleweed)
Using NetworkManager to manage the network
openSUSE provides two network management tools:
- Wicked: an openSUSE tool which aims to replace the traditional ifup family of scripts, recommended for servers; and
- NetworkManager: a tool present in almost all major Linux distributions, which aims to facilitate the networking configuration and operation for the end user, so that it “just works”, recommended for desktops.
If you’ve ever used Linux on a laptop, you know that when you arrive at a place that has a known Wi-Fi network, the system automatically connects to it. Who does it behind the scenes, perhaps without you even realizing it, is NetworkManager. It has another features, but I believe this is the best example.
If you’re going to use your Raspberry Pi as a desktop, you probably want to manage the network with NetworkManager. But this is not the default openSUSE setting on the Raspberry Pi. And to change it, we need to use the YaST Control Center.
To start YaST, open the XFCE Menu, by the bottom-left corner of the screen, and click the YaST icon, conveniently available in the Favorites category:
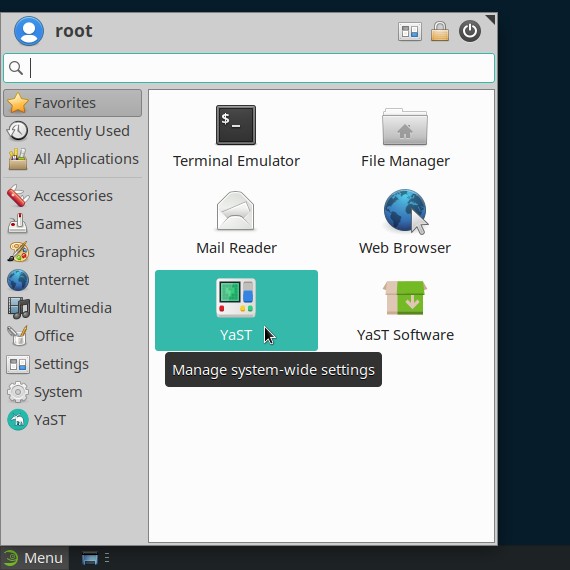
If you have already been using openSUSE for a while, probably you know YaST already. If not, let me present it. YaST stands for Yet another Setup Tool (very humble). It’s the central openSUSE tool for system administration. YaST features a friendly graphical interface and gathers in one place all the administrative settings (those that affect all users), such as installing and removing programs, printers, users, date and time, etc.
Who is used to Windows may think YaST resembles Control Panel.
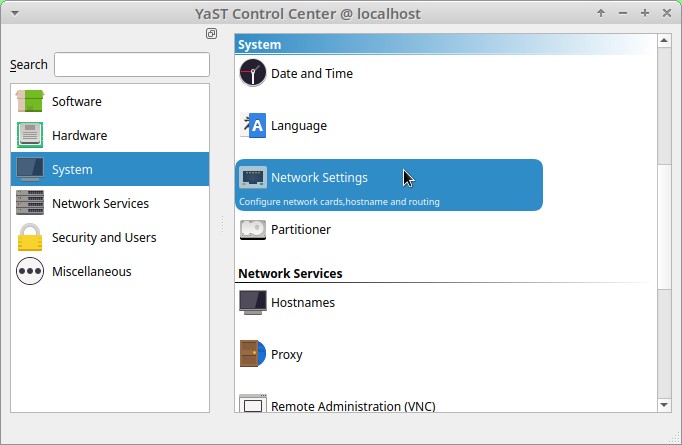
Select the System category by the left and the Network Settings option by the right:
Switch to the Global Options tab and under Network Setup Method, select Network Manager:
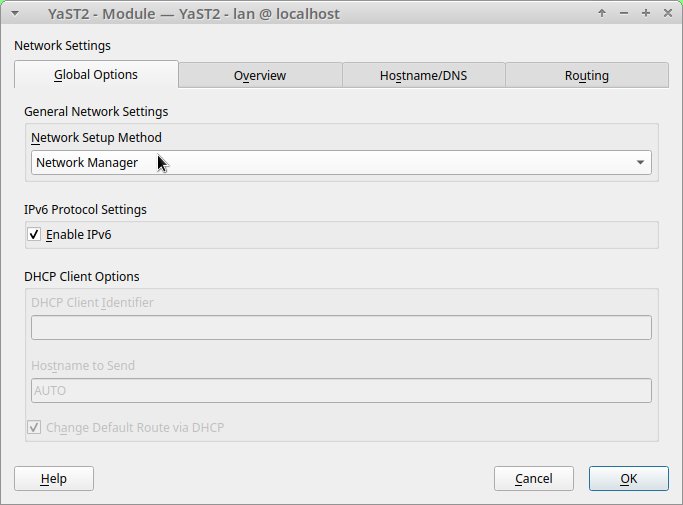
Click OK and wait for settings to be applied.
Connecting to the Wi-Fi network
It’s also thanks to NetworkManager that you can conveniently manage network connections from the desktop, without having to resort to YaST or terminal commands to do that.
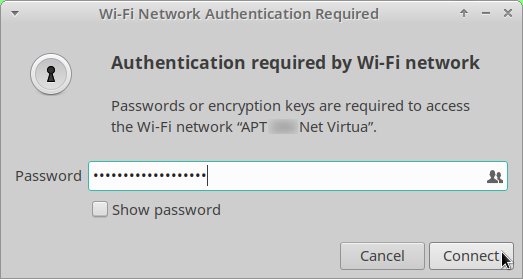
To connect to a Wi-Fi network, simply click the network icon next to the clock, by the bottom-right corner of the screen, and choose the Wi-Fi network you want to connect to:
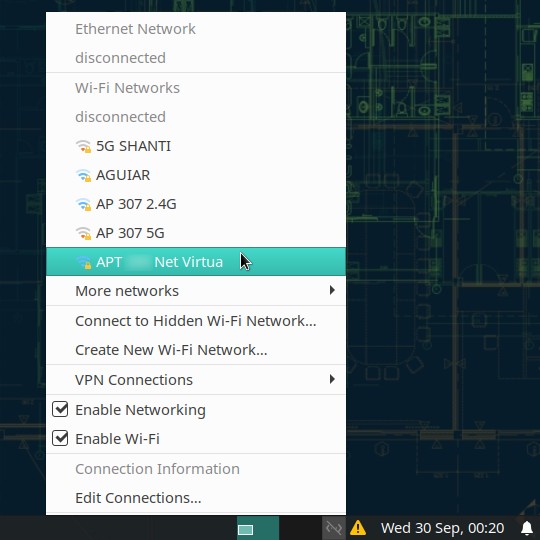
Enter the Wi-Fi network password and hit Enter or click Connect:
Installing translations
Connected to the Internet, openSUSE is able to download translations.
This how-to presents openSUSE in English and assumes you are going to use it that way. But you may want to translate it to your language. If not, you can skip this section.
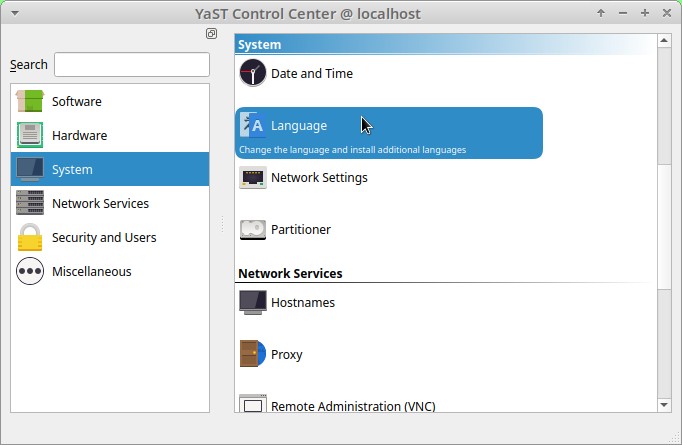
If you want to download translations to your language, go back to YaST, select the System category by the left and the Language option by the right:
Set the Primary Language as desired:
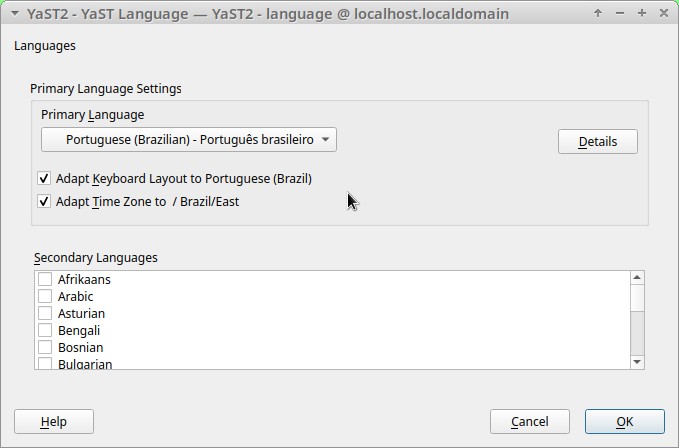
Also check both the Adapt Keyboard Layout and Adapt Time Zone options. Finally, click OK.
YaST is going to download and install the translation packages. When it finishes, you need to reboot, instructions are in the next section.
That should be enough to translate openSUSE into your language, but you may need to tweak a few other settings. As I said, for the purpose of this how-to I’m going to stay with openSUSE in English, so I won’t dive in detail about translations here. If you want to see which settings you may need to tweak, please take a look at this same how-to in Brazilian Portuguese (screenshots of the relevant part are in English):
Rebooting
You need to reboot right now only if you installed translations in the previous section.
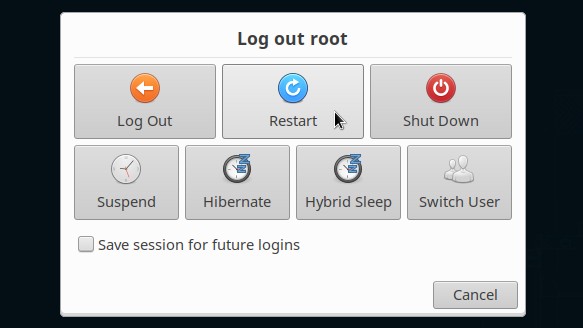
To restart openSUSE, open the XFCE Menu and click the Log Out button:

Among the various options, choose Restart:
Wait a few seconds and openSUSE will be back.
Syncing date and time
The Raspberry Pi 4 doesn’t have an integrated real-time clock (RTC) powered by a battery. On a traditional computer, that clock circuit assures that the date and time remains right even after the computer stays turned off or disconnected from the Internet for a long time. On a Raspberry Pi, whenever you turn it on, the date and time are wrong. That’s why we need to set up the system to retrieve the right date and time from the Internet.

If you open your desktop or laptop (don't do it if you don't know how), you will find a clock battery inside it. The Raspberry Pi does not have this.
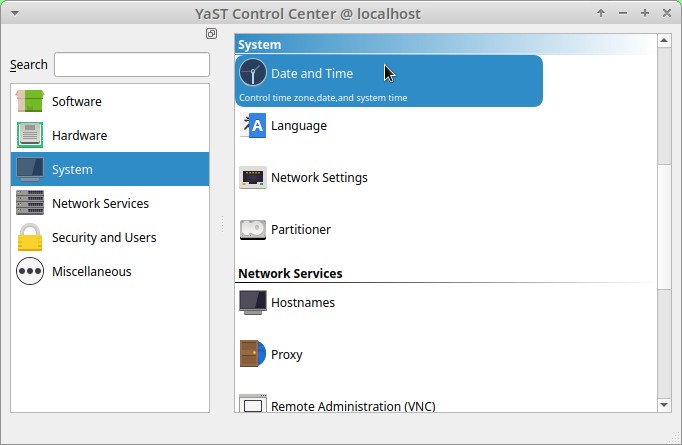
Open YaST, select the System category and then the Date and Time option:
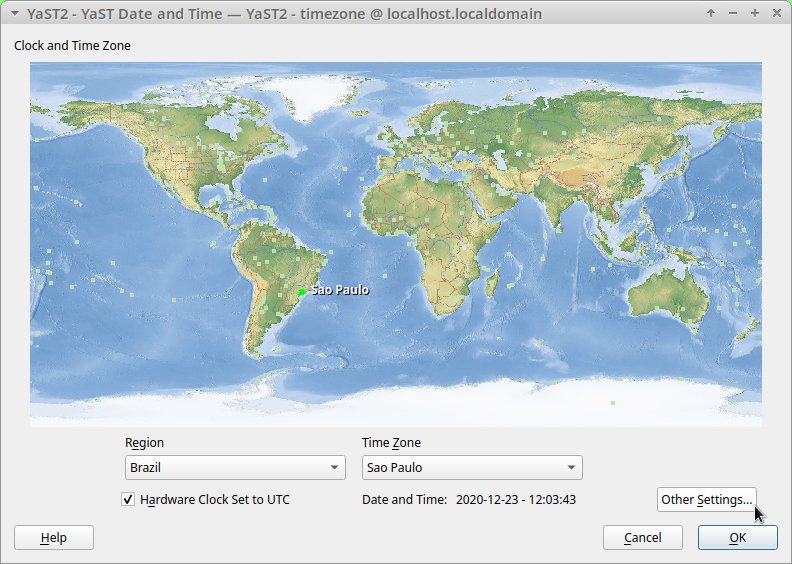
On the next screen, to select your time zone, click on the map closest to your current location or use the Region and Time Zone dropdown menus below the map. Then, click Other Settings:
Check the Synchronize with NTP Server option:
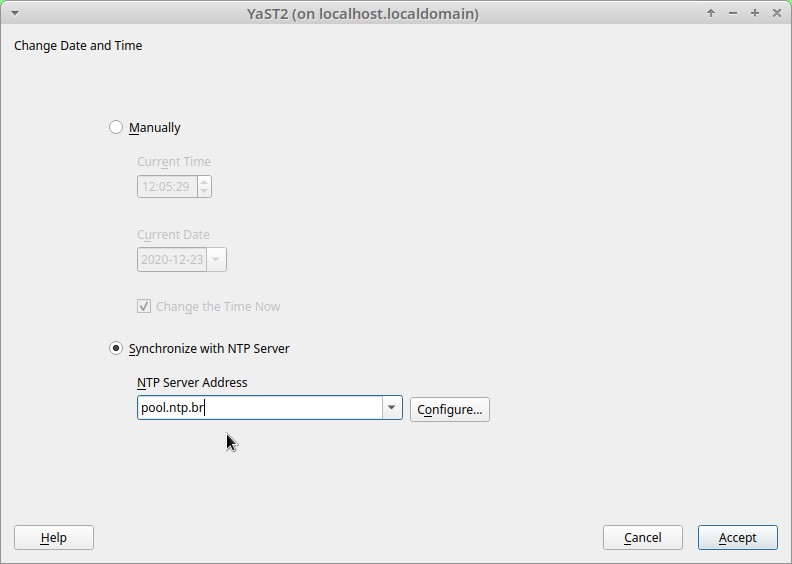
On NTP Server Address, type the name or IP address of the time server you want to sync with. You can look for a public time server or just enter pool.ntp.org, which is resolved by DNS to a time server close to you.
Click Accept and, back to the previous screen, OK to apply the new settings.
I briefly explained how to set up date and time. In case you need more info, take a look at:
Creating user accounts
By default, the openSUSE image for the Raspberry Pi comes with the root user only. For security reasons, we will create another account to use the system on a daily basis.
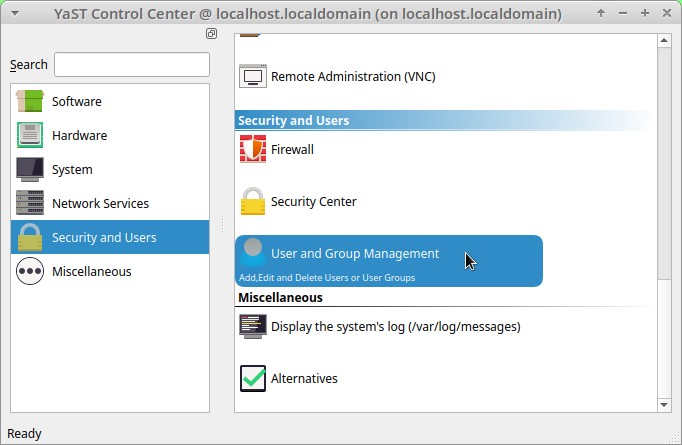
On the YaST main screen, select the Security and Users category and then the User and Group Management option:
YaST lists the system users (by now, we have no user other than the root, so none is listed):
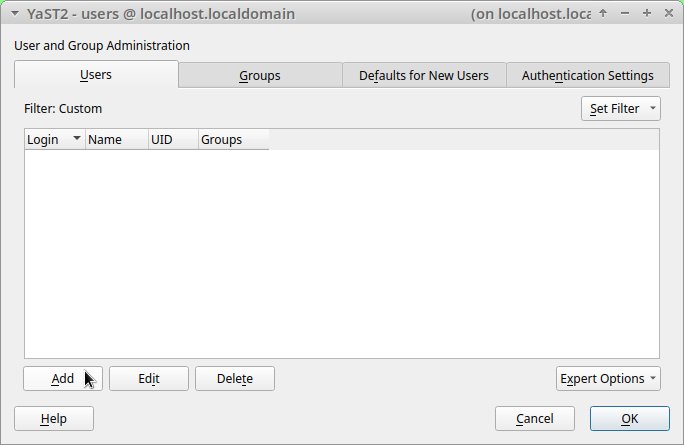
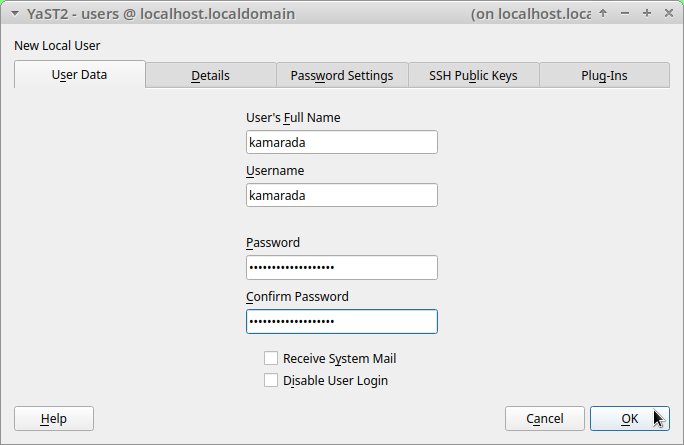
Click Add. On the next screen, enter the new user data and click OK:
Back to the previous screen, you can see the new user on the list:
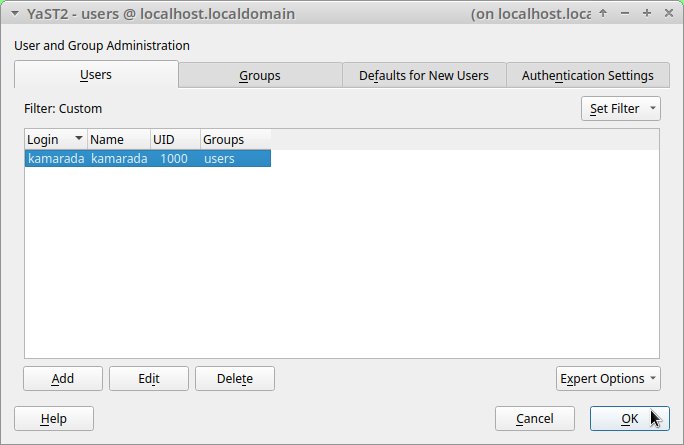
If you need, you can create more user accounts by repeating those steps.
When you finish, click OK to apply changes. YaST creates the new user accounts and take you back to its main screen.
You can close YaST now, we won’t need it for this how-to anymore.
Changing the root user password
Also for security reasons, we need to change the password of the root user, which is the same on all fresh openSUSE installations on Raspberry Pis and therefore is well known.
We could do that using YaST, but I think it’s easier to do that using the terminal.
To start the terminal, open the XFCE Menu and click the Terminal Emulator icon, conveniently available in the Favorites category.
On the terminal, run the passwd command:
1
# passwd
Type the new password, hit Enter, then type the new password again and hit Enter again.
1
2
3
New password:
Retype new password:
passwd: password updated successfully
Checking for updates
Taking advantage of the open terminal as root, let’s check for updates to the system and get them, if any. To do this, run the command:
1
# zypper up
I won’t go into detail about updating here because that was the subject of another text.
If you need more information on how to update packages on openSUSE, see:
When finished, you can close the terminal window.
Logging out
Now you can log out from the root user account and start using your Raspberry Pi with the user account you just created.
To log out from the current session, open the XFCE Menu and click the Log Out button.
Among the various options, choose Log Out.
Shutting down the Raspberry Pi
The Raspberry Pi does not have a power button. But, like Raspbian, openSUSE also has a shutdown command. It is important that you use it, so the operating system can properly unmount filesystems and prevent data loss. To turn the Raspberry Pi on, just plug the power supply into the power source. But to turn the Raspberry Pi off, don’t just unplug the power supply. Before doing that, you must use the system shutdown command.
When you are finished using openSUSE on your Raspberry Pi, to safely shut it down, open the XFCE Menu, click the Log Out button and choose the Shut Down option.
Wait for the Raspberry Pi to shut down completely. Observe the LED lights: for a moment, the PWR LED goes out and the ACT LED flashes, then the ACT LED turns off definitely and only the PWR LED stays on, indicating that the Raspberry Pi has power, but is doing nothing. Then, you can safely cut the power.
Have a lot of fun!

I hope that you make good use of openSUSE on your Raspberry Pi and that these how-tos have helped you to set it up to run smoothly!
I also hope that openSUSE improves its support for the Raspberry Pi so that we can get the most out of these amazing computer and operating system.


